We may earn revenue from the products available on this page and participate in affiliate programs. Learn More ›
Common Deck Staining Snafus
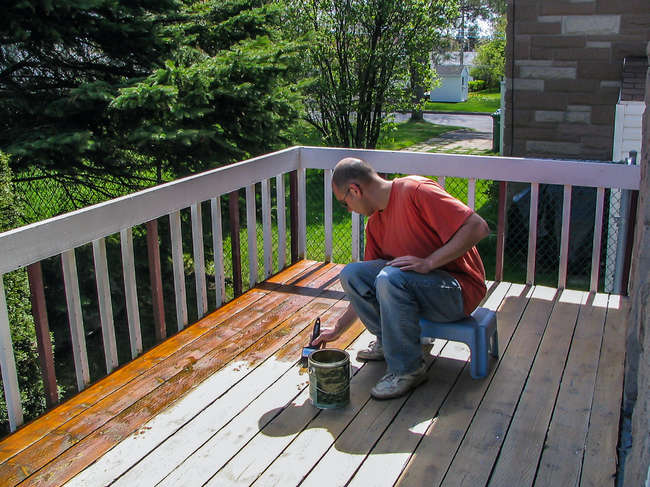
A common maintenance task for anyone who has a deck is to sand and stain the wood. This seals the wood, preventing moisture from seeping into the fibers and rotting out the deck. The stain also helps to protect the wood from freezing conditions and direct sunlight, which would otherwise dry out the wood, causing fading and cracking.
However, many people believe that staining the deck is as simple as using a paintbrush to coat the entire surface, but there are many pitfalls a DIYer needs to avoid, including these eight deck staining mistakes.
Misjudging Material
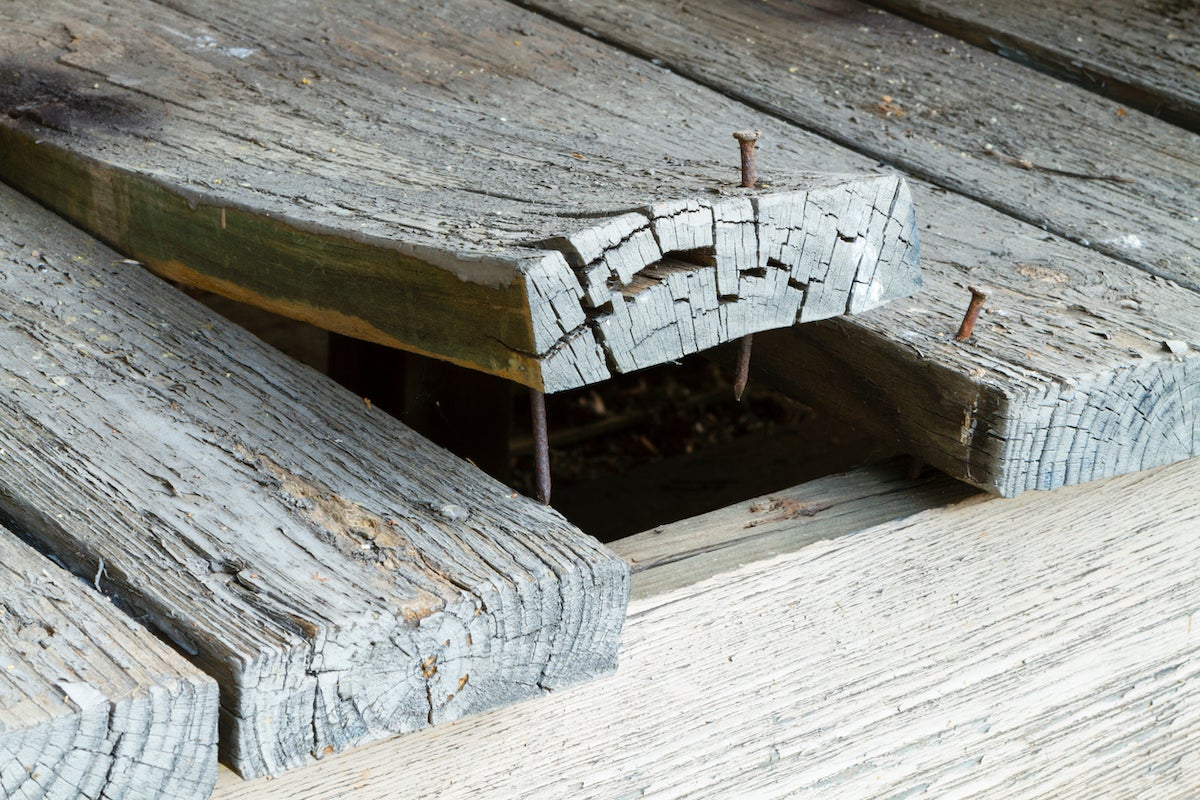
While it isn’t the best feeling, sometimes you just need to admit when the deck boards are too old or rotten to any longer support the deck adequately. Often this situation is discovered while sanding or prepping the surface of the deck for a new stain.
Don’t ignore the issue and simply stain the boards anyway. Sure, the deck will look better after a new coat of stain, but updating the color does nothing to repair the boards and they could collapse, causing someone to get hurt.
Take the time to properly remove and replace broken or rotted boards in the deck and fix loose nails. When the deck is in good shape again, wait for the preservatives in the new wood to dry, and then add a coat of stain.
Poor Surface Prep
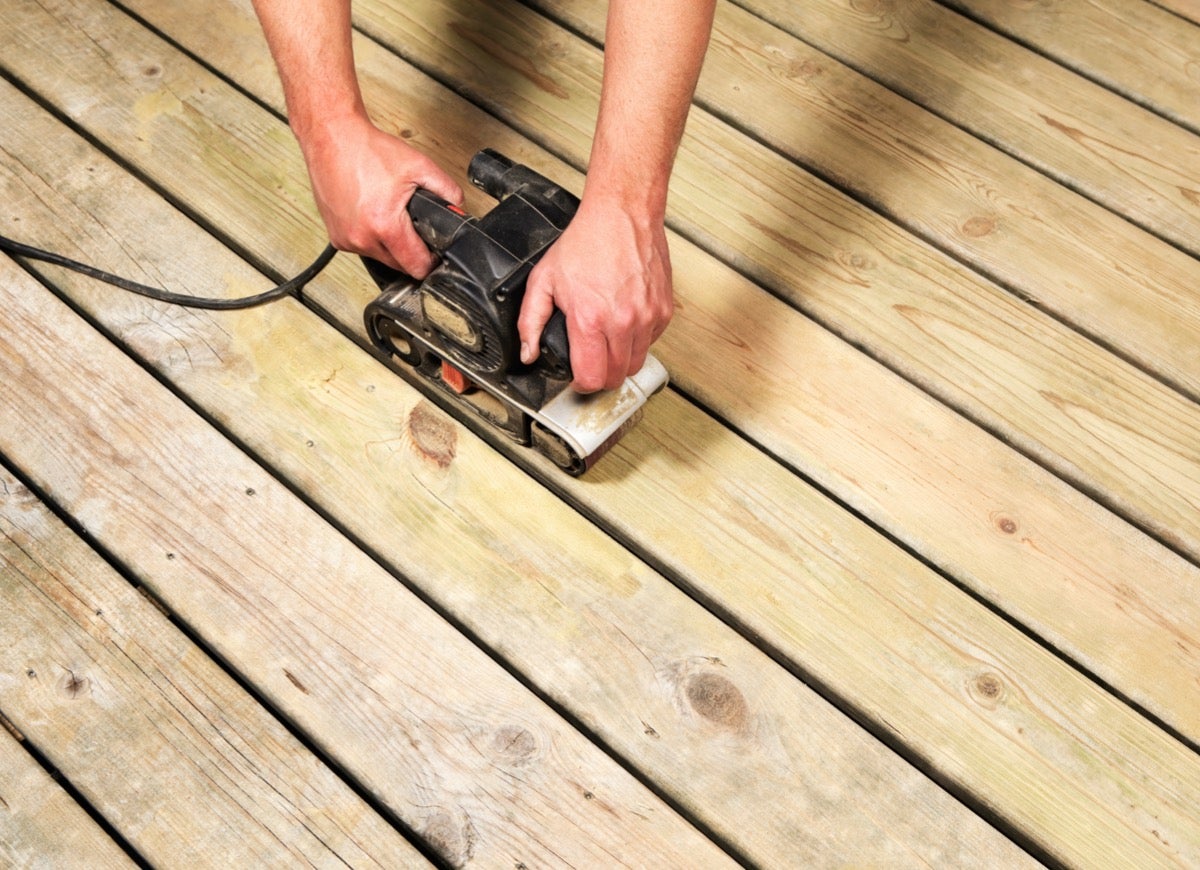
Before opening up the container of stain and getting the paintbrush wet, take a few steps that many DIYers miss. Sand the entire deck to remove any old stain, paint, or varnish from the wood. After sanding, power-wash the deck and allow it to dry for at least 24 hours before staining. Sanding exposes porous wood that’s ready to soak up the stain, but this isn’t possible if the wood is full of water.
DIYers working on a new deck should keep in mind that the preservatives in new wood can take up to 30 days to dry and evaporate from the wood. Staining before the 30 days is up might lead to poor soaking of the stain into the wood, and could leave unsightly staining and splotches.
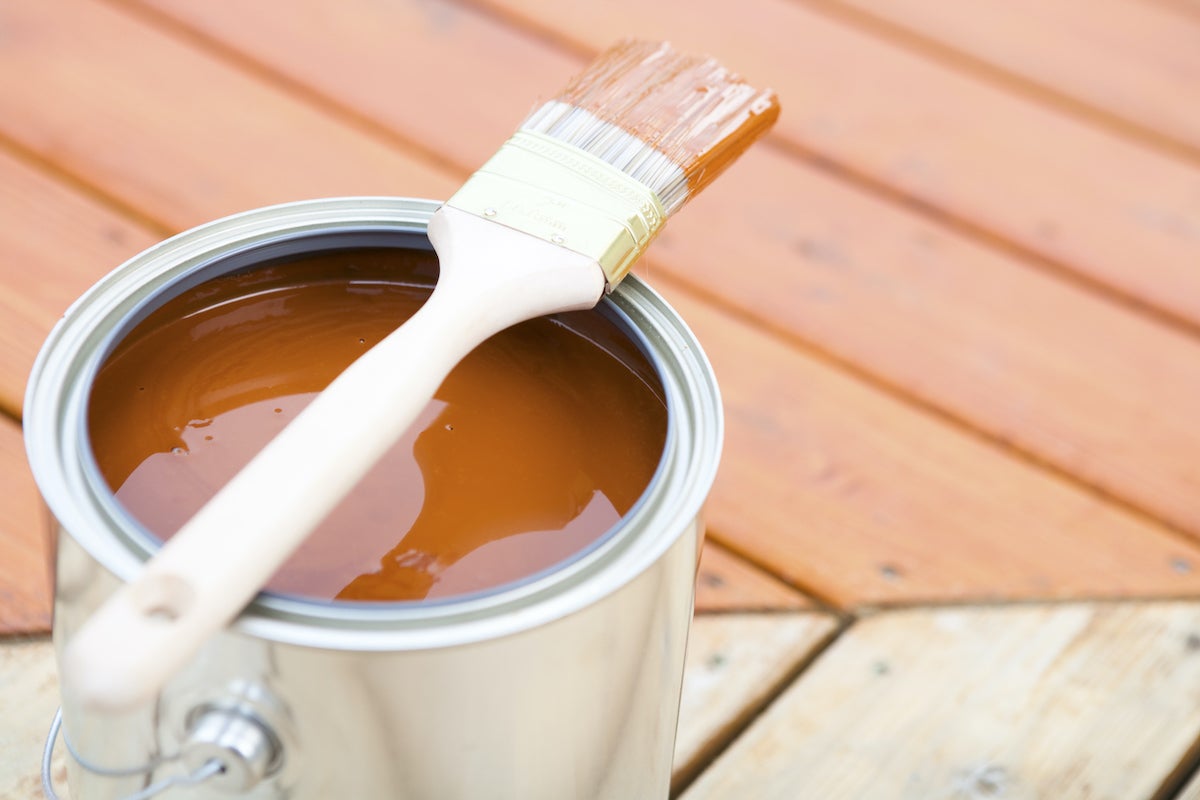
Limited Tools

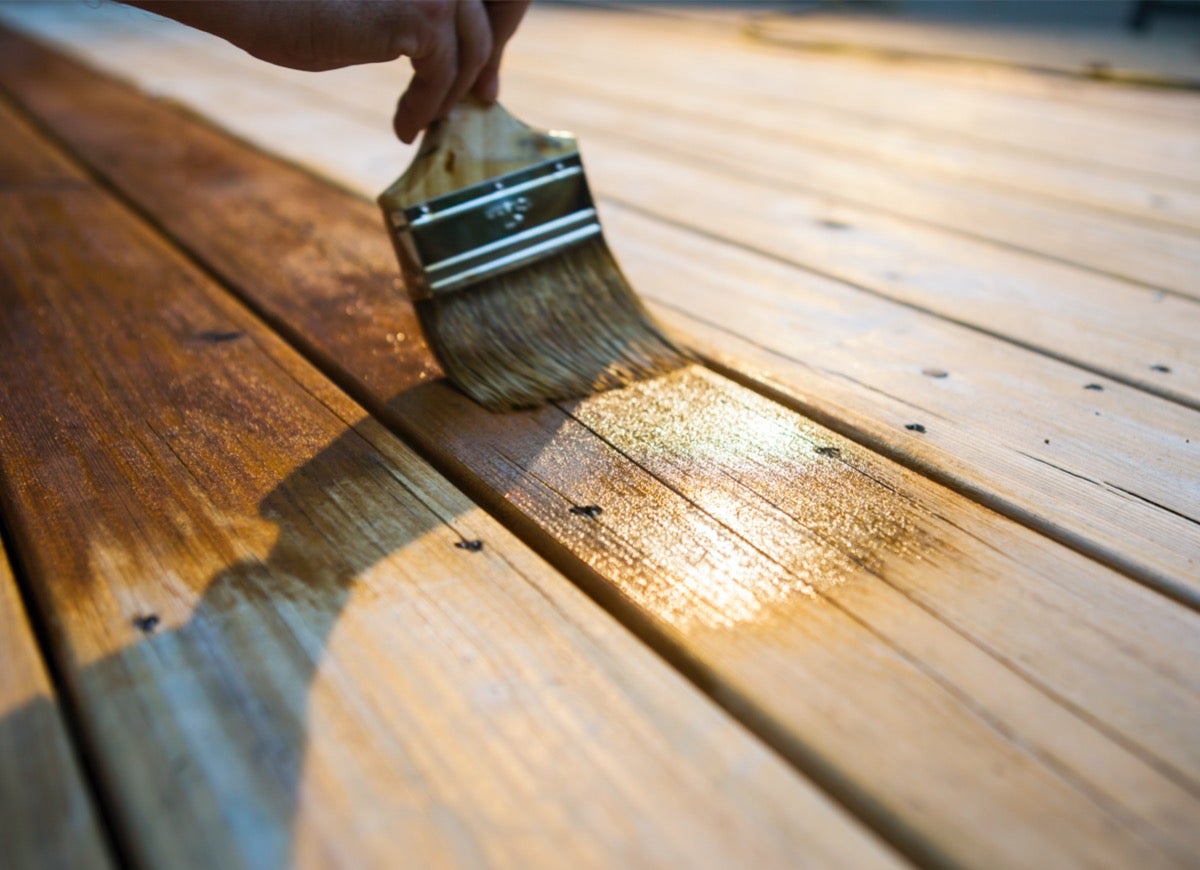
There are many different ways to stain a deck, but some DIYers get stuck on using only a simple paintbrush to complete the entire project. A paintbrush is a good starting point—especially for reaching into corners, edges, railings, banisters, and balustrades—but consider branching out to incorporate rollers, extension poles, and even paint sprayers.
Rollers make it easier to quickly cover the top of a railing, steps, and the deck boards. Adding an extension pole to the roller lessens how much a DIYer needs to bend over, easing strain on knees and the back. Paint sprayers quickly and effectively coat large decks with stain, but be sure to cover nearby plants, grass, lawn decorations, and the home’s walls or windows to prevent accidentally spraying stain where it isn’t needed or wanted.
Skipping the Test Board
When selecting a color for deck staining, use a test board or a mostly unseen corner of the deck to check the stain because the product works differently than paint when it comes to color. Paints are designed to cover the entire surface to which they are applied, but stains soak into the wood, accenting the natural grain and color. This means that the look of a stain can vary, depending on the specific wood and even the age of the deck.
Assuming the Weather Will Cooperate
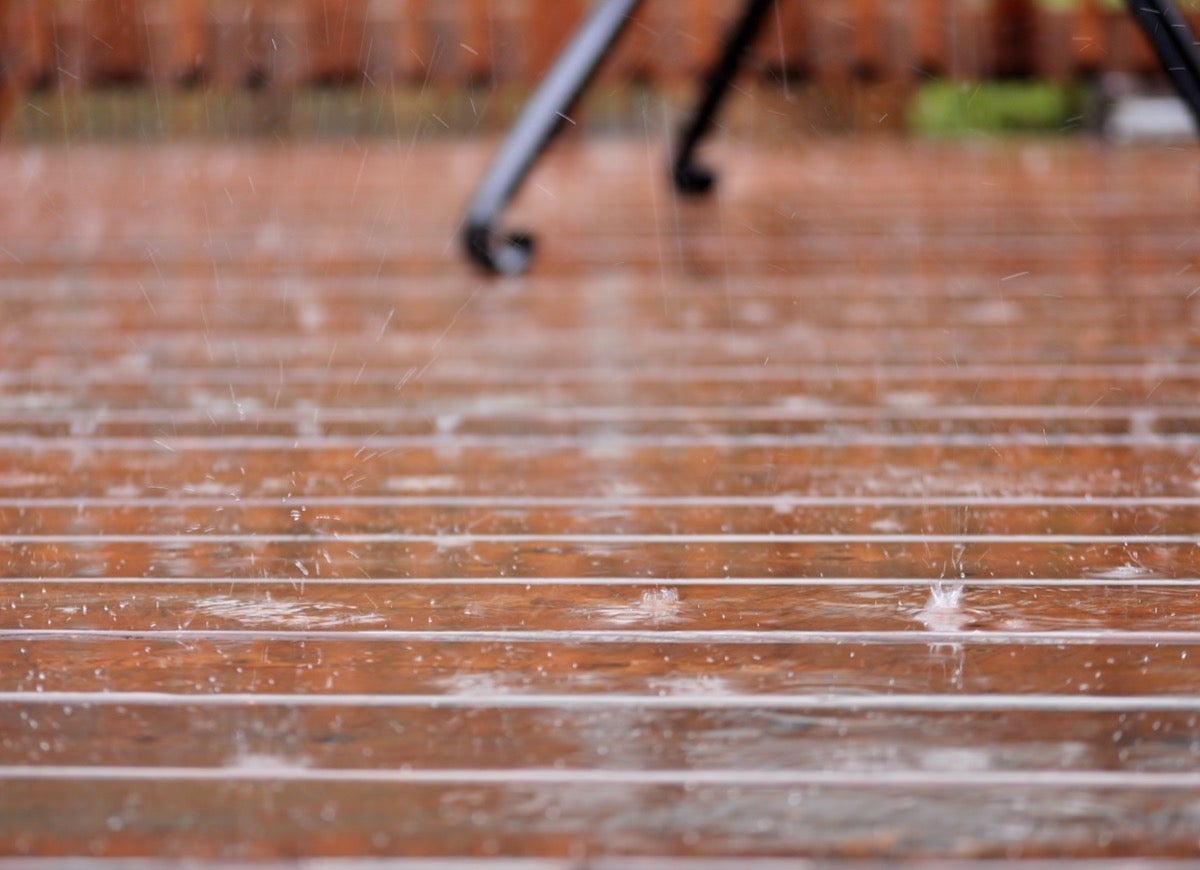
Stain doesn’t absorb well into damp wood, so trying to stain during or immediately after rain limits the wood’s ability to soak up the stain. Check the weather, then check it again. Plan the project for a clear period and keep an eye on forecasts up to and including the day of the project. If the deck has been dry for at least 24 hours and you already have sanded and power-washed the surface, then you are ready to start.
Keep in mind that staining the wood during the hottest hours of the day can also affect the final results. The heat from direct sunlight can quickly evaporate stain before it soaks fully into the deck. Try to start staining in the morning, and consider adding a second coat later in the afternoon to avoid peak heat.
Rushing Between Coats

Staining a deck takes time. This is an unfortunate fact that people tend to underestimate. Before even adding stain, the deck needs preparation such as power-washing and then drying for about 24 hours. If any rainy weather occurs during this period you might need to wait another 24 hours after rain until the deck dries completely. This helps to ensure that the first coat will soak into the wood.
The time between coats can vary depending on the specific product, but most advise waiting at least 4 hours before applying a second coat. This allows the first coat to settle into the wood before a second coat goes on. Keep an eye out for stain pooling on top of the wood. This indicates that the first coat isn’t dry and might indicate the use of too much stain for the deck boards to properly absorb.
Overcoating
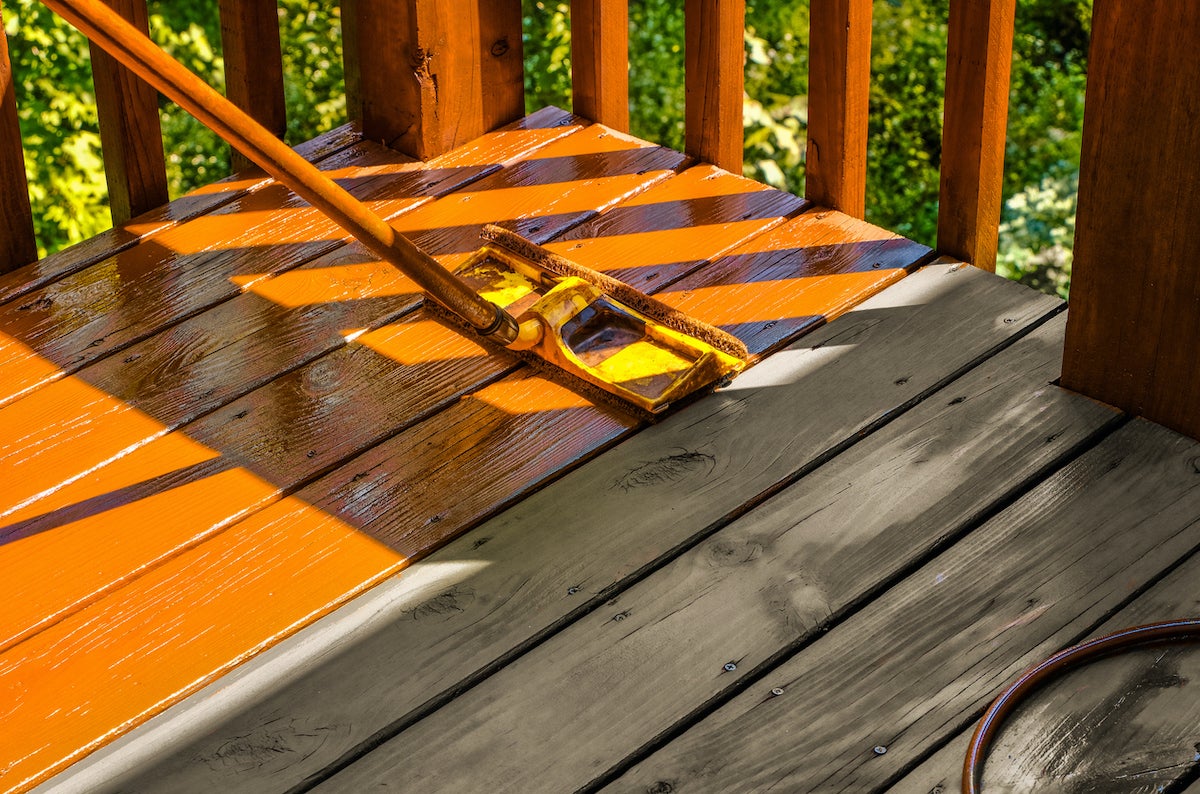
Overcoating the deck simply means adding too much stain. Unlike paint, you can’t keep adding coats of stain and expect the wood to keep absorbing the liquid. The wood in the deck comes to a point where it cannot absorb any more stain. When this occurs, the stain will pool on top of the deck boards or it might run down the sides of railings and balustrades and need to be wiped away.
Typically, one or two coats can properly seal and protect deck wood. Adding additional coats of stain can create a mess to clean up, and can cause the deck to become a slipping hazard. Excess stain keeps out water, but the slick surfaces reduce friction and can lead to injury.
Neglecting to Block Off the Area
After staining the deck, limit access to the area so that the wood has time to absorb the stain and fully cure. This can take up to 24 hours, but during this period the deck and stain are vulnerable to marks from excited kids and pets, as well as forgetful friends and family who might step outside for a second and track stain back through the home.
When situations like this occur, they typically are complete accidents that could have been avoided if the area was blocked off properly. DIYers can get an inexpensive roll of high-visibility caution tape to warn people about the newly stained deck or they might choose to limit access to the entire yard for 24 hours to allow the deck to fully cure without incident.
