

We may earn revenue from the products available on this page and participate in affiliate programs. Learn More ›
It can be a mighty labor-intensive and time-consuming process to remove paint, which is why many DIYers dread or even avoid the task. That’s a shame, given that the results usually are worth the effort.
Fortunately, there are several methods DIYers can use to strip paint from wood, some more natural or effective than others. By following the simple steps outlined below, you can learn how to strip paint from wood and successfully remove paint with minimal aggravation and without causing damage to the wood during the process.
MATERIALS AND TOOLS
You’ll need the following no matter which paint-removal method you use:
Lead test kit (for older homes)
Painter’s tape
Work gloves
Safety glasses
Respirator or mask
Rags
Depending on the method you choose, you may also need some of the following:
Distilled vinegar
Plastic scraper or metal paint scraper
Pressure washer
Coarse sandpaper
Hand sander or power sander
Heat gun
Citrus-based paint remover
Solvent-based paint stripper
5-gallon bucket
Paintbrush
Wire brush
Fine-grit sandpaper
Before You Begin
Before you can apply a fresh new coat of paint, you have to get the old stuff out of the way. There are several reasons that you might need to strip old paint, including “changing from a solid paint to a transparent or semi-transparent stain or to fix significantly uneven wear,” says Octave Villar, a section manager at the Behr paint company.
Take a minute to assess the wood’s condition and your desired results; this can help you determine which steps and tools you will need. Villar suggests determining how much of the previous coating needs removal. Some jobs don’t require the use of chemical strippers, for example.
Before you get started, don appropriate safety gear. The specific gear required for stripping paint from wood will vary with the method you use, but good work gloves, safety glasses, and a mask or respirator are essential for most paint-removal jobs. Even scraping can send flecks of paint into the air. When sanding, use safety goggles and a mask to protect your eyes and nose from fine dust or flakes of paint. These safety items plus respirators will give you some protection from paint strippers’ toxic fumes.
You’ll also want to protect surfaces from which you don’t want to remove any paint—including the floors beneath the wood, wall edges, windows, or doors—by taping off and covering them before getting to work.
Test the paint for lead.
Any home built before 1978 is likely to have lead-based paint lurking on surfaces. According to the EPA, 69 percent of homes built between 1940 and 1959 contain lead paint, and 87 percent of those old fixer-uppers constructed before 1940 have lead. The dust from that lead can be toxic, especially once you start messing with it, and especially in children. Lead poisoning can cause a variety of symptoms, including seizures and developmental delays in children.
If you believe your home could have lead paint, be sure to test for it before embarking on any of the steps below. DIY lead paint test kits give instructions for slicing through the paint to retrieve a small sample. Choose a rhodizonate-based or sulfide-based kit, depending on the paint color. If the paint tests positive for lead, follow the EPA’s recommended steps for lead assessment and abatement.
RELATED: How to Test for Lead Paint
Determine whether the wood is worth stripping.
Some wood, especially wood trim, may appear worn or rotted to the point that stripping will leave little left to paint. Before setting up to strip old paint from rotting wood, try a few tests to determine whether your work will be worth the time. You might need to replace or treat it before painting. For small problems, eliminate the cause of moisture before stripping or replacing.
“Stripping paint can be a messy and labor-intensive affair; sometimes it’s just more convenient to replace wood,” says Villar.
Know when to give up the ghost on removing paint from wood by checking for rot:
- Look for dry rot by noting spore dust on the wood, or a damp or musty scent.
- The appearance of fruiting bodies of fungus also indicates dry rot.
- Test for wet rot, more common in high-moisture areas, by gently poking a small portion of the wood to see if it is spongy.
- If you see signs of shrinkage or warping, it might be better to replace than repaint wood.
- Check for large cracks, or wood coming loose.
RELATED: How to Remove Paint From Trim and Molding
Remove protruding nails, screws, or hardware, and clean the wood’s surface.
Remove all hardware (nails and screws, brackets, and doorknobs) from the wood. The protruding ends can cut or scratch you while working, and can even show through after painting. Cover any non-removable hardware made of materials other than wood with tape before stripping and repainting. These steps will make it easier to use stripping tools and avoid damaging hardware you plan to reuse.
You should remove hardware like doorknobs before repainting anyway, so it is best to get those items out of the way before removing old paint. Set items like door hinges or drawer pulls aside, along with their screws. Put them in zippered bags and label them, if necessary.
Next, use a cloth to gently clean the wood surface with a dish soap-and-water solution, to remove dirt or grease. Allow it to dry before moving on to paint removal.
8 Ways to Remove Paint from Wood
Once you’ve determined that the wood is free of lead and worth saving, you’ll need to decide how you’ll take off the paint. Our rule of thumb is to start with chemical-free options, even if they require more elbow grease. Unless it’s obvious that the paint layers are thick and likely in need of chemicals or heat to soften them, try less caustic methods for which you have the tools, patience, and skills.
1. Vinegar
With its acidic properties, vinegar is a versatile household staple, and a potential paint remover. It is most likely to work on small projects with paint that already appears to be peeling off or chipping.
- Heat a small amount of distilled vinegar and about twice as much water in a pan on the stove or in the microwave.
- Place a clean cotton rag into the pan to soak up the warm vinegar mixture, and then dab it on the wood.
- Wait up to 15 minutes and then try scraping the paint off. If the paint won’t budge, try applying the vinegar again and waiting another 10 to 15 minutes.
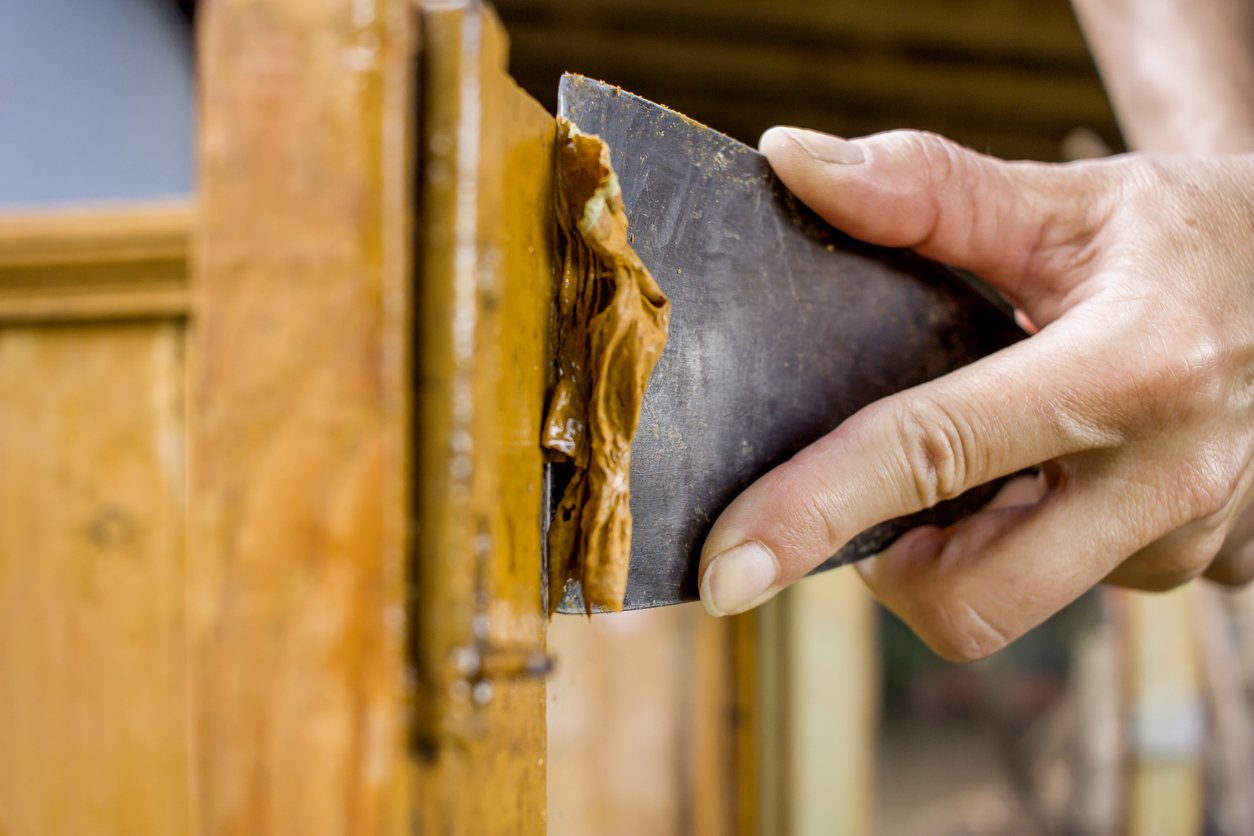
2. Paint Scraper
Fine layers of paint, especially those that are already cracking or peeling, might come off with a paint scraper, without having to use chemicals or heat. Plastic scrapers are less likely to mar wood surfaces and are inexpensive, but scrapers with brass or steel blades can better handle tough jobs.
- Always scrape in the same direction as the wood grain when you’re applying force to remove paint.
- When doing lighter scraping, go against the wood grain to pull off any remaining paint chips, but keep the pressure light.
3. Pressure Washer
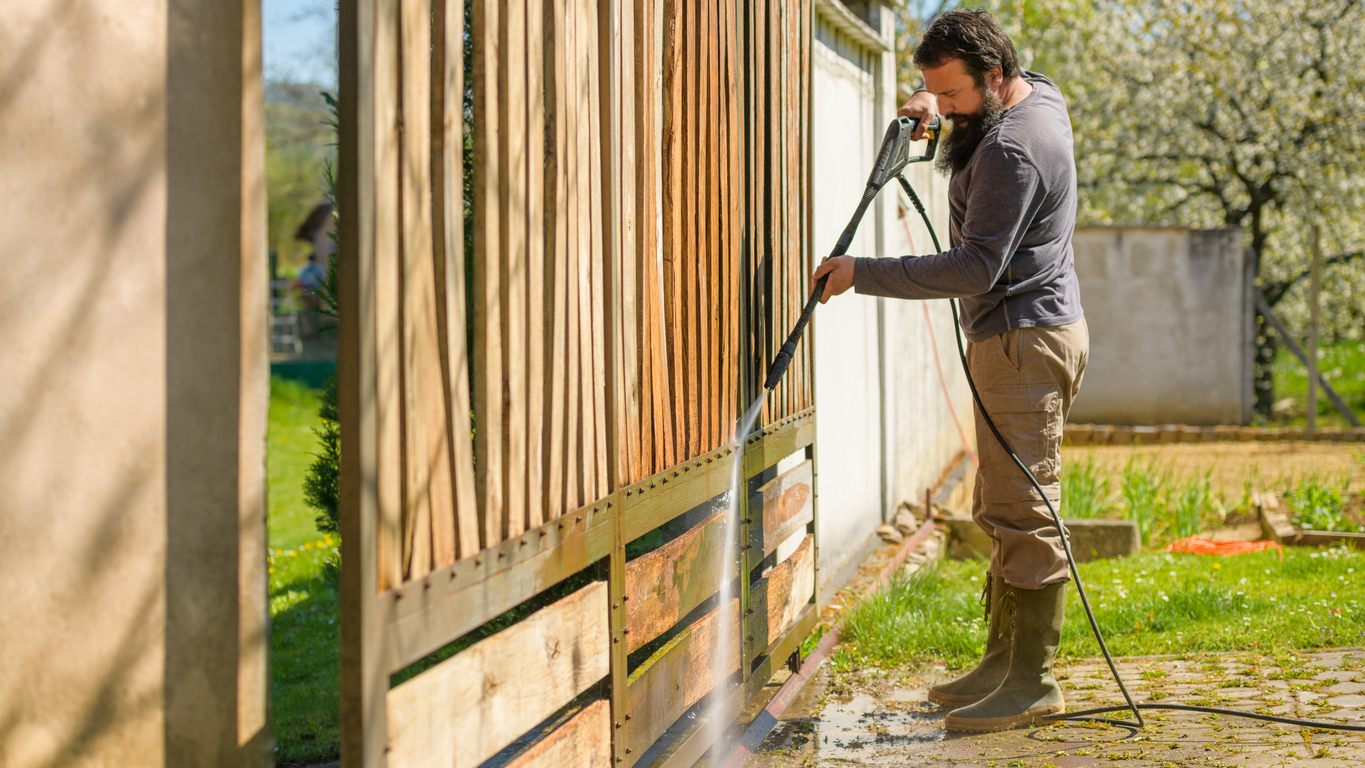
It is possible to use a pressure washer to remove paint, but the pressure has to be really strong—at least 2,500 to 3,000 psi—for the paint to come off. A pressure washer might be a good option, and a big time-saver, when removing paint from large outdoor surfaces. Avoid using a pressure washer on hardboard siding, however.
- Be sure to wear safety glasses.
- Wash along with the grain in a continuous motion.
- Use caution and don’t stand too close to the wood surface, since pressure washers can damage wood.
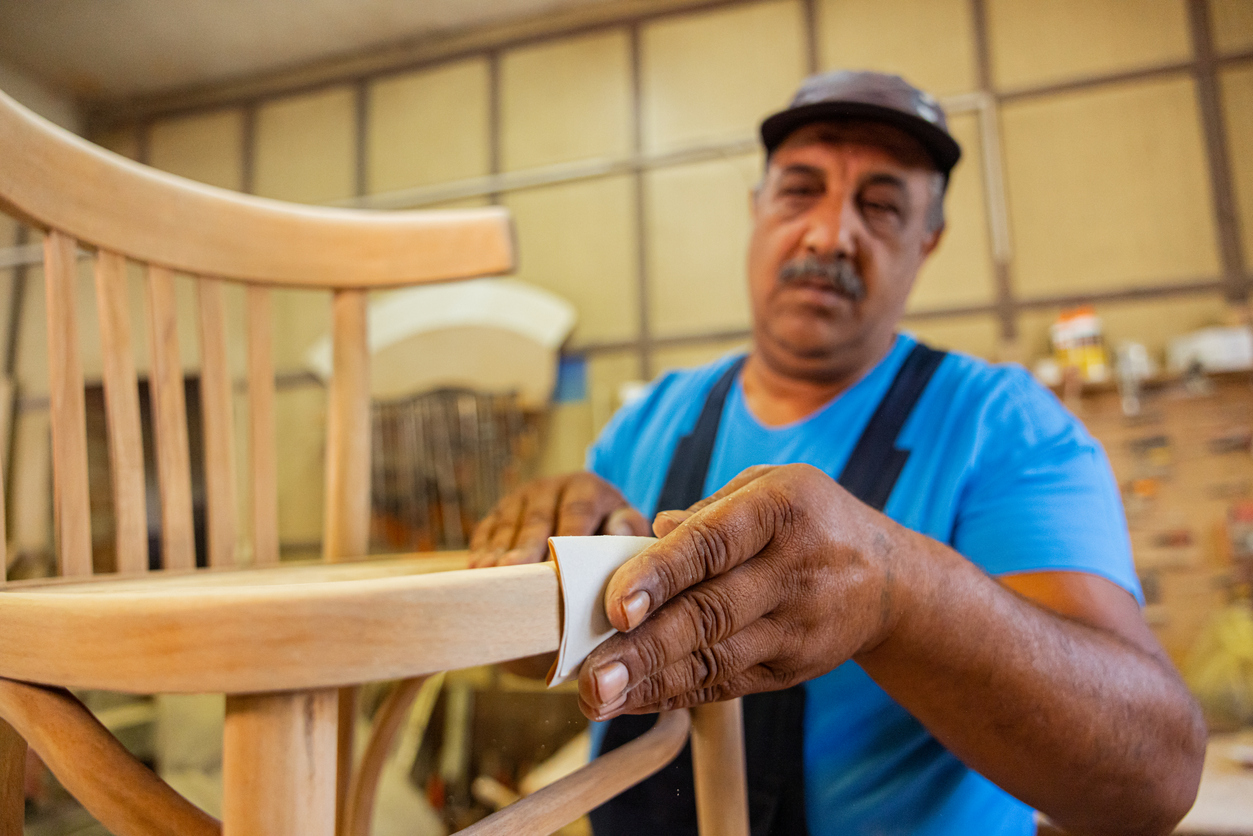
4. Sanding
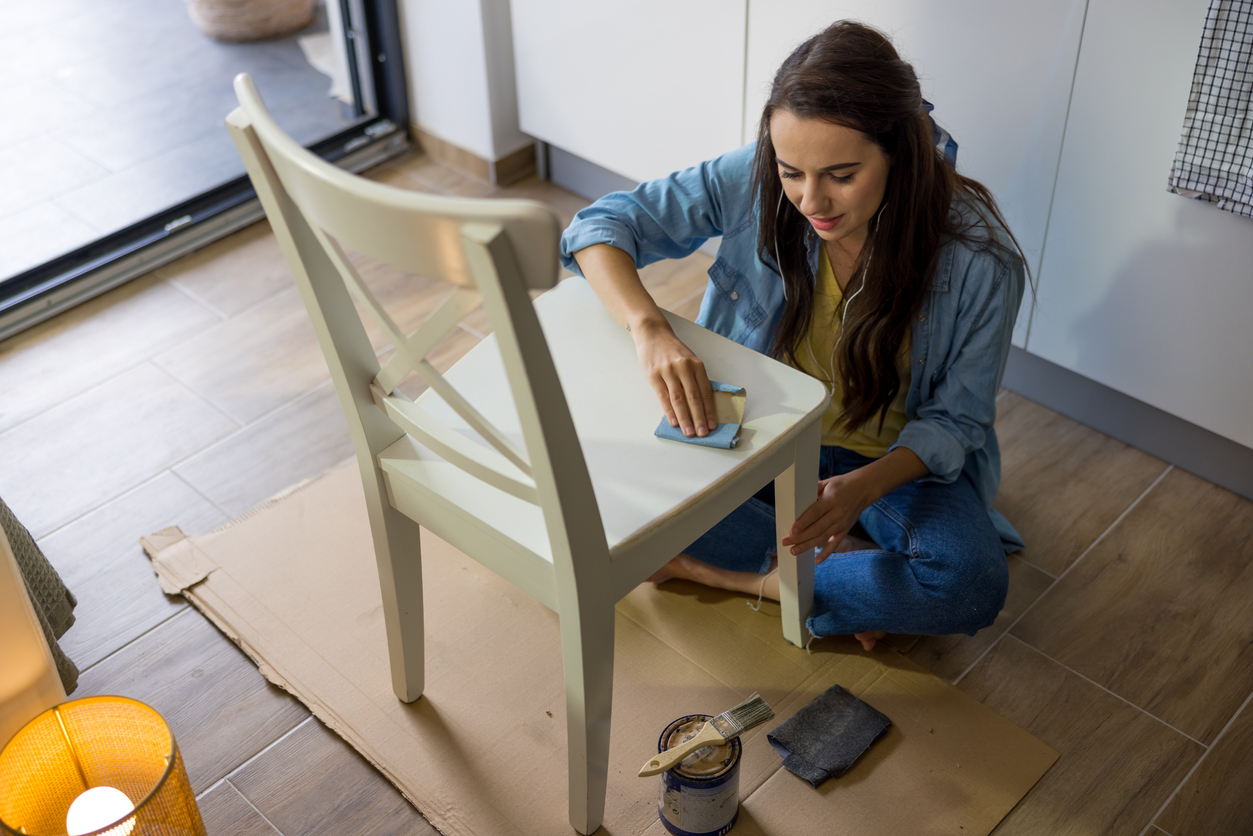
“Despite the additional labor, sanding is really my preferred way to remove paint,” says Villar. For minor jobs, like just getting past some peeling paint or making a surface smoother, you might be able to skip the stripper step and simply sand instead. Some jobs require just light sanding, especially if the wood surface is flat, the paint is thin or mostly flaked off, and you plan to repaint the wood.
- For smaller wood objects, use a strip of sandpaper held by hand that can reach easily into crevices.
- For big jobs—like, say, sanding a deck—use a power sander. Just be aware that sanding removes a fine layer of the wood and can damage it if it’s not done properly.
- Whether you’re sanding by hand or with a power sander, start with sandpaper that’s on the coarse end of the grit spectrum (about 80 to 120 grit), depending on the thickness of the paint.
- Take power-sanding projects outdoors. If you sand wood indoors, attach (or have a friend hold) a vacuum hose to capture dust.
- Start out slowly to determine how much pressure to apply to remove paint without damaging the wood surface.
- Always sand in the direction of the wood’s grain, and with steady pressure.
- Switch to medium or fine grits for later steps, and use a fine grit (around 220) for the finishing step.
RELATED: Buyer’s Guide: The Best Palm Sanders We Tested This Year
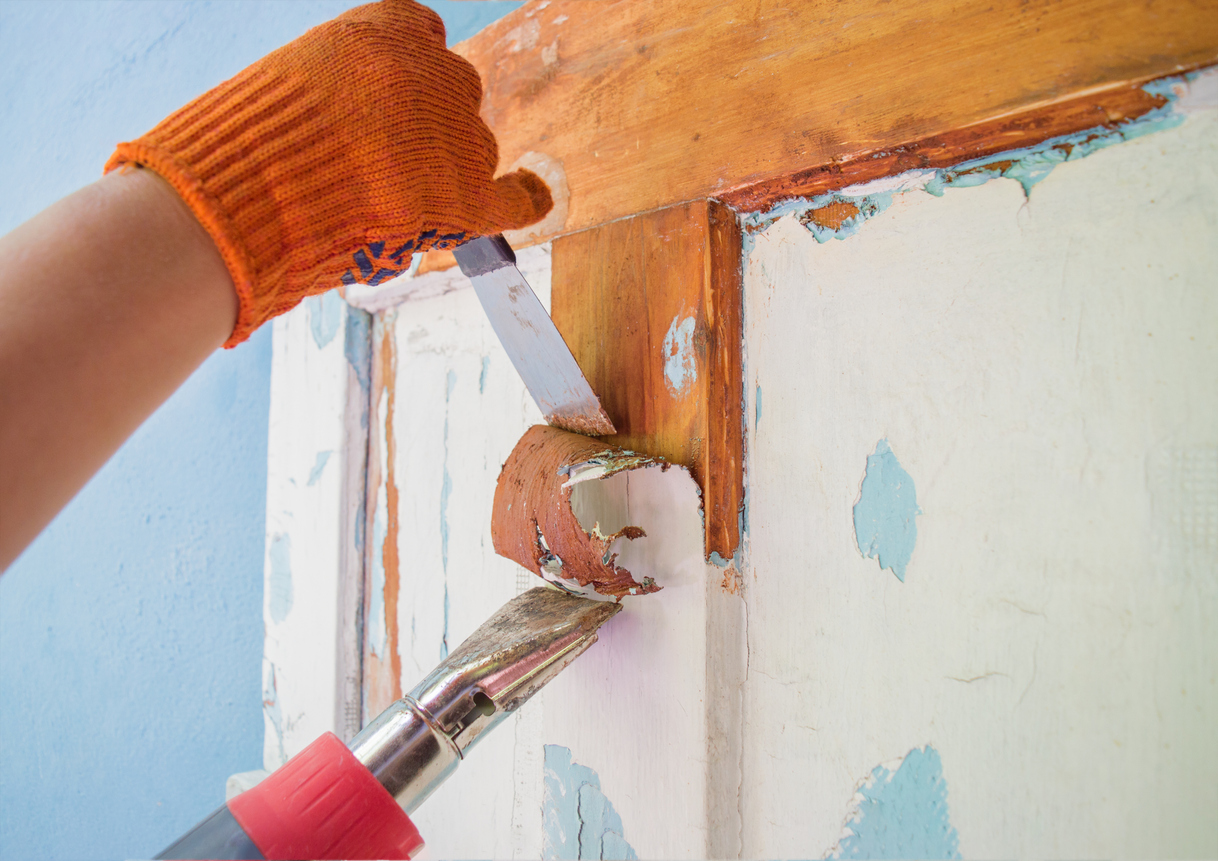
5. Heat Gun
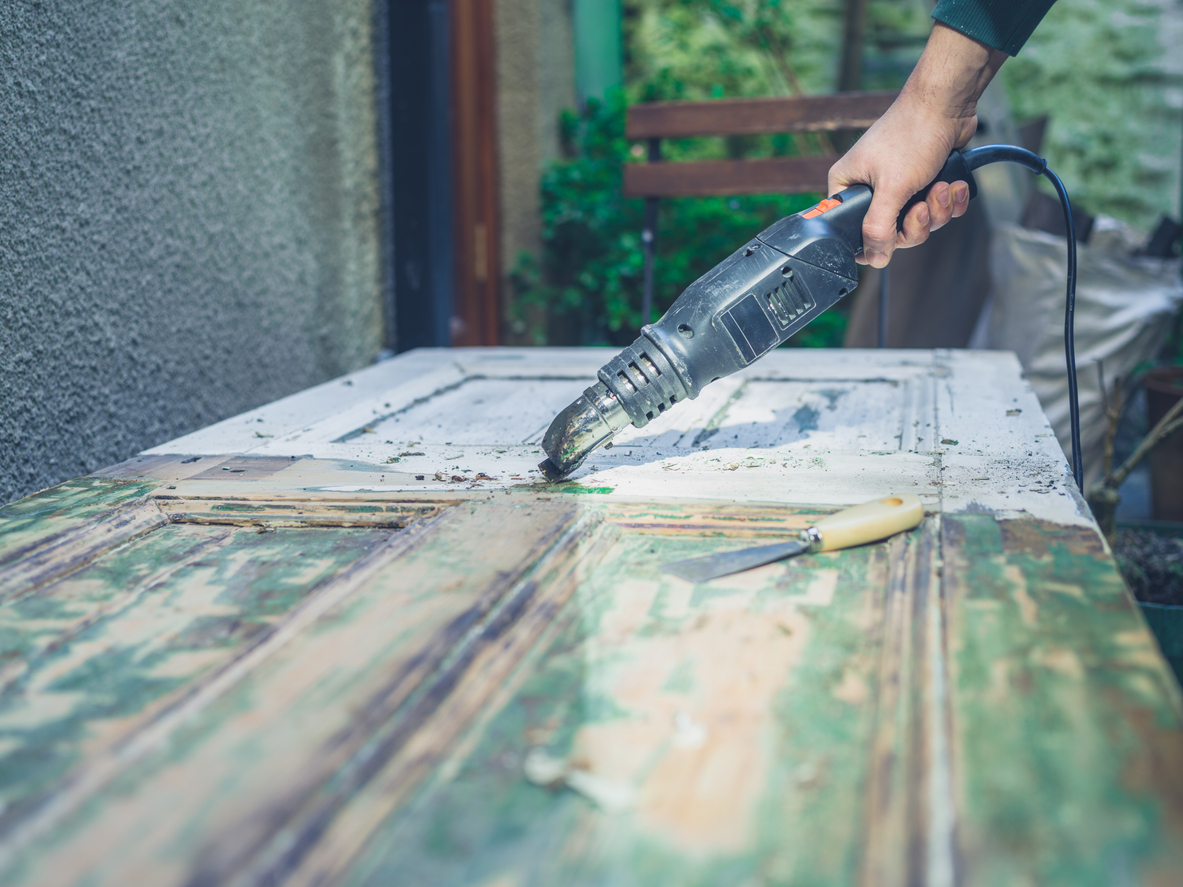
A heat gun can help “melt” paint so that it is easier to strip away. It is a useful tool when you’re working on old baseboards or other wood pieces that have multiple layers of paint. The nice thing about using a heat gun is that it will reduce your exposure to chemicals from strippers. Heat guns are safer than blow torches, but still can cause accidental combustion or magnify vapors that are unpleasant and even harmful.
- When using a heat gun, move it back and forth in a sweeping motion; don’t focus too long on a single spot.
- Once the paint softens, use an angled scraper to peel the old paint away.
- Keep the heat about 2 inches away from the surface to avoid burning the wood, and keep a fire extinguisher handy in case of emergency.
- Avoid using heat guns on wood that is varnished. The varnish will melt and turn sticky, making it harder to remove.
6. Citrus-Based Paint Removers
Citrus-based paint strippers contain organic compounds called terpenes that are derived from oranges or other plants. While citrus strippers are nontoxic and biodegradable, they do contain some chemicals. (On the upside, the more natural strippers smell like oranges instead of hazardous fumes.) Citrus-based strippers can work like chemically based products, but usually take longer to work. If you don’t want to resort to using harsh chemicals and have the time to wait, try using a citrus product to remove paint from wood.
- Shake the container, pour the stripper into a container, and apply the solution with a paintbrush.
- Allow 30 minutes (and up to 24 hours) before scraping. You can leave the stripper on overnight if you cover the surface with plastic.
- Follow the manufacturer’s instructions for removing paint. Typically, you’ll either wash the stripper off or use a scraper to remove it (along with the paint).
Buy citrus-based strippers like Citristrip online, or at local home improvement centers or hardware stores.
RELATED: Buyer’s Guide: The Best Paint Strippers We Tested This Year
7. Chemical Paint Strippers
Once you determine that stripping the paint with a chemical paint stripper is the best method for your project, take care to select an appropriate product, and remember to observe proper safety precautions. Before you begin work, don the safety gear that’s essential to wear in the presence of chemical paint strippers. That means gloves, glasses, and a respirator.
- Pour the solvent into a container. Shake the can well before opening and pouring some into a shallow container. Having closely consulted the manufacturer’s instructions, pour your chosen solvent-based paint stripper into an empty bucket.
- Apply paint stripper in small sections. Concentrating on one small section at a time, apply the paint stripper liberally with a paintbrush.
- Let the stripper sit on the wood for 20 minutes or more. Leave the product on the wood until the paint starts to bubble and peel (usually about 20 minutes). If you are removing several layers of paint, the solvent might need to sit for up to a few hours. As time elapses, test the paint intermittently to see whether it has softened. Be sure to remove all applied stripper on the same day. Once it dries, it can be very difficult to remove.
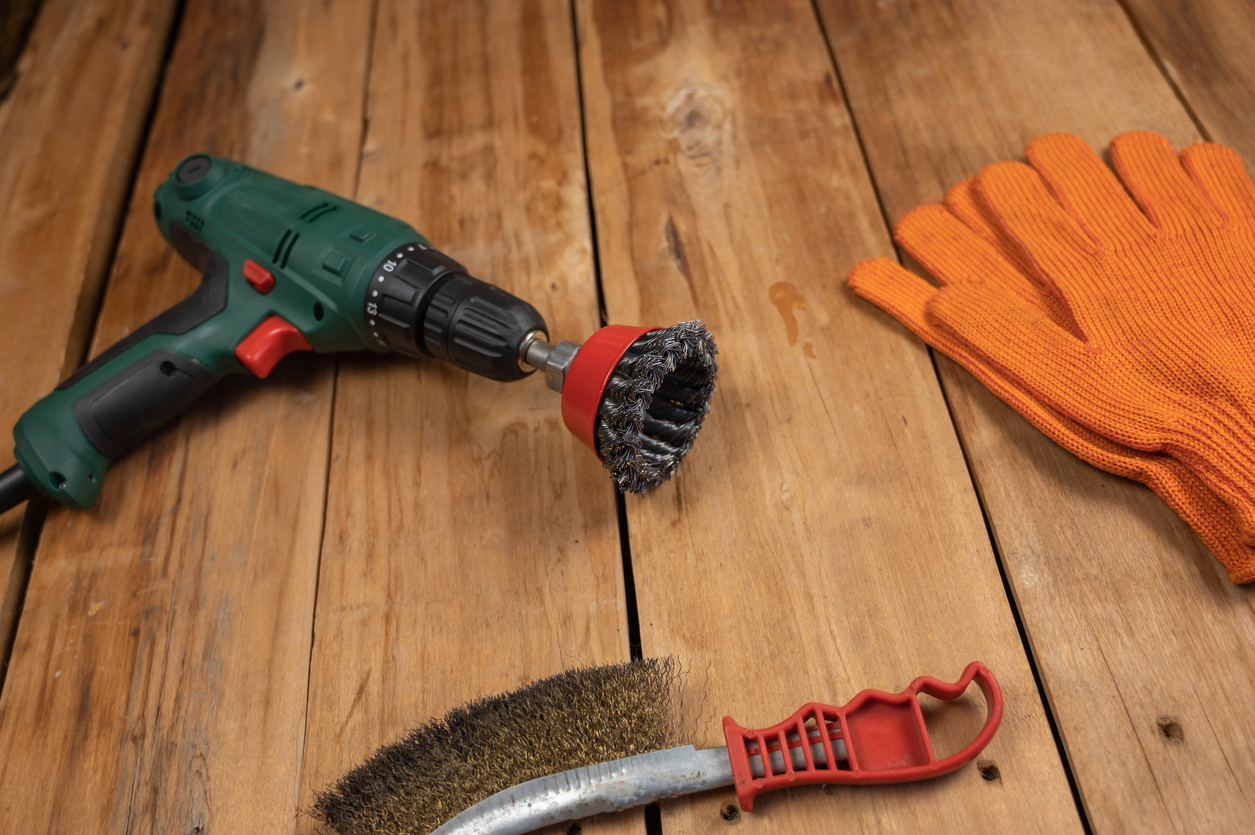
- Remove the softened paint with a paint scraper. Use a paint scraper to take off as much paint as possible from the area where you applied the stripper. Be gentle as you scrape; don’t gouge the wood. If you’re feeling more resistance than you’d like, give the remaining area a little more time under the stripper. For large and fairly flat projects, you can attach a metal brush to your cordless drill to speed up the process. Take care not to scrape too hard, which can leave scratches on the wood
- Repeat if necessary. Once you’ve removed all you can with the scraper, you may choose to repeat the process, reapplying stripper and going through the steps once more. When satisfied with the condition of the area you’ve been stripping, move on to the next step.
- Get into hard-to-reach places. After you have worked section by section to remove all the paint from the flat portions of the wood, address any raised or recessed areas (for example, in moldings). Spread the stripper on the wood again and wait at least 20 minutes, but this time scrape with a wire brush or steel wool to access hard-to-reach crests and depressions.
Finishing Touches
It might feel like you’re done once you’ve stripped those thick layers of paint. But this last step really is critical, whether you sand, scrape, or use paint strippers. “Final sanding and washing of wood helps to ensure the wood is free of loose materials, such as dirt and debris,” says Villar. In addition, sanding gives the wood a consistent surface for accepting paint or stain. “Although labor-intensive , these steps are critical to ensuring the success of your wood project,” he adds.
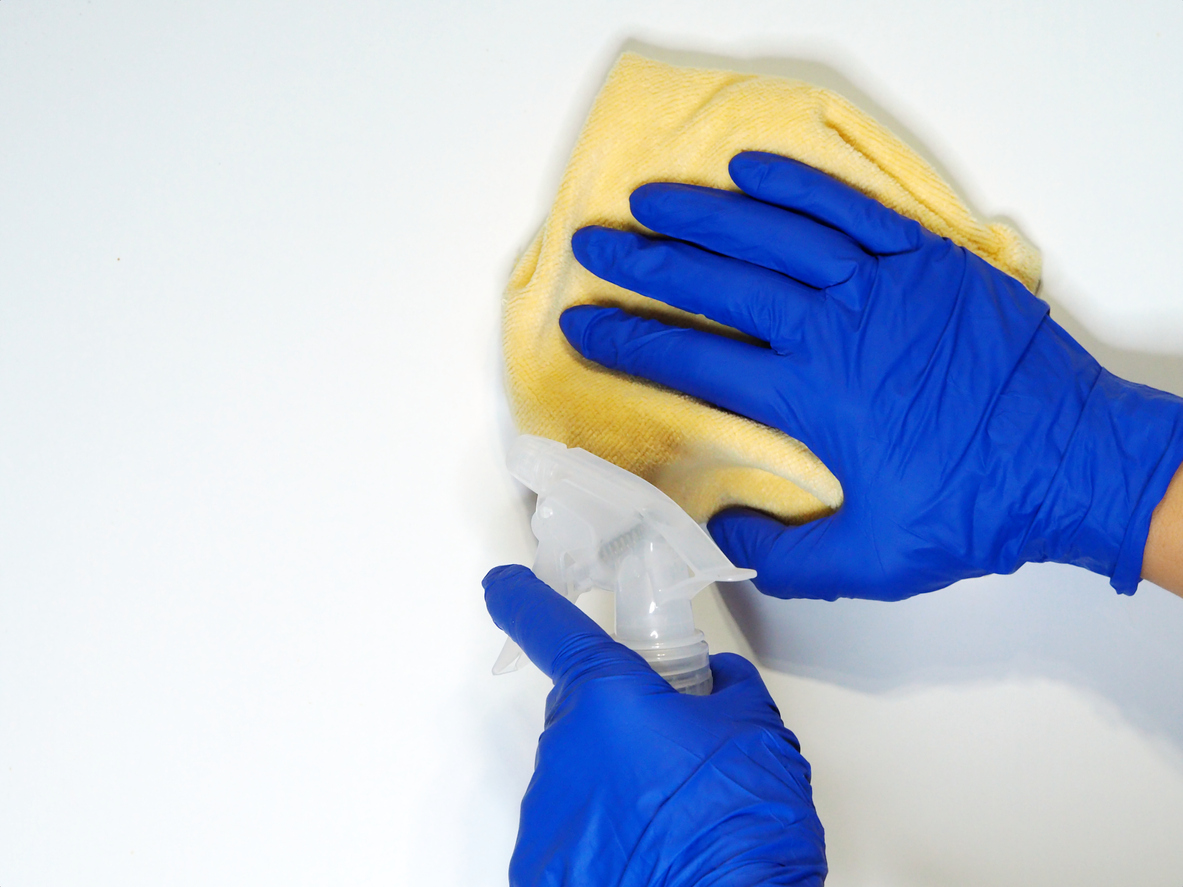
- Before sanding, wash the wood with a clean, water-soaked rag, then sand down the entire surface. If you have access to a power sander, you can use it to make quicker work of sanding the broad, flat sections, but you should still manually sand any fragile or carved parts of the piece.
- Wipe the wood again to remove particles or debris left from sanding. If you aren’t ready to paint, wipe the wood surface again with a barely damp cloth just before adding new paint. This removes any sanded particles or other debris that might have settled back onto the wood.
Villar suggests that DIYers pay attention to how the wood feels on that final wipe-down. “The surface should feel neither too rough (such as splinters grabbing the cloth) nor too slick,” he says. You should see no residue while moving your hand over your nicely sanded wood, and the surface should be clean and dry before painting.
FAQs
Q: What household items can remove paint from wood?
Vinegar can remove paint from wood in many instances. If you don’t have a paint scraper, try a plastic pot scraper instead, especially for small jobs. Steamers might soften paint, but their moisture can warp wood, so their use is not a good idea.
Q: How do you remove oil-based paint from wood?
Caustic strippers work well at removing oil-based paint from masonry, and can also work on wood. However, the strippers can blacken some hardwoods like maple. Special oil-based paint strippers are effective, but most contain volatile organic compounds (VOCs). Using them will require numerous safety precautions, especially indoors.
Q: What can I use to strip stain off wood?
Stripping stain from wood is a little tougher than removing paint. Wood absorbs stain. Removing stain starts with removing any varnish layers using a chemical stain stripper. Apply a thick layer of stripper with a brush and follow many of the same steps as for paint removal—scraping first and then wiping the surface with steel wool. Sand when dry.
Q: How do you remove paint strippers from wood?
Be sure to remove paint stripper from wood when the paint has bubbled up. Attempting to scrape it off too soon might necessitate reapplying stripper. Wait too long and the stripper hardens.
The best way to remove paint stripper is with a plastic or bladed paint scraper. You also can use a putty knife and wire brush for hard-to-reach spots. Always guide the scraper at an angle. If some chemical remains in spots, dip a steel wool pad into mineral spirits or paint thinner to scrape off the remaining stripper. Finally, wipe the surface with a soft cloth dipped in mineral spirits.