
We may earn revenue from the products available on this page and participate in affiliate programs. Learn More ›
When it comes to durability, affordability, and style versatility, it’s pretty difficult to beat ceramic tile. It’s also waterproof and it won’t promote bacteria growth. But tile can also be a challenge to install. It requires special tools for cutting and shaping, as well as some knowledge of the different mortars, thinsets, and grout to install it properly.
While you can hire a pro to install ceramic tile, learning how to install ceramic tile can save money. This guide will explain what DIYers need to know in order to tackle a ceramic tile floor installation on their own.
Tools & Materials
Bobvila.com may earn a commission from purchases made through these links.
- Tape measure
- Level
- Pencil
- Chalk line
- Felt tip pen or marker
- Tile cutter
- Mortar trowel
- Grout float
- Cement board (optional)
- Tile
- Tile spacers
Project Overview
Working Time: 8 hours for a small room
Total Time: 24 to 72 hours
Skill Level: Intermediate
Estimated Cost: Between $1 and $3 per square foot
Before You Begin
Whether it’s a floor or wall tile installation, it’s critical that the surface is in sound condition. Surfaces that have water damage, holes, or other types of damage need to be fixed before installing tile over top. If damage is merely covered over, the tile may not adhere correctly, resulting in popped tiles and poor installation.
Also, just like other tiles, the edges of cut or broken ceramic tiles can be sharp. When removing old tile or working with a cut tile, it’s best to wear a pair of gloves. It’s also a good idea to wear safety glasses when cutting tile.
Selecting the Right Materials
When installing tile, chances are that it’s in a setting where moisture is present, such as the kitchen, bath, or entryway. If that’s the case, make sure to use a waterproof adhesive. DIYers can use a premixed adhesive or a mortar, but if they choose the latter, make sure it’s a thin-set variety. (Thick-bed mortars require some practice and skill at smoothing to get the tiles to sit flat, and the additional mortar isn’t necessary for a watertight finish.)
Grout is usually purchased as a powder and mixed with water or a recommended additive. Read the instructions on the package or ask for advice at the tile store. Wear gloves and spread grout evenly, being sure to force it into the joints with a blunt stick or another tool.
One simple way to enhance the color scheme is to add a dye or pigment to the grout. White grout, even after it has been sealed with a grout sealer (which is recommended, especially for floors), may prove difficult to keep clean.
RELATED: How to Clean Ceramic Tile
A Quick Note on Cutting Tile
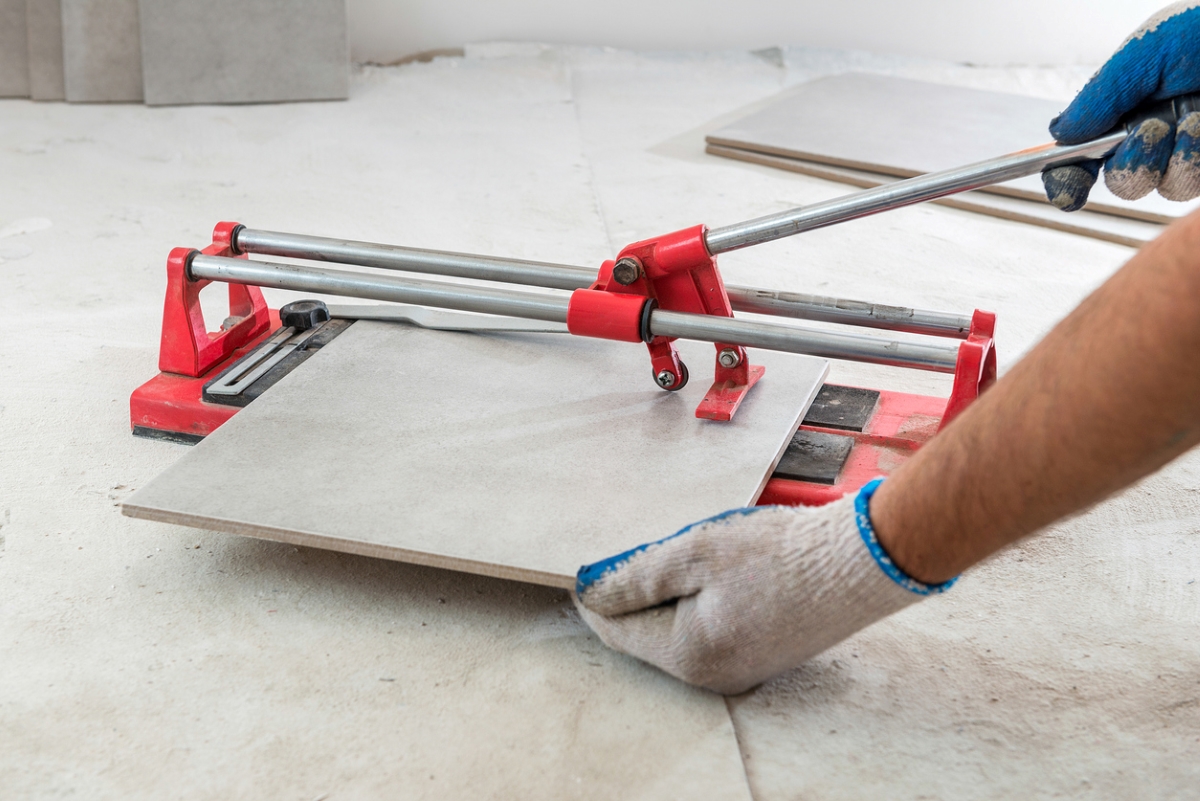
In addition to the tiles on the edges of the floor that need to be trimmed, there will be other times when cutting a tile to fit up to a cabinet, shower, or another obstacle will be necessary. Luckily, it’s fairly easy with a tile cutter.
For beginners, it’s best to practice cutting tile before spreading mortar. Here’s a quick overview on cutting tile:
- Measure the size and transfer the dimensions to the glazed surface of the tile via a felt-tip marker.
- Position the tile on the tile cutter, aligning the centerline of the cutter with the axis on which the tile is to be cut. To keep it square, the top of the tile should be held flush to the fence at the top of the cutter.
- Use the lever to which the cutting wheel is attached, draw the cutter across the surface of the tile, exerting firm even pressure. Make only one pass with the cutter.
- Apply pressure to the score line with the foot and leave to snap the tile.
Different snap cutters have different means of snapping tile. Some have a foot at the rear of the lever that has the cutting wheel at its toe; with others, the reverse is true. Whatever the design of the cutter, use the surface to apply pressure to the score line. In combination with a bead built into the base of the cutter, the pressure will cause the tile to snap in half. With a little patience, some practice, a score, and a snap, you’ll become a proficient tile cutter.
How to Lay Ceramic Tile
DIYers shouldn’t let ceramic tile scare them. While it does require some specific techniques, learning how to install ceramic tile is well within the capabilities of most do-it-yourselfers. Layout and patience are the most important pieces to this puzzle.
STEP 1: Assess the subfloor or backer board.

The condition of the substrate surface that will be tiled is just as important as the tile itself. A flexing floor (or an uneven and damaged wall) can lead to broken tiles and failed grout, so begin by inspecting the substrate. This could be the subfloor or concrete backer board.
- Check the stability of the substrate. Whether it’s backer board, plywood, or concrete, the substrate needs to be sound, clean, and dimensionally stable.
- Clean the substrate. Remove flaking paint, peeling tiles, or unsecured sheet flooring from the floors that will be tiled.
- Use a level to check for bumps. Surfaces need to be level or plumb and true to plane, as the pros say—that means no bumps.
- Choose the right type of substrate. Water-resistant backer board should be used under tile in areas prone to moisture or splashes (bathroom floors, for example).
RELATED: How to Install Tile the Right Way
STEP 2: Measure the area you plan to tile.
While it’s important to find the center of the surface regardless of whether it’s a wall or floor, the method for laying out tile on a wall differs from laying out tile on a floor. The following are some guidelines for tiling floors.
To make a finished ceramic tile floor appear symmetrical (even if it isn’t), find the center of the floor surface first. Starting in the center of the room ensures that the final tiles at the walls are equal in size for a symmetrical installation.
- In square rooms (or relatively square rooms), it’s easiest to stretch two strings between opposing corners so they intersect on the floor. Mark where they intersect on the floor; this is the center of the room.
- For nonsquare rectangular rooms, measure the distance from the center of the room to one of the walls. Make two marks at either end of the room parallel to the same wall. Stretch a chalk line between these marks and snap a chalk line on the floor. Repeat with one of the adjacent walls. This should form an X across the room and this will be the starting point for a standard installation.
- For 45-degree installations, simply stretch a line between the opposing corners and snap the line. This will also form a 45-degree angle and the starting point for a 45-degree installation.
- In an older home, you may find the floor isn’t square, which makes installing ceramic floor tile more complicated. Use the most obvious wall as a baseline, so those entering the room will see tile lines parallel to that wall; your job will look more even.
In all of these cases, the Xs will form quadrants. Start tiling from the center and then work your way into each of these quadrants.
STEP 3: Dry lay your tiles.
After finding the starting point for a ceramic floor tile installation, lay the tiles out dry to see how they will appear. Doing this layout dry, meaning before mixing and applying the adhesive or mortar to the floor tiles, so you have the ability to adjust the pattern or layout. For floors, do this within each quadrant of the grid or above the ledger board.
The space between the tiles should be uniform. The larger the tiles, the larger the space should be between them. Some do-it-yourselfers will make the mistake of pushing tiles too close together to reduce grout lines. Without enough surface area, grout won’t bond well and can fail prematurely, leaving room for leaks and water damage. Use tile spacers if the tiles aren’t pre-spaced on mesh sheets.
Once the tiles are laid out and look good, check the edges of the quadrants. Unless there’s a freak stroke of luck, perimeter tiles will require cutting, but they should be relatively even at each end. It’s best to cut these tiles at the end of each course rather than trying to cut them ahead of time.
STEP 4: Spread the mortar.
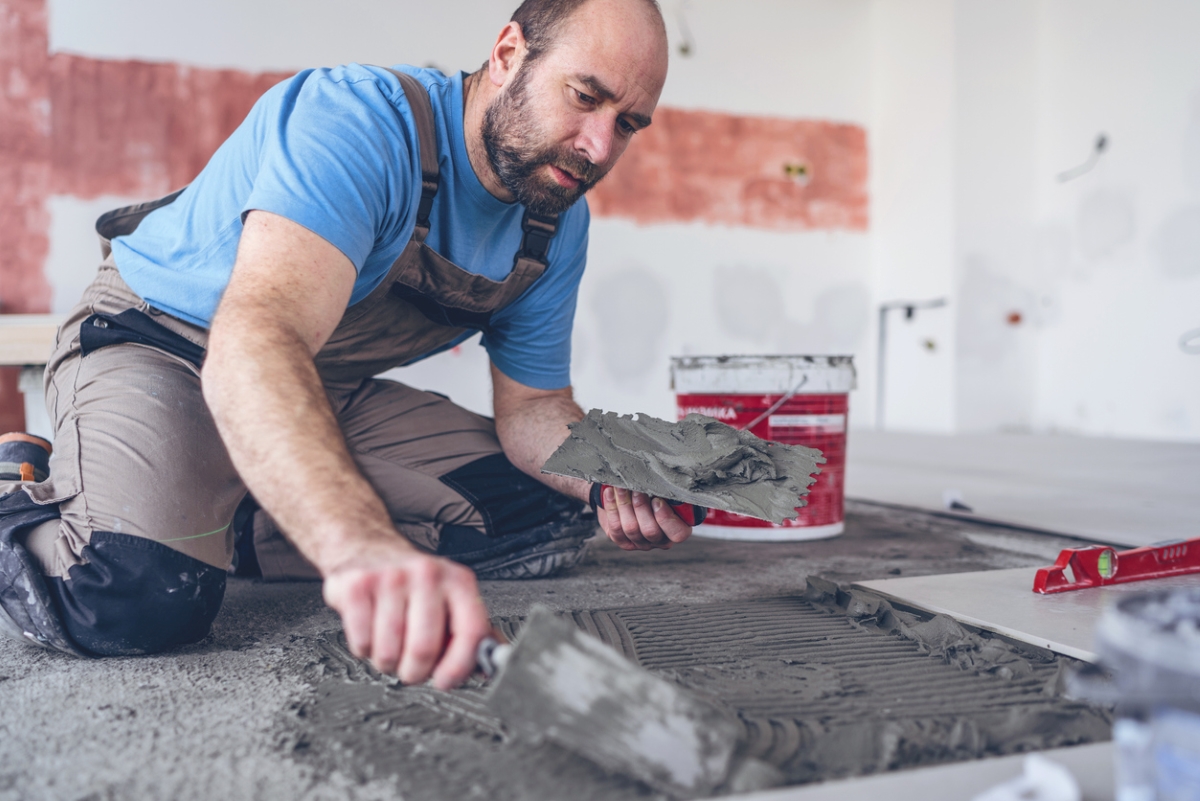
In most cases, DIYers will use a square-notch trowel for ceramic tile. Smaller tiles (6×6) will require a ¼-inch by ⅜-inch trowel, while larger 12×12 or 12×24 tiles can require a ½-inch by ½-inch trowel.
Use this trowel to apply mortar to the substrate. Start at the center mark and choose the quadrant furthest from the door, using the trowel to apply mortar up to the chalk layout lines. Hold the trowel upright and drag it over the mortar to create ridges.
Only apply enough mortar to work with two or three tiles at a time as it can start to dry. Also, avoid overrunning the chalk lines as they are a guide, and by the time the next quadrant is ready, the excess mortar can dry.
RELATED: 8 Tiling Tools Every DIYer Should Know
STEP 5: Lay the ceramic tile.
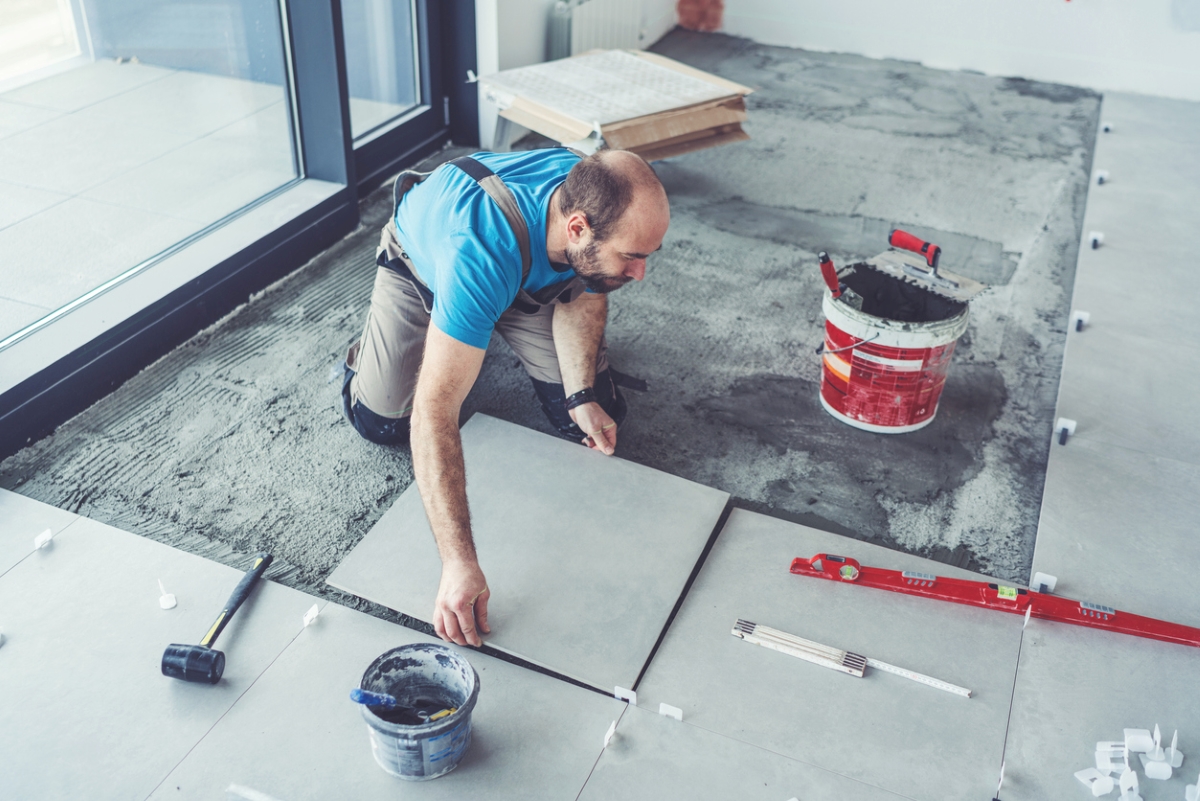
With the mortar spread, it’s time to start laying tiles. The best method is to place the tile’s edge against the neighboring tiles (or on the chalk line) and press it down into the mortar. Next, space the tile away from those neighboring tiles by pushing spacers into the gaps. This method usually prevents mortar from pushing up between the tiles while still allowing for a consistent gap. Use a level to ensure that each tile is level with those next to it, as well.
Be sure to check the product container to determine how quickly the adhesive will dry. Spread the adhesive smoothly with a square-notched trowel, then set each tile with a slight twist to spread the adhesive. Begin at the center of the surface and work out to the perimeter. Follow the manufacturer’s instructions and stay off the installation for the required amount of time before grouting the tile.
STEP 6: Make final cuts to the tile.
At the end of each row of tiles, there is most likely going to be a gap that a full-size tile does not fit in. These tiles need to be cut to length or width to sit nicely into the gap (it may even be necessary to drill a hole in tile). Here’s the easiest way to get a perfect measurement:
- Place a cut tile directly on top of the last adhered tile in each row. Make sure that it’s sitting squarely on top of the adhered tile. This is the tile that will be cut.
- Take another full-width piece of tile and butt it up against the wall, overlapping the tile that will be cut. Place spacers between the wall and this tile.
- Mark the tile that will be cut along the edge of the overlapping tile. Remove the overlapping tile to reveal a perfectly marked tile.
- Score and snap the tile along this mark. It will drop into the open space perfectly.
Apply mortar to the space, lay the tile, and use spacers to position it.
STEP 7: Add grout to the tiles.
Use the grout float to apply it to the tiles, pushing it into the joints. To remove the excess, hold the tile float at a 45-degree angle and drag it across the grout lines at a 45-degree angle. Be sure to work it into the gaps evenly and be careful not to pull it from the grout lines, particularly at the corners of tiles where grout lines intersect.
RELATED: What’s the Difference? Sanded vs. Unsanded Grout
STEP 8: Clean and seal the tiles.
Make sure to sponge off the residue on the surface of the tiles before it has the chance to dry. This step will require several passes over a period of an hour or more. It’s a critical stage when working with tiles that have a porous or variegated surface. Dried grout can prove almost impossible to remove from indentations.
After the grout is dry, which takes typically 48 hours, apply a grout sealer according to the manufacturer’s directions. If you apply the sealer too soon, and the grout isn’t completely dry, the sealer could flake or peel away from the grout, exposing it to potential issues. Grout sealers generally take 10 minutes to cure before the excess can be wiped off.
Final Thoughts
By following these steps, DIYers can learn how to lay ceramic tile on their floors and have the benefit of beautiful, clean, durable tiles without the expense or hassle involved with hiring someone to do the job. Have patience and spend time getting the layout perfect, and the rest of the project should be a snap.