
We may earn revenue from the products available on this page and participate in affiliate programs. Learn More ›
Anyone serious about woodworking or DIY eventually wants to add a table saw to their power tool arsenal. Named for the table that supports the material being cut, the table saw is an excellent tool for making quick, precise work of repetitive cutting tasks. If you’re in the market for one of these beauties or just bought one for your home workshop, study up here on how to use a table saw to make cuts correctly and safely.
Table Saw Basics
Table saws, which run between $300 for a standard model to $700 for a contractor-quality version, are sold by the size of the blades they accommodate. The 10” size is most common and ideal for most carpentry and woodworking tasks, yet you’ll find 8” table saws that are handy for small work and 12” versions well suited to creating deeper cuts on thicker material. The parts of a table saw include:
- A table top of at least 3’X3’ (possibly larger than 4’X6’) with extensions available for most brands. The table, typically made from cast steel or cast aluminum, rests on a stand or a metal cabinet. Most table saws are considered stationary power tools, but portable versions with foldable legs for easier moving are available.
- A blade that can be raised or lowered via a blade-height crank
- A rip fence, which is a guide bar positioned parallel to the saw blade
- A miter gauge that assists the user in making crosscuts
- Blade guards that encase the blade while it’s cutting to offer a measure of protection in case your fingers get close to the blade
- Push sticks that allow you to feed the material through the saw without your fingers getting close to the moving blade
- Depending on the saw you choose, you may have additional accessories such as rollers or table extensions to support long lengths of wood, vacuum attachments, or clamps.
Safety First
Too many weekend warriors—and pros—have suffered serious injuries for not knowing how to use a table saw. If not properly handled, the material being cut can get in a bind and kicked back, either throwing the material at a high velocity toward them or jerking it violently and pulling their fingers toward the blade. To lessen the risks of kickback:
- Never start the saw while the material you’re cutting is touching the blade.
- Always use the rip fence when making “rip” cuts.
- Always use the miter gauge, not the rip fence, for crosscuts (the rip fence doesn’t offer adequate support).
- Keep material completely flat against the table during the cut.
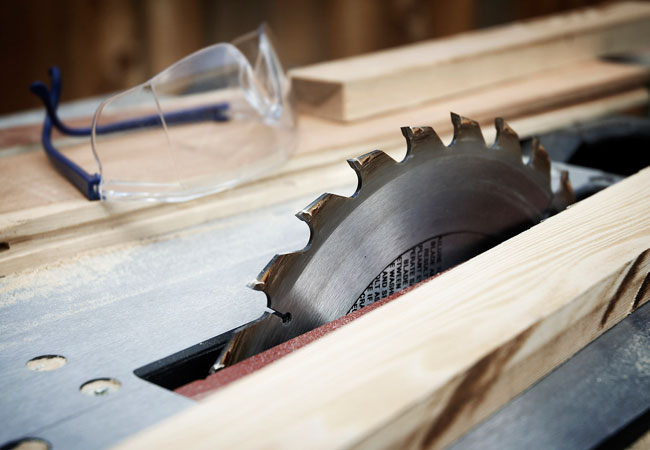
In addition to the specific safety observances to prevent kickback, take the time read the manufacturer’s safety provisions and be sure to always wear goggles and ear protection while using the table saw. Also remember to unplug the saw before you adjust or align the blade, and don’t remove the safety guards that come with the saw.
Making the Cuts
With accessories such as clamps, stops, and jigs, you can make such specialty cuts as dado cuts, compound angles, and rabbet joints—yet woodworkers rely on the table saw most for two basic cuts. Ripping, the most common use of a table saw, involves cutting material to a specific width. Crosscutting applies to cutting material to a specific length. Below, you’ll find step-by-step directions for using a table saw to make each of these common cuts.
How to Rip
Ripping is the simplest cut to make, thanks to the table saw’s rip fence that adjusts to the width of the desired cut and also serves as a guide to control the material while cutting.
STEP 1
Unplug the table saw and fit a rip blade (suitable for the material you’re cutting) into the blade arbor on the top of the table. Adjust the blade height so the top of the blade rises no more than ¼” above the thickness of the material you’re cutting. For example, if you’re ripping long pieces of wood from ½” plywood, set the blade no higher than ¾” above the tabletop.
To do this, use the arbor nut wrench that came with your table saw to loosen the arbor nut (the nut that holds the blade in place) and position the rip blade with the teeth facing the front of the table saw. A table saw blade spins towards you, from the top downward, so the sharp blades must face the front of the table saw and not the back. Tighten the arbor nut snugly.
STEP 2
Position the rip fence by releasing the locking lever on the front of the fence, which locks the fence into place, and then sliding it so its inner edge matches the desired width of the cut. Your table saw has a ruler on the front to help position the fence, but don’t depend solely on the ruler for measuring your cut. Use a precision tape measure and measure the distance from the fence to the closest edge of a saw blade tooth. Saw blade teeth alternate, one toward the left and then one toward the right. By measuring to the closest edge, you’ll account for the amount of wood the blade will cut away (called the kerf) during the cut.
STEP 3
Plug in the table saw and place the material to be cut on the table, aligned with the rip fence, but do not allow the material to touch the blade until you’ve turned on the saw and the blade reaches full speed. If the material makes contact with the blade before the blade reaches cutting speed, it a sure recipe for kickback.
STEP 4
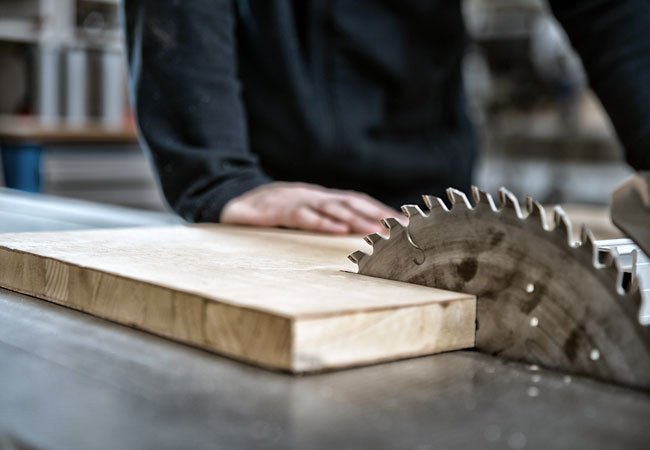
Guide the material slowly but firmly along the rip fence with one or both hands, whichever is necessary to control the material, keeping it flat along the table top and snugly aligned with the fence. When ripping large, thick boards, you’ll often want to use both hands to guide the material at the start, and then switch to one hand as the cut nears completion. If the material is long and extends beyond the back of the table, either use a table extension to support it or have a helper support it as you cut to keep the material flat at all times. Don’t let go of the material and walk around to the back of the table saw, which may cause the material to lift off the table, increasing the risk of kickback.
STEP 5
Use a push stick when necessary to keep your fingers away from the moving blade. A push stick is designed to guide the material when you’re making narrow rips that would put your fingers within a few inches of the blade. Don’t chance it—always use a push stick.
How to Crosscut
When making crosscuts on a table saw, it’s vital to remember not to use the rip fence a guide. The rip fence stabilizes long lengths, but most crosscuts are made on fairly narrow material—cutting it in half or taking off the end of a board, for example. Not enough of the material is available to fit along the rip fence during crosscuts so attempting to use the fence increases the risk of dangerous kickbacks. Instead, use a miter gauge.
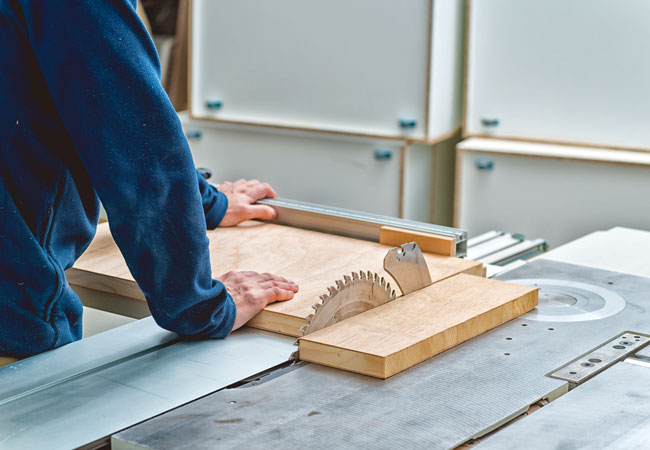
A miter gauge features a guide fence to stabilize the material and a bar that fits into one of the deep grooves on the table’s surface. When the bar is fitted into a groove, the whole miter gauge slides from the front to the back of the table saw so you can control the cut. It also features a protractor-like guide that’s adjustable by loosening a knob and then selecting the correct angle before retightening the knob. Sometimes, the miter gauge that comes with a table saw is a little on the lightweight side. If you plan to do a lot of crosscutting, consider investing in an after-market miter gauge that’s more substantial. Alternately, you can use a miter sled (see “Note” below).
STEP 1
Unplug the table saw and insert a crosscut blade into the table saw arbor as described above in Step 1 of “How to Rip.”
STEP 2
Adjust the protractor guide on miter gauge to make either straight or mitered (angled) crosscuts.
STEP 3
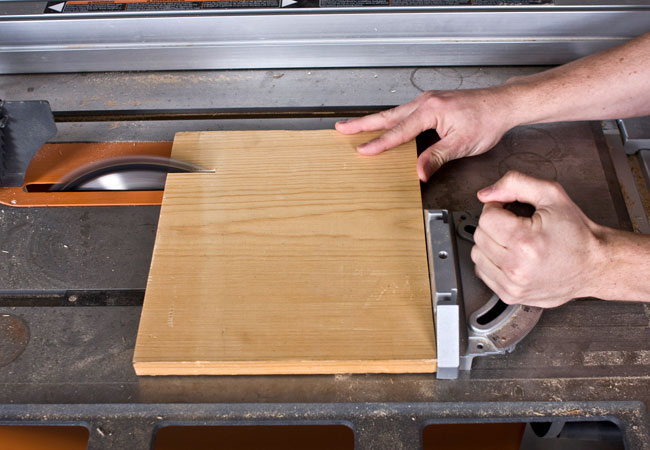
Position and align the material along the front edge of the miter gauge, using clamps if necessary to secure it in place.
STEP 4
Plug in the table saw and turn it on but do not let the wood touch the blade until the blade is spinning at full speed.
STEP 5
Carefully slide the entire miter gauge and the material you’re cutting forward slowly and carefully through the moving blade.
STEP 6
Turn the table saw off before retrieving cut off parts of material near the blade.
Note: You may wish to use an after-market miter sled to support your material during crosscuts. A miter sled resembles a shallow rectangular box with pre-cut slots in the bottom, which allow you to position the material in the sled and then slide the entire sled over the table while cutting. You don’t necessarily have to buy one, though. Many woodworkers make their own miter sleds, and you can find free detailed plans online. Making a miter sled might be a great first project for your new table saw!