
We may earn revenue from the products available on this page and participate in affiliate programs. Learn More ›
In the real estate world, there are fixer-uppers that need a fresh coat of paint, a little exterior work, and maybe some new flooring and appliances. Then there are houses like the run-down two-bedroom, one-bathroom ranch my husband and I moved into.
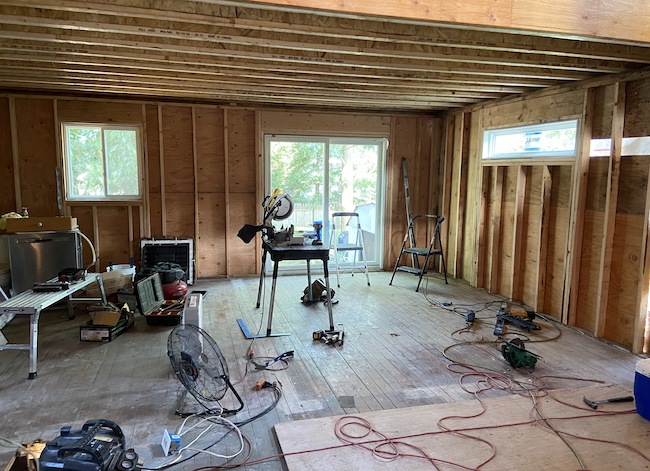
From day one, the plan was to completely gut the 80-year-old house and move the bedrooms up to a new second story, so our architect drew up plans to relocate the kitchen from the front of the house to the back, where the existing bedrooms were. Construction wasn’t scheduled to start for months, but we couldn’t wait: During our first week in the house, we tore down the wall that divided the two cramped 9-by-12 bedrooms and set up a temporary living space in what would one day be our open-plan 18-by-12 kitchen and dining room.
Our Vision and Inspiration
We love to cook together (our pipe dream is to buy and operate a food truck), so our new kitchen had to have lots of prep and storage space. We also love entertaining and having small groups of friends and family over for dinner, so we wanted a spacious, open layout with no separation between the kitchen and dining room.
The house hadn’t been updated since the previous owners purchased it 25 years earlier, which meant there was linoleum flooring, a lot of light wood cabinets, and (very) old appliances. As everything in our kitchen was going to be new anyway, we wanted a sleek, modern look for the space.
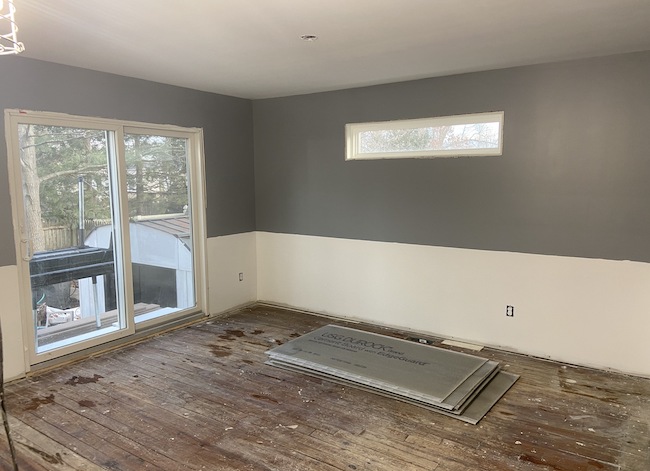
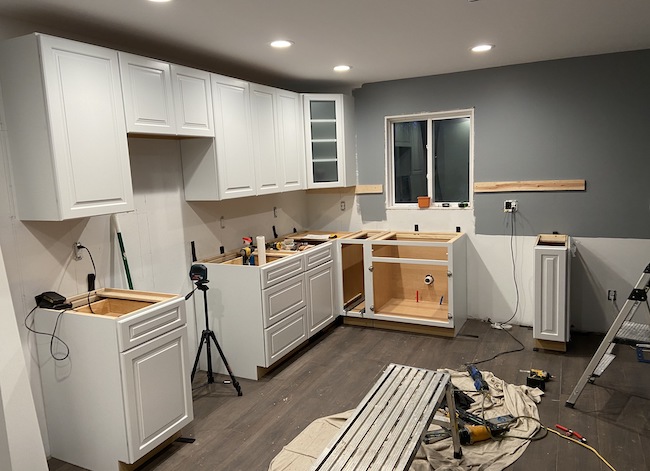
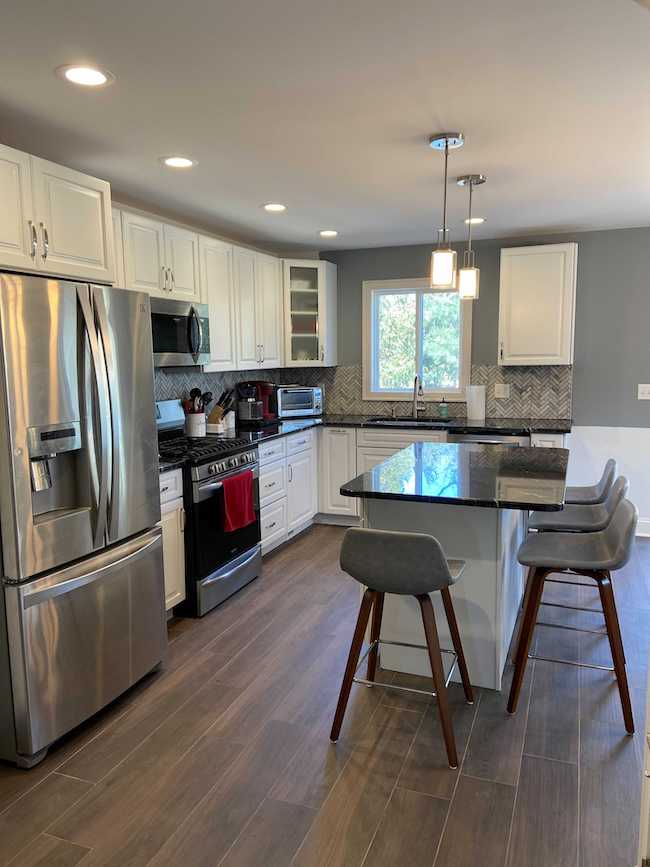
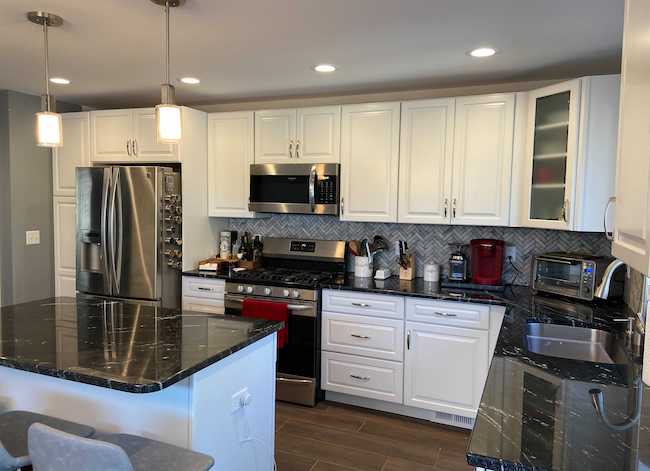
We opted for trendy all-white cabinets with a black-and-white granite countertop and a herringbone tile backsplash in grays and whites. (Yes, our tiler hated us just a little bit but agreed that it looked beautiful when it was finished!) The dining room would continue the monochromatic look with a two-tone gray-and-white wall.
To contrast with the cool grays, whites, and blacks, we chose a rich, warm floor tile that mimicked the laminate wood floors we installed throughout the rest of the house.
RELATED: These Cabinet Customizations are Totally Worth It, According to Pro Organizers
DIY Demolition
We were very fortunate that we were able to DIY much of this home renovation project. My father owns a general contracting firm, so he helped us out with a lot of the work, including demolition, framing, and installation of the new kitchen cabinets. We hired contractors to help with the utility work, drywall/insulation, and tiling.
The demo was by far the most fun and was a great way to de-stress. If you’re planning a DIY demolition, be prepared for a lot of dust and flying debris (safety goggles, work gloves, and dust masks are a must!). Also, be ultra-aware of your electrical wiring when tearing down walls and studs, so you don’t short a circuit and almost cause an electrical fire (like we did—oops!).
Let There Be (Natural) Light
One of the first things we noticed about our home when we moved in was the complete lack of windows along the back of the house, which made both bedrooms feel extremely dark and cavelike.
During the renovation, we boarded up the windows along the sides of the house and framed out a sliding patio door and a window above the sink on the back wall. We also added a small window along the top of the dining room wall. This allowed us to let in as much natural light as possible while increasing our overall privacy.
Bonus: With windows along the back wall, we can keep a closer eye on our pups when they go outside, and we get to enjoy the view of the big, beautiful trees in our yard!
RELATED: The Dos and Don’ts of Caulking Windows

Challenges
The biggest challenge we encountered during this project was contending with the original flooring. To prepare the space for the new tile, we had to pull up six (yes, six!) layers of existing flooring, including several layers of peel-and-stick carpet squares, discolored hardwood floor panels, and a partially rotted-out subfloor. Once all the old flooring was pulled up, we replaced the damaged subfloor and put down cement board to provide a flat, even surface for the tiler to lay down the new floor.
We also encountered quite a bit of black mold lurking behind the walls under the old windows, which were poorly insulated and had previously housed leaky window AC units. Fortunately, because we ripped out and replaced every stud and drywall panel, we did not have to worry about the mold returning.
Future Aesthetic Upgrades
As of this writing, our dream kitchen and dining room are almost finished. Aside from installing the forthcoming 9-inch cabinets that will frame the window above the sink, we still need to add a white chair rail to separate the gray and white paint in the dining room. We’d also like to create a faux panel look using white decorative molding arranged in squares on the bottom half of the dining room wall.
Our Favorite Feature
By far, our favorite part of our new kitchen is the big granite island. It afforded us some extra lower cabinet and drawer space while giving us a perfect spot to prepare, serve, and eat our everyday meals. It even doubles as an alternative workspace when we need a change of scenery from our shared home office!
Overall, our kitchen and dining room has become our favorite space in the house, and we look forward to many future dinner parties and family gatherings around our table.
RELATED: Before & After: A Breakfast Nook Goes from Dated and Drab to Modern and Cozy
