We may earn revenue from the products available on this page and participate in affiliate programs. Learn More ›
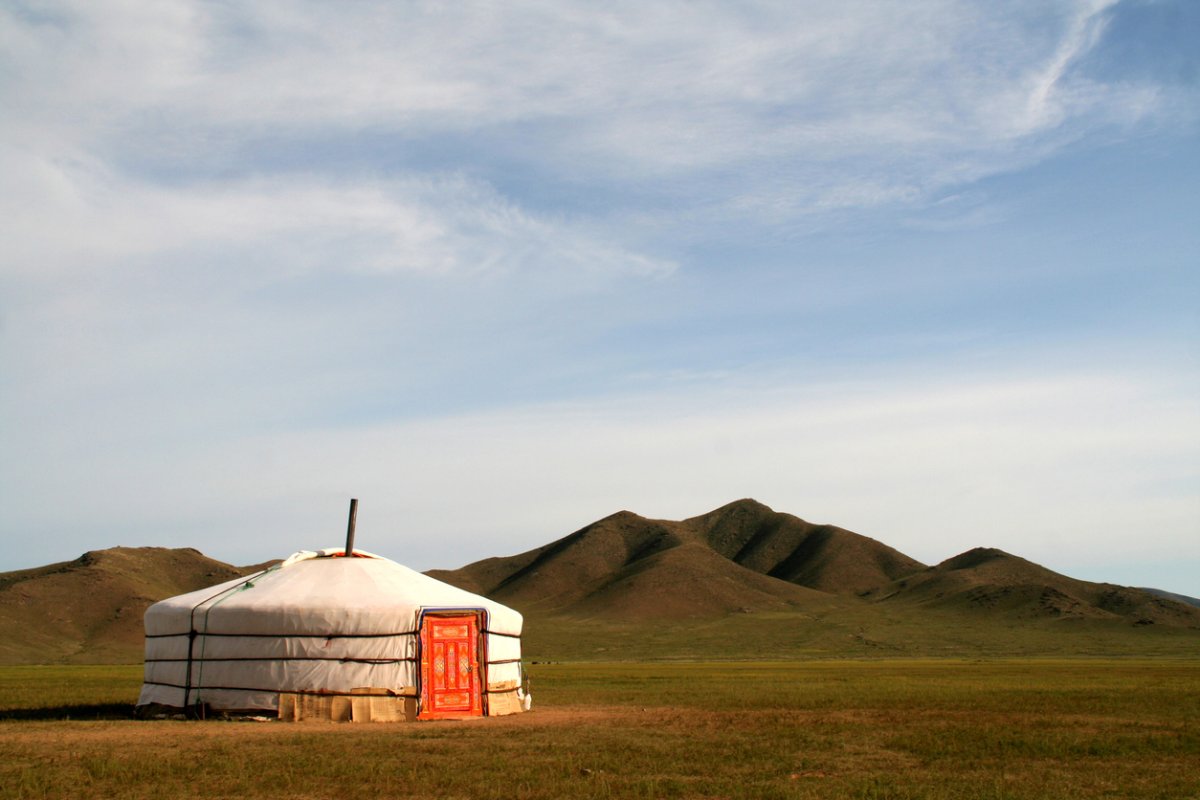
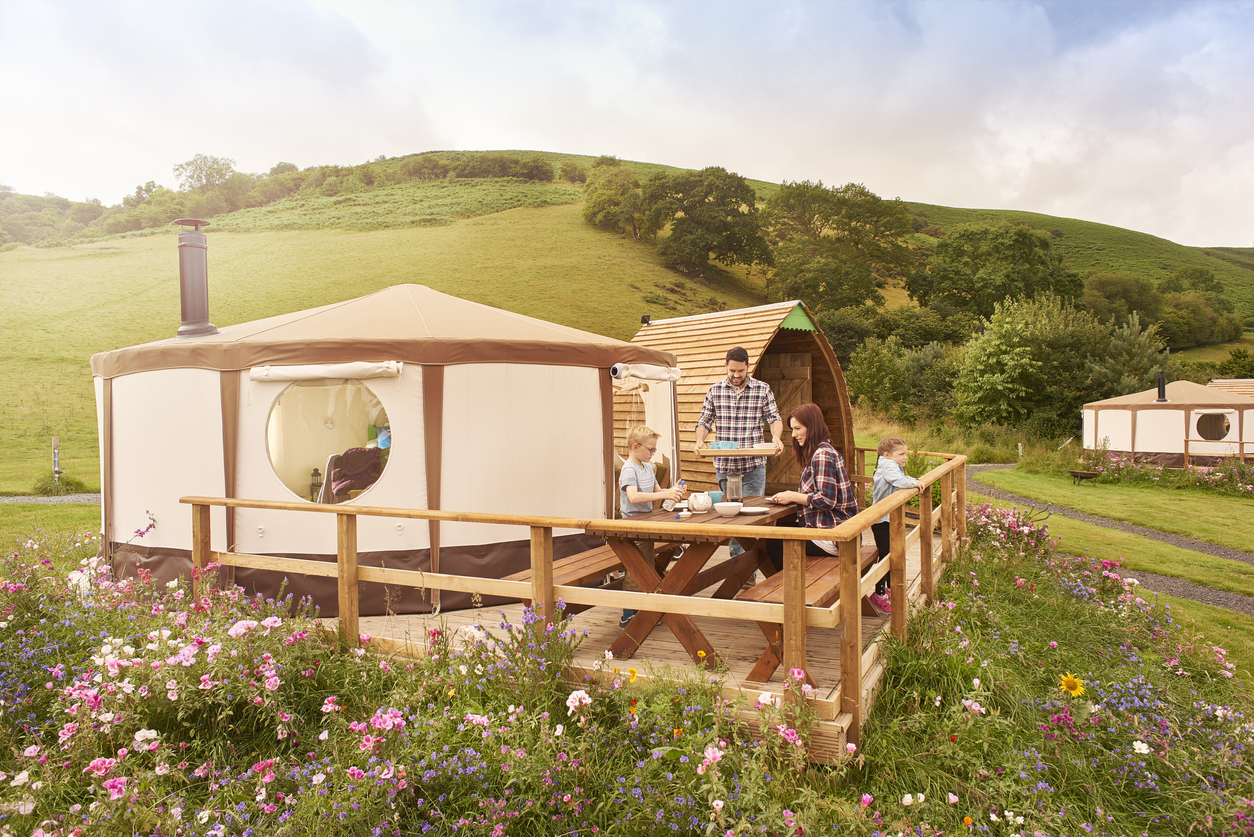
The yurt is one of the oldest forms of nomadic shelter in history, spanning at least 3,000 years. And while it’s a time-tested and traditional method of staying out of the elements, it’s also popular in today’s tiny house-loving culture. Many folks looking to downsize from their large traditional homes or move to a more minimalist lifestyle are choosing to build these round tent-like domed structures as permanent homes or as unique Airbnb-type rentals.
Tools & Materials
Bobvila.com may earn a commission from purchases made through these links.
But building a yurt is quite different than building a traditional home. Most yurt-builders opt for a kit that takes the guesswork out of designing and building one from scratch. This guide provides an overview of the building process and a list of the typical materials and tools needed, so you’ll know if DIY-ing a yurt is for you.
BEFORE YOU BEGIN
A yurt kit will contain all of the materials needed for assembling the yurt, including the canvas or vinyl covering and the wooden lattice section that create the wall, but a foundation of some sort will need to be prepared first. The size of that foundation will vary based on the kit, which may range from a modest 12 feet to a massive 40 feet. The following steps guide you through the process of constructing a yurt from the ground up.
STEP 1: Build a circular base.
A yurt needs a flat and stable surface to use as a foundation. A flat section of earth is by far the easiest and most traditional option. However, it’s not ideal for semi-permanent or permanent structures as there isn’t much to anchor the yurt, and they’re more likely to take on water in the rain or snow melt. If you do choose the route of creating a flat section on the ground, a landscaping shovel will help you level out any unevenness.
Most yurt builders opt to construct a raised wooden platform or deck that matches the footprint of the yurt. This design gives the yurt attachment points all around the perimeter. It also prevents rain and snow from collecting and running under the yurt. Depending on the size, the platform might require concrete footings, which will likely require permits and inspections. Tools and materials, including a ladder, hammer, drill, and framing lumber, also may be needed.
STEP 2: Install door frame and lattice wall.
After the foundation base is ready, the door location needs to be determined. If you built a platform with steps, directly in front of the steps is best. The yurt kit will come with a door and door frame, so it’s just a matter of anchoring the door frame to the foundation with the included hardware.
Once the door frame is secure, it’s time to stretch the lattice walls along the perimeter. Starting at one side of the door, anchor one end of the lattice wall to the door frame and stretch the lattice along the perimeter. When you reach the other side of the door frame, attach the lattice wall with the included hardware. Run the included wire cable through the top of the lattice wall for strength and stability, and secure the wall with the metal straps included in the kit.
Larger yurts might include two sections of lattice wall, in which case you should attach the sections to each other before stretching.

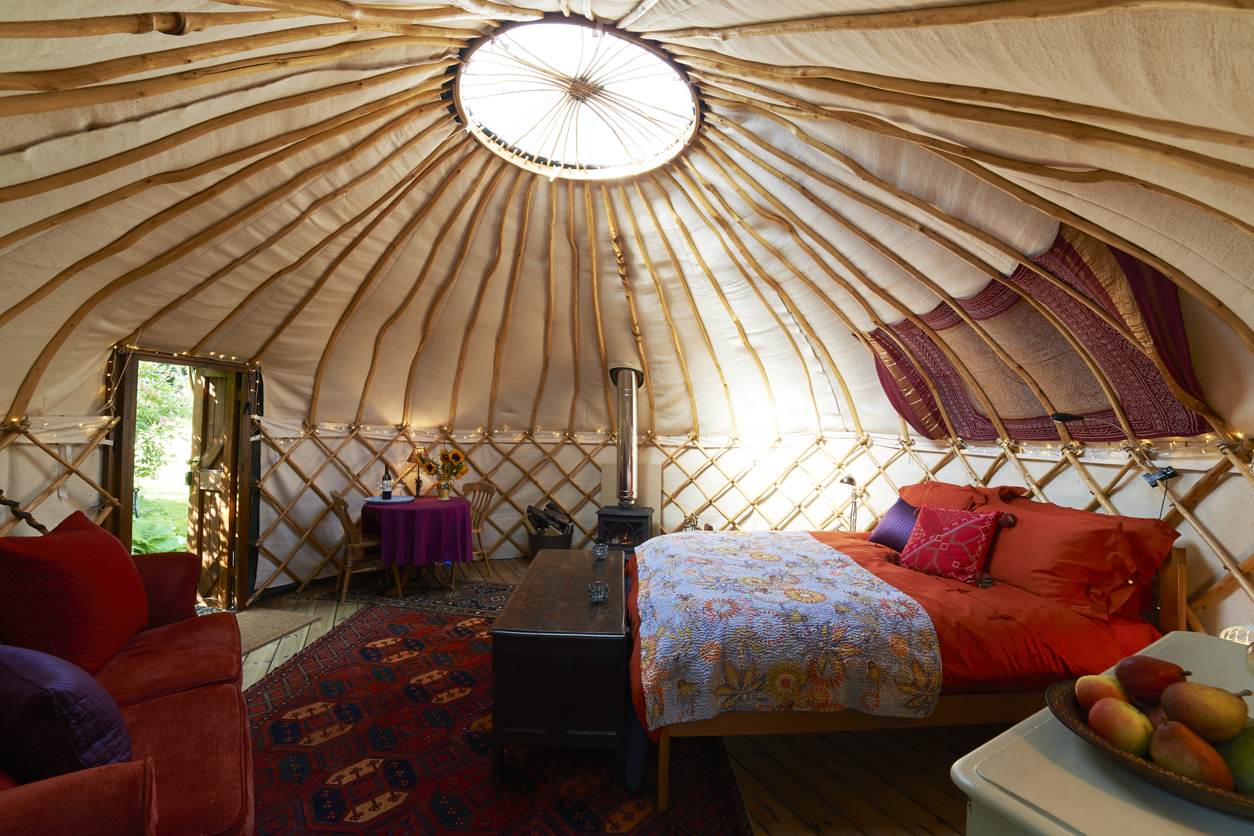
STEP 3: Build a roof by attaching rafters to the wall and a compression ring.
After the walls are in place, it’s time to erect the roof. The roof consists of rafters that sit on the lattice walls and a compression ring in the center that holds everything together. You might need two or three friends to help with this step.
Each rafter will attach to the compression ring with weather-resistant hardware and then slide over the wire cable at the top of the lattice walls. It’s best for someone to be in the middle of the yurt to stabilize the compression ring and ensure it’s level while the crew on the ground installs the rafters one at a time.
With all of the rafters in place, the compression ring will distribute the weight of the roof evenly—especially important when snow collects.
STEP 4: Cover the yurt.
With the structure built, it’s time to cover it. Covers can be a simple canvas material or weatherproof vinyl. Many yurt builders in colder climates opt to cover the roof with a reflective thermal layer to maintain the heat within the space before adding the roof, but the process is the same for both.
The roof will likely come rolled or folded. Standing on a ladder in the center of the yurt, allow the tent to unroll or unfold down to the wall. The crew on the ground can unfold material until it’s folded in half and covers half the yurt. Using a rope attached to the center of the top-most folded layer, pull the roofing material to the center of the roof. Toss the rope to someone on the ground so they can continue to pull until the roofing material covers the entire structure. Center the material and attach it to the structure with the included hardware.
The wall material typically comes in sections, and they’re easiest to install one at a time. Following the directions and using the hardware in the kit, start on one side of the yurt and continue to the other. Be sure that the wall section sits underneath the roof’s overhang to prevent leaks from entering the yurt.
Yurt Kit Options
While you might go the traditional route and build a yurt from scratch, using a kit is much faster. Kits from Pacific Yurt range from small spaces to yurt 30 feet wide. Colorado Yurt produces yurts in several earthy colors, if standard beige doesn’t strike your fancy. Rainier Outdoor offers some packages that might be a bit more affordable than the other.
Each of these yurt kit companies use the assembly processes listed above to create some rather cozy lodgings. You also can opt for an even easier, more temporary setup like a Danchel Outdoor Waterproof Cotton Canvas Yurt for a fraction of the cost.
