We may earn revenue from the products available on this page and participate in affiliate programs. Learn More ›
It all too easy to slap a coat of white paint on your ceiling and consider it done. But to really pull a room together, it ought to be stylishly topped off—and putting a textured effect on the ceiling is a great way to add impact to your décor. Another plus? Textured ceilings perfectly camouflage imperfections like cracks or evidence of water damage.
There are a variety of techniques you can employ to create your texture of choice (way beyond the “popcorn” look popular in the 1970s). All it takes is a mixture of paint and drywall mud—and a little ingenuity. Ahead, a simple step-by-step guide for how to texture your ceiling, your way, without sending your budget through the roof.
Tools & Materials
Bobvila.com may earn a commission from purchases made through these links.
- Ladder
- Paintbrush
- Extended paint roller
- Textured paint roller
- Paint roller tray
- Sponge
- Wide compound knife
- Trowel
- Drywall texture sprayer
- Drywall texturing combs
- Drop cloths
- Lightweight plastic sheeting
- Painter’s tape
- Paint primer
- Pre-mixed textured paint
- Wall paint
- Drywall mud
STEP 1: Cover up anything you don’t want drywall mud to splatter or drip on.
Since you’ll be working against gravity, you’ll want to protect your furniture, floors, and fixtures from splatters. Empty the room as much as possible, which will also give you space to move around. Cover remaining pieces of furniture and the entire floor with drop cloths. Next, take off any faceplates, vent covers, ceiling fans, and/or light fixtures. Finally, apply painter’s tape around the edges of the ceiling, right where it meets the wall, being careful to keep it stick-straight all the way across.
STEP 2: Prime before you texture the ceiling.
You might think that because textured paint is part drywall mud it will adhere to any surface, but for a quality job, you still want to prime first. This step will make application easier and give lasting results.
Choose a paint primer close to the color you’ll be using to texture your ceiling—a dark primer for dark paint and a light primer for light paint. Cover the entire surface in a thin, consistent layer and let dry fully (consult the can’s drying time guidelines) before moving on.
STEP 3: Start with pre-mixed textured paint, or combine paint with drywall mud.
Prep your product. If you’re looking for a subtle texture, you’ll get good results with pre-mixed textured paint. But if you’re aiming for more depth or special effects, mix your own by combining paint with drywall mud. The standard rule of thumb is one part drywall mud to 10 parts paint. Pour paint into a bucket, add drywall mud, and blend, aiming for the consistency of pancake or biscuit batter. Depending on the look you’re going for, you might want a somewhat thicker consistency. Do a small batch first to practice getting it just right.
STEP 4: Apply texture to the ceiling with one of four techniques.
It’s always wise to start in the least noticeable part of the ceiling when applying the texture—perhaps the darkest corner of the room, or the edge of the ceiling closest to the door. Position your ladder there and make sure you can work from a reasonable angle without arching backward. The exact technique (and subsequent tools you’ll need) depends on your desired effect.
- For a subtle finish: Apply pre-mixed textured product as you would typically put on paint. Cut in at the edges first with a paintbrush. Then use an extended roller and paint tray, taking care to bring your roller as close to the edges as possible. To amp the look slightly, use a specialty roller with a texture of its own. Don’t be afraid to experiment; after all, if you don’t like the initial result, you can always switch gears and apply another coat.
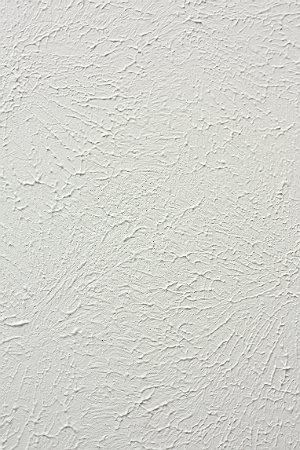
- For a stucco finish: To mimic the look of stucco, you’ll need a damp sponge or cloth as well as a wide compound knife or, if you’ve chosen a thicker-than-average consistency for aesthetic reasons, a trowel. Working on one small section at a time, apply the mixture to the ceiling, and then dab a damp sponge or cloth into your work in a repetitive motion to create the texture you desire. Repeat this process around the room, one section at a time, being careful not to let the pattern become too uniform.
- For a popcorn finish: If you like this retro look, you’ll need to buy or rent a drywall texture sprayer. Purchase enough lightweight plastic sheeting to protect your walls from flying particles, securing it to the perimeter of the room with painter’s tape and covering the walls like a floor-length curtain all the way around. Before spraying, choose the nozzle and air pressure setting that matches your desired result, and then follow its instructions as you move the sprayer across the ceiling. Again, allow your application to look as random as possible rather than aiming for a perfect pattern.
- For an artistic finish: Truly advanced DIYers may wish to add extra character by creating a Victorian style rose medallion around a central lighting fixture or ceiling fan. This dramatic effect is achieved by using drywall mud and an array of texturing combs (two or three should do the trick, anywhere from 3 to 10 inches in length apiece). Working in concentric circles, you’ll use the combs to apply drywall mud (without paint) in thick, even, decorative stripes to mimic the look of plaster. When completely dry, you’ll paint the entire ceiling. Just keep in mind that this project will require a steady hand and a solid sense of design, so study up on the process before giving it a shot.
Whichever technique you choose, the end result will lend extra punch to your space’s style. The array of colors and effects is endless, so have fun and aim for a look that captures the personality of the room and those who live in it.
