We may earn revenue from the products available on this page and participate in affiliate programs. Learn More ›
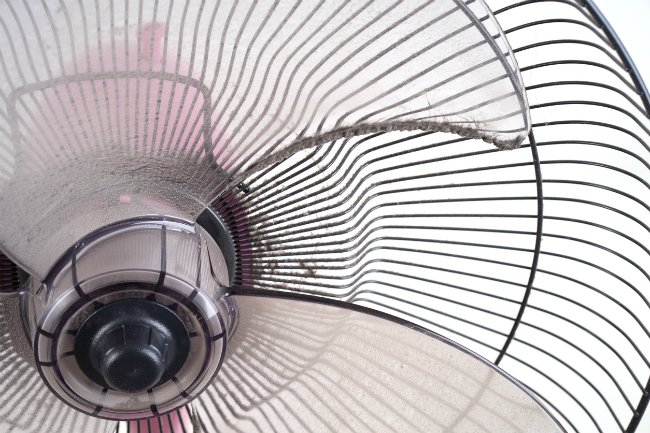
Oscillating fans are a smart choice for cool comfort thanks to a side-to-side rotating mechanism that evenly distributes air throughout a room. In the process, however, the fan grill and blades can suck in and amass a fair amount of dirt and dust, making your fan work less efficiently. Regular cleaning of your oscillating fan with inexpensive supplies is the best way to keep microscopic intruders at bay and keep your fan operating in peak condition.

Routine Cleaning
If you follow these steps for how to clean a fan on a weekly basis, you can fend off light accumulations of dust and effectively skip having to disassemble the fan altogether! For good measure, a quarterly basis or whenever the inner blades look visibly grungy, proceed with the deep cleaning routine that follows.
MATERIALS AND TOOLS
– Vacuum cleaner with a dusting brush attachment
– Hair dryer (optional)
– Can of compressed air (optional)
– Microfiber cloth
STEP 1
With the fan off and unplugged, set the oscillation control knob on the fan motor housing to the off position. Affix the dusting brush attachment to the vacuum.
STEP 2
Vacuum the outer surface of the front and back grills of the fan, working from the top to the bottom of each grill.
STEP 3
Hold either a hair dryer or a compressed air (available at home centers and office supply stores for $3 to $10) about six inches from the fan and quickly blast away light accumulations from the front of the inner blades.
STEP 4
Move behind the fan and use the same technique to blow or spray air over the back of the fan blades and over any vents located on the motor housing (the compartment at the back of the fan that contains the fan motor).
STEP 5
Gently wipe down the surface of the fan motor housing, pole (if unit has one), and base with a microfiber cloth.
Deep Cleaning
Before you enter deep-cleaning mode, consult the manufacturer’s instructions for specific disassembly procedures for your fan unit. For certain single-blade oscillating fan models, for example, the fan blade is accessed from the back grill rather than the front grill as described here.
MATERIALS AND TOOLS
– Screwdriver
– Commercial all-purpose cleanser
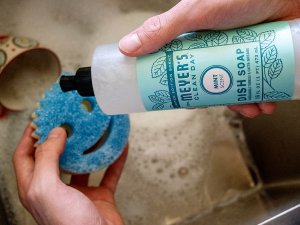
– Liquid dish soap (optional)
– Spray bottle (optional)
– Cloth
– Showerhead
STEP 1
With the fan off and unplugged, set the oscillation control knob on the fan motor housing to the off position.
STEP 2
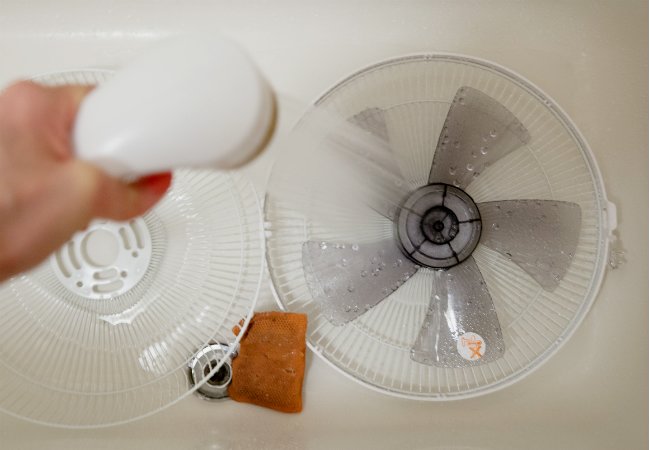
Loosen the screw at the bottom of the grill with a screwdriver, then remove the grill clips around the perimeter of the grill either by hand or with a screwdriver depending on your fan unit. Pull the front grill away from the back grill and set it on a clean, dry surface.
STEP 3
Unscrew the blade cap securing the fan blades to the motor housing, then remove each blade and set it down with the front grill. Finally, unscrew the rear grill mounting nut from the back grill, pull the back grill off of the motor housing, and set it down with the front grill and fan blades.
STEP 4
If not using a commercial all-purpose cleanser, mix a DIY solution of two tablespoons of dish soap diluted in three cups of warm water in a spray bottle. Shake well to distribute and generously spray the front and back grills and both sides of the fan blades. Gently scrub grills and blades with a clean cloth saturated in the solution, then rinse thoroughly under warm or cool running water in a large sink or tub to remove the suds.
STEP 5
Wipe down the rinsed grills and blades with a dry, lint-free cloth, then allow to air dry completely on a clean indoor surface. When the grills and blades are completely dry, re-attach the back grill, rear grill mounting nut, fan blades, and blade cap, to the motor housing in the reverse order in which they were removed. Secure the front grill to the back grill, then re-attach the grill clips and tighten the grill screw at the bottom of the grill with a screwdriver to complete fan reassembly.
Keeping Other Cooling Appliances Clean
Once you’ve dusted off the dirt and debris from the blades on your oscillating fan, take the extra step toward cleaner air by addressing your cooling appliances.
- The ceiling fan often works in conjunction with other fans to move breeze throughout a room and into others, and therefore collects dust just as easily. Just because it’s out of sight line doesn’t mean it should be out of mind. Turn off your overhead fan, and then you can clean those ceiling fan blades using a specialized pole duster or dampened microfiber cloth—even a pillow case, if you’d like to better keep dust contained—every week.
- Pull out your window air conditioning unit to give it a good cleaning at the beginning and end of the season to ensure peak performance and a long lifespan. This bit of AC maintenance involves wiping down the front of the unit with a slightly damp cloth, vacuuming up any dirt or debris covering the interior evaporator or condenser coils, then thoroughly drying the whole unit before plugging back in. Pro tip: Clean the AC filter even more frequently (once a month during summer) for best air quality!