
We may earn revenue from the products available on this page and participate in affiliate programs. Learn More ›
If you’re like 78 percent of the respondents in a 2022 survey conducted by OnePoll, an untidy home adversely affects your well-being. Perhaps more significant are the health ramifications that can occur from living in an untidy space. According to the Cleveland Clinic, cold germs can live on surfaces for up to a week.. The flu virus can live 24 to 48 hours on hard surfaces, and the coronavirus can live from a few hours to a few days.
Even those of us who do a pretty good job of keeping our homes relatively clean should pay attention to often-overlooked areas to keep away germs, insects, and even dust that causes allergies. We talked with a few home-cleaning experts to get their take on overlooked spots that can use a good scrub.
1. Underneath and Behind Furniture
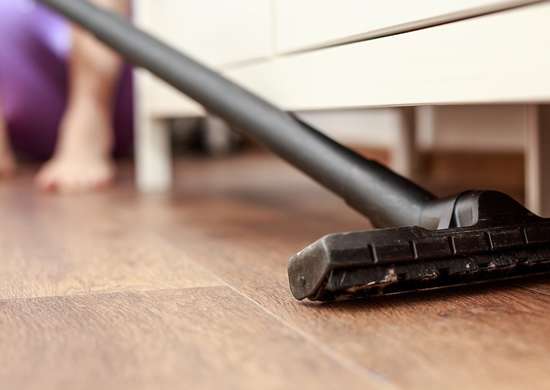
Vacuuming is already part of most people’s cleaning routines, but a little bit more effort can eliminate a lot more dust and dirt. A low-profile vacuum typically can reach under most furniture; extension wands and vacuum brush attachments are handy for getting to those really hard-to-reach areas. Don’t forget to lift up the couch cushions to suck up all the crumbs and debris that have fallen through the cracks. The tops of the couch cushions likely need some attention too, particularly in homes with pets.
2. Refrigerator Gaskets

Most appliances have flexible rubber gaskets around their doors, and these collect dust, dirt, foot bits and drips, grease, and moisture. A quick wipe with a mild soap and water solution, followed by a gentle wipe with a soft cloth, will remove the grime. Finish by wiping with a rag dipped in clean water.
RELATED: 9 Signs You Need to Replace Your Fridge
3. Tops of Doors and Windows
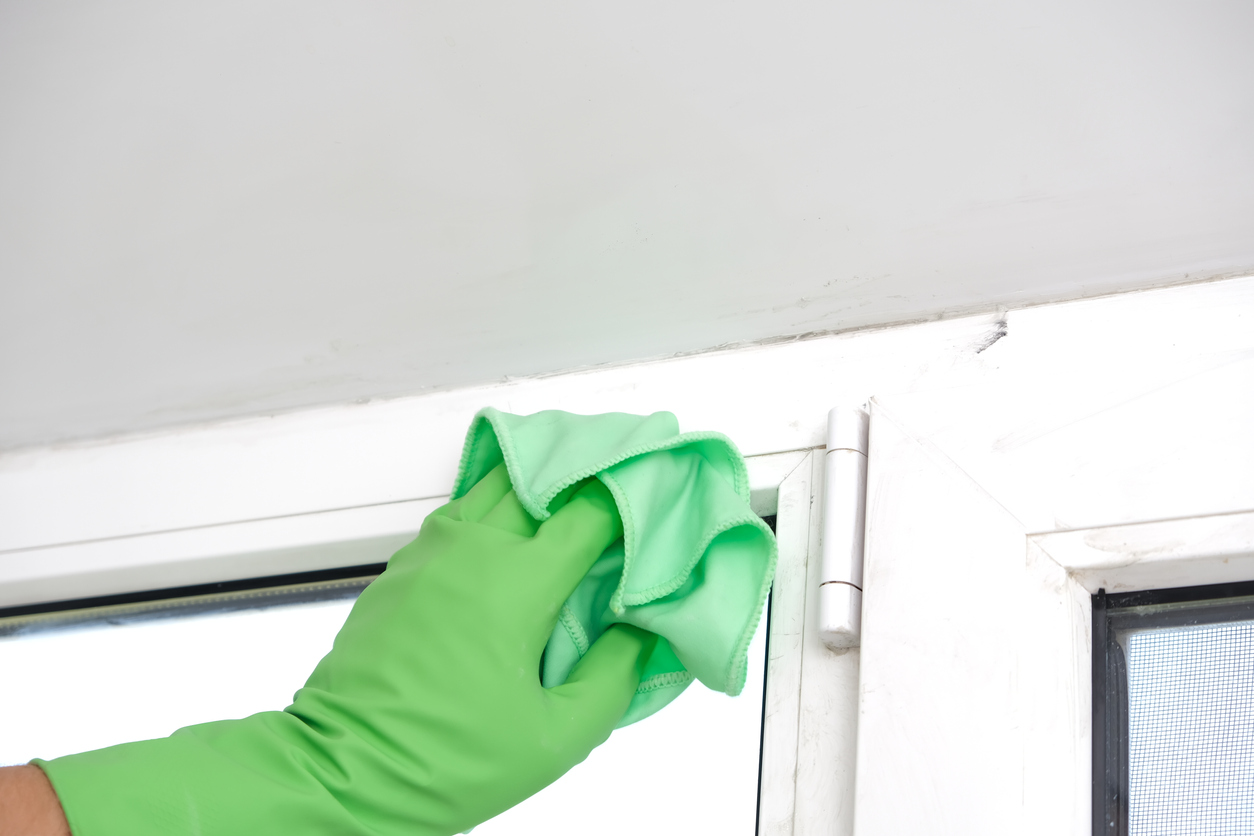
Door and window frames often harbor accumulations of dust and dirt. A regular swipe with a microfiber or feather duster will help cut down on the dust buildup; a regular monthly or quarterly wipe with a soft cloth and plain water will keep those surfaces sparkling.
4. Infrequently Used Pots and Pans
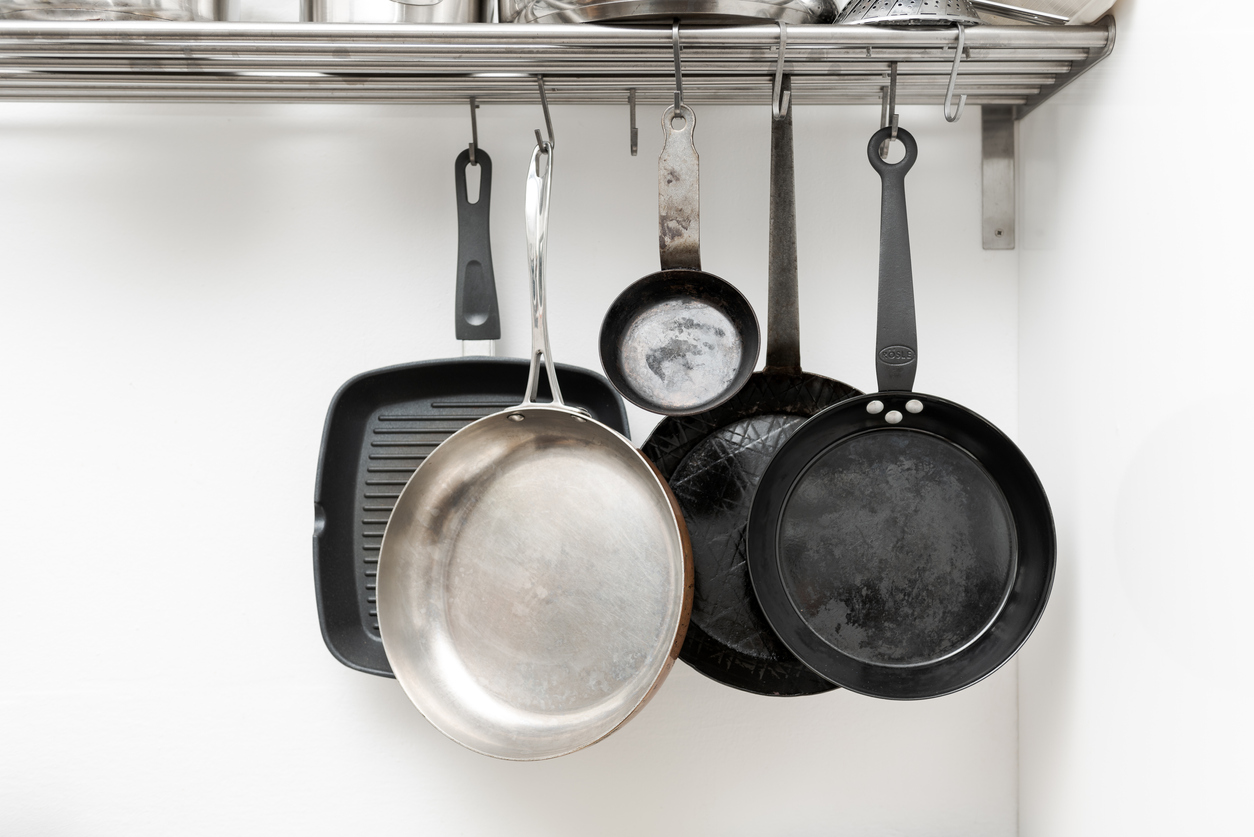
Pot racks are a wonderful tool to keep kitchens organized, but unfortunately, they can also be a magnet for airborne grease, which in turn attracts dust. Remove rarely used pots and pans and the rack they sit upon a couple of times a year, give them a quick dunk in hot, soapy water, and put them away after they dry.
5. Inside Heating Registers
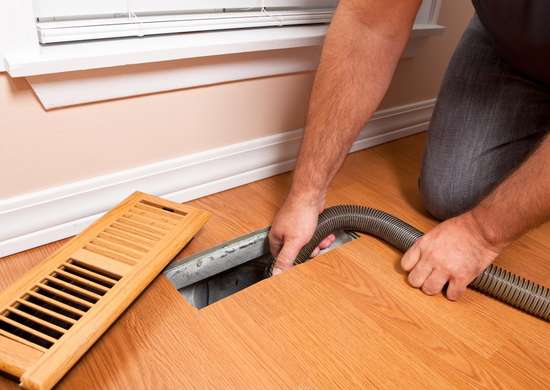
Many homes have heat registers in the floors, ceilings, or along the baseboards, and these register covers “can harbor dust, allergens, and even mold if not maintained properly,” according to Simon Reed, owner of Affordable Carpet Cleaning in Laredo, Texas.
This gunk can circulate throughout the house when the heat is on. Regular cleaning can cut down on airborne irritants. Carefully remove the cover and vacuum it out thoroughly, then wipe down the register with a moist towel.
6. Smartphones
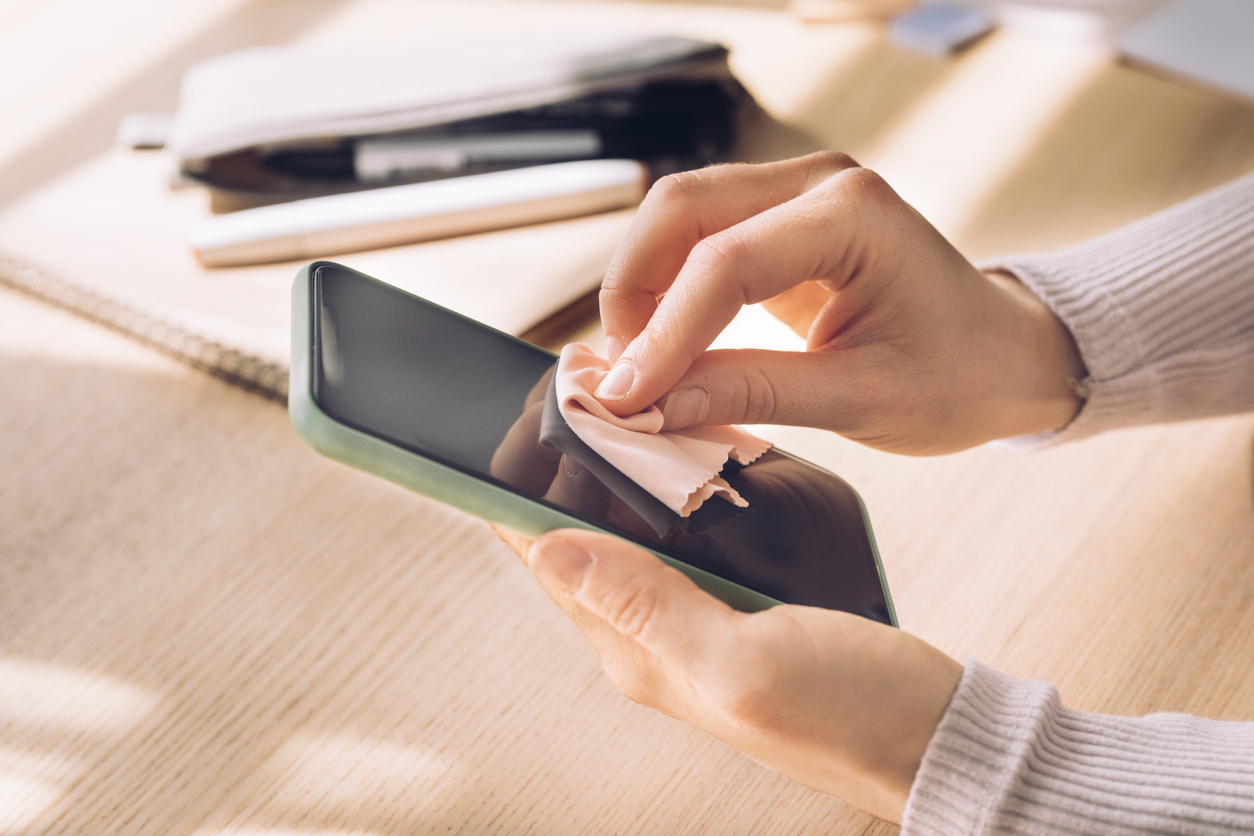
Telephones and smartphones are breeding grounds for bacteria. A 2019 study conducted by the University of Arizona found that mobile devices carry 10 times more bacteria than most toilet seats. Among the thousands of germs found on phones in a different study were Staphylococcus aureus, a bacteria that causes numerous diseases, and Bacillus cereus, which can cause intestinal illnesses.
Bear in mind, however, that you can’t clean mobile phones with common household cleansers without risking damage to sensitive electronics. Cotton swabs and microfiber cleaning cloths moistened with a mild vinegar-and-water cleaning solution will eliminate bacteria and cut through grease and grime; follow with a second wipe with plain water.
RELATED: The 10 Germiest Spots in Your Home, According to Scientists
7. Inside the Closet
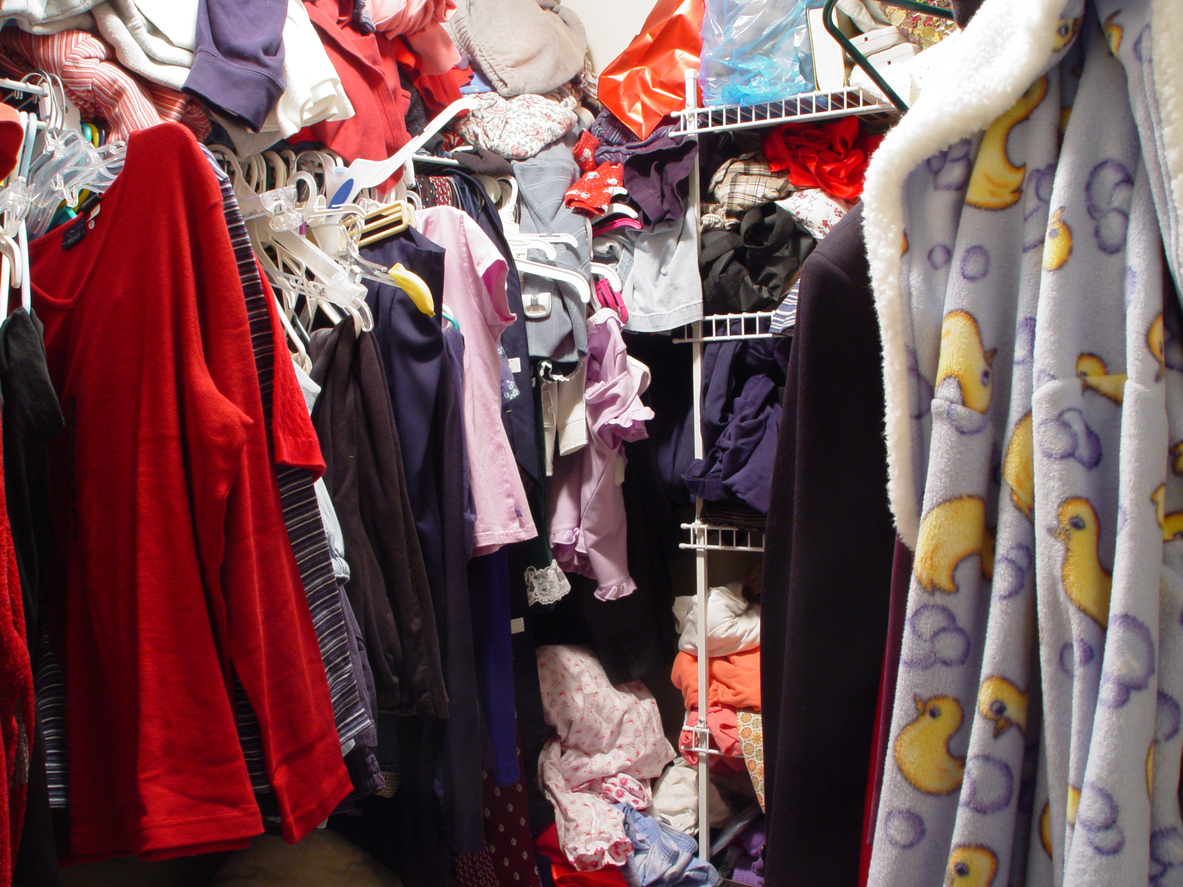
“Regularly inspect closets for any signs of mold or pests,” recommends Parveen Garg, manager at Ola Clean, a Melbourne, Australia, cleaning service. A thorough cleaning of your closet will help to eliminate clothes-damaging bugs such as moths, and address the significant amount of dust that clothing fibers create. Carefully vacuum closet floors, including under hanging clothes. A couple of times per year, remove boxes and stacks of clothing from shelves and wipe the surfaces with a water-and-vinegar solution.
RELATED: 7 Storage Bins That Won’t Crack or Warp Under Pressure
8. Computer Keyboards
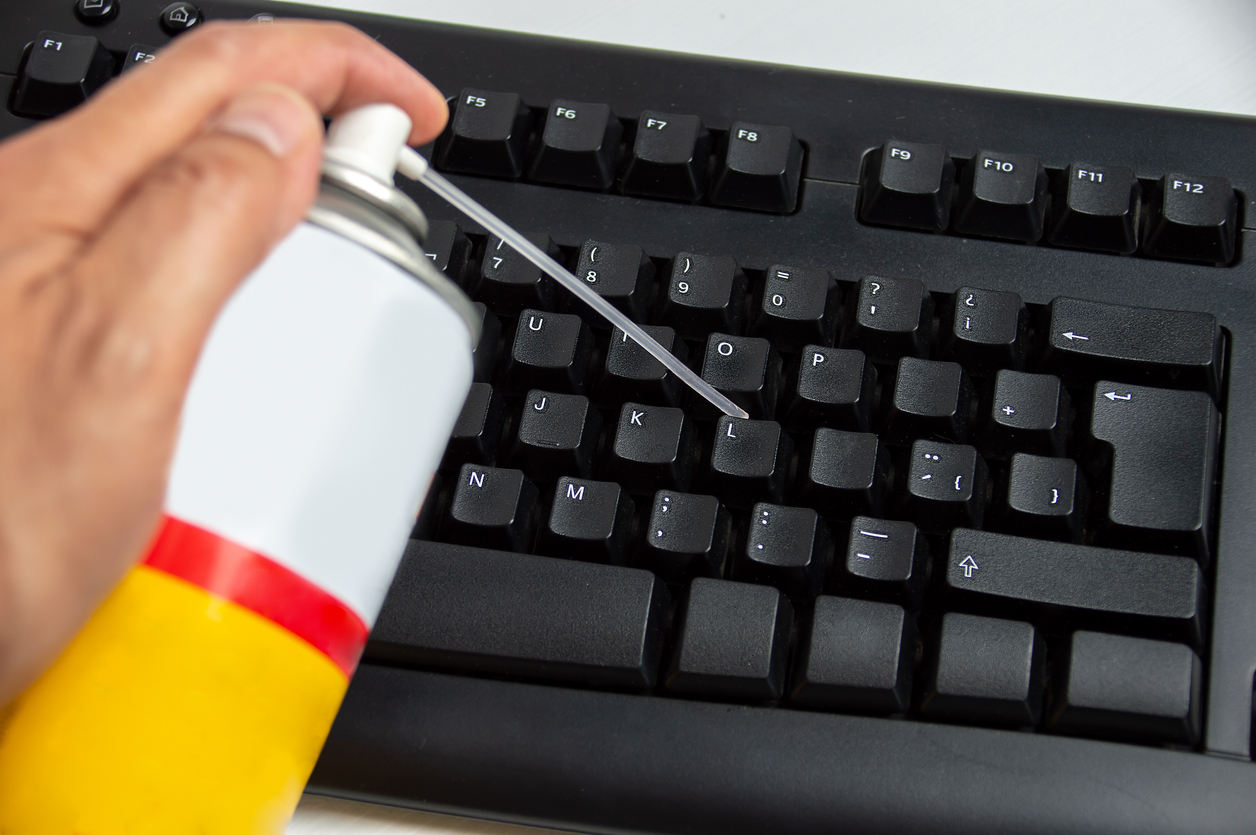
Computer keyboards attract dust, dirt, and bacteria. Every so often, pick up the keyboard, turn it upside down, and shake it—you’ll be amazed at what falls out! For deeper cleaning, use compressed-air spray. Unplug the keyboard, turn it upside down, and spray all the keys with compressed air. Wipe with a clean, damp cloth.
9. Inside the Dryer Vent
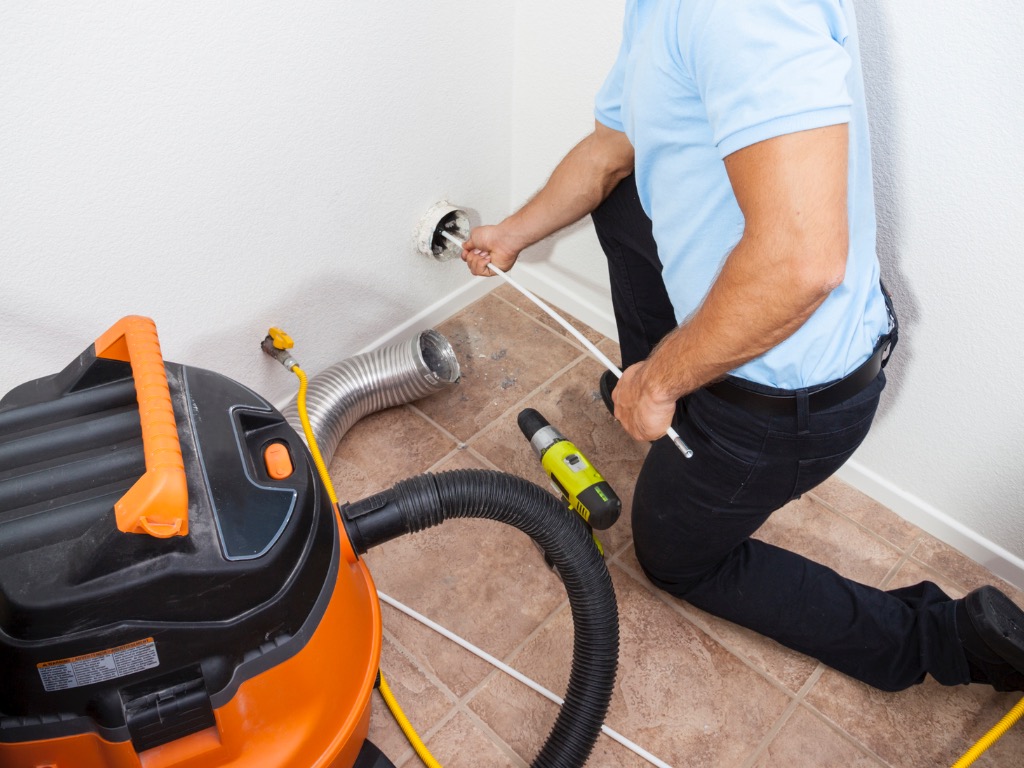
Dryer vents are prone to lint buildup, which keeps the dryer from working effectively and can actually be a fire hazard. Unplug the dryer and detach the vent by unscrewing the clamp that holds it to the dryer. Insert a clean toilet bowl brush into the vent pipe and dislodge excess dirt and lint. Vacuum and reattach the vent pipe.
RELATED: How to Clean a Dryer Vent in 5 Simple Steps
10. Door Knobs and Handles
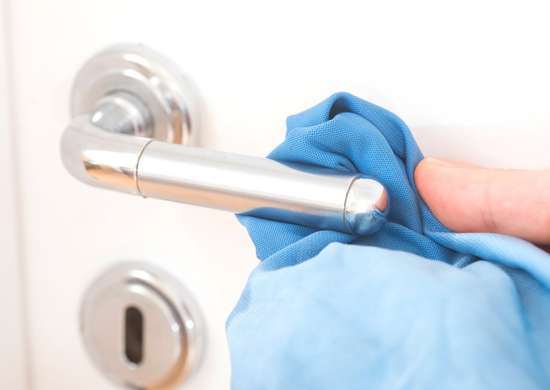
Even if your door knobs don’t look dirty, they probably are. In fact, studies conducted during the Covid-19 pandemic indicate that the virus spread not only through airborne contamination, but also through hard surfaces, including door handles. According to the CDC, “Many of the germs that live on dry surfaces can live for a very long time—days or even weeks.” Fortunately, a quick wipe will go a long way toward removing dirt and germs. Antibacterial wipes are ideal for this purpose, or use a soft microfiber cloth moistened with a vinegar-and-water solution, followed by a wipe with plain water.
11. Refrigerator Coils
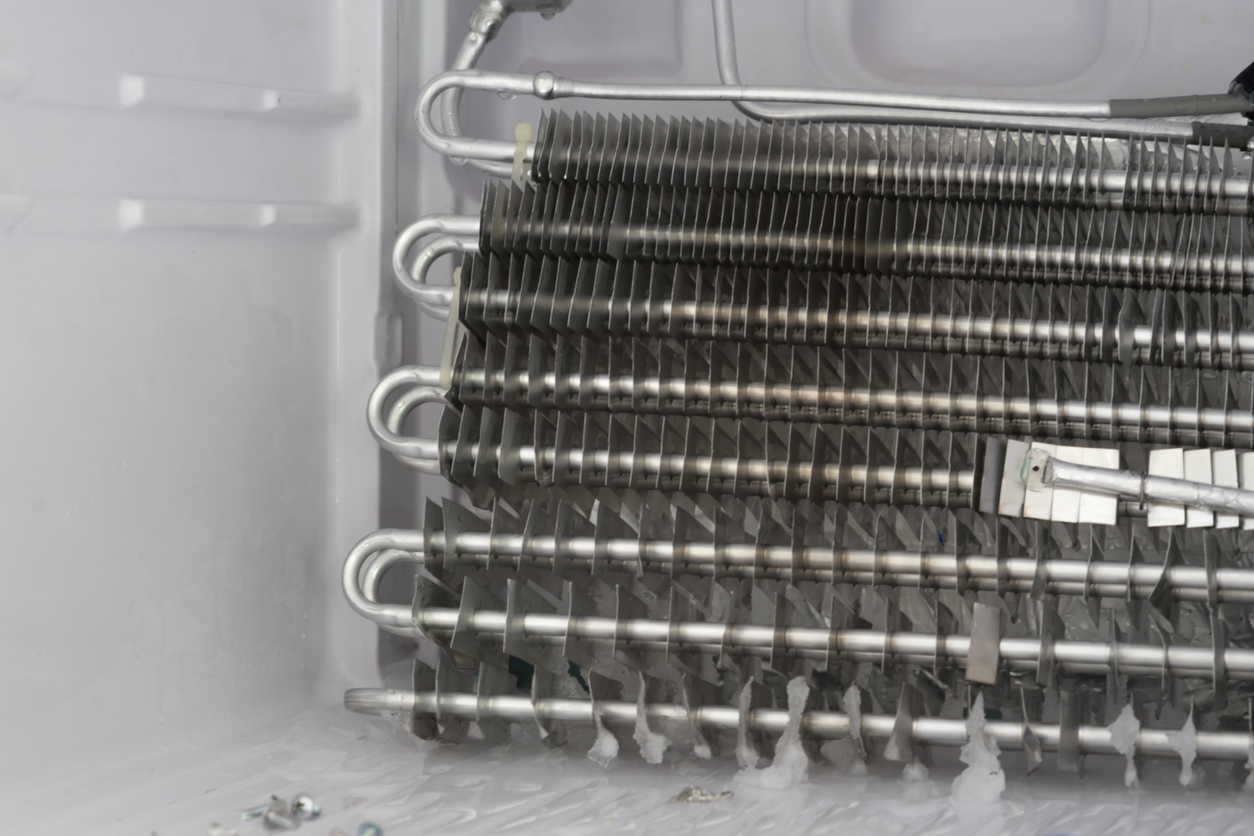
Refrigerator and freezer coils attract a large amount of dust, dirt, and hair. Keep appliances operating at peak performance, and save energy, by vacuuming the coils once a month. Two or three times a year, wipe down the coils with a soft cloth and plain water. And while you’re at it, clean on top of and underneath the fridge, too.
RELATED: How To Clean Every Appliance in Your Home
12. Remote Controls
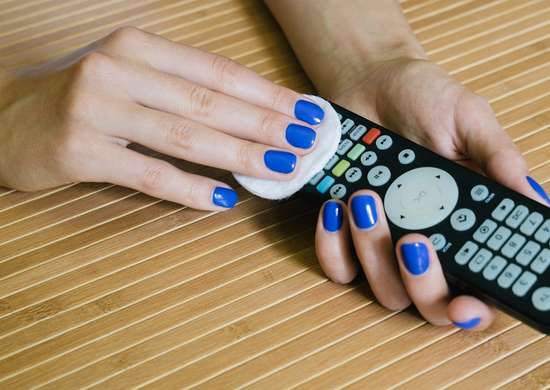
Remote controls can get positively sticky with grease and grime. These oft-used devices “are frequently touched but often overlooked” when it comes to cleaning, says Rhianna Jones, a registered nurse with Canxida, a Los Angeles company that works to combat candida yeast overgrowth. The quick and easy solution: cotton swabs and antibacterial wipes. “Wipe them down regularly to help prevent the spread of germs,” Jones advises. Remove the batteries and go over the entire remote with a moist wipe, then use a cotton swab on and around each individual button. Dry with a soft cloth, replace batteries, and continue with (germ-free) Netflix binging.
RELATED: How to Clean TV Screens the Right Way
13. Trash Cans

Unsurprisingly, trash cans can get quite dirty. Bits of dried-up food, drips of ketchup that almost made it into the liner bag, the odors from all this, and the potential to attract pests—add up to gross. Simple trash cans are easy enough to clean with soap and water. Fancier types with pull-out cans have a bit more complicated cleaning process: Lift out the can and clean it. Then clean the nooks and crannies of the parts around the can. It’s also necessary to clean down inside the receptacle part that holds the can (for example, the frames of pull-out trash cans in kitchen cabinets). A handheld vacuum with a crevice attachment works well for this.
14. Tops of Ceiling Fans
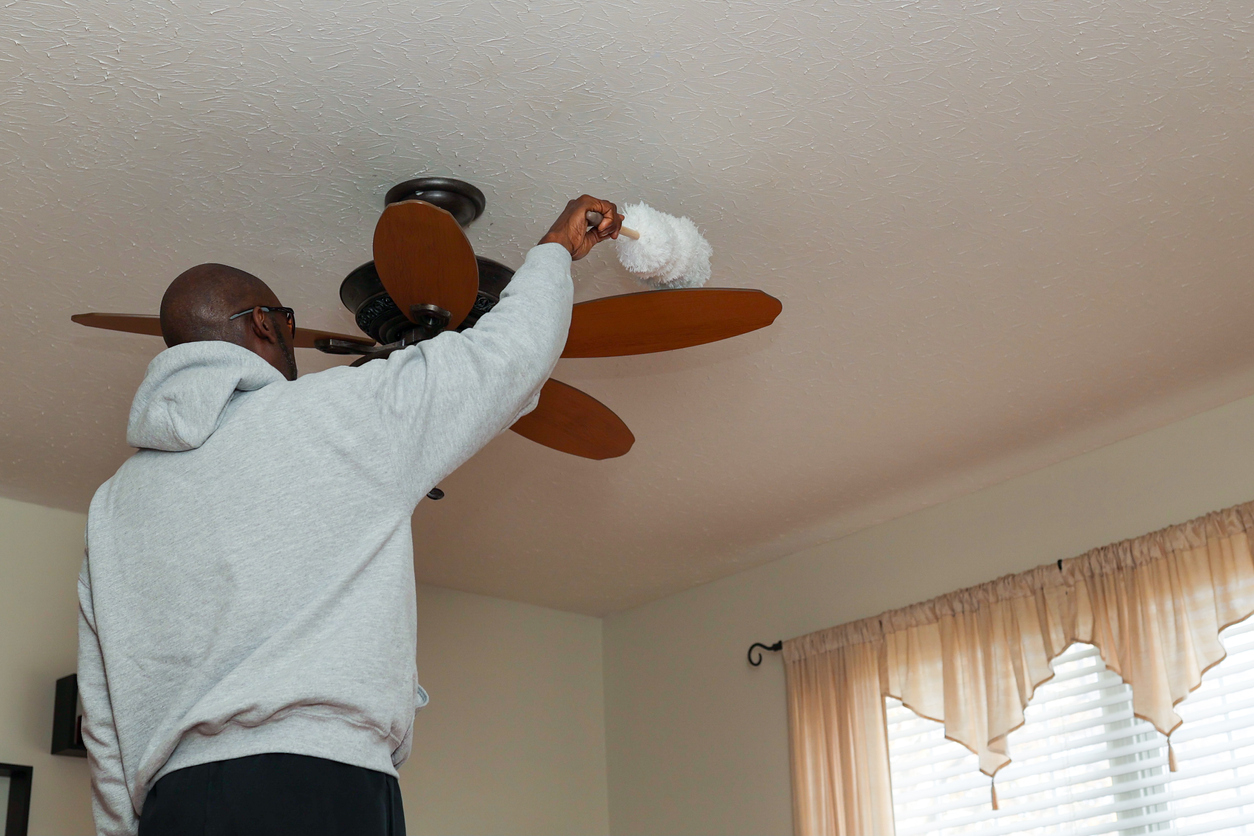
One of the dirtiest jobs around the house is cleaning ceiling fan blades. The thickness of the dust pile that can amass on the tops of the blades is pretty revolting. Even worse, that dust gets dispersed when the fan is turned on. Before tackling fan cleaning, spread an old sheet or blanket—something washable—over furniture or rugs that are beneath the fan. Get out a step ladder, and using a soft rag, gently brush the dust off the fan blades.
RELATED: Why Is My House So Dusty? 8 Common Culprits–and What to Do About Them
15. Window Treatments
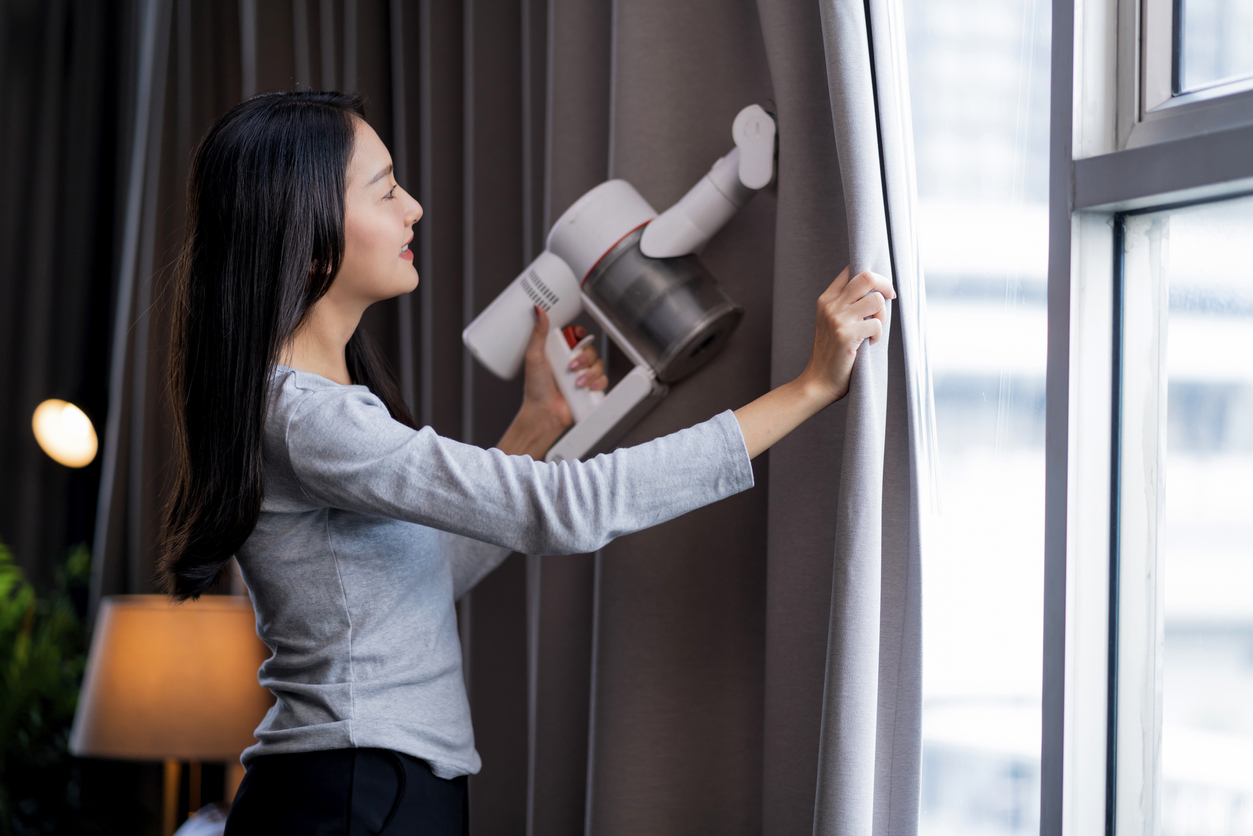
Dust, dead spiders and their webs, cookie crumbs from exuberant toddlers—all of this can collect on blinds, shades, curtains, and valances. Take these down once a year and wash them, if possible. If they’re too big or bulky to wash, give them a very good shake. Alternatively, use a fabric attachment on the vacuum to clean both sides of the curtains thoroughly.
16. Shower Curtain
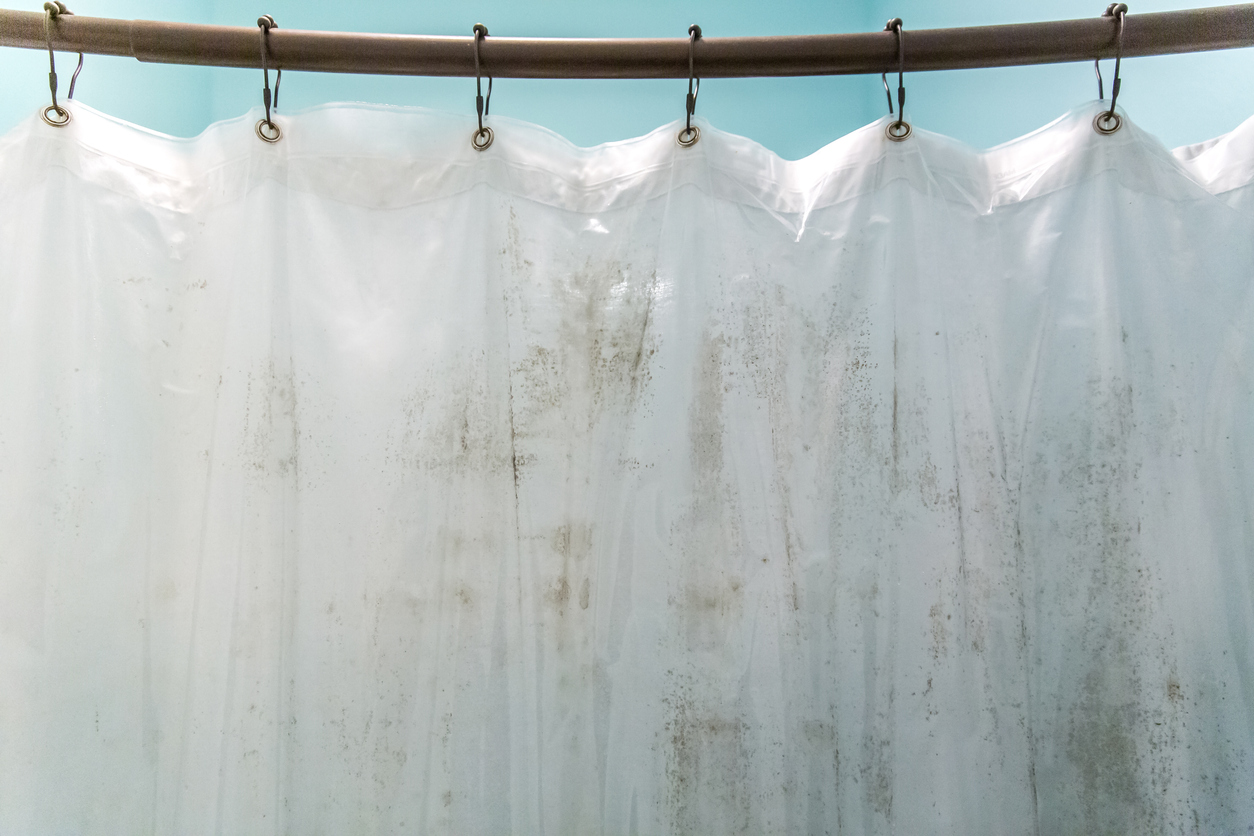
Is there a plastic shower curtain liners in your preteens’ bathroom that you just don’t see every day? Odds are, it needs some serious cleaning (or even replacing). Hard water stains, mildew, mold, soap residue—all this gunk collects on that liner over time, and in addition to just looking nasty, mold can cause irritation for those with pre-existing respiratory conditions such as COPD, allergies, and asthma. Spray it with a vinegar solution and scrub away. Check the liner’s label, too—some can be washed in the washing machine in cold water. And while we’re on the topic of bathrooms and teenagers: Remember to give the floor around the toilet a good scrubbing, particularly if you have boys.
17. Light Switches
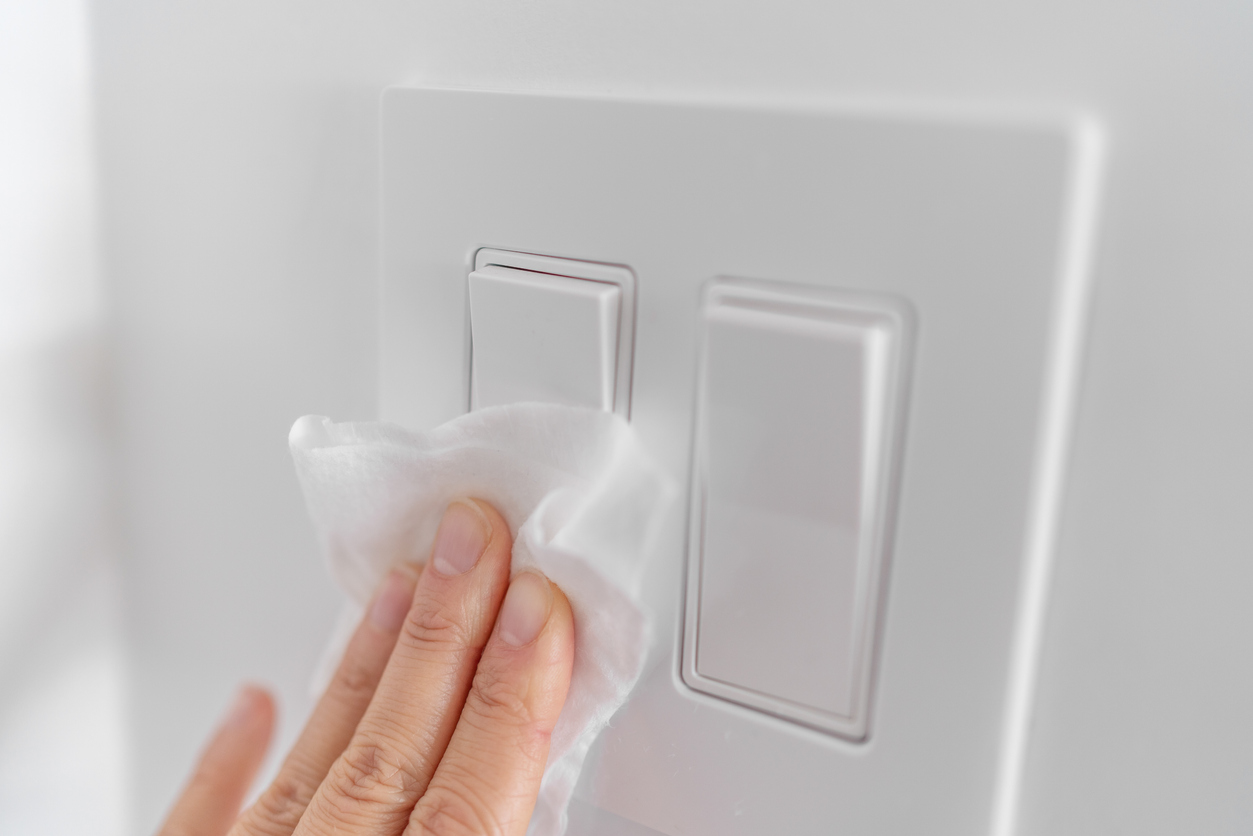
“Switches are some of the surfaces that come in most contact with our hands, which may be contaminated from our whereabouts throughout the day,“ says registered nurse Nancy Mitchell, who works with Assisted Living Center helping seniors find the right setting. She adds that these switches “can harbor microbes for weeks on end.” Clean light switches with a microfiber cloth lightly dampened with your preferred cleaning solution, and dry immediately.
18. Inside the Washing Machine
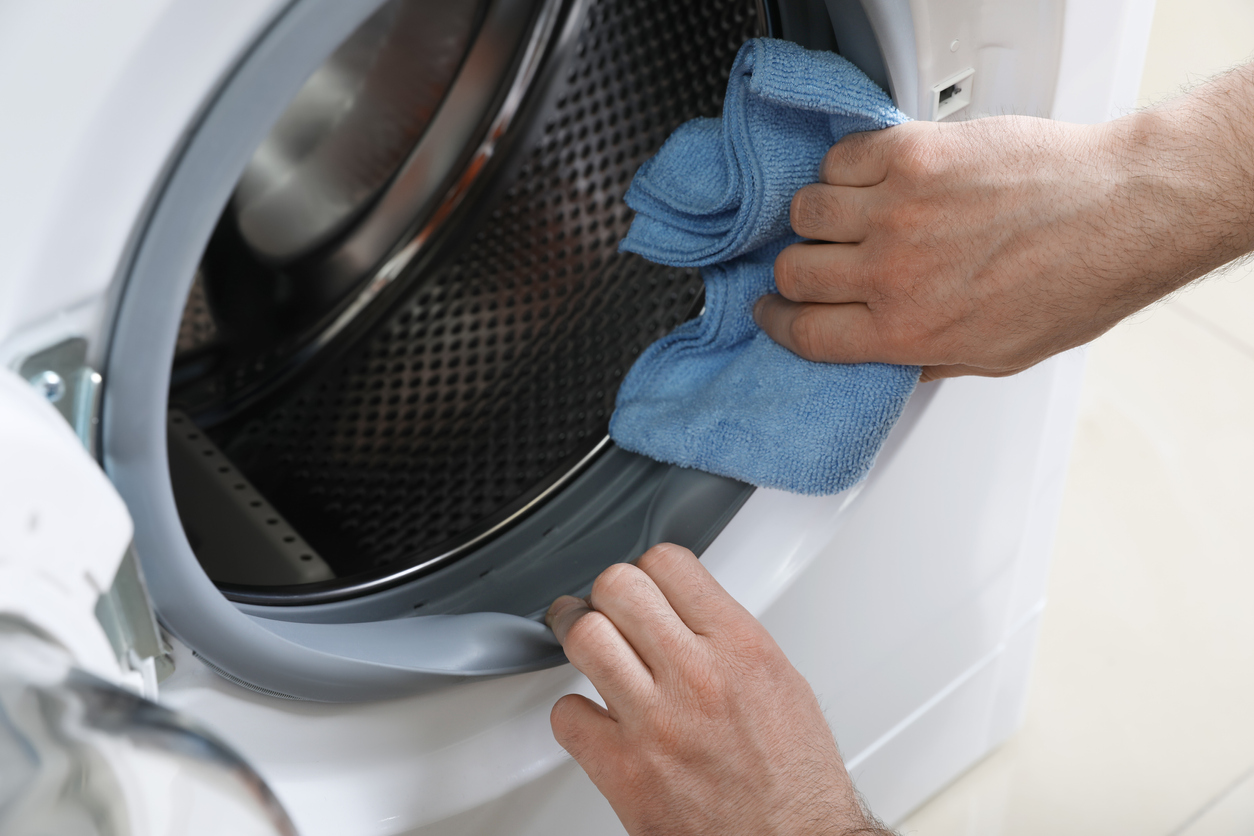
It seems odd, but the washing machine actually needs cleaning from time to time. On front-loading machines, the window can get quite filmy, with soap scum and wet lint clinging to it. Furthermore, closing the door tightly after a wash cycle can lead to a musty smell inside the machine from mold or mildew growth. Every now and then, wash a load of whites with a good amount of bleach, and then wipe down the inside of the window. Get the sealing gaskets and the soap dispenser area, too. When you’re feeling extra industrious, pull the washer and dryer out and clean behind and underneath them.