We may earn revenue from the products available on this page and participate in affiliate programs. Learn More ›
Our computers are treasure troves of personal information, including social security numbers, credit card numbers, bank account numbers, and website logins and passwords. When we erase this data or reformat the hard drive with a data-wiping program, it’s possible that this information can still remain on the hard drive. For this reason, it’s important to remove and destroy your hard drive before recycling or donating your computer, but this isn’t as easy as just smashing it with a hammer. Read on to find out how to destroy a hard drive and keep your data protected.
Tools & Materials
Bobvila.com may earn a commission from purchases made through these links.
BEFORE YOU BEGIN
Don’t begin this process until you have backed up all of the documents on the hard drive (including pictures and videos) that you want to keep. Move this data to a new computer or external hard drive, or upload it to a cloud storage service before destroying the old hard drive. If you don’t, the information will be lost and irretrievable.
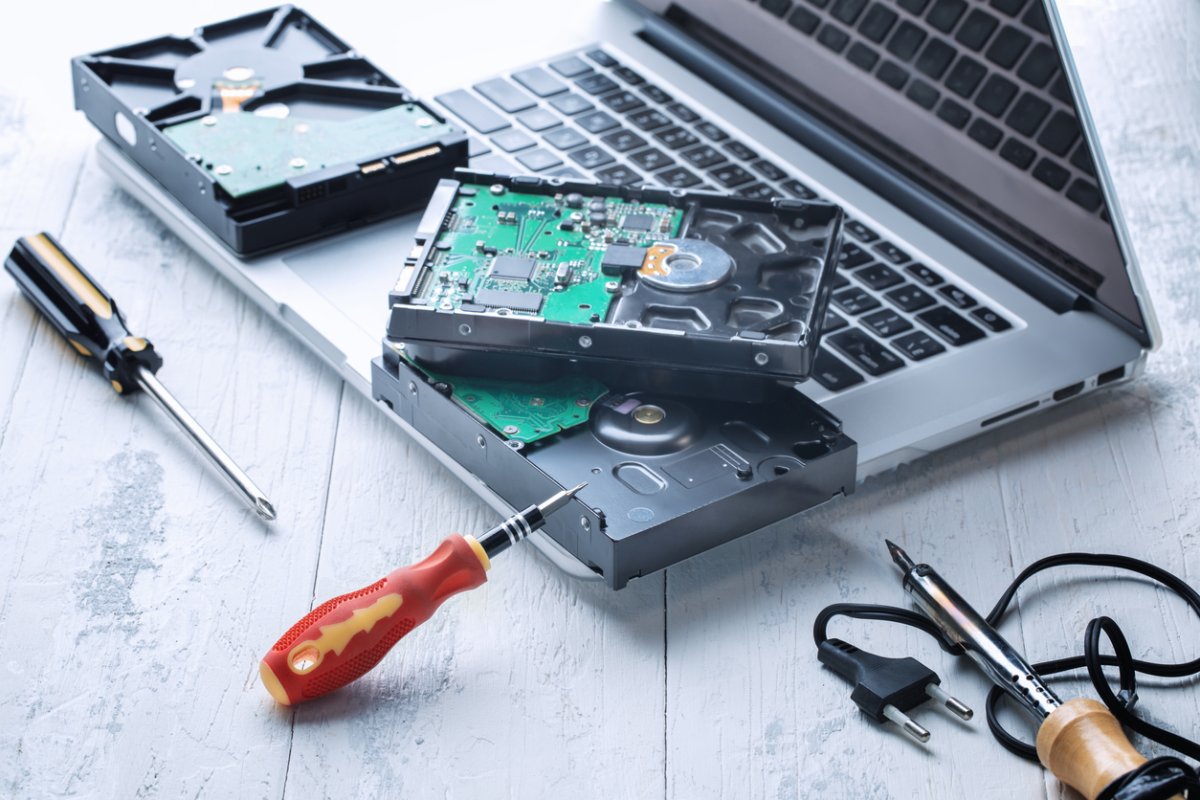
STEP 1: Remove the hard drive from your computer.
Use a precision screwdriver to remove the casing from the computer and locate the hard drive—it looks like a slim, rectangular metal box. Once located, remove the hard drive from the computer.
Depending on the manufacturer, type of computer, and age of the computer, the type and number of screws that you’ll need to remove will vary. Cover your bases by purchasing a precision screwdriver set, which comes with screwdrivers in a variety of shapes and sizes.
Related: The 10 Best Screwdriver Sets, Tested and Reviewed
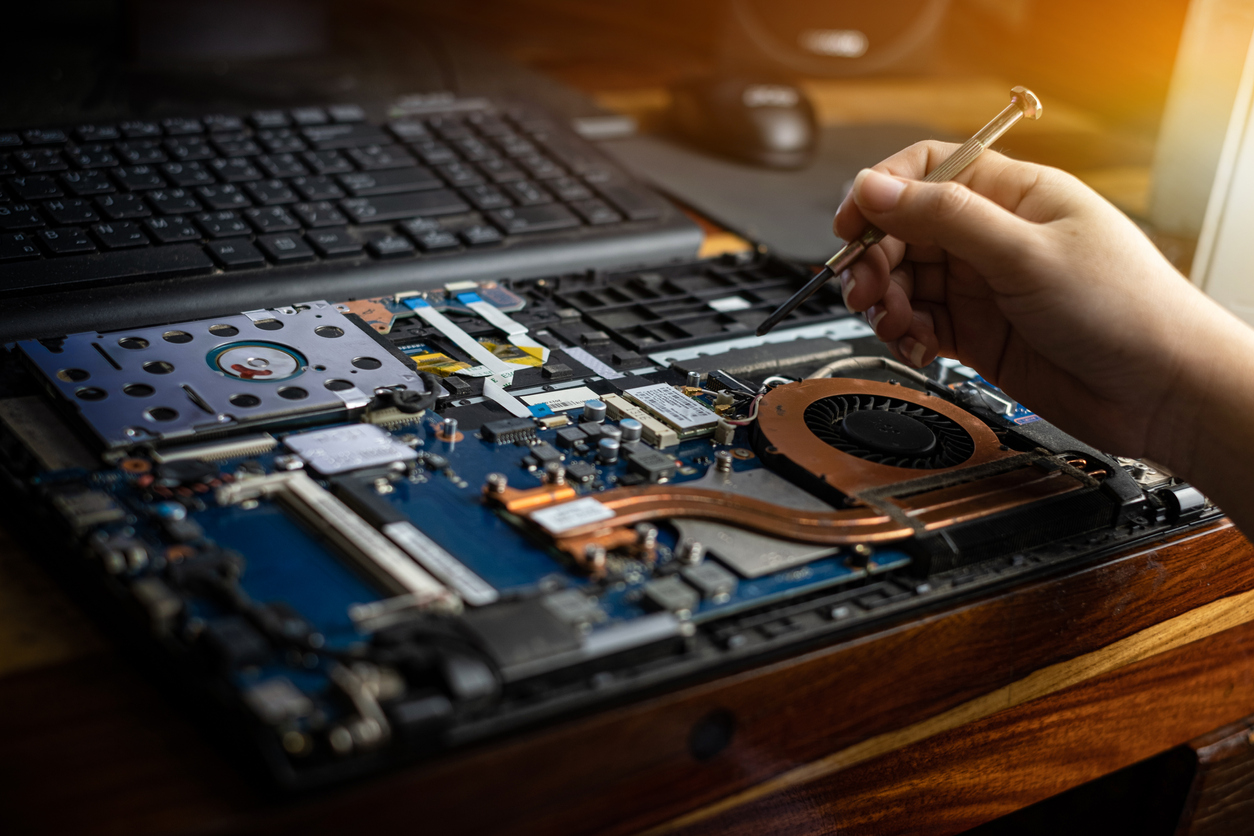
STEP 2: Access the hard drive’s platters and circuit board.
Once the hard drive has been removed from the computer, you will then need to open up the metal casing to access the platters and the circuit board. This next step is important because removing the hard drive from the computer isn’t enough to delete the data stored on the platters, and if you don’t destroy the circuit board the hard drive may still be accessed.
The screws used to secure the hard drive casing are typically either flathead or Torx screws. Using the appropriate screwdriver from the precision screwdriver set, remove these screws and then remove the metal casing to reveal the drive’s internal components.
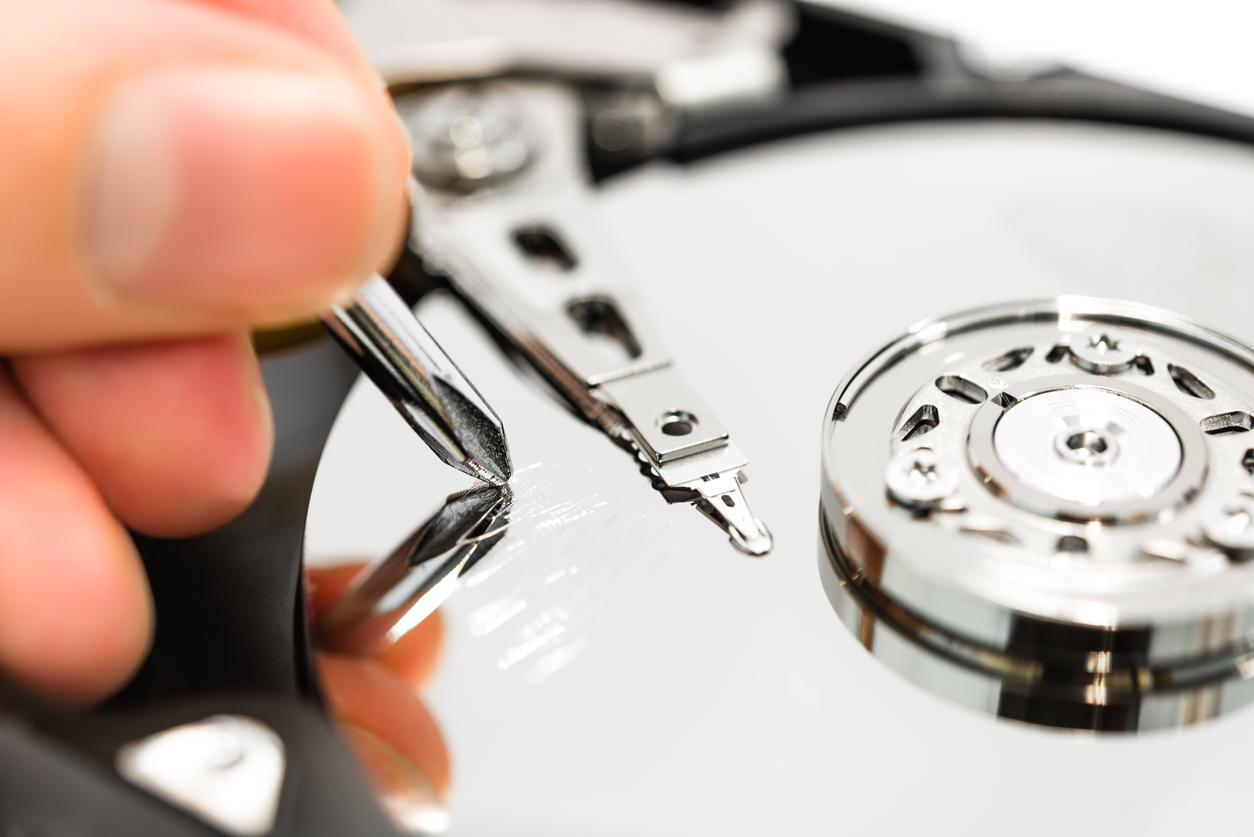
STEP 3: Remove the read/write arm, and scratch the platters with a screwdriver to destroy data.
A hard drive’s metal casing protects the internal components, preserving data stored on the platters, and when the casing is removed the platters are exposed. Platters are circular disks that look like CDs or DVDs, and spin rapidly on a center spindle. The hard drive’s data is recorded and read by a read/write arm that sits above the platters.
To access the platters, use a precision Torx screwdriver to remove the screws and take out the read/write arm. Lift the platters off of the spindle and use a screwdriver to remove the top layer of material from the platters. If scratching the platters with a screwdriver is too pedestrian for you, these disks can be destroyed in a number of other creative ways. You can use sandpaper, a rotary tool—fire, even—as long as the surface of the disk is scratched or burned off.
STEP 4: Break the circuit board.
Destroying the platters eliminates the stored data on the hard drive, but if you want to be extra certain your private information can’t be accessed, the next step is to remove the circuit board. A circuit board is responsible for operating the hard drive and typically has ROM, NV-RAM, or a chip that controls access to the drive. If this board is damaged or removed the hard drive can’t be accessed, regardless of the state of the platters.
To remove the circuit board, use a precision screwdriver to loosen any screws holding the board to the drive. Lift the circuit board off the drive and break it in half. When you do this, be sure you’re wearing protective eye gear. This will prevent small pieces of the board from getting in your eyes. You might also want to consider wearing thin work gloves to protect your hands.
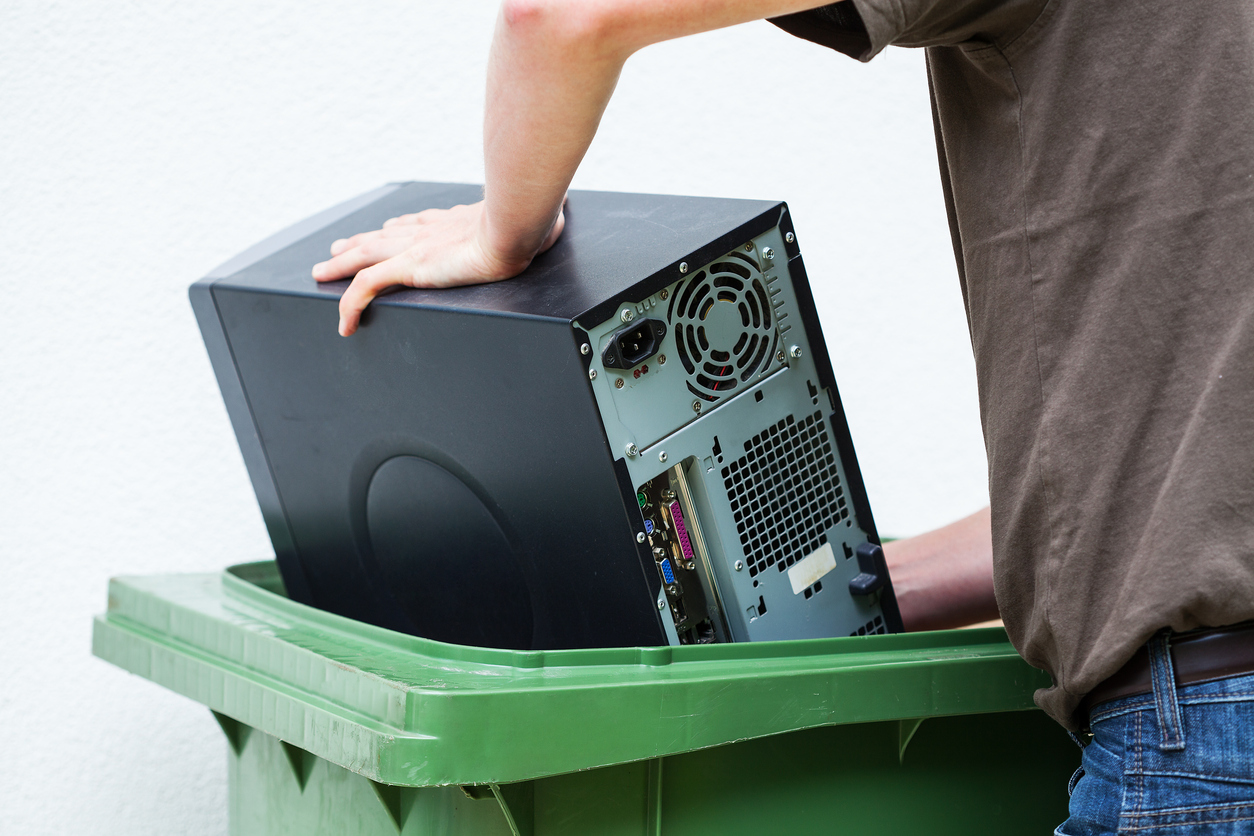
STEP 5: Recycle the computer’s components.
After dismantling and destroying the hard drive, its components need to be recycled. The EPA lists several companies and programs that recycle old, used, and broken electronics. Local governments may offer electronic recycling programs to help reduce waste in the region.
Electronic waste, including your computer’s hard drive components, can take hundreds of thousands of years to decompose in a landfill. Though it might be a bother to load old computer parts into a vehicle and drive them to a recycling center, this is a more eco-friendly way to dispose of electronic waste than throwing it into the garbage.
Destroying a hard drive and eliminating stored personal data can keep you safe from potential identity theft and financial fraud. Removing and destroying the platters is the most important step in the process, but you may as well go the extra mile and break the circuit board to prevent any and all access to the hard drive. For safety’s sake, remember to use proper eye protection when breaking the circuit board (and consider wearing a pair of thin work gloves to protect your hands).
