
We may earn revenue from the products available on this page and participate in affiliate programs. Learn More ›
A running toilet can seem like a mild inconvenience at first, but continuous or intermittent water running can lead to bigger problems. In addition to higher water bills, a constantly running toilet may also wear out sooner due to the high frequency of use. Before the problem can grow, it’s recommended to find out how to fix a toilet that runs nonstop.
Learning how to fix a constantly running toilet isn’t overly difficult, though DIYers with little to no experience working on plumbing systems may struggle to quickly identify the root of the issue. Before starting this job, it’s a good idea to become more familiar with how a toilet works and the various parts that may be responsible for a running toilet. Find out more about toilet troubleshooting and discover how to fix a running toilet with this straightforward guide.
Why Does My Toilet Keep Running?

Common causes of a running toilet include:
- a broken float
- a faulty flapper chain
- a worn-out flapper
- a leaking toilet tank
- an overflow tube that is too short
- the water level is set too high
- either the flush valve assembly or fill valve assemblies need to be replaced.
Due to the high number of toilet components that could cause a toilet to run nonstop, it’s most efficient for the repair process to work in tandem with the assessment or troubleshooting process.
Tools & Materials
Bobvila.com may earn a commission from purchases made through these links.
Project Overview
Working Time: 15 to 30 minutes
Total Time: 30 minutes to 1 hour
Skill Level: Intermediate
Estimated Cost: $10 to $20
How to Repair a Running Toilet
When a toilet runs continuously or intermittently, the cause is often due to the flush valve, fill valve, overflow tube, or toilet flapper. However, before replacing the flapper or switching out the fill valve, it’s important to inspect the toilet components and assess the current function to determine the exact cause of the problem. Start by ruling out any issues that are relatively easy and affordable to repair before moving on to more serious fixes.
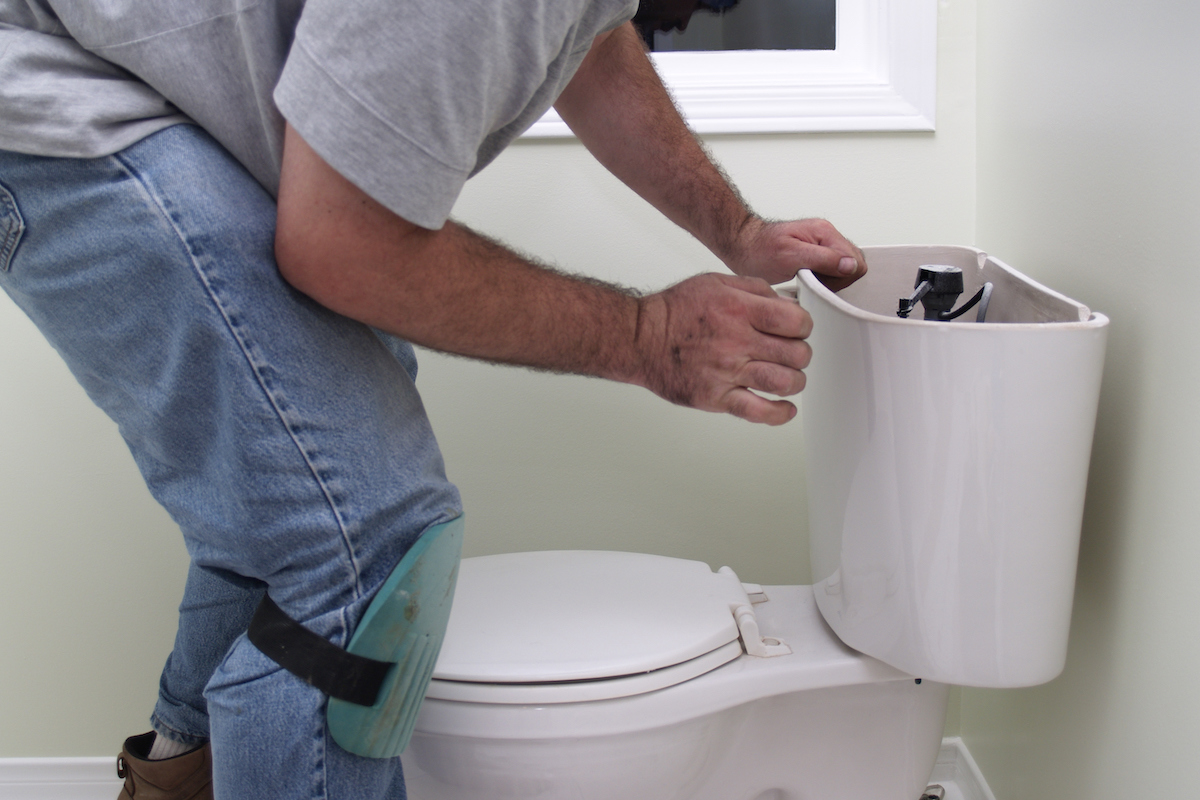
Step 1: Lower the water level and inspect the overflow tube height.

A common issue that can cause a toilet to run is that the water level is simply set too high. Remove the tank lid and check that the water is running into the overflow tube. If the water is running into the overflow drain, then you can adjust the float to lower the water level inside the toilet tank.
Adjust the float position using a screwdriver or a set of pliers to turn the adjustment screw about a quarter-turn in the counterclockwise direction. This toilet repair will lower the maximum water level in the tank.
Keep turning the adjustment screw until the water no longer flows into the overflow tube to stop the toilet from constantly running. However, if the overflow tube is too short for the toilet, then you will need to replace the flush valve assembly to resolve the problem.
Step 2: Inspect the flush valve assembly.

The flush valve is the part responsible for flushing the toilet. If the toilet won’t flush, it’s typically due to this component. The flush valve assembly includes the overflow tube, the flapper, and the flapper chain.
- Start by inspecting the overflow tube to determine if it is damaged or too short for the toilet. If the tube is damaged or too short, the flush valve assembly will need to be replaced.
- Next, check the flapper chain. If the chain is too short or has become twisted, it will prevent the flapper from closing properly and can allow water to leak into the toilet bowl.
- Similarly, if the flapper is bent, warped, or severely worn, it may not close properly and cause water to leak through into the toilet bowl.
- Alternately, if a buildup of dirt or grime is preventing the flapper from closing, then you can resolve the issue by cleaning the toilet flapper.
Step 3: Repair or replace the flush valve assembly.
If the toilet flapper or chain is responsible for the issue, then you can simply replace the old flapper or chain without removing the entire flush valve assembly. If the problem is caused by a damaged or short overflow tube, the flush valve assembly will have to be replaced.
How To Replace the Flapper and Chain

- Open the toilet tank to access the flapper and flapper chain.
- Disconnect the flapper and chain.
- Install the new flapper and chain.
- Make adjustments to the length of the chain, if necessary.
- Check that the flapper closes properly.
How To Replace the Flush Valve Assembly

- Turn off the water to the toilet.
- Flush the toilet to drain the toilet tank, then use a sponge to dry up any remaining water.
- Place a bucket under the water supply inlet, then disconnect the water supply hose with a set of channel lock pliers.
- Remove the tank-to-bowl bolts, which are located underneath the tank.
- Lift the toilet tank off the base to access and remove the tank-to-bowl gasket.
- Loosen the flush valve nut to remove the old flush valve assembly.
- Install the new flush valve assembly and tighten the flush valve nut.
- Reposition the tank-to-bowl gasket, then put the tank back in place on the toilet base.
- Reinstall the tank-to-bowl bolts.
- Reconnect the water supply hose and turn on the water.
- Allow the toilet tank to fill completely to verify that the toilet is no longer running.
Step 4: Inspect the fill valve assembly.

Generally, if the issue is not caused by the current height of the water level or any components of the flush valve assembly, then the running toilet is typically due to a problem with the fill valve assembly.
- Remove the top of the toilet tank to get a clear view of the components and verify the water level and the overflow tube are the right height for the toilet.
- Inspect the water supply inlet hose and check around the bottom of the toilet tank for any signs of a leak. If the toilet tank is leaking, the toilet will run any time the water level in the tank drops below the set level.
- Next, manually move the float up to the set water level. If the fill valve is working properly, the water should stop flowing into the toilet when the float reaches the set water level.
- Check the fill valve assembly for any signs of damage or severe wear. If the fill valve isn’t working properly or is in poor condition, it will need to be replaced.
Step 5: Repair or replace the fill valve assembly.
Fixing a leaking water supply hose or replacing the entire fill valve assembly are relatively straightforward repairs, though if you need to replace a worn out tank-to-bowl gasket, then there are a few more steps involved in the process.
To Replace a Leaking Water Supply Hose

- Turn off the water to the toilet.
- Drain the toilet tank by flushing the toilet, then using a sponge to soak up any remaining water.
- Position a bucket under the water supply inlet, then use channel lock pliers to disconnect the water supply hose.
- Install a new water supply hose.
- Turn the water on and check the water supply inlet for any leaks.
To Replace a Fill Valve Assembly

- Turn off the water to the toilet.
- Flush the toilet to drain most of the water out of the tank, then use a sponge to collect any leftover water.
- Put a bucket under the water supply inlet before disconnecting the water supply hose with a set of channel lock pliers.
- Loosen the fill valve locking nut on the bottom of the tank, then pull out the old fill valve assembly.
- Adjust the height of the new fill valve to suit the toilet tank, then insert the new fill valve assembly into the bottom of the tank.
- Tighten the fill valve locking nut to secure the new fill valve assembly.
- Reinstall the water supply hose, then turn on the water.
- Allow the toilet tank to fill completely in order to verify that the toilet is no longer running.
To Replace a Tank-to-Bowl Gasket

- Turn off the water to the toilet.
- Flush the toilet to drain the toilet tank, then use a sponge to dry up any remaining water.
- Place a bucket under the water supply inlet, then disconnect the water supply hose with a set of channel lock pliers.
- Remove the tank-to-bowl bolts, which are located underneath the tank.
- Lift the toilet tank off the base to access and remove the old tank-to-bowl gasket.
- Install the new tank-to-bowl gasket, then put the tank back in place on the toilet base.
- Reinstall the tank-to-bowl bolts.
- Reconnect the water supply hose and turn on the water.
- Allow the toilet tank to fill completely to verify the toilet is no longer running.
Final Thoughts
Repairing a toilet can help DIYers save a significant amount on labor costs. Especially if the problem is as easy to resolve as replacing a flapper or adjusting the water level of the toilet tank. However, if the steps above seem too complex or you feel uncomfortable working with home plumbing systems and water-using appliances, then it’s best to contact a professional plumber to assess and resolve the problem. Trained pros can quickly and effectively determine what is causing the toilet to run and make clear suggestions that can repair the issue.
Similarly, if you have tried the methods suggested above and the toilet continues to run, there is a chance that the tank is cracked or the connection between the tank and the bowl is damaged. If this is the case, the toilet will likely need to be replaced. Call in the pros to make the replacement or let a DIYer with enough hands-on plumbing experience learn how to replace the toilet.