We may earn revenue from the products available on this page and participate in affiliate programs. Learn More ›
Typically, toilet fill valves last about 5 years without any issues, depending on the quality of the valve, hard water content, and how frequently the toilet is flushed. Knowing how to replace a toilet fill valve pays off when one inevitably fails due to debris, hard water mineral build-up, or regular wear-and-tear. On average, hiring a professional plumber to repair a toilet costs about $60 to $150, while replacing the toilet fill valve on your own may only cost about $10 to $30.
To keep your toilet working as intended while keeping more money in your wallet, use this guide to learn how to replace a toilet fill valve.
Tools & Materials
Bobvila.com may earn a commission from purchases made through these links.
Project Overview
Working Time: 20 minutes
Total Time: 40 minutes
Skill Level: Intermediate
Estimated Cost: $10 to $30
BEFORE YOU BEGIN
There are two main parts of a toilet tank: the flush valve and the fill valve. The toilet flush valve is the component responsible for emptying the tank into the toilet bowl and closing the connection between the tank and bowl when the tank has been emptied of water. The toilet fill valve is also located inside the tank, where it’s responsible for allowing water to flow into the tank and shutting off the flow once the water level reaches a set point.
However, even if the toilet fill valve isn’t 5 years old yet, you may notice that the toilet keeps running after flushing or runs intermittently when not in use. This could indicate that the fill valve is leaking or has failed, in which case you will need a toilet fill valve replacement. First, though, make sure the overflow tube is the right height for the toilet and that the water level is set to about an inch below the overflow tube. If the toilet overflow tube is the correct height and set to the correct water level but water continues to flow into it, then proceed with your DIY toilet repair.
There are a range of toilet fill valve types available at most home improvement stores. Generally, you should look for a new fill valve that matches the old valve in size and shape, though you can also pick up a universal toilet fill valve if you aren’t certain which type you need.
RELATED: The Best Toilet Repair Kits, Vetted
STEP 1: Prepare the surrounding area.
Like most DIY projects, the first step is preparing the area. Place a bucket under the water supply line and have a towel on hand in case any water gets on the floor. Also, have your pliers and new flush valve assembly ready to go.
STEP 2: Turn off the water and disconnect the water supply line.
Turn off the incoming water to the toilet by closing the isolation valve located on the toilet’s water supply line. With the water shut off, flush the toilet to empty most of the water out of the tank. This will make it easier to drain what little water remains while reducing the risk of bathroom water damage.
Using a set of channel lock pliers, loosen and disconnect the water supply line from the base of the toilet tank. Place the end of the water supply line into the bucket so that any remaining water in the line can drain into the bucket, instead of falling on the floor. Use a towel, cloth, or sponge to clean up any water that missed the bucket.
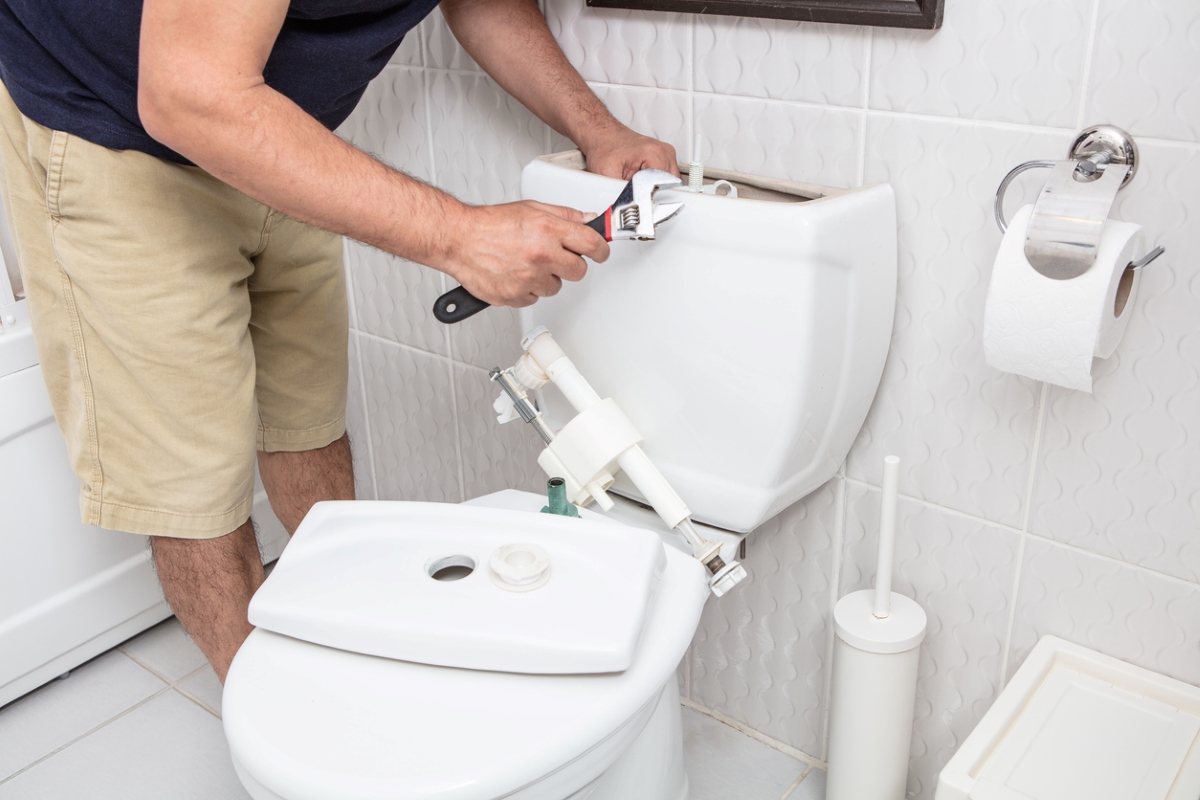
STEP 3: Unscrew the locking nut and remove the fill valve assembly.

With the water supply line disconnected, you have access to the fill valve locking nut on the bottom of the tank. Unscrew the fill valve locking nut to loosen the fill valve assembly.
If you haven’t already, remove the tank lid and place it in a safe spot until the job is done. Reach into the open tank and take out the existing fill valve assembly. It’s recommended to put it into the bucket or inside the bathroom sink to catch any remaining water.
STEP 4: Install the new fill valve and adjust the float height.

Double check the new fill valve to ensure that it is compatible with your toilet, then remove it from the packaging. Place the new fill valve into the open toilet tank and secure it in position by fastening the locking nut on the bottom of the toilet tank.
Adjust the height of the fill valve and the float to ensure that it is sitting at the correct level for the toilet. This should be about an inch below the top of the overflow tube to properly fill the tank without water draining into the overflow tube.
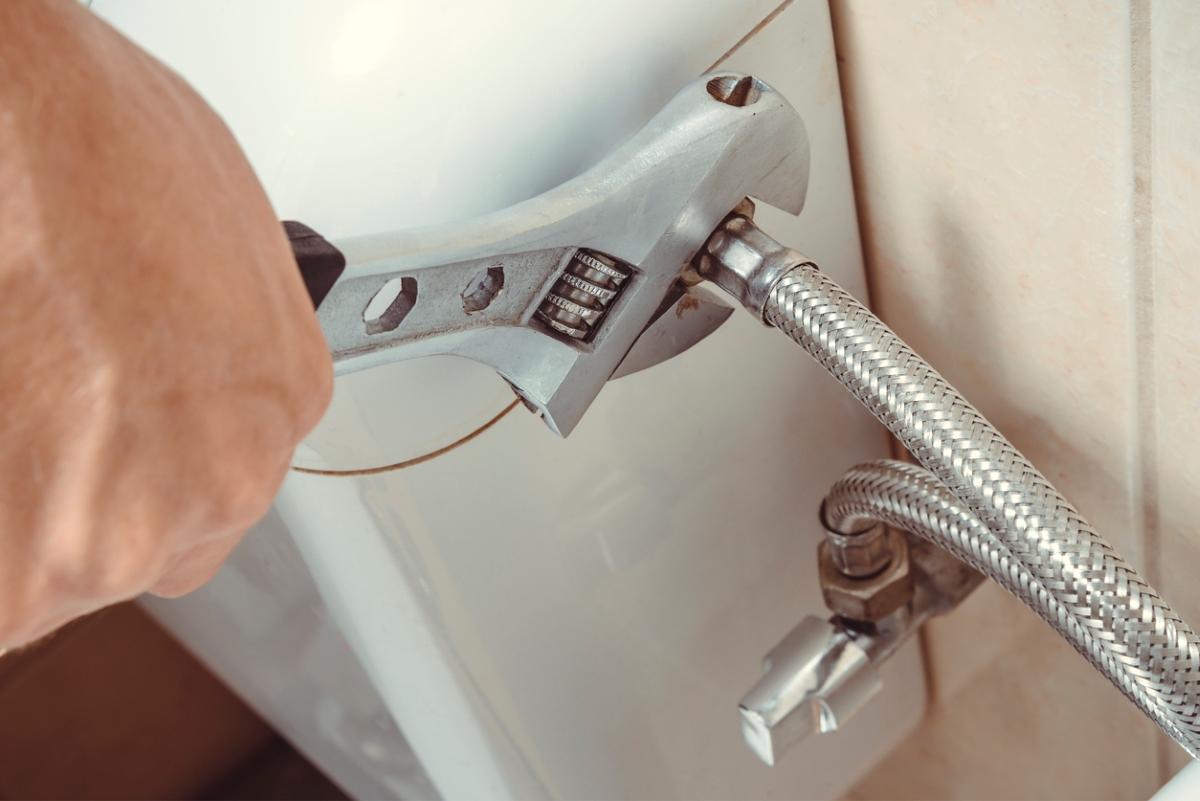
STEP 5: Reattach the water supply line and turn on the water.
Now that the new fill valve is in place and you have tightened the locking nut to secure the fill valve assembly, the next step is to reattach the water supply line to the base of the toilet tank. Start by hand-tightening the nut until it cannot turn anymore, then use your channel lock pliers to snug up the connection.
Don’t over-tighten the water supply line as this can cause the nut to crack, leading to a leak and potential water damage issues. Similarly, if this connection is not tight enough, water may leak from the base of the tank.
STEP 6: Test the toilet to determine if the repair was successful.
Turn the water back on at the isolation valve on the water supply line. While the water begins to fill the tank, check the bottom of the tank and the water supply line connection for any leaks.
If your repair is successful, the water should stop flowing into the toilet tank when the water level reaches the set point, which is about an inch below the overflow tube. Flush the toilet to ensure it is functioning correctly. When the tank has refilled and the flow of water has stopped, put the lid back on the tank and clean up the area.
Final Thoughts
The two main components inside the toilet tank are the flush valve and the fill valve. If the fill valve is worn, damaged, or not operating properly, you may notice a leak from the base of the tank or the toilet may continually fill as excess water drains into the overflow tube. By replacing the fill valve assembly, you can reduce wasted water in a home and lower utility bills without needing to replace the entire toilet.
RELATED: Solved! What to Do When the Toilet Won’t Flush