
We may earn revenue from the products available on this page and participate in affiliate programs. Learn More ›
One of the most important plumbing fixtures for any home is the toilet. It’s used frequently by residents of the home and guests alike, so it’s important to ensure the toilet is in good condition. Unfortunately, the parts inside a toilet can wear out over time, leading to leaks, constantly running water, and faulty flush mechanisms. One such part that can create problems is the toilet flapper.
The toilet flapper is essentially the disk, ball, or rubber seal that closes the opening in the base of the toilet tank to prevent water from flowing into the toilet bowl. When the toilet is flushed, the toilet flapper is lifted up, allowing the water from the tank to rush into the toilet bowl. However, if the toilet flapper is leaking, it will not close properly, causing water to seep into the toilet bowl. As water drains out of the tank, the water level decreases, triggering the fill valve to begin filling the tank. If the flapper is not repaired or replaced, then the toilet will continue to run intermittently, increasing the cost of your water bill, as water flows into the toilet drain. Find out how to replace a toilet flapper using this informative guide.
What Is a Toilet Flapper?
Before starting a toilet flapper replacement project, you need to have a clear idea of what this part looks like and how it functions. There are three main toilet flapper types, including seat disk, tank ball, and standard rubber flappers. A seat disk toilet flapper is an older design that consists of a small circular disk that covers the flush valve. A tank ball flapper is easy to spot because it is essentially a small rubber ball that sits in the opening at the base of the toilet tank, like a toilet plug.
The most common toilet flapper type is a standard rubber flapper, which typically attaches to the base of the overflow tube and sits over the flush valve opening. It is connected to a chain, which lifts the flapper when the toilet is flushed. While the flapper is considered a part of the flush valve, most running toilet issues are due to faulty flappers or fill valve assemblies. For this reason, it’s important to learn how to replace a toilet fill valve and flapper to keep the toilet operating for years with minor DIY repairs.
Tools & Materials
Bobvila.com may earn a commission from purchases made through these links.
Project Overview
Working Time: 10 minutes
Total Time: 20 minutes
Skill Level: Beginner
Estimated Cost: $20 to $30
Before You Begin
Don’t replace a toilet flapper without checking the toilet flapper size. Not every flapper will fit every toilet, so before replacing a toilet flapper, you need to take a measurement of the old flapper and find a suitable replacement part. Additionally, you may be able to fix a toilet flapper instead of changing a toilet flapper, depending on the problem.
If the toilet flapper is not sealing, inspect the bottom of the flapper and the flush valve connection for signs of built-up residue. This residue can be cleaned off using a cloth or sponge to fix the leaking toilet flapper seal. Just keep in mind that dirt and grime is not always the culprit, so if the toilet flapper is still leaking after a good cleaning, then you will want to learn how to install a toilet flapper using the following steps.
Step 1: Turn off the water to the toilet.
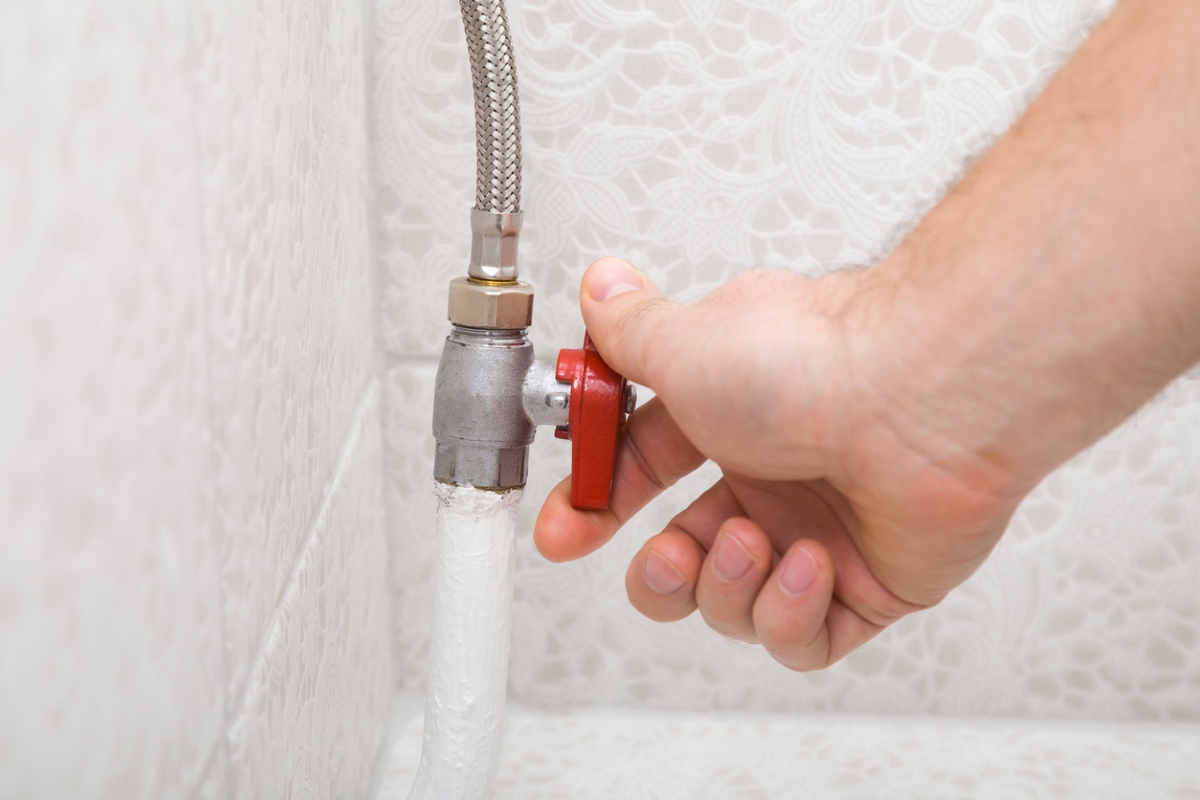
The first step in most DIY toilet repair projects is to turn off the water. The valve for the toilet is typically located just behind the toilet on the water line that runs to the base of the tank. Turn the valve counterclockwise to prevent water from flowing into the toilet tank. While you can complete this job without turning off the water to the toilet, this isn’t recommended unless absolutely necessary.
For instance, if the shut-off valve to the toilet and the main shut-off valve for the home are both seized, broken, or otherwise inoperable, then you can replace a toilet flapper seal without shutting down the water. Just be prepared to get a little wet as you work.

Tried-and-True Advice
“After noticing my water bill spiking, I assumed my toilet flapper was failing and replaced it only to find out a month later, when my bill continued to be high, that the culprit was really the toilet fill valve.
Toilet flapper and fill valves are only designed to last 5 to 7 years, after which all of these parts begin to fail. Rather than replace each failing part one at a time, replace the whole kit all at once. It will save you having to cut the water and drain the toilet tank multiple times, and will save you money since the parts are cheaper when purchased as a kit.”
—Tony Carrick, Contributing Writer
Step 2: Drain the toilet tank.
If you were able to turn off the water to the toilet, then all you need to do to drain the toilet tank is flush the toilet. Flushing the toilet causes the flapper to lift up, allowing the water from the tank to flow into the toilet bowl. Since the water is off, the fill valve is unable to fill up the tank, leaving it mostly empty for this repair.
Even if you could not turn the water off to the toilet, it’s still recommended to flush the toilet to empty the tank. Once the tank is empty, keep the flapper in the open position to allow any water that is entering through the fill valve to drain into the toilet bowl, instead of refilling the toilet tank.
Step 3: Disconnect the old flapper.
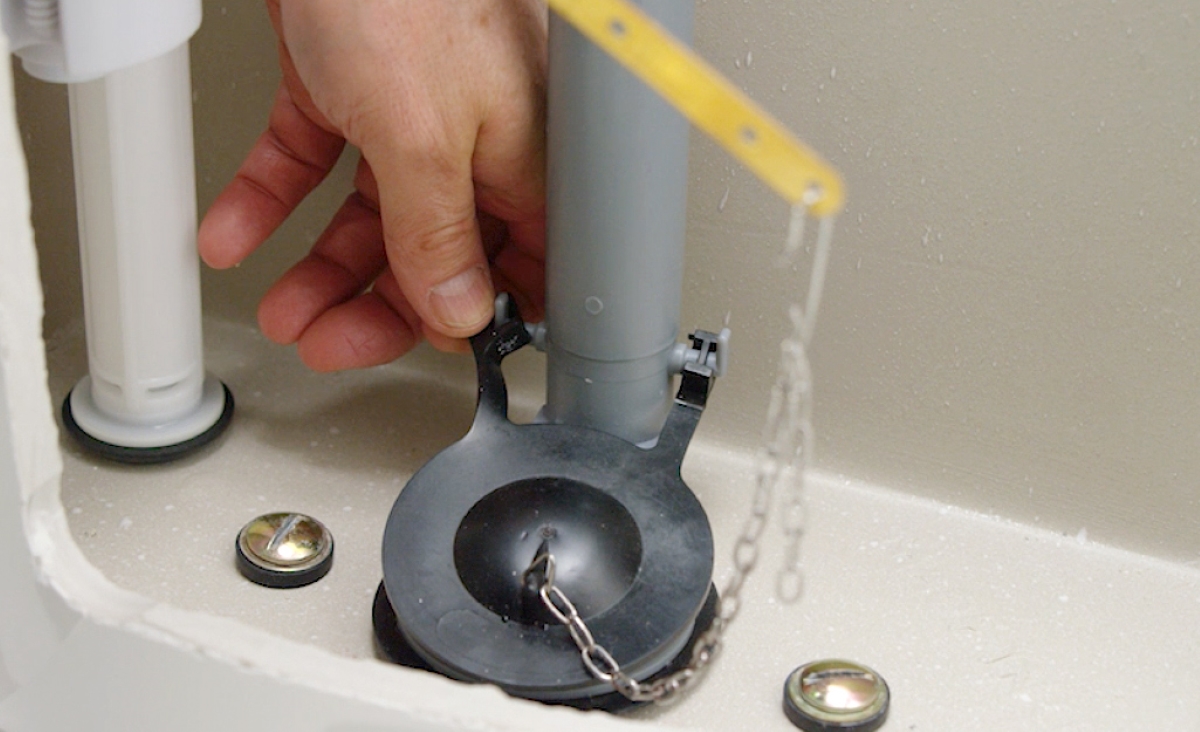
To remove the old flapper from the toilet, you need to first disconnect the chain from the flush handle lever. The flush handle lever is a horizontal bar that runs from the flush handle across the tank to just above the flapper. Undo the clip on the end of the chain from where it hooks into the holes on the handle lever.
Next, slide the flapper off of the overflow tube. The overflow tube is the tall, cylindrical tube that extends up from the base of the tank. If the flapper is attached to the overflow tube with a ring, then simply lift the flapper up off the tube. However, if the flapper is attached to pegs extending from the sides of the overflow tube, then you need to slide the ears of the flapper off the pegs.
Step 4: Install the new flapper.
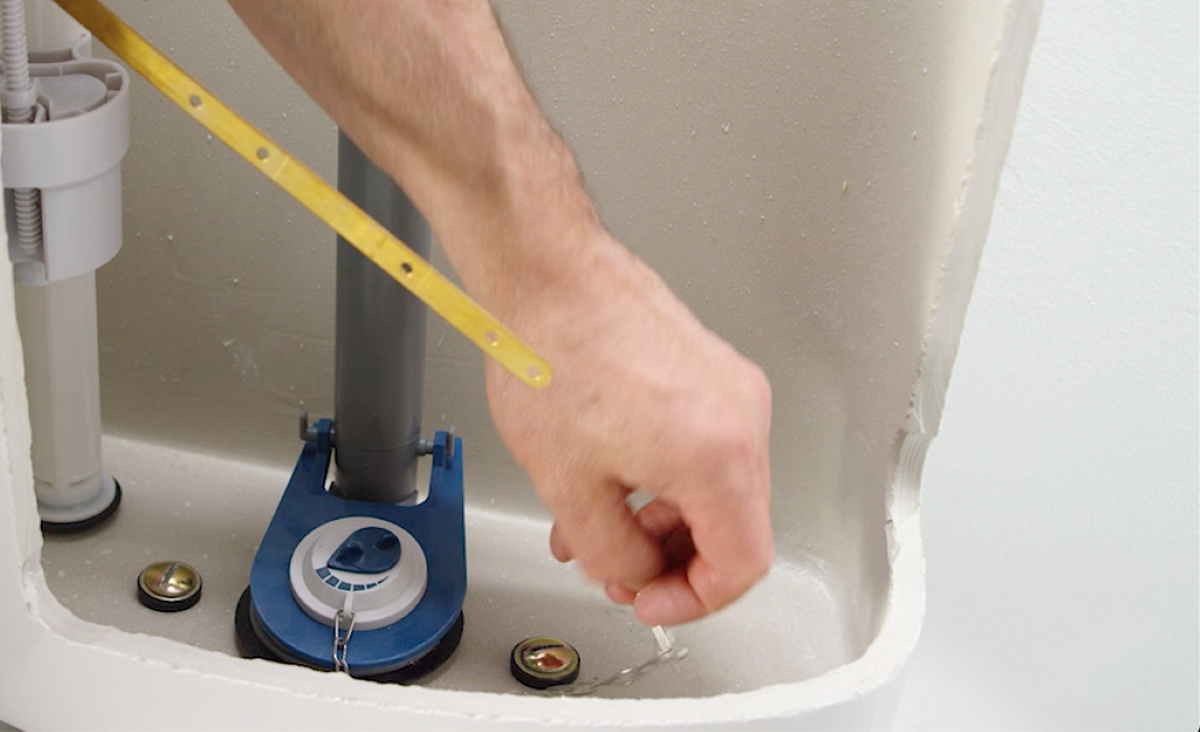
With the old flapper removed, you can now install the new flapper. If the flapper has a ring-style design, then slide it down over the overflow tube, before connecting the new chain to the flush handle lever. If the flapper connects with ears, then slide each ear over the pegs on the sides of the overflow tube. After connecting the ears, attach the new chain to the flush handle lever.
Keep in mind some flappers may have a combined ring/ear design to account for overflow tube configuration. If you have one of these hybrid flappers, you can either slide the ring down over the overflow tube, or you can use aviation snips to cut the ring off, allowing the flapper to connect using the ears.
Step 5: Turn on the water and test for leaks.
After replacing the toilet flapper, check to make sure the chain is the right length. It should sit at a relaxed length, with a small amount of slack when the flapper is closed. If the chain is too tight, the flapper may not be able to close completely. Similarly, if the chain is too long, it could get caught under the flapper, preventing it from closing.
Turn the water on to the toilet and allow the tank to fill. If the repair was completed successfully, the toilet should stop running when the toilet tank is full. Flush the toilet once to make sure that the flapper opens and closes properly, then wait for the tank to refill once more to ensure the issue is resolved.
Final Thoughts
The toilet flapper is responsible for blocking the toilet flush valve opening in the base of the tank, but if it gets cut, torn, bent, or otherwise damaged, then water may seep through the opening. This leak releases water into the toilet bowl, gradually draining the water out of the toilet tank. When this occurs, the toilet fill valve is triggered, causing the toilet to run constantly until the tank is full. However, with just a couple simple tools, a few minutes, and a minor investment in a new flapper for the toilet, you can resolve this problem by learning how to replace a toilet flapper. This project is a relatively easy job that most DIYers can handle rather than hiring a plumber and paying costly repair bills.
