We may earn revenue from the products available on this page and participate in affiliate programs. Learn More ›
If you’re looking for a versatile cooking staple you can easily grow at home, learn how to grow onions from seed, purchased transplants, or sets (immature bulbs). Once you’ve chosen the best type of dry (storage) onion for your region and conditions, you’ll just need balanced, well-draining soil, plenty of sunlight, and some water.
“Typically, the easiest way to grow onions is from sets,” says Heather Bryant, field specialist, food and agriculture at University of New Hampshire Cooperative Extension. Sets are typically sold in packages of 60 to 100 bulbs. Read on to find out how to select the best onions for your garden’s sun exposure, when to plant onions or sow onion seeds, and how to harvest and store bulb onions.
Growing Onions at a Glance
Common Name: Onions, dry onions, storage onions, bulb onions
Scientific Name: Allium cepa
Hardiness Zone: 5 to 10
Soil: Well-draining, loose, very slightly acidic pH (6.5 to 6.8)
Light: Full sun (up to 13 hours a day, depending on type)
Water: Consistently moist (not soggy) for larger bulb size
Food: Balanced fertilizer before planting and at 4 to 5 weeks
Propagation: Seed, sets, or transplants
Safety: Toxic to dogs and cats
Onion Characteristics
Onions (alliums) are in the Amaryllidaceae family and are closely related to garlic, chives, and leeks. The bulbs grow underground and send up dark green tops, which are also edible raw or cooked. The most common, all-purpose type is the yellow onion, though white onions can have a more pungent flavor, and red onions add color and flavor to dishes. Other types of onions include shallots, which are smaller and grow in clusters rather than individual bulbs, and green onions, which gardeners grow mostly for their hollow, flavorful leaves.
When shopping for seeds or sets, try to match the onion type to your growing zone (and its available daylight) for best results. Other characteristics to select for include taste, color, disease resistance, and how well they store.
Recommended Onion Varieties


Onion type, color, and sun exposure or zone are important considerations when selecting an onion variety to grow. “Varieties or cultivars of onions are bred for certain characteristics,” says Bryant. “For example, I’ve had good success with Bridger, which is a yellow storage onion.” She recommends the following varieties, especially in the Northeast.
- Bridger: Yellow long-day onion with large, flat bulbs, often ready for harvest by August; can overwinter in northern climates. Get Bridger onion seeds at Best Seed.
- Ailsa Craig: A sweet heirloom that is large and pale yellow and best eaten fresh rather than stored; long-day type for northern climates; 95-day estimated maturity. Get Ailsa Craig onion seeds at Baker Creek Heirloom Seeds.
- Candy: Popular sweet yellow variety to eat fresh; intermediate-day variety; matures in 90 to 100 days. Get Candy onion sets at Amazon.
- Red Mountain: Deeply red color with good disease resistance and reliable storage; long-day onion; matures in 110 days. Get Red Mountain onions at High Mowing Organic Seeds.
- Blush: Long-day sweet pink onion; matures in 106 days and stores well. Get Blush onions at Johnny’s Seeds.
Other popular onion varieties include:
- Texas Early White: Sweet white onion; short-day type; matures in 105 to 110 days; stores for up to 3 months.
- Red Creole: Short-day red onion ready to harvest in about 100 days; stores for up to 7 months.
- Yellow Granex: Short-day sweet yellow onion that matures in 140 days; considered Vidalia if grown in approved region near Vidalia, Georgia.
Planting Onions
Begin by preparing the garden bed with well-draining soil with a pH of 6.5 to 6.8 for best results. If you are unsure about your soil nutrients and pH, Bryant notes that “most state extensions offer soil testing” for recommendations on improving soil for onions or other crops. In most cases, mixing a few inches of compost into the soil will improve onion growth, as will applying fertilizer before planting.
When is the best time to plant onions?
The best time to plant onions is typically early spring (late April to early May, depending on the growing zone) as soon as you can work your garden soil. Planting too early can expose onions to too much cold and shorter days with too little sunlight. The lack of sun exposure can affect the bulbs’ growth, so you gain little by jumping in too soon. If your season is long enough, try succession planting, starting new rows of onions every few weeks.
Where can onions grow?
Cultivating onions for their bulbs requires a location that receives more than 6 hours of sunlight per day and has fertile, fast-draining soil. If your ground contains a lot of clay and tends to be soggy in spring, grow your onions in a fast-draining raised bed to avoid the problems caused by working heavy soil when it is wet. Onions can grow near tomatoes and many common vegetables, but avoid planting relatives like garlic or chives nearby; onions also make bad plant neighbors for peas and beans.
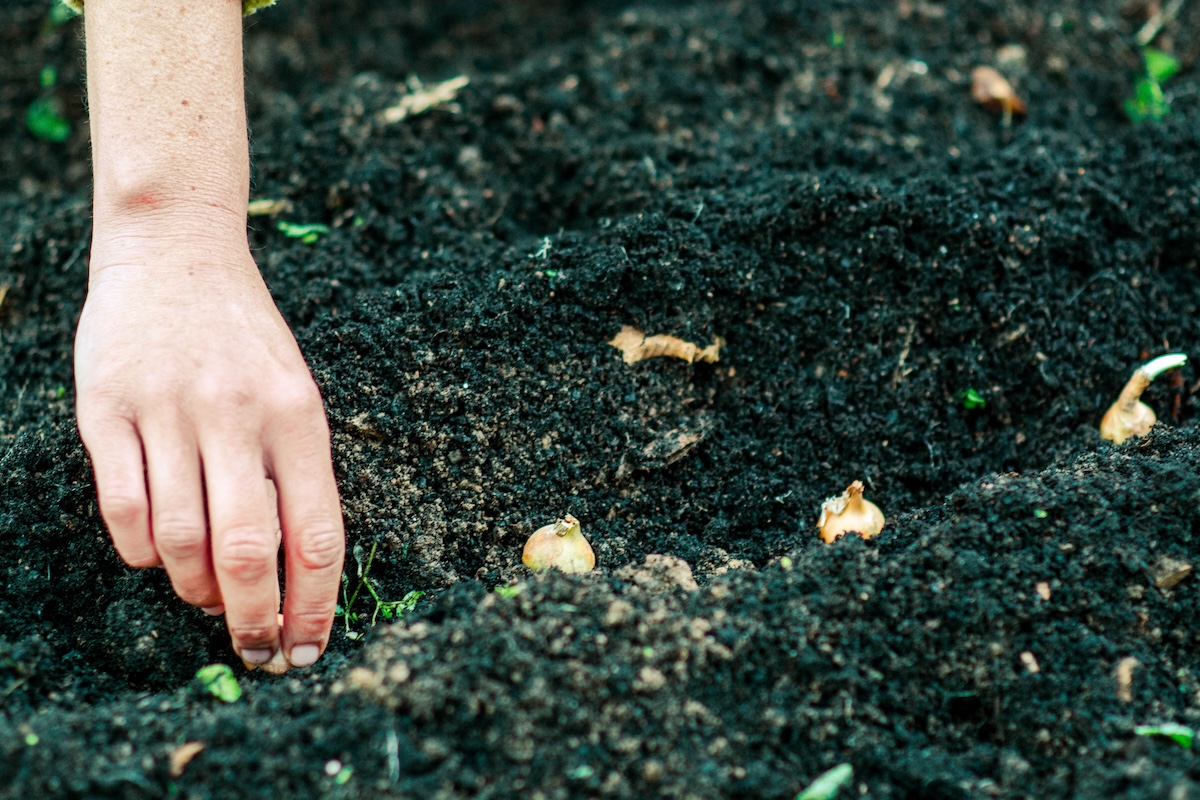
Growing onions from sets is generally the easiest method, but many stores sell sets identified only by color or a similar characteristic. If you would like to grow a specific variety of onion, look to specialty seed suppliers locally or online. Order your sets a week or more in advance of planting time for your area. Unpack shipped sets or transplants in the open so they can get air circulation to prevent rot.
Long-Day vs. Short-Day Onions
Onions are classified as short-, intermediate-, or long-day types. “The classification refers to how many hours of daylight are needed for the onion to begin to form bulbs,” says Bryant. She says Northeast gardeners tend to grow intermediate or long-day types, which require at least 13 hours of sunlight a day. “Short-day varieties start to form bulbs when they have 10 to 12 hours of daylight” and are suitable for southern regions
How do you plant onions?
Before planting, separate sets to identify those smaller than a penny, if possible. These smaller sets are more likely to put energy into bulb growth rather than flowering. Save the larger sets to grow for their stalks if you have space, and use them as green onions. Separate transplants into the healthiest, greenest plants.
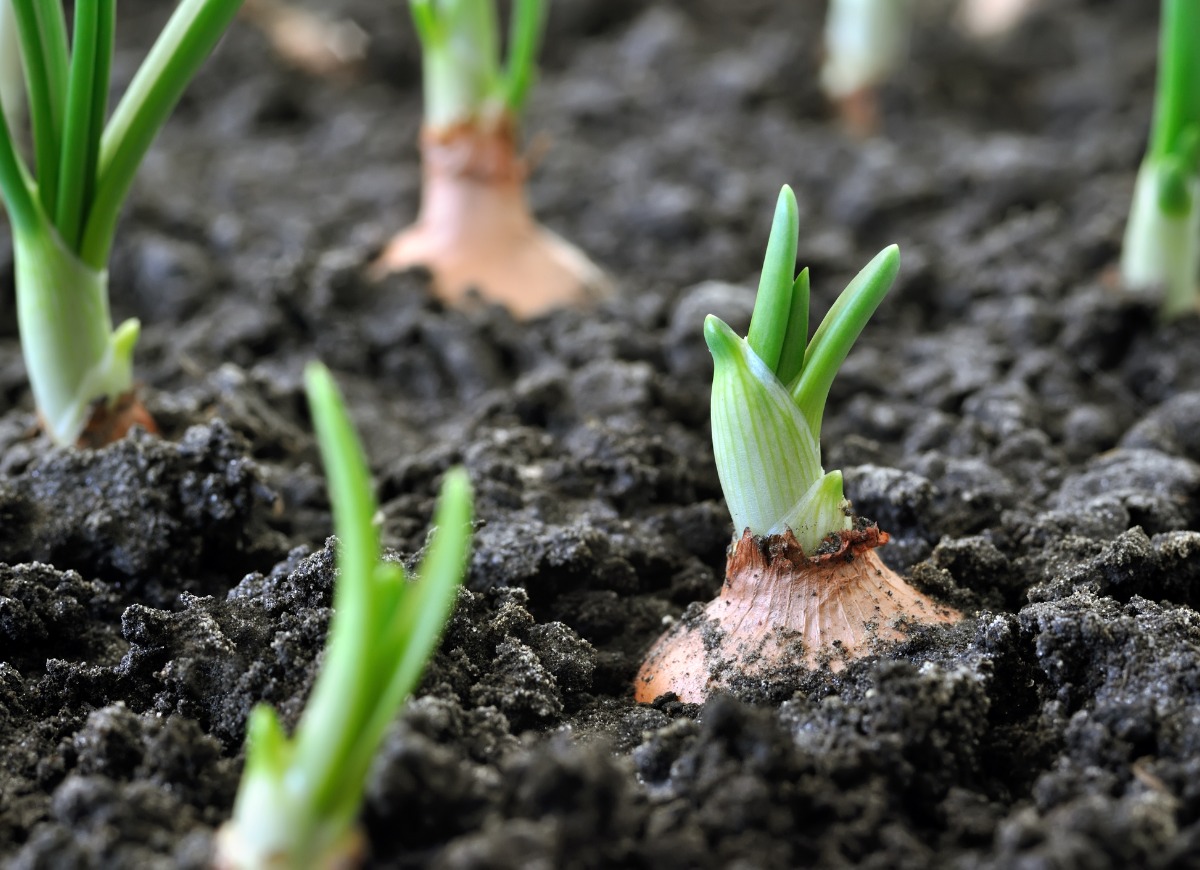
How to plant onion sets
- Create holes in rows that are a foot apart. Make holes 1 to 1½ inches deep and 4 to 6 inches apart within each row (or space as recommended for variety).
- Plant sets with the pointed end facing up.
- Cover each hole with an inch of soil.
How to plant onion transplants
- Space the onions 4 to 6 inches apart in rows that are a foot apart.
- Place each transplant 1 to 1 ½ inches deep and fill the hole with soil.
- Trim the top green stalks if they are long.
How to grow onions from seed
- It’s a good idea to start seeds indoors at least 8 weeks before planting time. “Here in the Northeast, we seed them in the greenhouse in late February or early March and transplant them outdoors 10 to 12 weeks later,” says Bryant.
- Sow seeds ¼ to ½ inch deep in loose seed-starting mix.
- Keep the top layer of soil consistently moist until plants emerge.
- Thin if needed and follow directions for planting onion transplants.
Can you grow onions in containers?
It is possible to grow onions in large containers, such as whiskey barrels or plastic tubs, though containers will not yield as many onions as garden bed rows will. Fill containers with a fertile container potting mix and space onions about 3 inches apart. Use larger raised beds, if possible, especially if ground soil is heavy or too acidic.
Watering Onions
Make sure the onion patch receives at least 1 inch of water per week, either via rainfall or irrigation with a drip system or soaker hose laid beside the rows of seedlings or sets. Because onions have shallow roots, if the soil feels dry down to 1 inch beneath the surface, it is time to water.
Fertilizing Onions
“The onion bed will definitely need fertilizing before planting,” says Bryant. “Some growers will also side-dress or provide a little extra fertilizer 4 to 5 weeks after planting to make sure the plants have the fertilizer they need when they enter a fast growth period,” she adds. Choose a balanced fertilizer (such as 10-10-10) and place it in a narrow band between rows (2 to 3 inches from plants), according to package directions.
Propagating Onions
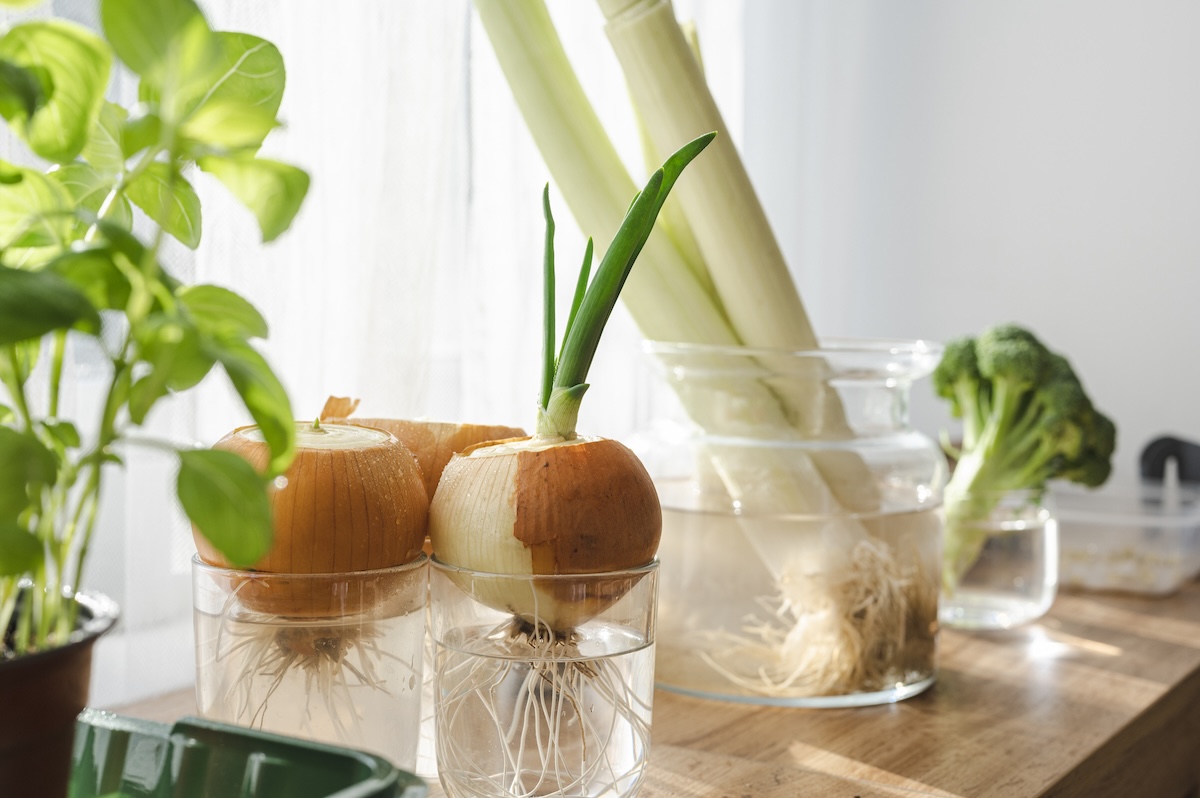
Onions are easy to grow from sets or transplants and inexpensive to start from seed. Some sources outline how to grow onions from onions by planting the bottom of an onion in moist soil or in water to form roots. While this can be a fun indoor gardening project, it is not an effective way to grow onion bulbs. “Growing them from the bottom is an option if you just want scallions, and it would be a fun hobby or science project for kids,” says Bryant. However, you will only get a good yield of bulbed onions for your efforts by starting with sets, transplants, or seeds.
Overwintering Onions
Though some onion varieties are great vegetables for winter storage, and others can even survive outdoors through the cold months. In the South, gardeners can grow short-day onion varieties into winter. Bryant participated in a trial for overwintering onions by seeding them in the fall under tunnels with heavy-duty row cover. The trial showed some success in areas as cold as USDA Hardiness Zone 4b. She recommends it as an excellent school gardening project.
Sowing seeds in August or planting onion starts in October can lead to some success; check with your local extension office for the best overwintering varieties and cold protection in your area.
Safety Considerations
Onions contain N-propyl disulfide, an alkaloid that can poison dogs, cats, cattle, and horses. Cats and cattle are most susceptible, as are some dog breeds (Akitas and Shiba Inus). Signs include vomiting, high heart rate, and anemia. Poisonous effects are also possible in people but depend on factors such as age and the amount of onion ingested.
Potential Pests and Diseases
Onions are generally easy-care edible plants, but they can be subject to a few problems.
- Allium leaf miners can puncture and damage the leaves, which can also lead to smaller bulbs or mushy, inedible parts in the plant. Leaf miners can introduce bacterial and fungal diseases to onions.
- White rot, a fungal disease, causes onion foliage to die back. The affected bulbs are destroyed and have a moldy white or gray fuzz or a crusty covering with black dots.
- Fusarium basal rot turns bulbs brown and watery.
- Black mold can affect growing or stored onion bulbs; look for black discoloration.
- Bolting occurs in reaction to cold weather (less than 45 degrees Fahrenheit). In cold temps, the plant puts energy into flower production, which deteriorates the quality of the bulb.
Removing weeds in the garden or using row covers over young plants can help control leaf miners. Buying certified disease-free sets or seedlings can help prevent white or fusarium basal rot. If white rot occurs, remove and dispose of the infected bulbs. Take care not to wound onions when harvesting to help prevent black mold. Harvest and use bolted onions immediately to preserve the bulb quality.
Planting onions only in well-draining soil and rotating their location in the garden each year can help prevent diseases. Finally, do not hill up onions (pile soil up around the base of the plant) as advised by some sources. “It can put too much moisture around the neck of the plant and increase the risk of a disease or disorder,” says Bryant.
Harvesting Onions
Onions are not among the fastest-growing edibles, however, they store well. Harvesting and storing onions carefully can prevent potential problems like black mold and extend their storage life.
When is the best time to harvest onions?
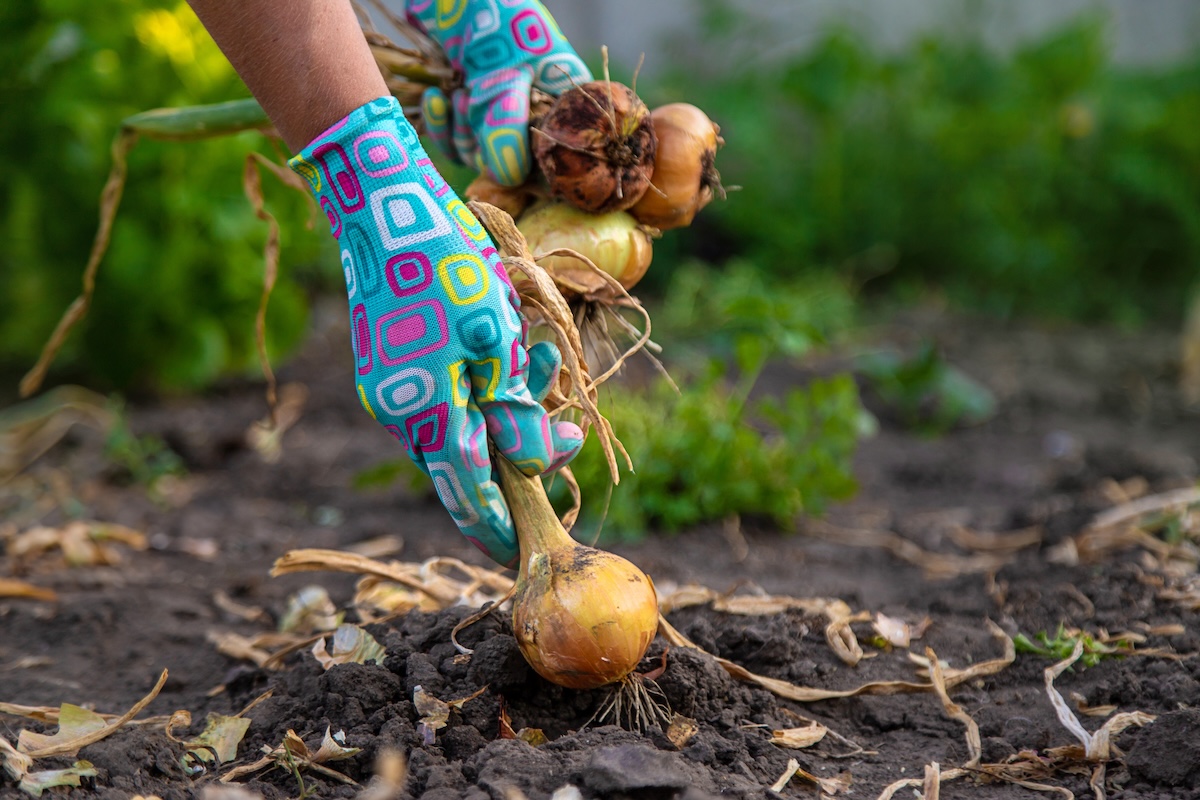
Onions typically take from 85 to 120 days to grow and form mature bulbs, but this time varies by type. “Onions are great because they tell you when they are ready for harvest by laying over on the ground,” says Bryant. Wait to harvest until at least two-thirds of the dried top leaves are laid over.
How do you harvest onions?
The key to harvesting onions that will store well is to pull or dig them up carefully and allow them to dry (cure) before storing the bulbs.
- When tops are laid down, carefully pull the onion up or dig it up by pushing a trowel or shovel down into nearby soil to loosen the bulb from the bottom without damaging it.
- Do not cut the tops when harvesting.
- Lay harvested onions out in the field to dry or in a well-ventilated attic or porch out of direct sun for up to 2 weeks to begin curing.
How do you store onions?
“In a perfect world, onions should be allowed to dry for 2 weeks at 75 to 80 degrees Fahrenheit and 70 to 80 percent relative humidity,” says Bryant. But she says in dry weather, a picnic table under a tree can work for curing onions. “If it’s rainy, the best place may be your garage or a sunporch,” she adds.
After they’ve cured, brush the remaining dirt off your onions and cut off their dried tops to about 1 inch above the bulb before storing them in mesh bags. Bryant says to cool cured onions slowly. Store onions in conditions where the temperature remains cool but above freezing, preferably at 32 to 45 degrees Fahrenheit. A root cellar, an unheated basement, or an unheated garage can work well. Do not refrigerate onions.
