We may earn revenue from the products available on this page and participate in affiliate programs. Learn More ›
Chances are the phrase “eat your peas” sounds familiar. But if the only thing that comes to mind are the mushy, canned variety, prepare to be converted. Fresh peas right off the vine taste nothing like their mass-produced cousins. They’re full of flavor, crisp, and in some cases they’re as sweet as candy.
The good news is that peas also are incredibly easy to grow and do well in cool weather, so they are often planted during shoulder seasons when other veggies are already fading or unable to start. This guide to growing peas will have you embracing peas on your plate again.
Growing Peas at a Glance
Common Name: Pea, Garden Pea, Snap Pea, Sugar Pea, Snow Pea
Scientific Name: Pisum sativum
Hardiness Zone: 2 to 11
Soil: Rich, quick-draining soil, pH 6 to 7.5
Light: Full sun
Water: Regular, even
Food: Little to none
Propagation: Sow directly in soil
Safety: Edible, nontoxic
Pea Characteristics
Peas are lovely vining plants that are easy to grow in nearly any climate. Their vines range in size from 2 feet long to several feet high. Unlike other vegetables, the plants can tolerate quite a bit of cold and fog, so peas are an excellent cool-season crop and an attractive addition to a fall vegetable garden.
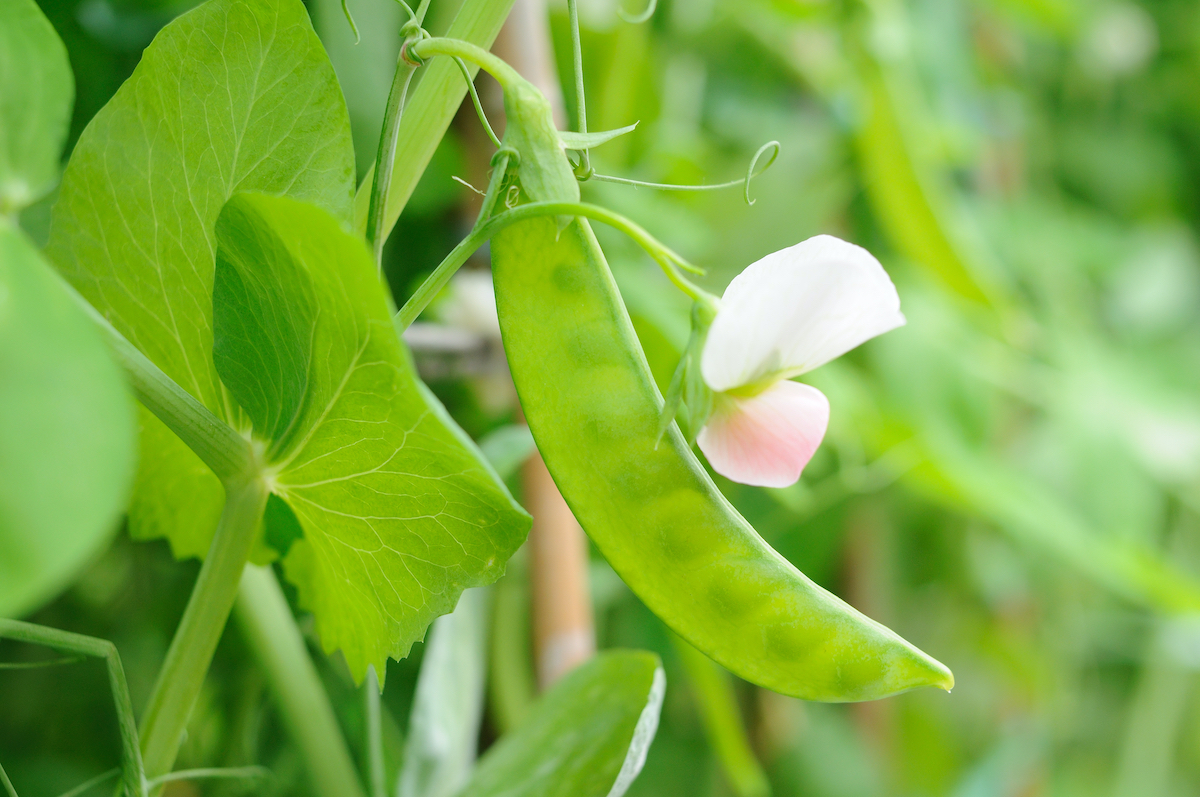
There are two different categories of peas: shelling peas and edible-pod peas. Shelling peas are usually called garden peas, and they require growers to open the pod (shell) to harvest the peas, and then discard the shell. Edible-pod peas include snap peas and snow (or sugar) peas. Snow peas are flatter than snap peas. The entire pea, including the shell, is edible.
If you’re wondering “is a pea a vegetable?” the answer is yes and no. Peas are legumes, though the fresh and frozen peas are considered starchy vegetables. No matter what you call it, nearly all of the pea plant is edible including the shoots, leaves, flowers, and pods.
Recommended Pea Varieties
- Sugar Snap: sweet-tasting edible pods; eat right off the vine
- Little SnapPea Crunch: a small, crisp variety of snap pea great for containers
- Snowbird: A very early, cold-tolerant, dwarf snow pea
- Mammoth Melting Sugar: A large edible, sweet snow pea
- Lillian’s Caseload: Excellent taste, high-yield shelling pea
- Sugar Magnolia: Shelling pea with purple pods and bright green peas
- Lincoln: High-yield shelling pea, heat tolerant
- Little Marvel Garden Pea: Hardy, compact, high-yielding shelling pea
RELATED: 14 Wise Ways to Weatherproof Your Garden
Planting Peas
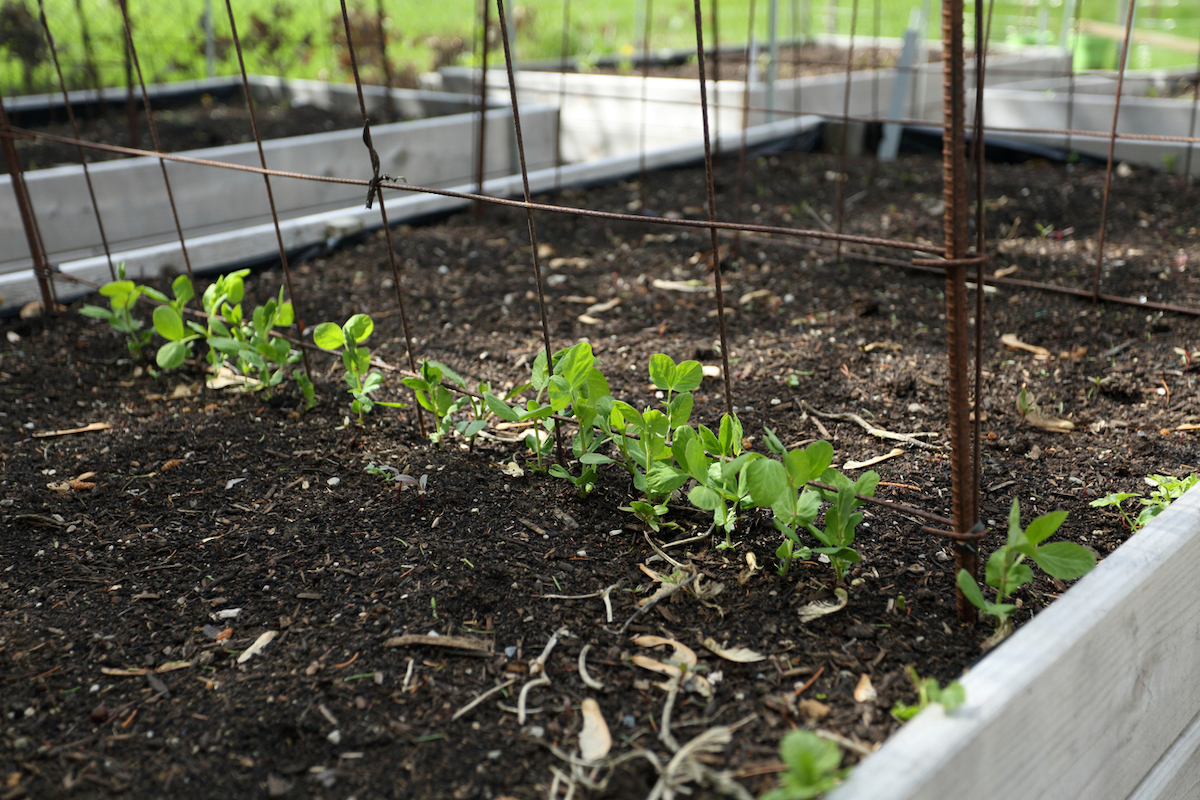
Peas do best sown directly in the ground. Starting peas indoors is usually not worth the effort since peas like cool weather and are usually the first crop to go in and their roots don’t take kindly to transplanting. The most important thing when planting peas is giving them some kind of support, such as a trellis, on which to grow. A trellis might be as simple as a garden string fashioned between two stakes. Even bush varieties need some trellis support.
When is the best time to plant peas?
When to plant peas will depend on your climate. Peas don’t like temperatures above 85 degrees, so they are considered a cool-season crop. In areas with cold winters, peas can be the first crop sown in early spring, as soon as the soil is workable. For fall crops, plant up to 12 weeks before the first expected frost date.
In climates with milder winters, plant anytime from fall to early spring; however, if you live in a climate where springs turn hot (above 85 degrees) quickly, avoid planting too late. Most peas take 60 to 70 days to mature.
Where can peas grow?
Choose a place in your garden with full to partial sun and good airflow. Garden peas are climbing vegetables that require support as they grow but be mindful of planting along a fence that doesn’t allow for air circulation. Not enough circulation leads to powdery mildew.
Garden peas can tolerate various soils as long as there is adequate drainage. Enrich the soil with compost to create a nutrient-dense planting mix. You can maximize garden space by planting a tall, vining pea plant that will climb up a pole, and planting microgreens in its shade, not unlike companion planting with cucumbers and salad greens.
How do you plant peas?
Planting peas is rewarding as most pea seedlings germinate within 1 to 2 weeks.
- Plant seeds at the base of a trellis. How high will depend on the type of pea you’ve chosen.
- Dig a narrow, shallow trench, about 1½ inches deep.
- Plant the seeds 6 to 7 inches apart in the trench unless the seed packet suggests otherwise.
- Press the seeds into the trench and cover them with 1 inch of soil.
- Gently tap the soil to firm it over the seeds.
- Water carefully to avoid flooding and dislodging the seeds.
- Keep the soil evenly moist.
- Once the pea seedlings are several inches high, you can mulch around the base of the plant to keep moisture in.
Can you grow peas in containers?
In general, peas do not put down deep roots. The plants, especially the dwarf or bush variety, do not grow very tall. For these reasons, it is possible to successfully grow them in a container. The biggest challenge is to ensure that the soil is both rich in nutrients and drains well. Some kind of trellis or support will need to be added to allow the peas to grow up and not simply vine over the sides. It’s advisable to set the trellis in place before the peas start to grow.
RELATED: 10 Tips for Turning Your Yawn of a Yard into an Incredible Edible Landscape
Watering Peas
Avoid overhead watering—water peas at the base of the plant, keeping the soil evenly moist. Watering in the early morning will help prevent wilting during the day and allows plants to dry out before cooler evenings, helping to prevent powdery mildew. Be careful not to flood out delicate pea seedlings.
Fertilizing Peas
If peas are planted in a compost-rich planting mix, no fertilizing is required during the growing season. If the soil is lacking in nutrients, fertilize pea plants 6 weeks after germination with a water-soluble fertilizer (10-10-10) and apply directly to the soil after watering in the morning.
Some growers choose to inoculate peas with Rhizobium, a bacterium that helps fix nitrogen from the air to store in the roots, resulting in a healthier, more vigorous plant. Look for a pea inoculant at any garden center or nursery. Prior to sowing the seeds, sprinkle a small amount of the inoculant directly into the seed packet and shake it. Many seed varieties will already be inoculated and will say so on the package. Peas will grow and produce without inoculation.
Safety Considerations
Nearly all parts of the pea plant, Pisum sativum, are edible and pose no risk to animals or humans. However, it should be noted that sweet pea plants, Lathyrus odoratus, which are grown for their flowers, are toxic to humans, dogs, cats, and horses. The seeds of the sweet pea are poisonous. To make matters even more confusing, there is an edible sweet pea variety called Lathyrus sativus, which can be consumed but should be avoided in large quantities.

Potential Pests and Diseases
Pea seedlings are susceptible to slugs and snails. Because peas can be grown during cooler months, this is often a bigger problem in early spring or fall weather. Aphids can cause damage to plants, though not often the pods, and spread disease.
Powdery mildew is a common problem in the vegetable garden and pea plants are no exception. If caught early, the affected leaves can be removed to prevent spread. If it’s already started to spread, either wait until the peas mature, harvest the peas and then remove the plants, or pull out the diseased plants right away to prevent spreading. There are fungicides for powdery mildew, but it is difficult to spray the plants without coating the edible pods, and it is not generally advisable.
RELATED: Everything You Need to Start a Raised-Bed Garden, According to a Seasoned Gardener
Harvesting Peas
Knowing how to grow peas is a great start, but understanding how to harvest and store them also is helpful. Harvesting peas of any variety requires similar steps; however, the type of pea you’ve planted will dictate the pea’s readiness for harvest as well as how you store the pea.
When is the best time to harvest peas?
Peas typically mature between 60 and 70 days after planting, though the exact time to maturity depends on the variety—this will be listed on the back of your seed packet. Most pea plants will begin to produce pods within 8 to 10 weeks. The pods first appear at the bottom of the plant. Harvest these right away to encourage more growth and pod production. Look for pods that are plump but not hard. If peas over-ripen, they become starchy and the shells become tough.
How do you harvest peas?
Harvesting garden peas of any variety requires similar steps; however, the type of pea you’ve planted will dictate the pea’s readiness for harvest.
Snow peas are best when still flat, with just the beginning of peas forming inside. Sugar snap peas are at their sweetest when the pod looks plump and glossy, typically when the pods are 2 to 3 inches long, but the length varies depending on the exact variety. Garden peas are best when the peas are large but not fully developed. Look for pods that are full but not split or ready to burst. They will be somewhat cylindrical and still bright green.
- Look for peas that are at peak readiness. Peas produce a lot of pods, and it won’t take long to learn the ideal stage for harvest once you’ve picked a few.
- Harvest peas any time of the day, but morning is best, when they are plumpest.
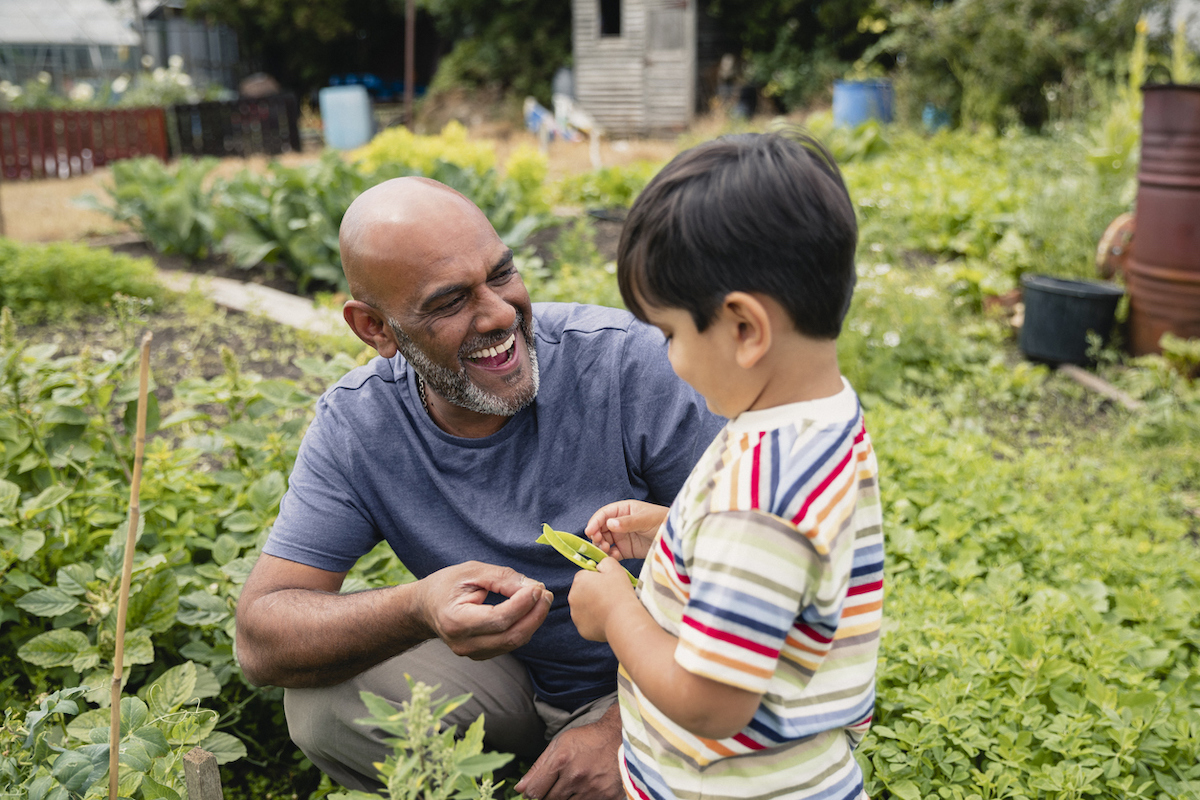
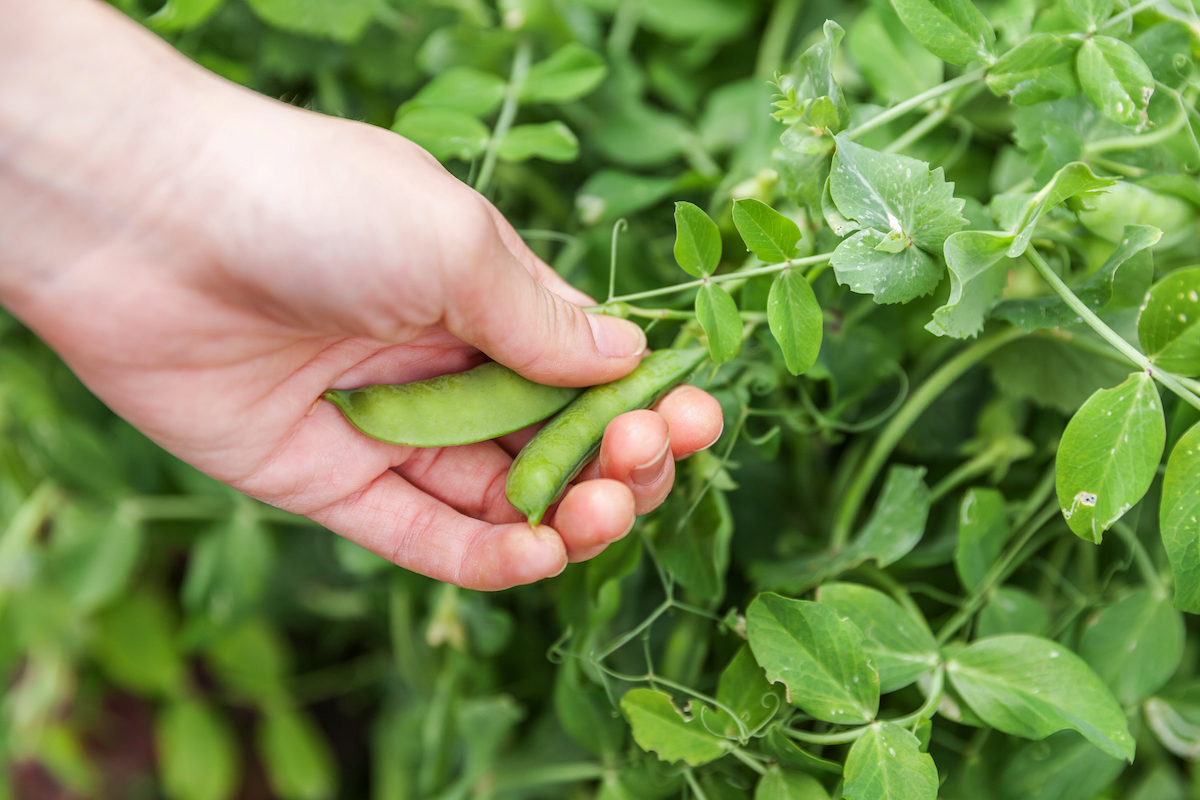
- All types of pea plant are delicate, so be careful when harvesting them. Try twisting the pod gently with one hand while holding the vine with the other, or use scissors or garden shears to remove the pods to avoid breaking the vine.
- Peas are best when eaten right away.
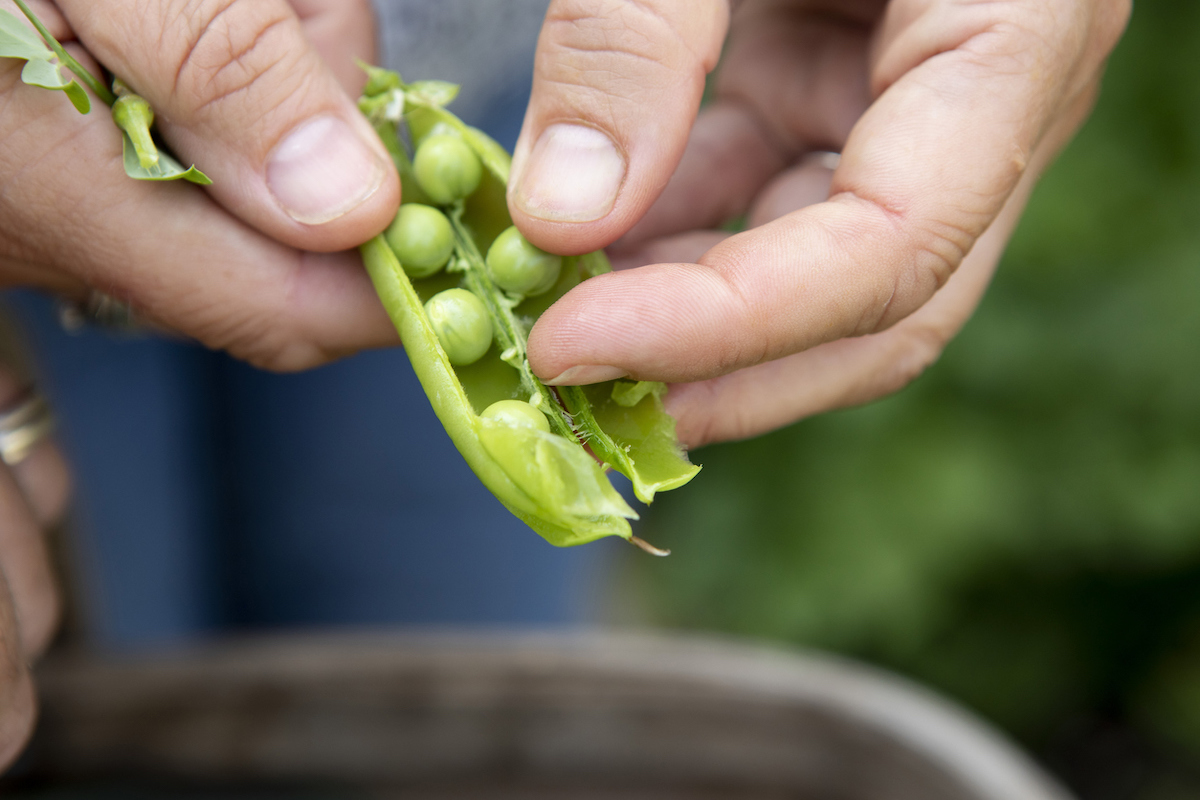
- Shell garden peas by splitting them open and gently scraping the peas inside into a bowl.
- Some snow peas and snap peas have fibrous strings at the edge of the pod that should be removed before eating. If you plan to store your peas, wait to remove this.
How do you store peas?
If you are storing garden peas, shell the peas and then immerse them in cold water to chill. Some gardeners will shell their peas directly into a bowl of chilled water. Once they are cool, remove them from the water, allow them to dry, and store them in the refrigerator in a bag or container. They should hold their quality for up to a week in the refrigerator.
You can also freeze peas following the same method, allowing them to dry completely before freezing. Don’t freeze whole garden peas; always shell them first.
Snow peas and snap peas should be cooled right after picking. Dunk them in cold water, allow them to dry, and store them in the refrigerator for up to a week. Both have fibrous strings at the edge of the pod that should be removed before eating, but leave them intact until you are ready to eat them. You can freeze snow and snap peas similarly to garden peas after cooling the pods and allowing them to dry.
If storing dried peas, particularly toward the end of harvest season, allow the pea pods to dry completely on the vine. They will start to brown and will sound like a rattle. Once the pods appear dry, pull the entire plant up and hang it to dry. Once the rest of the plant has dried out, remove the pods, shell the peas inside, and store for planting next year.