
We may earn revenue from the products available on this page and participate in affiliate programs. Learn More ›
Knitting is a fun and productive pastime—not only is the process itself meditative, but when done right, it should end with a lovely handmade item. However, learning how to knit for beginners can feel daunting. With all the talk of casting on, purling, tension, casting off, and more, knitting sounds like a complicated hobby. But in reality, almost anyone can learn how to knit.
We break down basic knitting terminology and stitches in this step-by-step guide to knitting right-handed in the English style. Learn to knit with the handy information ahead.
Important Knitting Tools and Materials
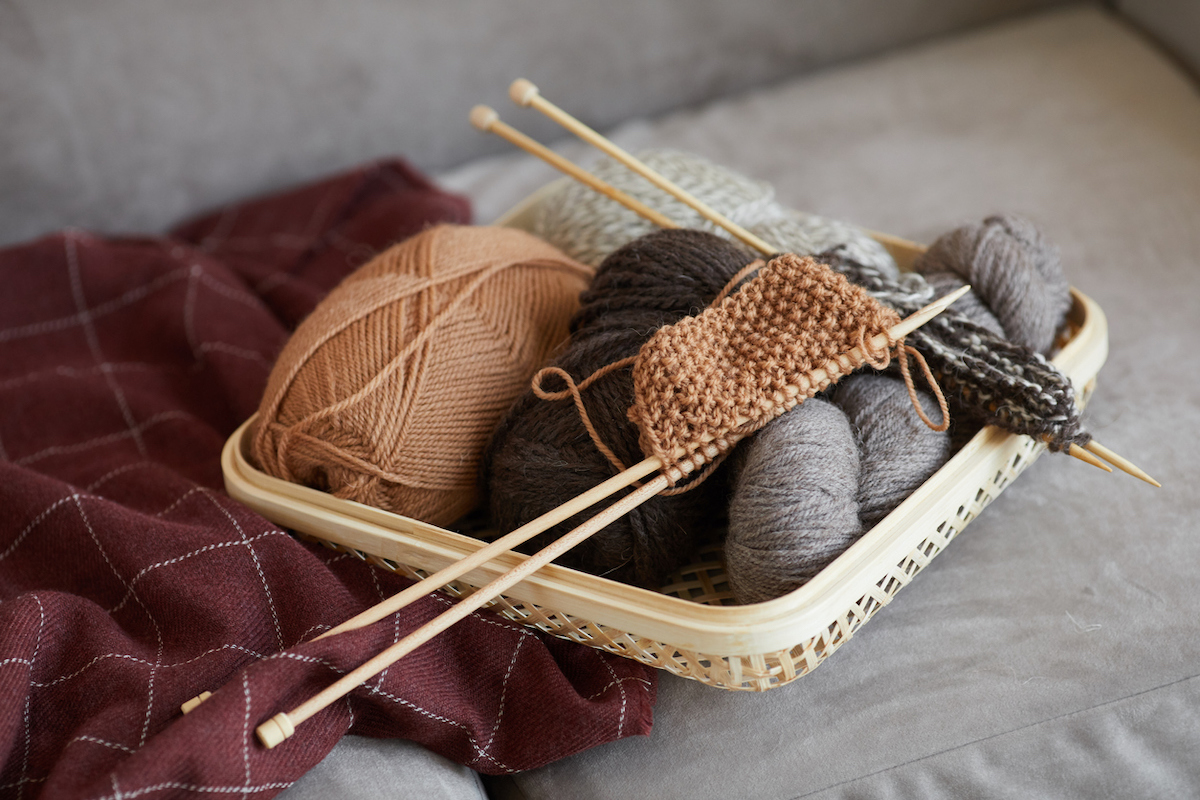
Learning to knit is an accessible hobby because of its low-cost materials and free learning resources. Knitting doesn’t require many tools, and the basic ones are often widely available at craft stores and other retailers. Besides a set of knitting needles and yarn, there are a few useful items to have on hand, including scissors, a crochet hook, and a darning needle. More experienced knitters may also like to keep a few more tools, like a yarn winder, stitch markers, row counter, yarn swift, knitting gauge ruler, or blocking mats, on hand. Before continuing to the knitting tutorial, here are the tools and materials you should know about first.
Knitting needles
There’s no knitting without knitting needles! Knitting needles come in various materials and sizes (or needle thicknesses). Common sizes range from US size 0 to 50 (or 2 to 25 millimeters in diameter), though both smaller and larger needles are available. Straight medium-sized knitting needles are easy to handle for beginners. Consider choosing US size 6 to 8 (or 4 to 5 mm) needles to start.
Common knitting needle materials include metal, wood, bamboo, and plastic. Many beginners will find wood or bamboo needles the most comfortable to use. They grip yarn better than metal and plastic needles, giving new knitters more control. We recommend these 9-inch single-pointed bamboo knitting needles from Clover, which are a US 8 (5 mm) size.
Yarn
Part of the fun of knitting is shopping for yarn, which is available in a wide range of colors, textures, materials, and weights. There are eight standard yarn sizes, starting at lace (0) and reaching up to jumbo (7), with many projects calling for in-between weights, often light (3) or medium (4) yarn.
Generally, medium-weight yarn is the ideal beginner knitting yarn. Delicate, fluffy, or slippery yarn is harder to work with, so choose a smooth-textured yarn, such as easy-to-find and affordable acrylic yarn. Choose a lighter color for a first-time project, which will make it easier to see each individual stitch. We recommend our favorite acrylic yarn pick, Caron Simply Soft Yarn, from our guide to the best yarn for DIY projects.
Scissors
It’s rare that a knitting project will use exactly one ball of yarn, so scissors are necessary to snip off the excess. Virtually any pair of scissors will do just fine, but consider using the crafting or embroidery scissors from this BambooMN set, the budget pick in our guide to the best all-purpose scissors.
Crochet hook
A crochet hook for knitting? As it turns out, a crochet hook is the perfect tool for picking up “dropped stitches,” or stitches that fall off the knitting needle. You won’t need many crochet hooks to start, so something like this Boye 5.75-mm aluminum crochet hook should help you pick up any dropped stitches on beginner projects.
Darning needle
Most knitting projects require some tidying up at the end, which usually involves weaving in loose strands of yarn, or “weaving in the ends.” Darning needles (also known as tapestry or yarn needles) are larger than sewing needles and are made to fit a piece of yarn through the eye rather than thin sewing thread. They have a blunt tip and are made of metal or plastic with a straight or slightly bent tip. Either type will work for beginner knitters, and most will choose one based on personal preference.
Stitch markers
Stitch markers aren’t a necessity when learning how to knit, but they’re very useful when moving onto bigger projects. As the name suggests, they’re used to mark individual stitches in a knitted project. This makes stitch markers useful for keeping count of stitches, signaling a color change, stitch type change, or an increase or decrease in stitches.
How to Hold Knitting Needles and Yarn
Before getting into the actual knitting instructions, it’s important to learn how to hold the knitting needles and yarn. There are two common ways to hold knitting needles: the pencil grip and knife grip. Knitters choose based on personal comfort.
- Pencil grip: Hold each needle like a pencil, gripping it gently between the thumb and index finger and resting it against the middle finger.
- Knife grip: With the knife grip, hold the needles as if they are a fork and knife, with the palms facing down. The needles should rest between the thumb and index fingers, with the rest of the fingers wrapped gently around each needle.
There are also many ways to hold the yarn. For beginners learning the English method (which is the method we outline in this guide), weaving the yarn through the fingers on the right hand can help control the knitting tension. To hold the yarn, weave the working yarn through the fingers of the right hand: on top of the index finger, below the middle finger, on top of the ring finger, and below the pinky finger.
As an aside: knitting tension refers to how loose or tight the stitches are when knitting. After practicing for a while, most knitters naturally figure out a tension that feels “just right”. Good knitting tension isn’t too tight (which makes it hard to insert the knitting needle) or too loose (which can cause the yarn to fall off the needle or cause gaps in the knit work). Practice makes perfect when it comes to tension.
Slip Knot Basics

The first step of knitting is getting the yarn onto the needle, which is also called “casting on.” There are many ways to cast on, but this guide will use the single cast on method, one of many cast-ons that starts with a slip knot.
To start making a slip knot, unravel the yarn skein a bit. About 6 inches from the end of the yarn, create a loop with the tail end of the yarn (the part of the strand that leads to the end) on top of the working yarn (the part of the strand that leads to the yarn ball).
Hold the loop in place with your left index finger and thumb. With your right hand, insert your index finger and thumb through the loop from behind. Use your fingers to grab the tail end of the yarn, a bit below your other fingers that are holding the loop. Pull the newly-grabbed yarn through the loop. While doing so, loosen your left hand’s grip on the loop and use it to pull down on the tail end of the yarn. This will create the slip knot. Lower the loop down onto one knitting needle and pull on the working yarn to tighten it on the needle.
1. Cast On

After making a slip knot and putting it on the needle, we’ll start with a single cast on. Hold the knitting needle in the right hand and the working yarn in the left hand. Make a thumbs up gesture with the left hand. The working yarn should be held inside the four fingers. Loop the section of yarn between the hand and the knitting needle around the thumb, in a clockwise direction.
Place the point of the needle at the base of the thumb, on the palm side. Slide it upwards until it slips under the front piece of the yarn looped around the thumb. Continue moving the knitting needle upwards to pull the loop off the thumb and transfer it onto the knitting needle. This is one cast on stitch! Repeat the process until the desired number of stitches is reached. Keep in mind that the slip knot counts as one stitch.
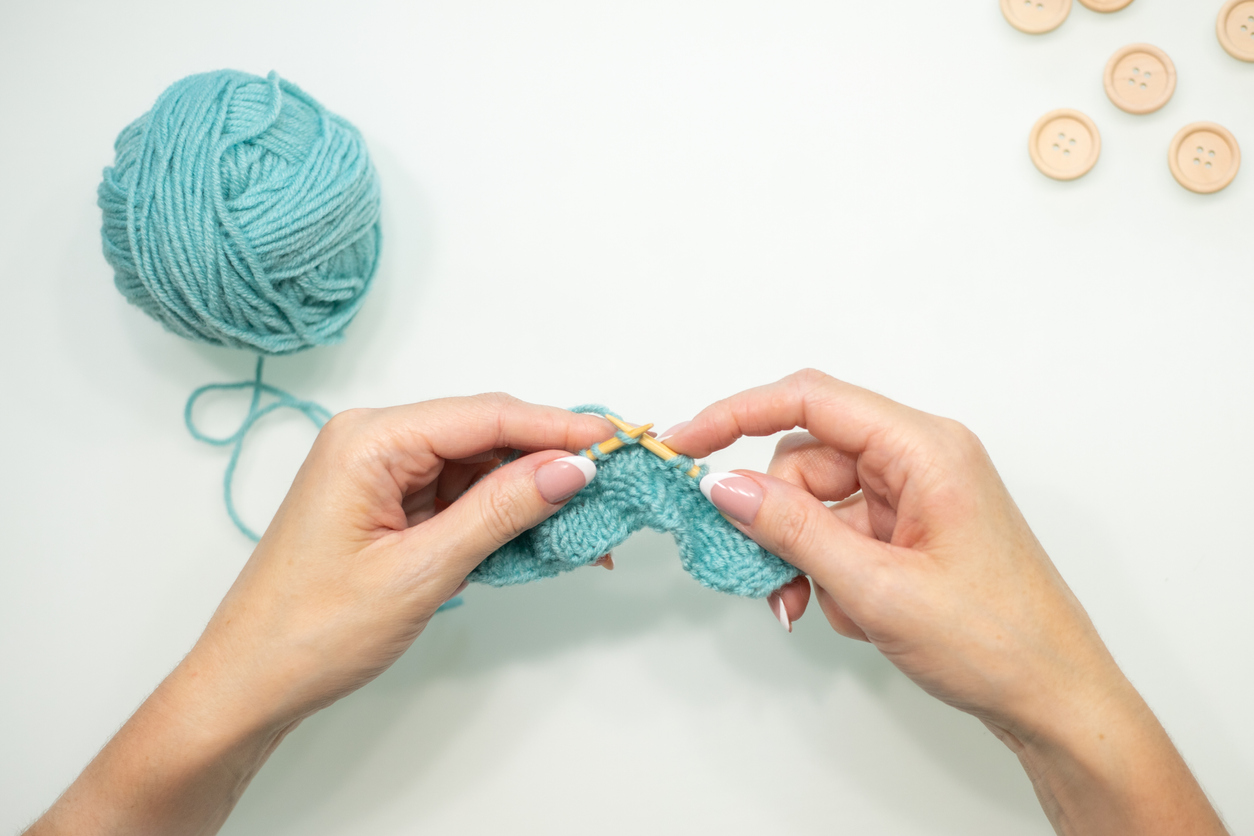
2. Knit Stitch
As the name suggests, this simple stitch is the foundational stitch for knitting. To knit stitch, hold the needle with the cast on stitches in the left hand and the empty needle in the right. Insert the needle into the first stitch (the stitch closest to the needle point) from bottom to top. Make sure the right needle is under the left needle.
Use the right hand to grab the working yarn and wrap it around the right needle from back to front (or counterclockwise) to create a loop around the right needle. Pull the right needle downward and use the needle point to pull the newly created loop through the stitch. The right needle should now be in front of the left needle with the new loop. Imagine this next step as a way of transferring the loop from one needle to the other. Slide the right needle up until the stitch slips off the left needle. This completes one knit stitch.
Repeat these steps until all the stitches are off the left needle and on the right needle. That makes one row! At the end of each row, it’s important to “turn” the work by passing the needles with all the stitches on it back over to the left hand. Repeat the entire knit stitch process to knit more rows.
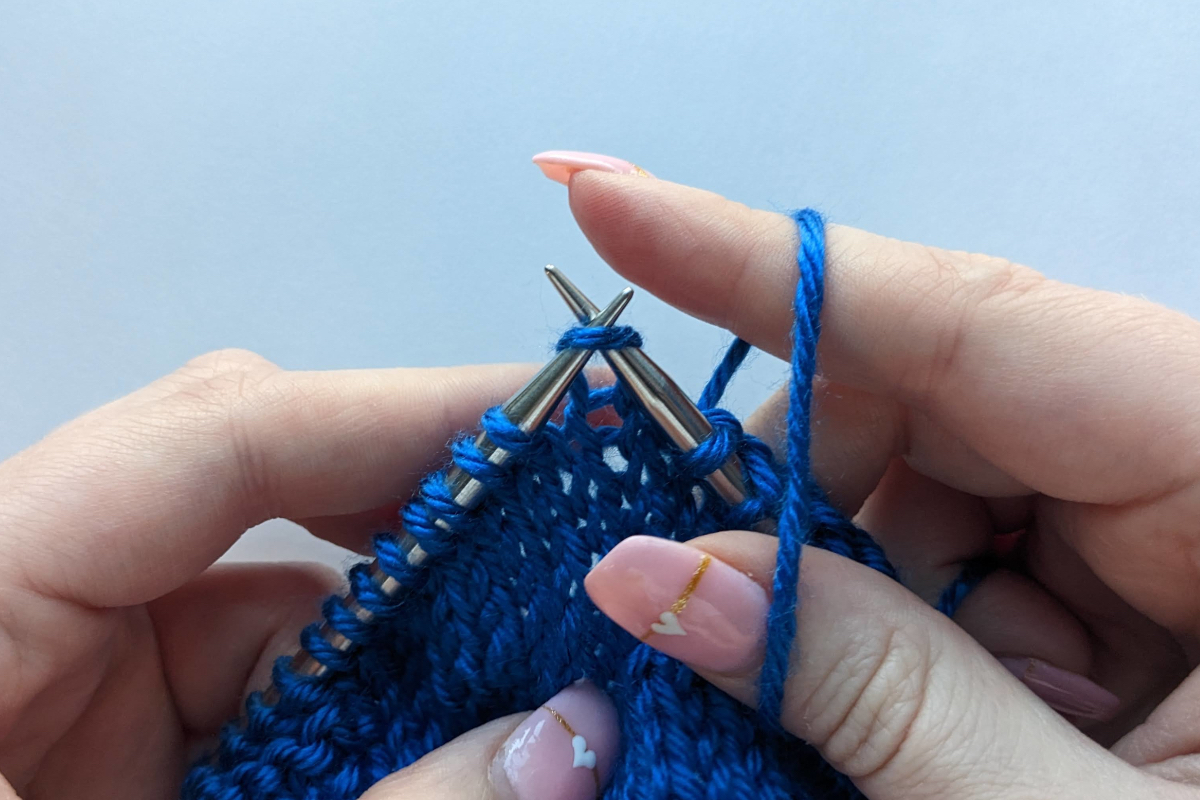
3. Purl Stitch
A purl stitch is very similar to a knit stitch—it’s essentially just the knit stitch but backwards. Start with the needle with the project on it in the left hand and the empty needle in the right hand. Make sure to keep the working yarn in front of the needles when doing a purl stitch. To start, insert the needle in the right hand through the first stitch of the needle in the left hand, from top to bottom. The needle in the right hand should be in front of the needle in the left hand.
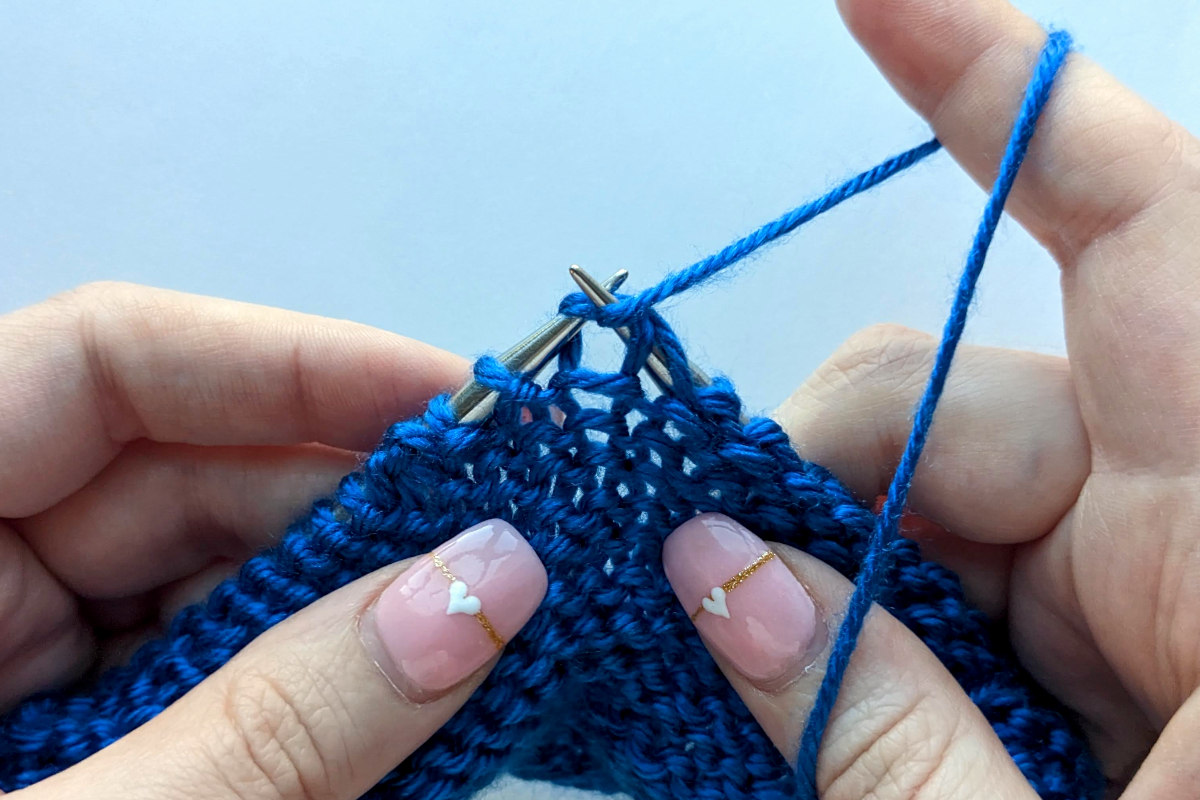
Use the right hand to wrap the working yarn around the right needle, back to front or counterclockwise. Pull the right needle downwards and pull the yarn through the stitch on the left needle, this time in an upwards motion to get it through the loop. The right needle should now be behind the left needle with the new loop. Slide the right needle up until the stitch slips off the left needle to complete one purl stitch. Repeat these steps until all the stitches are off the left needle and all on the right needle. This makes one purl row. Turn the work before starting on a new row.
4. Stockinette Stitch
The stockinette stitch is one of the most common knitting stitches. It’s an easy but beautiful stitch that creates the knit look we’re accustomed to in clothing and accessories. It creates V-shaped stitches. The side with the V-shaped stitches is referred to as the “right” or the knit side (it’s the decorative side that faces outwards). The “wrong” side or the purl side is the back side and looks like small, bumpy stitches.
The stockinette stitch is easy to do, even for beginners! It requires alternating rows of knit and purl stitches. To knit the stockinette stitch cast on as usual and knit all the stitches on row one using the knit stitch. On row two, purl all the stitches. Repeat this process, knitting odd-numbered rows and purling even-numbered rows, until the project reaches the desired length. Cast off as usual.
5. Cast Off
The opposite of casting on, casting off (also called binding off) is the process of getting the finished work off the needle. Don’t be tempted to just pull the project off the needle; it will end up unraveling. While knowing how to cast off when knitting isn’t the last step of a project (washing, blocking, or other final touches may be needed), it’s an important that requires as much patience and care as casting on.
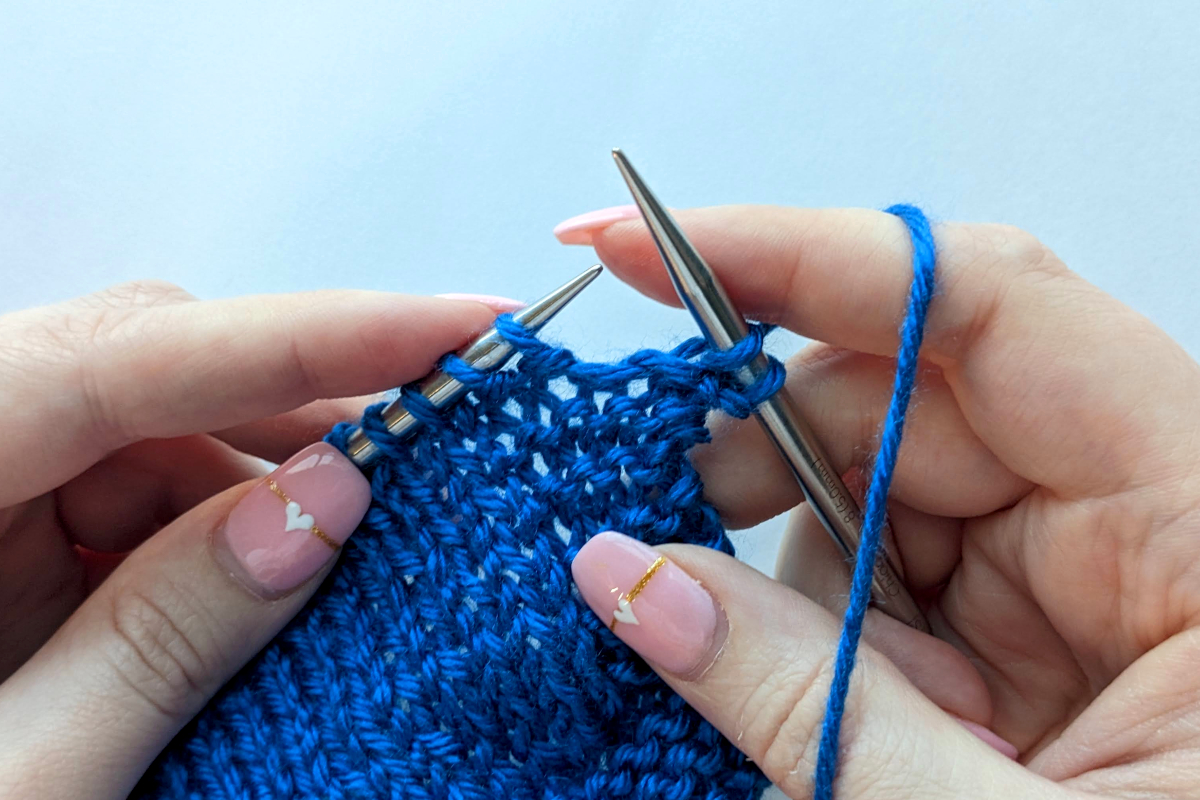
To cast off, knit the first two stitches on the work as normal. There should be two stitches on the right needle and the rest of the project remaining on the left. Then, use the left needle to transfer the lower stitch (the one furthest away from the needle point) over the top stitch (the stitch closer to the needle point) on the right needle. To do so, enter the point of the left needle, from top to bottom, into the lower stitch of the right needle. Pull this grabbed stitch over the top stitch by moving the left needle towards the point of the right needle and dropping the grabbed stitch. This step should now leave one stitch on the right needle. This is one casted off stitch.
To cast off the next stitch, knit one more stitch as usual. Then, repeat the process, transferring the lower stitch over the top stitch on the right needle and dropping it off. Repeat these steps until there is only one stitch left on one needle. Take a pair of scissors and cut the working yarn, leaving about a ten-inch tail from the project. Thread the tail through the final loop left on the knitting needle. Pull the loop off the needle and pull on the tail end of the yarn to tighten the final knot. Use a darning needle to weave the tail into the project.
6. Pick Up a Dropped Stitch
When a stitch falls off the knitting needle, it’s called a dropped stitch. A dropped stitch doesn’t need to derail the entire project! It’s usually easy to spot a dropped stitch—it will look like a gap in the knit pattern. It often looks like a ladder with a rogue loop hanging out at the bottom. That loop is the key to picking up the dropped stitch.
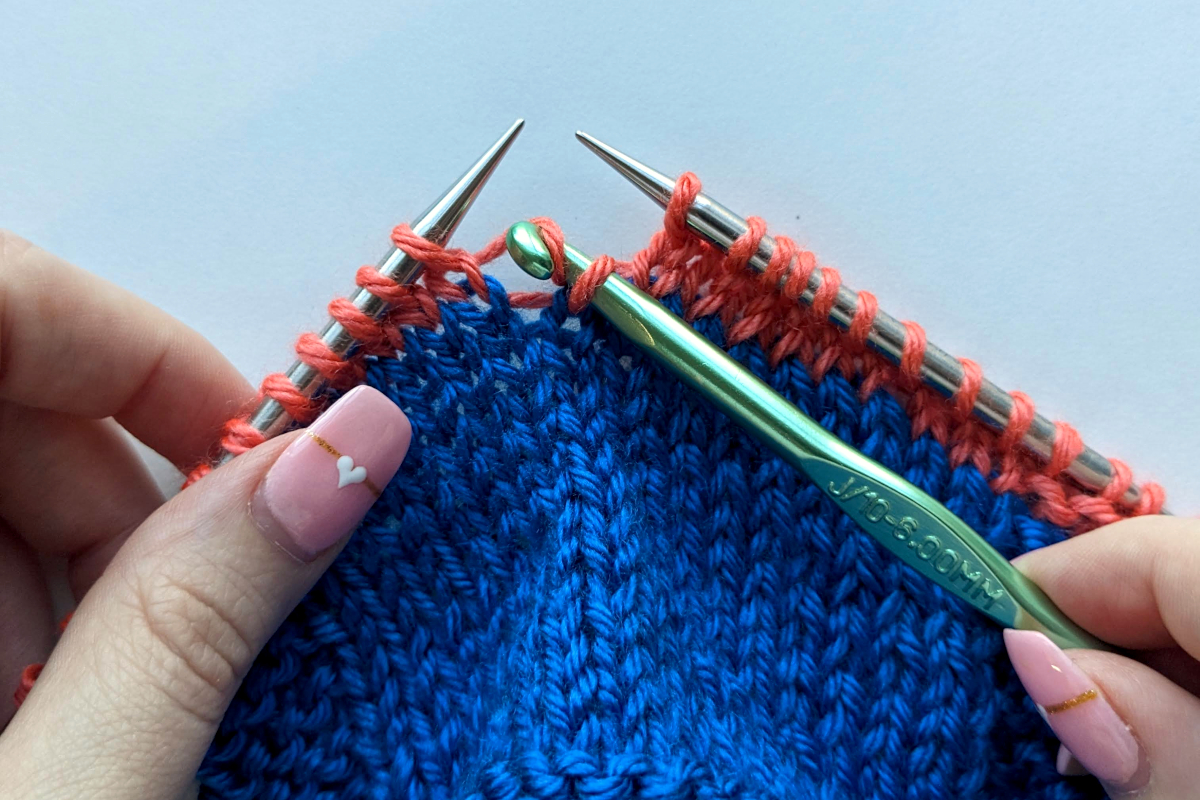
A crochet hook is the perfect tool for picking up a dropped stitch. Follow these steps to pick up a dropped stockinette stitch. Working on the knit side, knit until the spot where the dropped stitch is located. Carefully put the knitting needles down and insert the crochet needle front to back into the loop of the dropped stitch. Use the crochet hook to grab the loose piece of yarn directly above the loop (the next “rung” of the ladder, if that is how it looks) and pull it through the loop. Repeat this process, pulling the next loose piece of yarn through the loop until reaching the top. Then, place the loop on the left needle by placing the left needle from front to back through the loop. Continue to knit as normal.
FAQ About Knitting
While this knitting for beginners guide covers the basic knit stitches and knitting process, new knitters might still have a few questions. It takes practice to become a seasoned knitter, after all! We’ve answered some frequently asked questions about knitting ahead.
Q. What’s the easiest thing to knit for beginners?
It can be hard for beginners to think of things to knit that are simple but still useful and nice-looking. Pretty much any item that is a flat square or rectangular is great for a first-time project. A few easy things to knit include coasters, placements, pot holders, and scarves.
Q. What are the three basic steps in knitting?
The three basic steps in knitting are casting on, knitting, and casting off.
Q. Is knitting a talent or a skill?
Knitting is a skill that anyone can learn. While some knitters might have an easier time learning new stitches or creating patterns, learning the basic stitches comes down to practice and patience.
Q. Can I teach myself to knit?
Absolutely! Anyone can take advantage of free how-to knitting guides and videos online to learn to knit.
Q. How long does it take to learn to knit?
Most new knitters can learn the basic knitting fundamentals in this guide in a few hours.
Q. What kind of knitting needles are best for beginners?
Beginners should use a straight medium-sized pair of knitting needles (US size 6 to 8, or 4 to 5 millimeters in diameter). Any material is fine, but wood and bamboo offer a bit more grip to prevent the yarn from slipping off the needles, which is a common problem for many beginners.
RELATED: 15 Crochet Patterns for Beginners
