
We may earn revenue from the products available on this page and participate in affiliate programs. Learn More ›
Many homes have brick facades, fireplaces, mantels, interior walls, and walkways. Although it’s a long-lasting building material and your brick may still be in good shape, it may have started to look tired or you may crave a different aesthetic. Fortunately, there are several options for updating the appearance of brick, including painting, whitewashing, limewashing, German smear, and staining.
While painting brick is more common, staining is an alternative worth considering. When weighing the relative merits of brick stain versus paint, there are several factors to take into account. One advantage of staining brick is longer-lasting color lasts because the porous bricks absorb the stain. Because it doesn’t create the smooth coat that paint does, brick stain also preserves more of brick’s natural look. Stain doesn’t offer the same range of color options as paint, but there’s still a sizable number of interior and exterior brick stain colors to choose from.
Keep reading to learn how to stain brick and give the brick surfaces in your home a face-lift.
Tools & Materials
Bobvila.com may earn a commission from purchases made through these links.
- Paint sprayer (optional)
- Mortar mix (optional)
- Painter’s tape
- Concrete and brick stain
- Wooden paint stirrer
BEFORE YOU BEGIN
Gather all of the necessary materials ahead of starting your brick stain project. If you don’t know where to buy brick stain, check at your local home improvement store. You can also find stain for brick online through large retailers like Amazon, The Home Depot, and Lowe’s.
RELATED: The Best Paint for Brick Fireplaces
STEP 1: Check the brick for sealer.
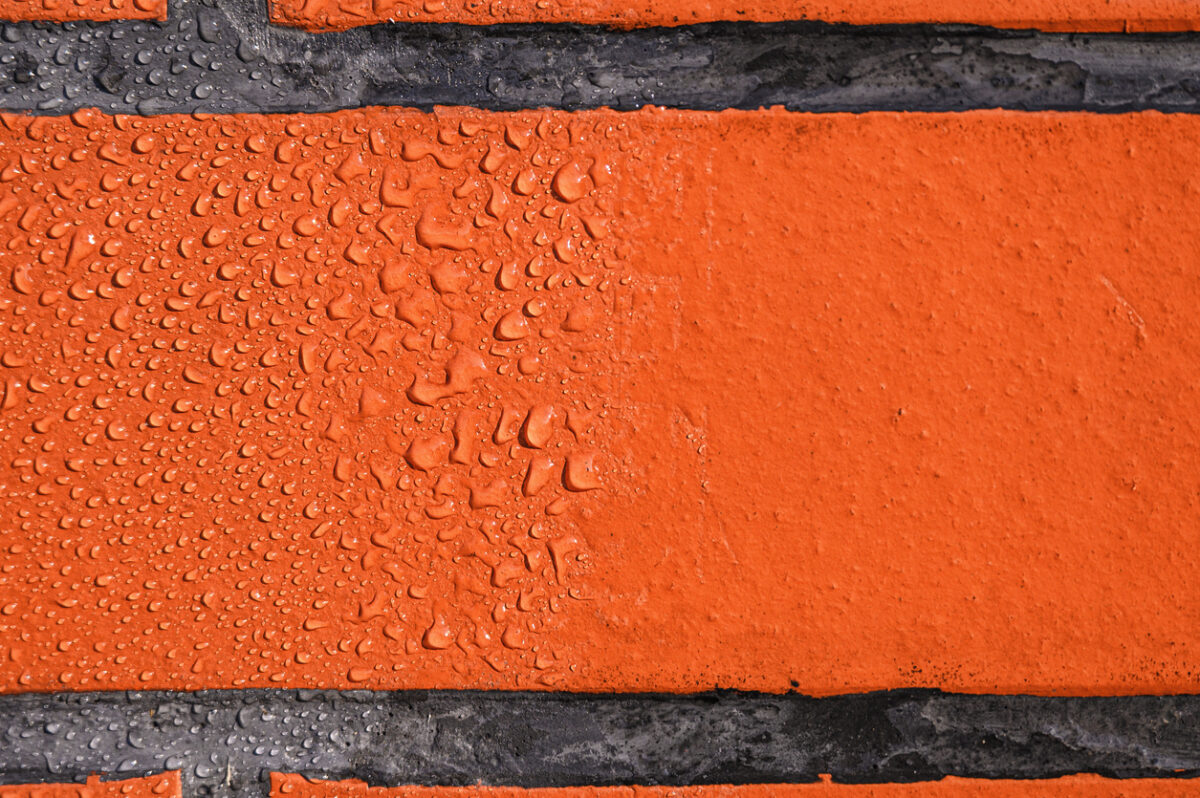
Can you stain brick that has been sealed? Unfortunately, no, you can’t stain sealed bricks. Before attempting to learn how to stain a brick fireplace or another brick surface inside or outside your home, you should first check if a sealer was applied over the brick.
To do this, put your fingers in a glass of fresh water and splash a little water on the brick. If it has been sealed, you should notice the water beading up over the surface of the brick. If that’s the case, you will need to remove the sealer using a power washer before you can stain the brick, or hire a qualified professional to help you.
If the water soaks into the brick after you splash it, it’s unsealed and you can progress to the next step.
STEP 2: Test the brick stain in an inconspicuous spot.
Before you officially get started with your staining project, it’s a good idea to test the stain on an inconspicuous area to make sure you’ll be happy with the way the brick will look once the project is finished. Try staining the bottom side corner of a fireplace, one of the bricks on the back of your house, or even a spare brick lying around your property.
Keep in mind that brick is porous and will soak in the stain, so it will take multiple coats of stain to achieve the results you’re after. When testing, you may want to apply a few coats to get a better idea of what the finished product will look like.
STEP 3: Clean the brick.
Next, you will need to clean the brick to remove any dirt or debris before applying the stain. Add warm water and mild soap to a bucket and mix it well. Use the soapy water to scrub the brick using a nylon-bristle brush, working from the top to the bottom of vertical surfaces to avoid dripping dirty water on sections that have already been cleaned. Be sure to lay out a drop cloth on the floor when working indoors or on garden beds if you’re working outside.
Continue scrubbing until no more dirt comes off. You may need to refresh the soapy water a few times depending on how large of a surface you are cleaning and how much dust and dirt has accumulated on the brick over time. Lastly, rinse out the bucket and fill it with clean water (no soap). Rinse the brick with the water to remove any soapy residue. Give the brick at least a full day to dry before staining it.
RELATED: 7 Types of Brick All DIYers Should Know
STEP 4: Make any necessary repairs.
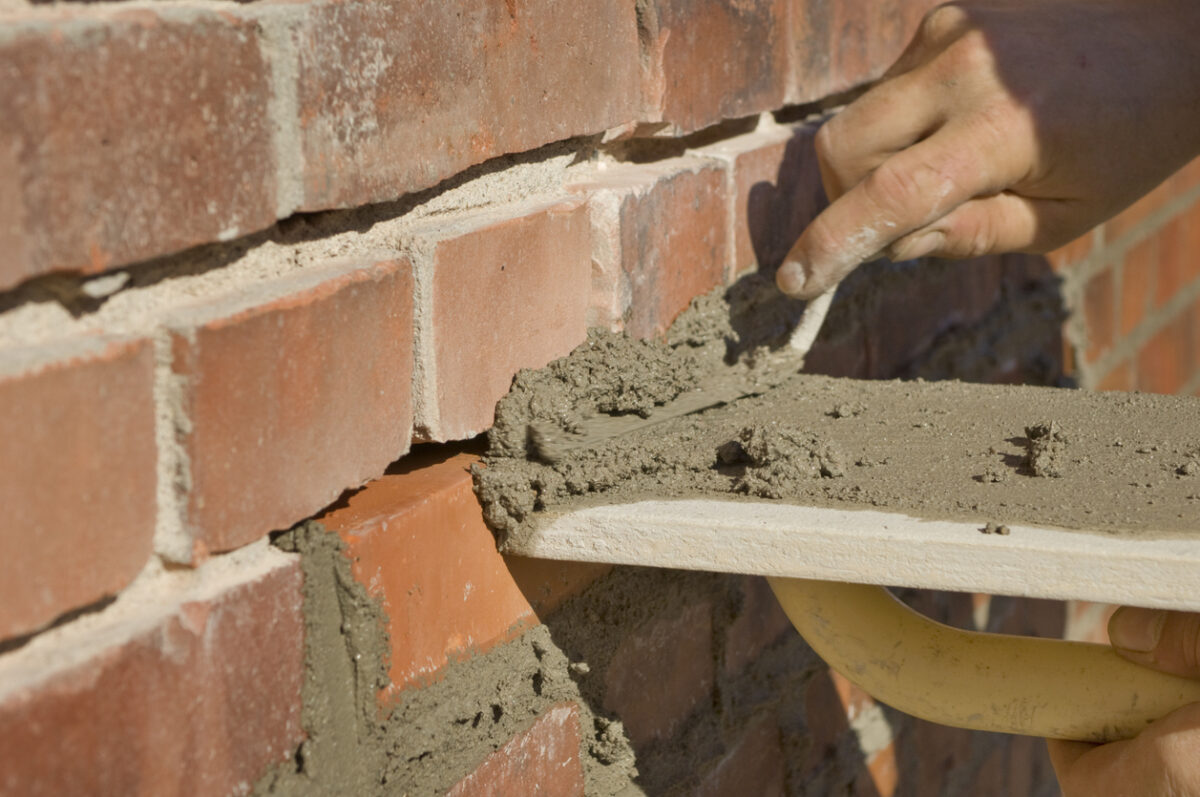
Now that the brick is clean, you’ll be able to check more easily for any needed repairs. Overall, brick structures are very durable and long-lasting, but you may find a few spots where mortar is missing or has started to crack.
If you notice any damage, purchase a bag of mortar mix for repairs. Follow the directions on the bag to mix it, and then use a pointing trowel to replace the mortar, taking care to make sure that the mortar is pressed as far into the joint as possible. Allow the mortar to dry for 2 to 3 days.
STEP 5: Protect the surrounding area.
When you’re finally ready to start staining the brick, lay out drop cloths around the work area. Use painter’s tape to secure the drop cloths to the edge of the brick to prevent any stain from dripping onto your floor or other surfaces in the home. If you’re applying exterior brick stain, use drop cloths to protect your deck, patio, or any nearby garden beds or plants.
Don’t forget to protect yourself, as well. When working with brick stain, wear clothing and shoes that you aren’t worried about getting brick stain on. It is also a good idea to protect your eyes with a pair of safety glasses and your hands with waterproof gloves.
STEP 6: Mix the brick stain.
Brick stain tends to separate when sitting in the can. The pigments in the stain become concentrated along the bottom of the can, while the solvents move toward the top. If you skip the important step of mixing the stain, you won’t be able to achieve even coverage of your surface.
Using a drill with a paint mixer attachment is the most efficient method for stirring the stain. If you don’t have a drill or the correct attachment, a wooden paint stirrer will also work.
RELATED: How to Remove Paint From Brick
STEP 7: Apply overlapping coats of stain.
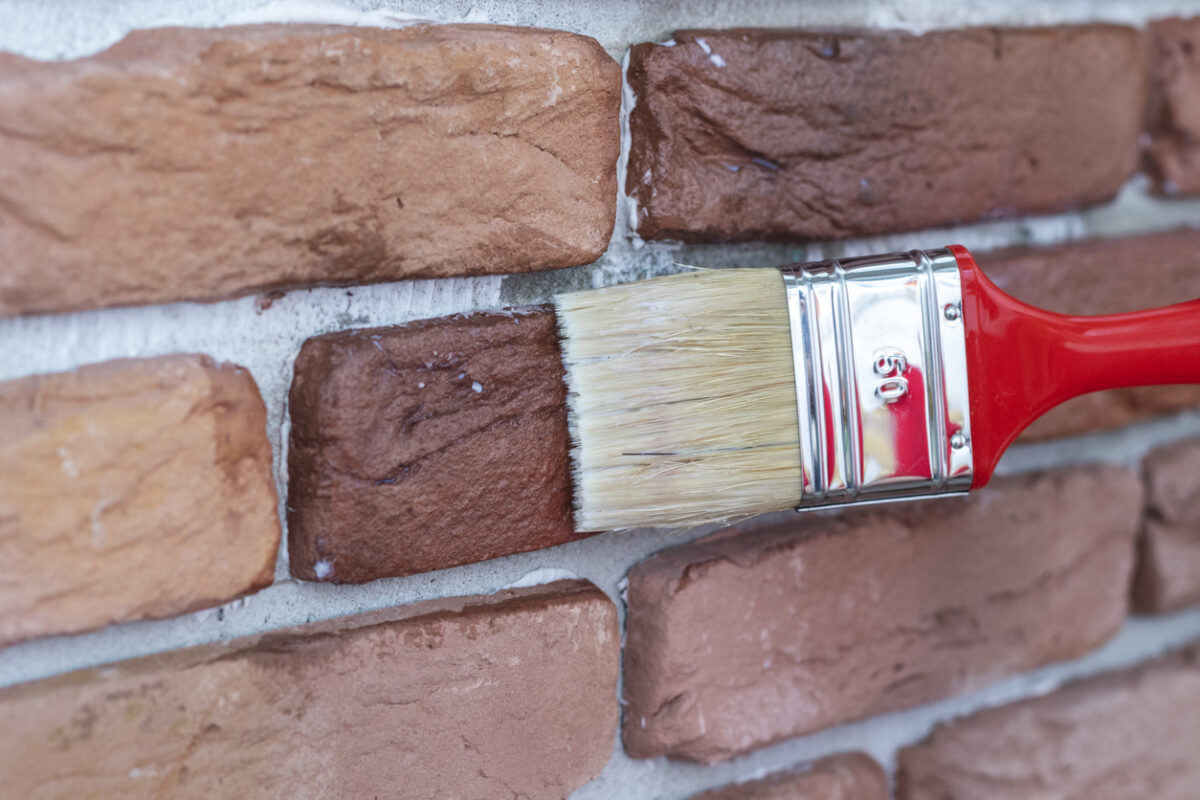
When applying brick stain colors, it is important to work evenly and smoothly. If applying the stain with a paint brush, take care to avoid applying more stain to one section than the others.
You may find that a paint sprayer is a worthwhile investment when staining brick. Using a sprayer will not only simplify and speed up the task, but it will also help you keep coats more even and consistent. If you plan to use a paint sprayer, sweep the sprayer from left to right, starting at the top of the surface. With each sweep, overlap about halfway up the previous pass.
Whether you use a paint brush or sprayer, let the brick stain dry after applying one coat. The drying time will vary depending on heat, humidity, airflow, and the amount of stain that was applied. Apply additional coats of brick stain until the color matches your vision.
STEP 8: Allow the brick stain to dry completely.
Once the desired color has been achieved, allow the stain to fully cure. As mentioned above, the humidity, temperature, airflow, and amount of stain applied can all impact the drying time.
Consult the stain manufacturer’s instructions to get a more specific idea of how long your stain may take to dry, but expect it to be somewhere between 24 and 72 hours. While the stain is drying, avoid touching the brick, walking on it, or placing any items on top of it.
Final Thoughts
Staining brick offers a relatively easy and cost-effective solution for updating brick surfaces or structures in your home. Compared to paint, stain lasts longer and also helps brick maintain a more natural appearance. Just remember that because bricks are porous, they will absorb much of the stain. This can make the process of staining bricks more tedious and time-consuming than painting them. However, the time and effort you invest will be well worth it when you’re able to admire the finished product for years to come.
RELATED: All You Need to Know About Tuckpointing
