We may earn revenue from the products available on this page and participate in affiliate programs. Learn More ›
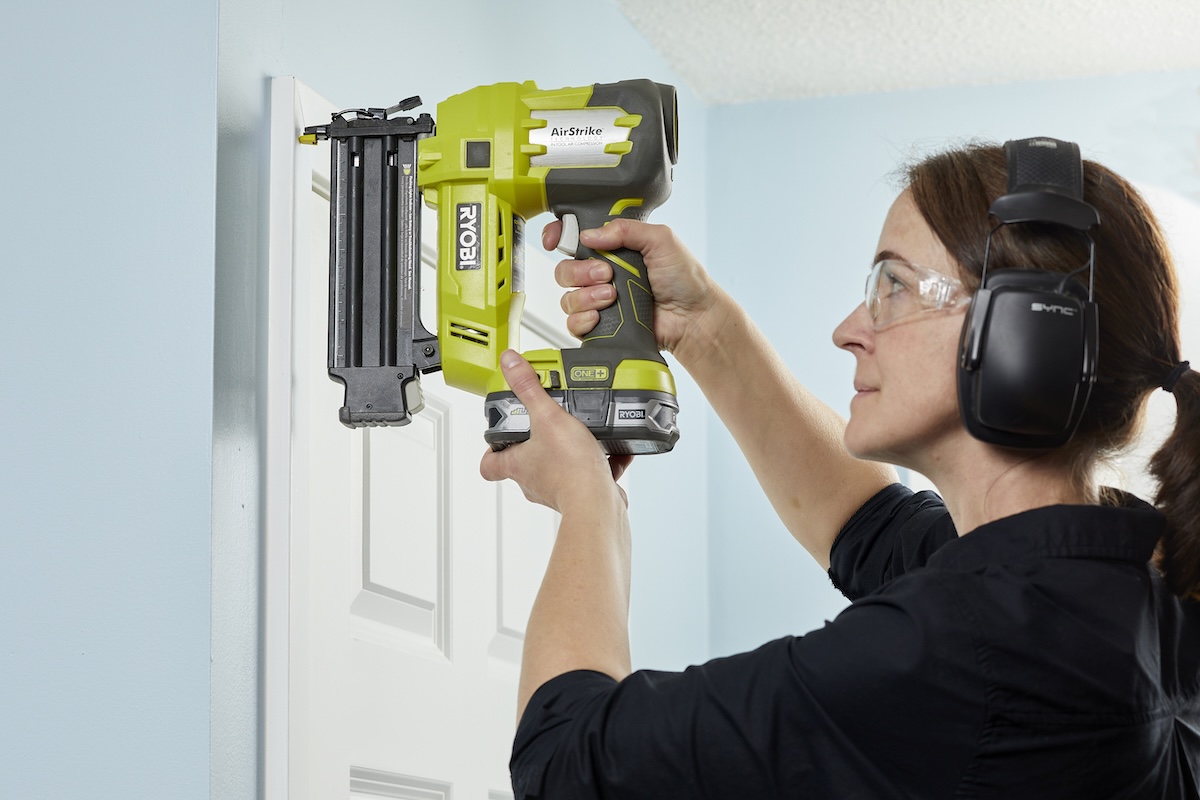
Whether you’re looking to add shiplap, install trim, or tackle one of the hundreds of other carpentry projects, a nail gun (also called a “nailer”) will speed up the project and improve nailing consistency. We’re not downplaying the role of the hammer and nail, but the sooner you can complete a project, the sooner you can move on to the next one, or enjoy a little downtime for recreation and relaxation.
Nail guns are powered by electricity, compressed air, or combustible gas and, like many other power tools, they can be dangerous if used improperly. If you’re new to this type of tool, keep reading to find out how to use a nail gun safely and correctly.
Parts of a Nail Gun
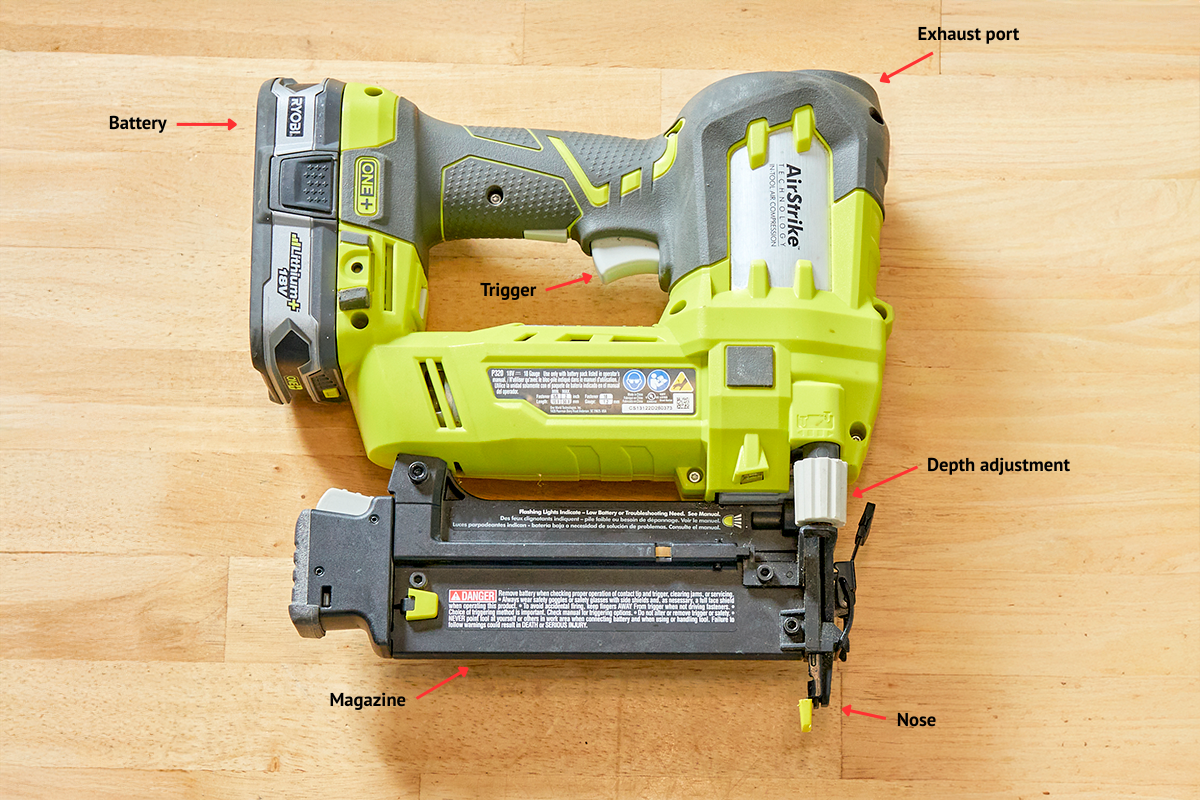
For a nail gun to function properly and safely, it has a lot of moving parts. Below is a guide to some of the parts of a nail gun and their functions.
- Nose: This is where the nail shoots out of the gun. Most nail guns have safety mechanisms on their noses that prevent the gun from firing unless the nose is pressed against a surface.
- Magazine: This is the part of the nail gun that holds and feeds the nails. It has a spring-loaded latch on the bottom to open the magazine.
- Trigger: It’s a finger-activated switch that fires the nails. In most cases, the trigger will only function if the nose switch is depressed.
- Air fitting: This fitting is the port at the bottom of the handle where the user connects the air hose.
- Exhaust port: The place where air exits the nail gun each time it fires a nail.
8 Types of Nail Guns
Like most tools, nail guns come in a few variations, each with a specific job to do. These tools will range in size, power, and even the type of fasteners they fire, so be sure to choose the right one for the task at hand.
1. Framing Nail Guns
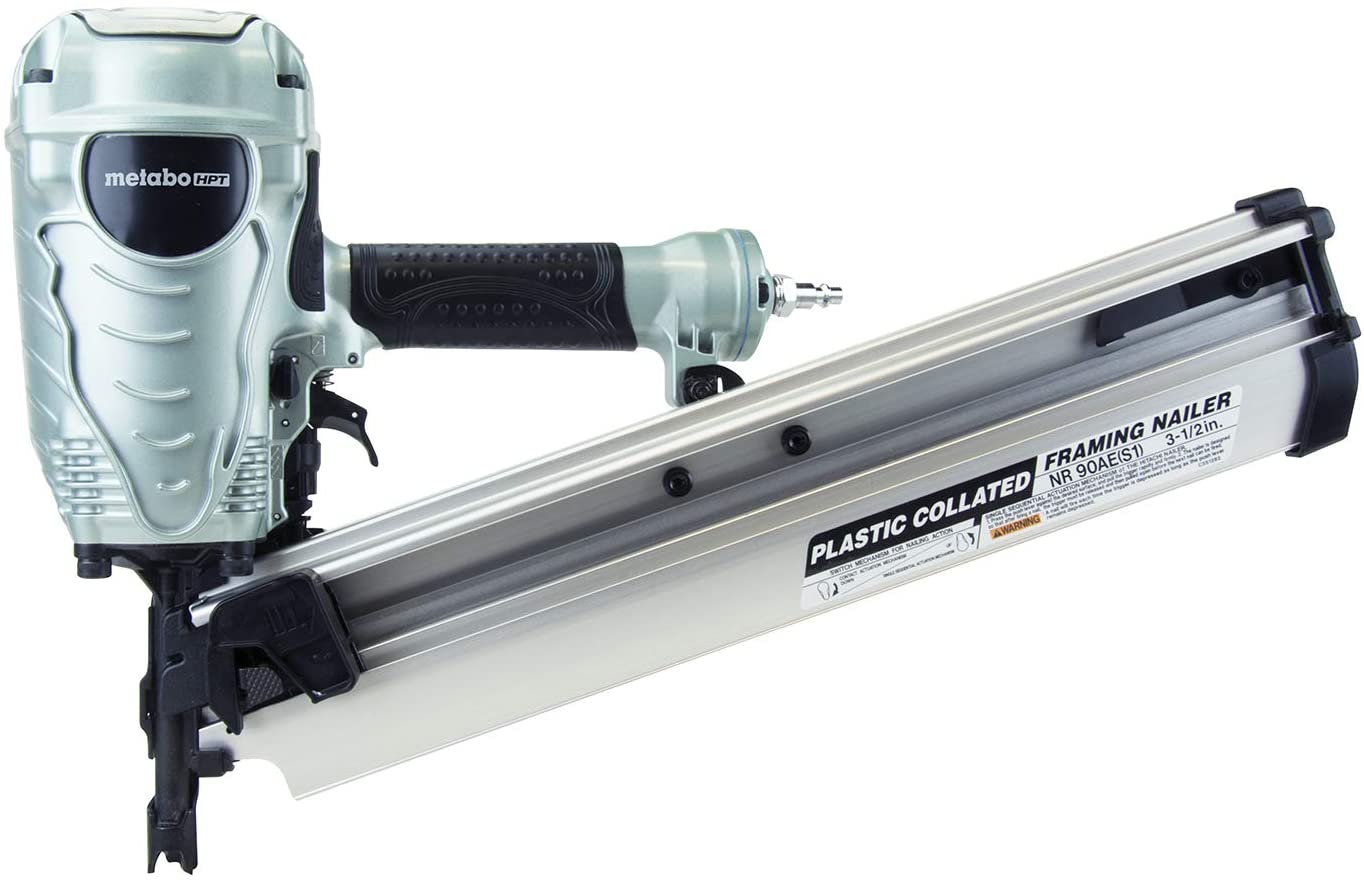
Framing nail guns are for heavy-duty construction projects, like building walls and securing plywood sheathing to a structure. They’re available in different sizes, but most shoot nails between 2½ and 3½ inches long. They have straight magazines that accept sticks of nails, and barrel-shaped magazines that accept collated nails. Framing nail guns are also available with “bump-modes,” which allow the user to hold the trigger down and bump the nose of the gun against the surface for faster nailing.
Our Recommendation: Metabo HPT Framing Nailer – Get it at Amazon for $179.
Metabo HPT’s legendary nail gun is a favorite among pros, thanks to its large magazine, light weight, and quality construction.
2. Roofing Nail Guns
Roofing nail guns are all about working quickly and efficiently, and without damaging the new shingles. These nail guns feature big, wide nose pads that roofers can bump against the shingles without denting them, and can shoot nails with heads large enough that they won’t pull through the shingle. They’re more compact and lightweight than framing nailers, and the nails they fire are usually relatively short. However, they almost exclusively have barrel-shaped magazines because they need to hold a lot of nails.
Our Recommendation: Metabo HPT Roofing Nailer – Get it at Amazon for $247.08.
The Metabo HPT Roofing Nailer features a wide nose pad, weighs just 5.5 pounds, and has rubber pads that hold the gun in place on a roof when not in use.
3. Siding Nail Guns
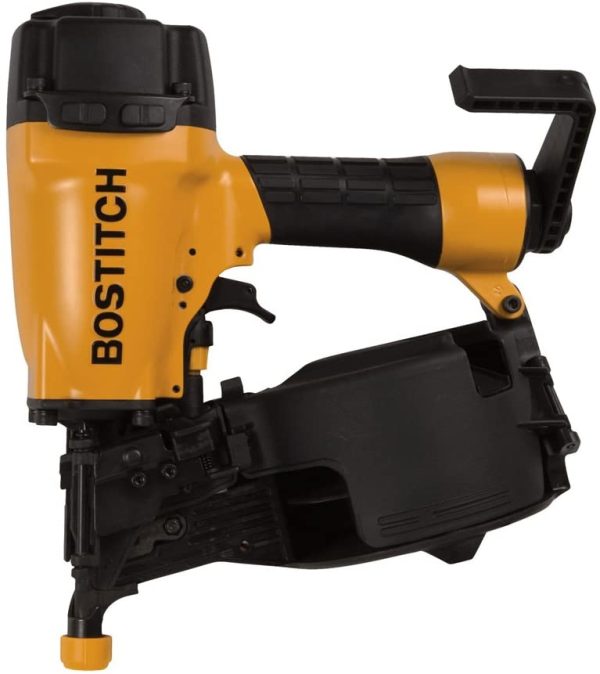
Like other nail guns, siding nail guns have specific features that make them useful for driving nails into wood siding. These nail guns fire nails with wide heads and feature padded noses that prevent damage to the siding. Most of the time, they have barrel-shaped magazines and fire collated nails without driving them so deeply that they shoot through the siding. This allows siding crews to work quickly and accurately.
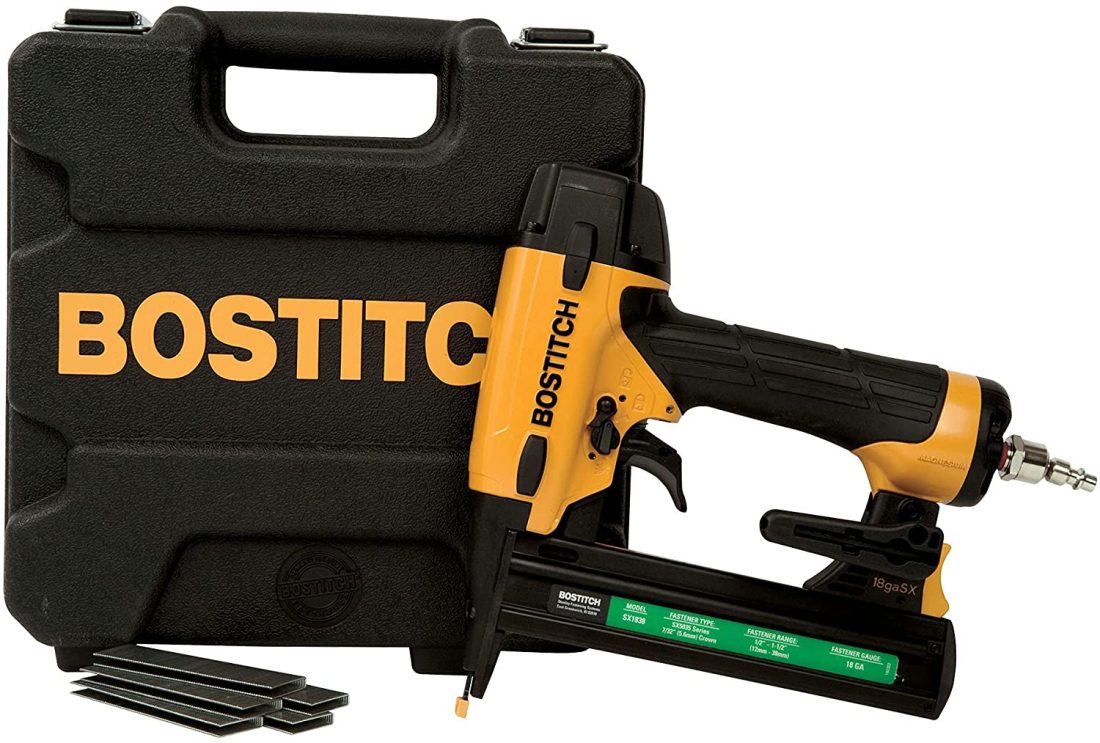
Our Recommendation: BOSTITCH Coil Siding Nailer – Get it at Amazon for $235.
This siding nailer from BOSTITCH features toolless depth adjustments, a soft rubber nose to prevent damage, and a lightweight aluminum design.
4. Finishing Nail Guns
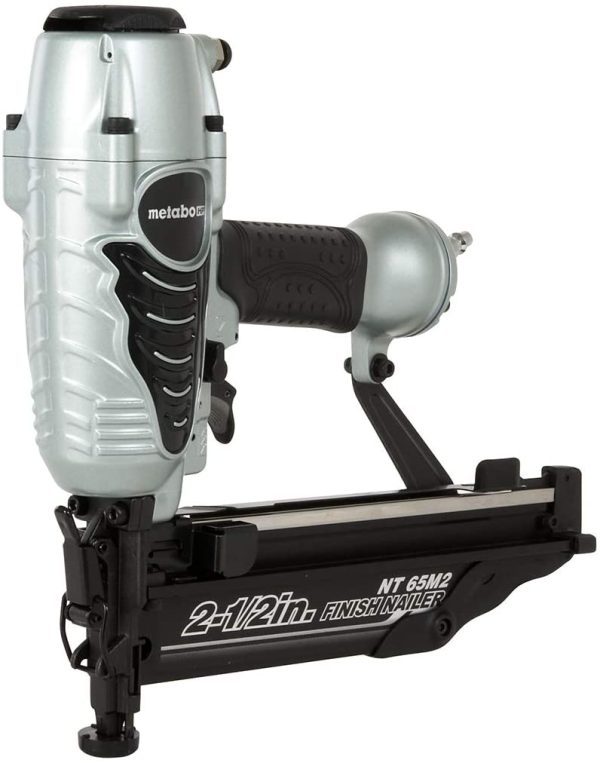
When it comes to nailing crown molding, baseboard, window casing, or door trim, the tool to reach for is a finish nailer. These finishing nail guns fire thin nails through the trim and into the structure behind the wall. When adjusted correctly, the head of the nail sinks below the surface, leaving a small rectangular depression that the user can hide with wood filler. Because finish nailers often have to fit in tight or awkward angles, they’re usually compact and feature straight magazines that accept sticks of nails.
Our Recommendation: Metabo HPT Finish Nailer – Get it at Amazon for $129.
This finish nailer from Metabo HPT fires 16 gauge nails between 1 and 2½-inches long, weighs just 3.7 pounds, and allows for tool-free depth adjustments and jam clearing.
5. Brad Nail Guns
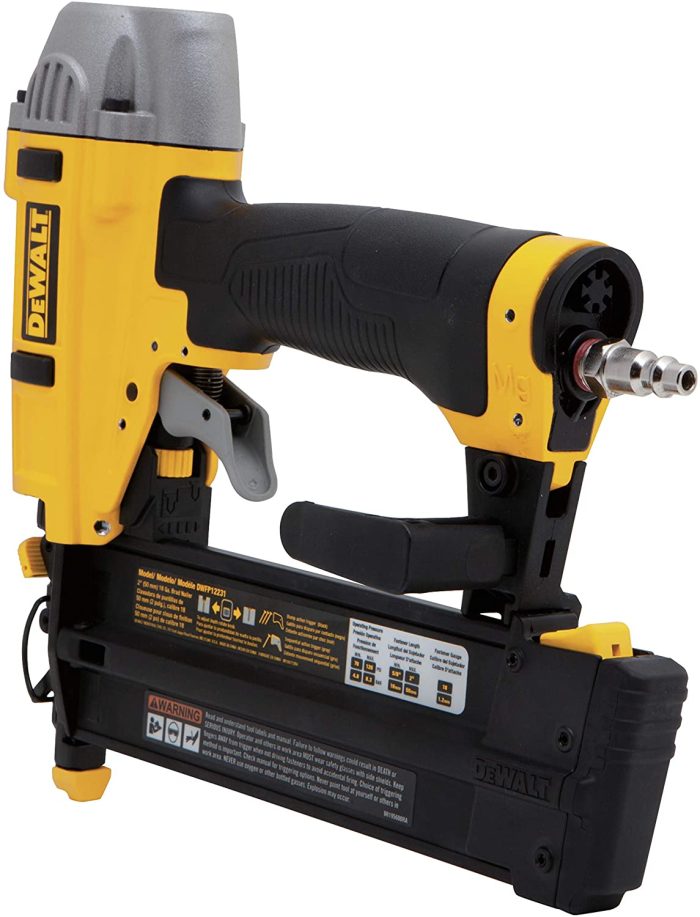
Similar to finish nailers, brad nail guns are helpful for fine carpentry work. The main difference, however, is that brad nails fire thinner nails known as brads. Brad nail guns can nail trim to walls, but they typically fire shorter nails with less power. The guns’ noses are smaller and fit in even tighter spaces. They leave a smaller indentation that’s even easier to fill than the nail holes left behind by finish nailers.
Our Recommendation: DeWALT Brad Nailer – Get it at Amazon for $83.83.
DeWalt’s Brad Nailer features a compact design and small nose for shooting brads into tight spaces.
6. Flooring Nail Guns
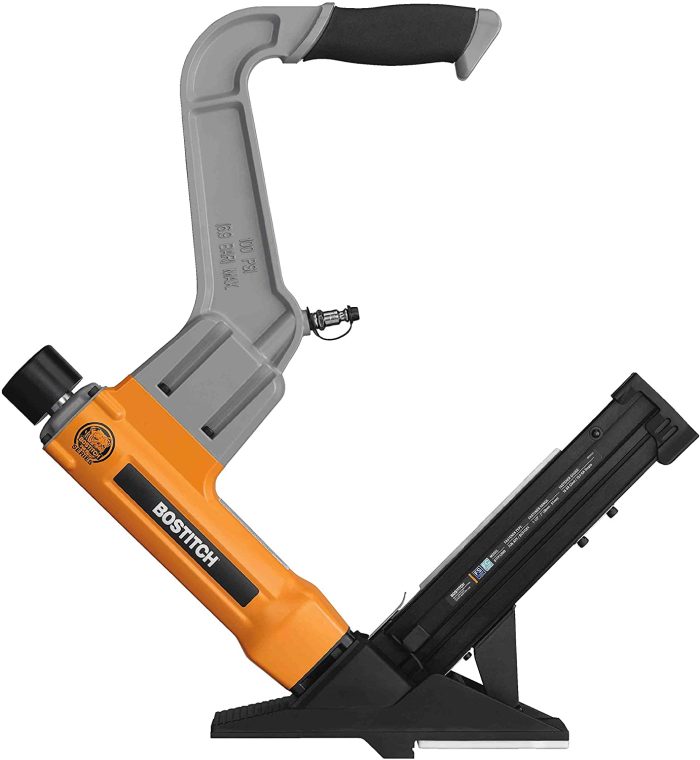
Flooring nail guns have one job to do: Secure hardwood flooring to the subfloor below it. They do this by registering against the tongue of a piece of hardwood and driving a staple through that tongue at an angle. But, rather than a trigger, they have a large button that the user hits with a rubber mallet to fire the fastener. After that, the user lifts the flooring nail gun with its large handle, scoots it up against the tongue a bit further down, and fires again. This is much faster than hand nailing each board, and the fasteners are hidden in the tongue for a clean look.
Our Recommendation: BOSTITCH Flooring Nailer – Get it at Amazon for $269.99.
This flooring nailer from BOSTITCH fires both staples and cleats, and it features interchangeable baseplates for flooring of different thicknesses.
7. Staple Nail Guns
While most nail guns fire nails or brads, staple nail guns fire staples. These guns work the same way as nailers, but their magazines accept sticks of staples and feature wider noses. They’re especially useful when firing construction staples through plywood and into wall and floor framing. They also come in smaller versions called finish staplers, and these are useful when nailing trim to the wall. Fasteners for these tools are a bit more expensive than traditional nail guns, and they’re often limited in terms of length, but they offer a ton of holding power.
Our Recommendation: BOSTITCH Crown Stapler – Get it at Amazon for $108.20.
The BOSTITCH Crown Stapler features bump-fire mode, a comfortable grip, and tool-free depth adjustments.
8. Pin Nail Guns
Pin nail guns really shine when an application calls for fasteners to disappear from sight. This could be for a picture frame, an apron return on window trim, and a number of other applications. These guns fire tiny wire pins without heads, leaving almost no sign that they penetrated the wood. They’re great for holding things together while glue is drying, or when attaching a small piece that a brad might split. They don’t provide a lot of holding power, but they’re not designed for heavy-duty use.
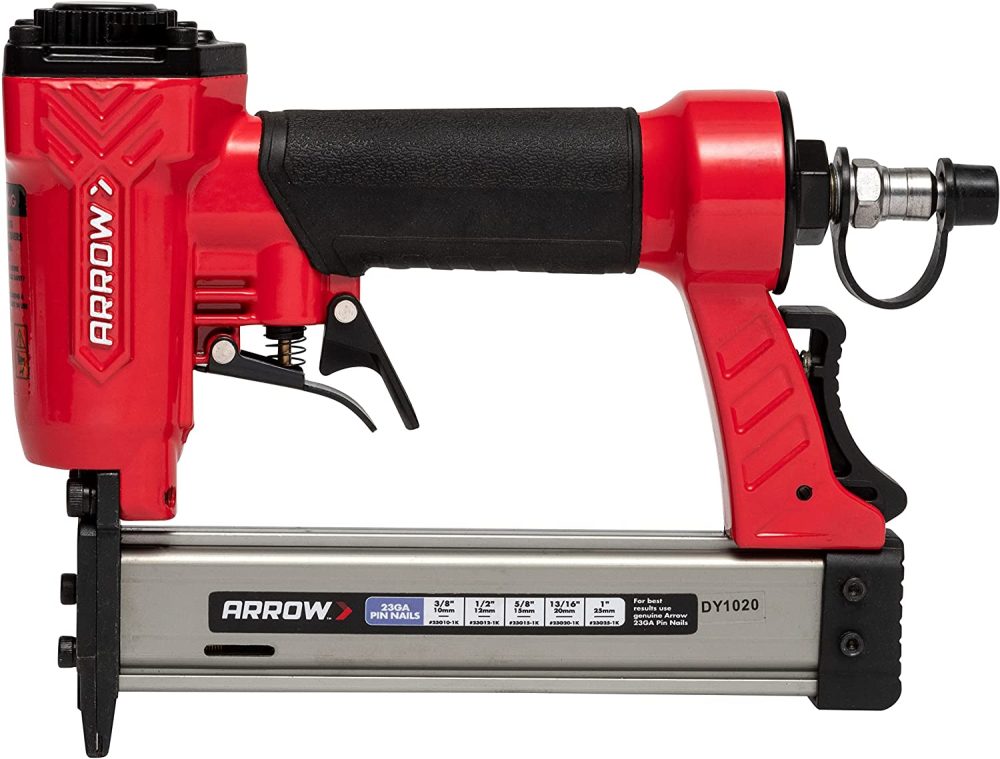
Our Recommendation: Arrow PT23G Pneumatic 23 Gauge Pin Nailer – Get at Amazon for $45.10.
Arrow’s PT23G Pneumatic Pin Nailer features a precision point nose with a double-trigger safety mechanism for safe firing.
Nail Gun Safety Tips

Too often, DIYers buy a new tool only to flip through the manual’s illustrations and then toss it aside, but that’s not a good idea. According to the Centers for Disease Control and Prevention (CDC), nail gun injuries are responsible for around 37,000 visits to emergency rooms annually. The more familiar you are with your tool, the safer you’ll usually be.
Many nail guns, both large and small, feature a couple of different firing modes. The main two types commonly found on DIY tools are “sequential” and “bump.”
- Sequential mode: This firing mode requires the user to complete a sequence of steps before the gun will fire the nail. The sequence involves depressing the safety nosepiece (a spring-loaded tip that retracts when the gun is pressed against the material) and then pulling the nail gun’s trigger to fire a nail. This two-step process is the safest way to use a nail gun. (Some nail guns have a single-sequential trigger, which fires a second nail when the trigger is released again without depressing the safety tip.)
- Bump mode: Some nail guns allow the user to save time by switching from sequential mode to bump mode. In the latter, the user can hold the trigger down and then move the nail gun to a new spot, and every time the safety tip is depressed, a nail will fire. You may have seen professional roofers quickly shooting nails to attach shingles one right after another with less than a second in between using bump mode. Unless you’re a professional construction worker, you should probably stay out of bump mode—that type of speed is rarely required from DIYers and craftsmen, and there is a greater potential for mishaps in inexperienced hands.
Some nail guns, especially the larger ones intended for framing, can be quite noisy, ranging from around 90 dB (similar to a lawn mower) to more than 100 decibels. For this reason, it’s important to wear hearing protection while you work. In addition, when a nail misfires, it can send chips of material flying, so you should wear protective eyewear at all times.
While today’s nail guns are designed to be as safe as possible, there’s still a risk of a nail misfiring when the gun is being loaded or when you’re removing a nail jam. The best prevention: cut the power. Unplug a corded nail gun, remove the battery from a cordless nail gun, or disconnect the air hose from a pneumatic nail gun before you load nails or remove a jam. Similarly, if you use a less-common type of gun powered by butane cartridges, remove the nail gun cartridge before loading more nails or trying to remove a nail jam.
One of the most common nail gun accidents occurs when the user is holding two pieces of wood together while firing a nail near his or her hand. If the nail goes all the way through the material and comes out the bottom, or if, instead of the nail going in straight, it bends and shoots out the side of the board, it can puncture your hand. Use clamps when necessary to hold pieces of wood together to keep your free hand out of the way.
It’s not unheard of for a nail to go completely through the material being nailed, so ensure that no part of your body or others are standing on the other side in the line of fire.
If you’re ready to climb down a ladder or scaffolding after a completed job, resist the temptation to lower a pneumatic nail gun by the air hose connected to it. When a nail gun is in bump mode and it inevitably swings and bumps the ladder or a nearby object, the safety nosepiece can depress and the gun will fire a nail.
- Don’t skip reading the manual.
- Stay in sequential firing mode.
- Protect your ears and eyes.
- Disconnect the nail gun’s power source before loading nails or removing a nail jam.
- Keep your free hand out of the line of fire.
- Keep yourself (and others) out of the line of fire.
- Don’t lower your nail gun by the hose.
Initial Setup and Calibration
Some nail guns come with air hose attachments, but some do not. For those that don’t, it’s important to find a quick-connect fitting that fits the thread of the nailer. Be sure to wrap those threads with Teflon tape to prevent air leaks that can compromise the nailer’s power and run the compressor down too quickly.
With the nail gun attached to a hose and nails fed into the magazine, drive a nail through a test piece of lumber. For framers, finish nailers, brad nail guns, staplers, and pin nailers, the fastener should sit below the surface. For roofing and siding nailers, the nail should be slightly proud of the surface. Adjust the depth by twisting the knurled knob until the fastener is at the appropriate depth.
How to Load a Nail Gun
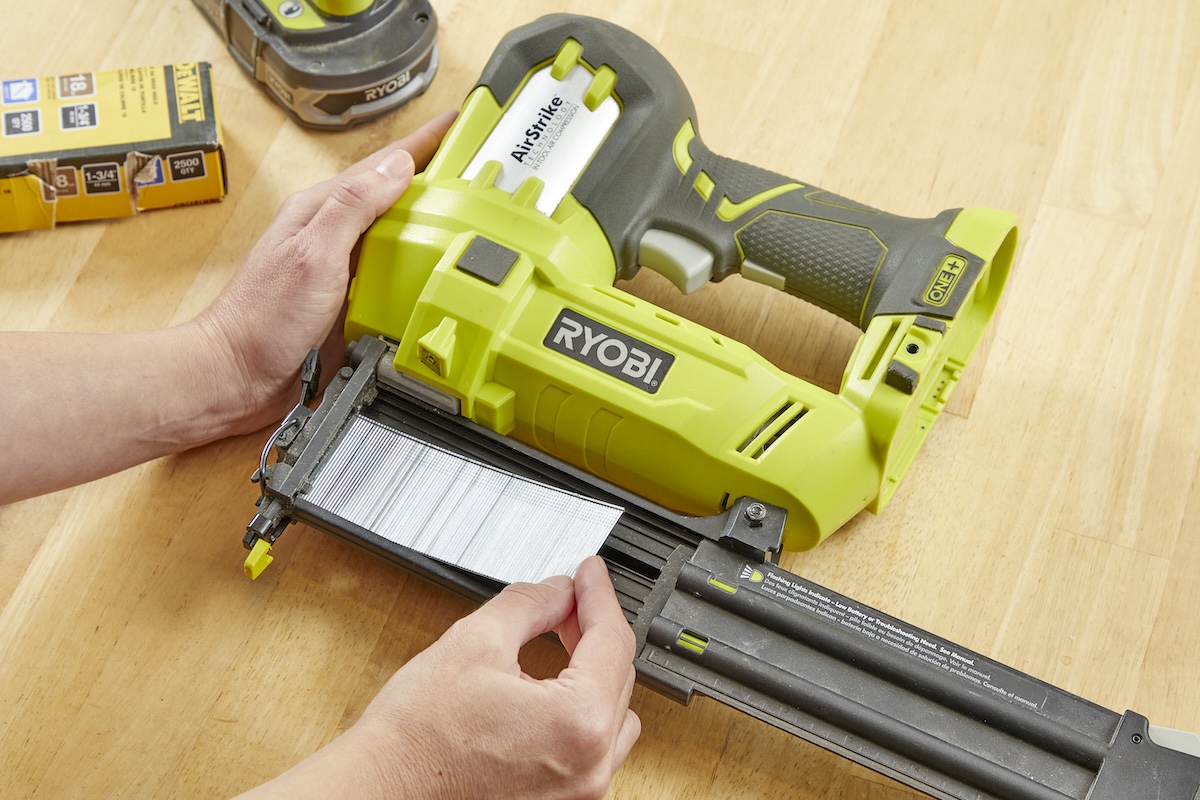
When it comes to loading mechanisms, nail guns are further divided into two types. In order to know how to load a nail gun, you need to know your nail gun’s loading mechanism type before buying nails and loading your nail gun.
- Slide type nail guns load by pressing a magazine release and then sliding the magazine (the long, narrow case that holds the nails) backward. You will not be able to pull it all the way out—just far enough to drop in a strip of nails with their tips pointed down. Push the magazine back into place, making sure it clicks securely into place.
- Coil type nail guns hold coils of nails rather than strips. These are often reserved for professionals, such as roofers, so they don’t have to load their nail guns as often. If you have this type of nail gun, open the cylindrical case that holds the nails (usually via a release button), and then position a coil of nails facing downward in the case. You’ll need to position the first nail of the coil into the slot that feeds the nails into the gun. Close the case. If the case doesn’t close easily, you don’t have the nails positioned correctly; compare the position to the manual’s instructions and try again.
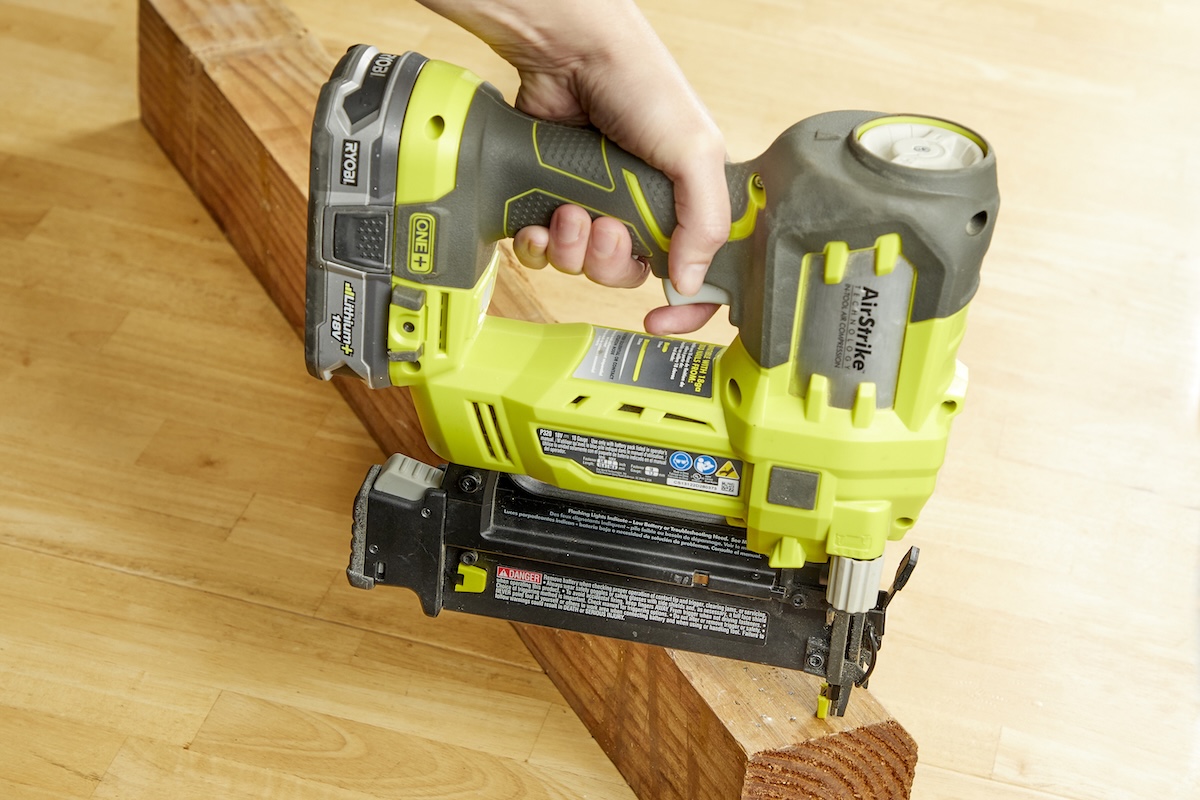
How to Use a Nail Gun
Now that we’ve gotten all the safety issues out of the way, let’s load that new nail gun and get to work.
Tools & Materials
Bobvila.com may earn a commission from purchases made through these links.
Step 1: Connect the nail gun to a power source.

After putting on safety glasses, load the nail gun. Then, connect it to the power source, whether that be a battery, an electrical cord, an air hose, or even a butane cartridge. Make sure no one is behind the workpiece (or you) before proceeding.
Step 2: Position the tip of the nail gun and shoot a nail.
Hold the nail gun perpendicular to the surface of the wood so you don’t shoot at an angle, and press the gun firmly against the wood to depress the safety nosepiece. While holding the nail gun steady, pull the trigger.
Pro tip: Until you get a feel for how your nail gun operates, practice shooting nails into a piece of scrap wood, keeping the above safety tips in mind.
Step 3: Adjust the depth of the nail.
In some instances, such as when you’re attaching sheathing to the exterior of wall studs or you’re framing a wall, it’s not imperative that every nail head is sunk below the surface of the plywood. In these cases, you can just load your nail gun and shoot without worrying too much about nailhead height.
When you’re constructing a project that will have a smooth surface, however, such as a cabinet or bookcase, it’s ideal if the head of the nail is flush with the surface of the wood or slightly countersunk. Your nail gun has an adjustment for this. This button or knob is usually located close to the trigger—check your owner’s manual if you can’t find it. Turn the depth selector until your gun shoots a nail to the depth you want.
Troubleshooting tip: If the nail you shoot is crooked or the head sticks up even after you’ve adjusted the depth selector, it could be because you’re lifting the nail gun as you shoot. Be sure to keep the gun pressed firmly to the surface of the wood until after you’ve fired the nail.
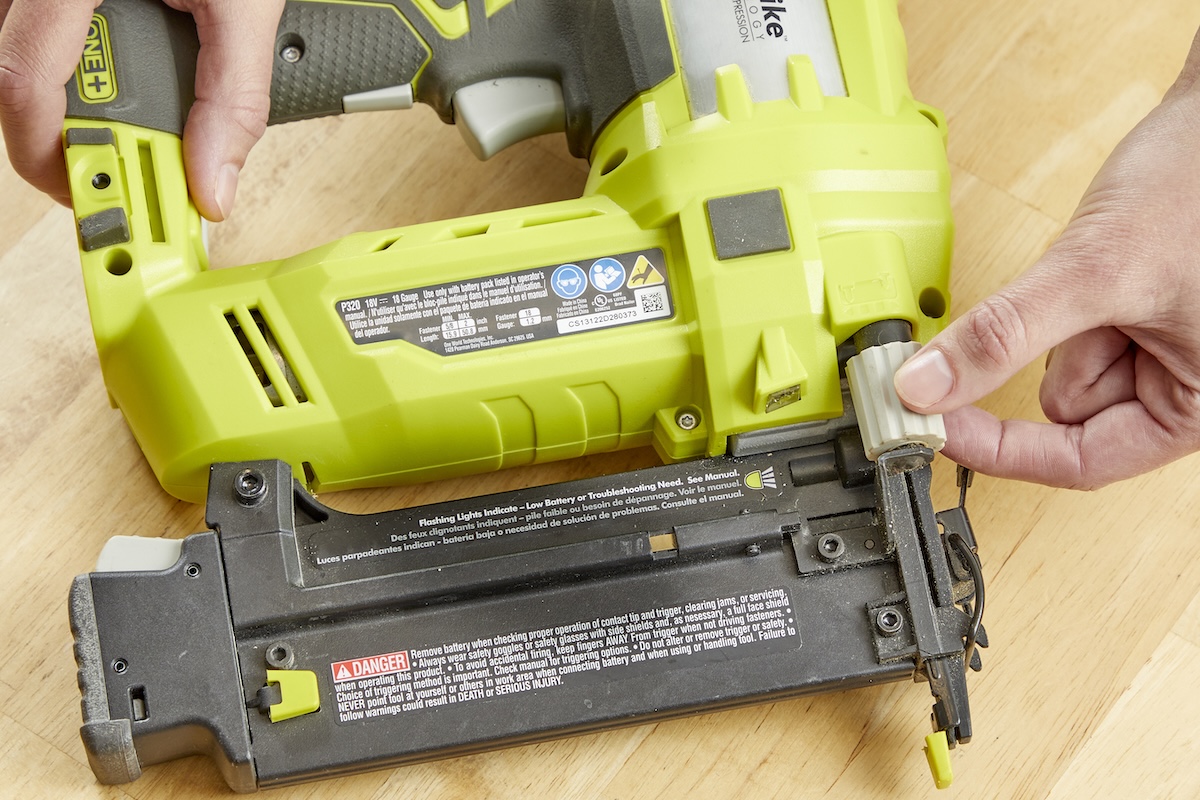
Step 4: Remove nail jams as needed.
Nails typically jam when they hit something hard, such as a knot in wood or another nail. You’ll know when your nail gun jams because it won’t fire anymore when you pull the trigger, despite the tool being full of nails.
Disconnect the power source and then release the magazine as described in Step 1. It’s important to release the magazine to avoid putting pressure on the rest of the nails. Then, flip open the safety cover on the front of the nail gun and use your fingers or pliers to remove the jammed nail. Close the cover. Reinsert the magazine, reconnect the power source, and the tool will be good to go again.
Nail Gun Maintenance Tips
Some nail guns require oiling in order to operate smoothly and properly. In most cases, the user just needs to add a few drops to the air inlet port every few uses. If the gun seems to be losing power despite the compressor being at full pressure, or constantly jams, it probably needs oil.
Nail gun jams are usually pretty easy to clear, but there are some things to know. First, if a nail gun jams, be sure to disconnect the hose before attempting to clear it. Then, simply flip the lever open on the top of the gun to open the nose. A pair of pliers is usually all it takes to remove the jammed nails.
Always ensure that the safety switch on the nose is working properly before using a nail gun. Accidentally firing a nail can be very dangerous, but these safeties help prevent that from happening.
- Be sure to oil the nail gun every few uses.
- Disconnect the air hose before attempting to open a jammed nail gun.
- Always ensure that the safety switch on the nose of the nail gun is working properly before using it.
Final Thoughts
Learning how to use a nail gun might seem a bit intimidating at first, but the truth is these tools are relatively straightforward. With some consideration for safety, some basic maintenance, and the knowledge to select and adjust the correct type of nail gun, DIYers can be more confident about putting these highly useful tools to the test.
Prices listed here are accurate as of October 1, 2025.
