We may earn revenue from the products available on this page and participate in affiliate programs. Learn More ›
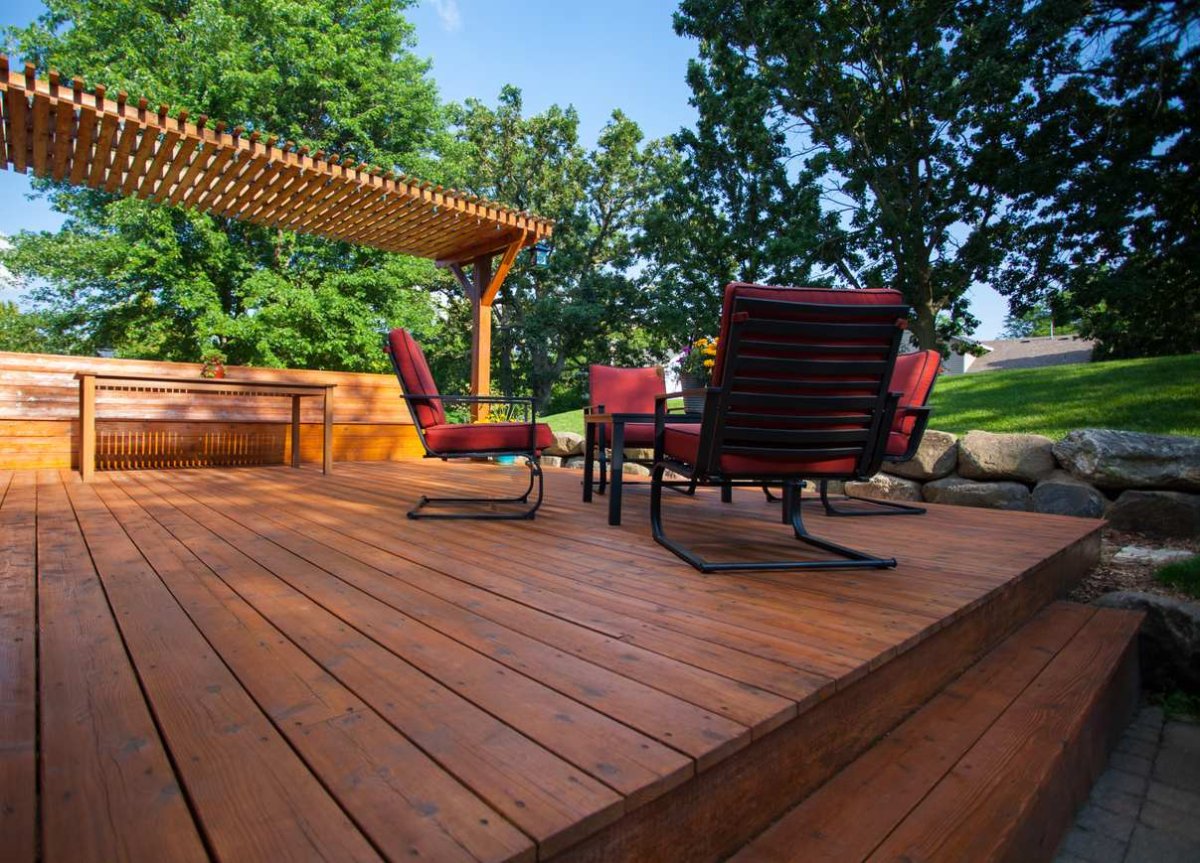
A backyard deck can be the perfect platform for good times, but a wooden surface needs a proper sealant to protect it against the ravages of sun, rain, and temperature fluctuations. While you can hire a decking contractor to seal the surface, which can cost between $555 and $1,379, according to HomeAdvisor, many homeowners opt to purchase a few tins of sealer and tackle the task themselves.
Deck sealing generally involves applying a coating of transparent, liquid sealant to the wood, creating a barrier that protects the wood against moisture, while reducing UV radiation. This process helps to preserve the appearance and structural integrity of the wood. If your deck is exposed or the existing sealant looks worn out, use this guide to learn how to seal a deck.
The Benefits of Sealing a Deck
After investing time and money to build a deck, it’s important to keep the wood protected and properly maintained in order to preserve the wood as long as possible. Sealing the deck is a necessary step that offers several benefits to help keep your deck looking and feeling great for years.
- Moisture resistance is the primary benefit of sealing a deck. The sealant creates a protective layer over the wood, preventing rain, snow, and meltwater from seeping into the fibers.
- Mild UV protection is also a beneficial effect of sealing a deck, though transparent sealer doesn’t offer as much UV resistance as stain or even deck paint, so if your backyard doesn’t have any shade, it may be better to consider a stain or deck paint, which offer a wide selection of deck color options.
- Rot and mildew prevention is essential when you use wood to build a deck. For this reason, sealant is one of the best options to help protect and preserve the wooden structure.
- Preventing the wood from cracking and splitting helps to extend the life of the deck. Sealant coats the surface of the wood, blocking out moisture, and reducing the risk of cracking, splitting, or splintering.
- Enhancing the grain and color of the wood by applying sealant gives the deck a natural look that many homeowners appreciate.
- Increasing the lifespan of the deck is another great benefit of sealing a deck. You can even reduce the need for frequent cleaning, though this doesn’t mean you should skip the deck cleaner altogether.
Consult a pro
Connect with a deck renovation professional near you and get free, no-commitment estimates today.
How to Choose the Right Sealant

Selecting the right sealant can help improve the appearance of the deck; it can also provide necessary protection against moisture, rot, mildew, and mold. When choosing a sealant, you should consider the age of the deck, the climate, and the desired look. Generally, older decks will need a more robust sealant that has strong mold and mildew resistance, while homeowners with newer decks may choose to use a sealant that enhances the natural beauty of the wood.
Depending on where you live, you may need to find a sealant that is designed to hold up to extreme cold or extreme heat. Similarly, choosing a sealant that can withstand snow and ice is important for homes located in colder regions, while opting for a sealant with built-in UV protection is more integral for homes in warmer locations that get a lot of sun exposure.
Before you decide on a sealant, consider the benefits and drawbacks of each product. If you’re still unsure, you may be able to get a small sample from the store, so you test the sealant on a small, inconspicuous area of the deck first to determine if you are satisfied with the result.
What’s the difference between staining and sealing?
Sealant, stain, and combined stain-and-sealant products can all be applied to a deck for different degrees of protection.
- Sealants are primarily used for deck waterproofing to protect against moisture damage. They contain waterproof or water-repellant properties and have a thicker viscosity than stains. While they exist, it’s unusual to find a clear deck sealer with UV protection. The reason for this is that unlike stains, sealants often lack the pigmentation that naturally blocks UV rays.
- Stains are always pigmented—they add color to the deck and protect against UV damage. Even the best deck stain generally offers only moderate moisture protection, but it’s still better protection than nothing.
- Combined stain-and-sealant products offer both durable moisture and UV protection. However, while a combined 2-in-1 stain-and-sealant can be convenient, applying stain is still better for UV protection, while applying sealant is better for moisture-resistance.
Recommended Stains and Sealants
Easy to apply and fast-drying, this semi-transparent wood stain is ready for a second coat in just 30 minutes, letting you work quickly. Additionally, this stain produces an even coat with no inconsistencies or visible brushstrokes, so any minor mistakes while staining can still produce a satisfying result.
- Sealant: Seal-Once Marine Grade Waterproofing Exterior Wood Sealer – Get it at The Home Depot for $44.98.
Intended for use in high-moisture environments, this marine grade sealer penetrates deep into the wood, but doesn’t alter the color or finish, so you don’t lose the natural appeal of your deck. The sealer is also made to resist mold, salt, and algae, making it ideal for those who live near rivers, lakes, or other bodies of water.
- 2-In-1 Stain-and-Sealer: BEHR Premium Waterproofing Stain & Sealer – Get it at The Home Depot for $43.98.
Most other stain-and-sealer products tend to offer maximum coverage of around 150 square feet per gallon, but this 2-in-1 Behr Premium option can cover up to 300 square feet with just one gallon. Use a sprayer or roller to get the best results and to achieve a streak-free finish.
Dos and Don’ts of Sealing Your Deck
In order to ensure your deck sealing project is a success and you get the best results possible, it’s a good idea to have a firm understanding of what you should and should not do when sealing the deck. Check out these dos and don’ts that can help guide you to the successful completion of your deck sealing project.
DO wait 30 days before sealing a new deck.
If you’ve just built a new deck, you’re probably itching to finish the job by sealing it with a high-quality deck-sealing product. But preservatives in the wood often require about 30 days’ dwell time before the deck can soak up the sealant.
After a 30-day period, pour some water on your deck. If it beads up, the wood is still too wet to seal. If the water is absorbed, it’s ready to seal. Be sure to apply sealant as soon as the wood is ready. Leaving the deck exposed any longer increases the likelihood of damage from both ultraviolet (UV) rays and moisture.
DON’T use the deck for 48 hours after applying wood sealer.
While wood sealant is normally dry to the touch within a few hours, for a proper seal that protects the wood, stay off your deck for 2 full days. Disrupting the drying process can affect how well the wood is sealed, and you could find yourself having to repeat the entire sealing process.
To remind family members to stay off the deck, put yellow caution tape across the patio doors, stairs, and other access routes to the deck. After 48 hours, let the partying begin!
DO repair, wash, and sand your deck before sealing it.

Proper prep is key to a successful deck sealing. Begin by repairing or replacing any loose or broken boards. Then, use a power washer to scrub the surface clean. Allow the deck to dry for 24 hours, then sand the surface with 60- to 150-grit sandpaper or a sanding disk. Use a palm sander to remove the top layer of wood, which could act as a barrier to the sealant.
Sealing a stained deck isn’t as easy as sealing an untreated deck. If your deck has old stain or sealant on it, it’s especially important to sand the entire surface—attend to areas where the sealant has worn away as well as those that still have moisture protection intact. Remaining patches of the old stain or sealant will prevent new sealant from being absorbed, so sand evenly to ensure a clean, bare surface.
Finally, sweep or vacuum the wood thoroughly. Even a new deck will need at least a brief washing and drying to banish any dirt and grime that has accumulated during the initial 30-day drying period.
DON’T treat composite decking the same as wood decking.
While there are general similarities and differences between caring for a wood deck and a composite deck, there is nuance involved when it comes to sealing composite decking. Manufacturers of composite decking stipulate that it does not need to be sealed and only requires a periodic soap-and-water wash (that said, you may find that some deck sealers are promoted as working with certain brands of composite decking). Homeowners should note that solid plastic decking should not be sealed.
Note that the framing under a composite deck is often made from wood, which can be sealed, and sealing this framing can help extend the life of the wooden structure. Plus, any railing elements that are made from wood can benefit from a sealer too.
DO apply a sealant-and-stain product once a year.
It’s a good idea to apply a good deck stain and sealer at least once a year, depending on your climate zone and the age of your deck. In sunnier regions, adhere strictly to a once-a-year schedule to protect the wood from powerful UV rays.
Northern regions may get away with sealing and staining every two, or even three, years. Bear in mind, though, that decks in these regions are more susceptible to moisture damage. Northern residents should be extra vigilant about sanding the deck before sealing it. You want to make sure that the sealant soaks into the wood and provides long-term protection against snow and other moisture damage.
DON’T apply deck sealant to damp or frosty surfaces.
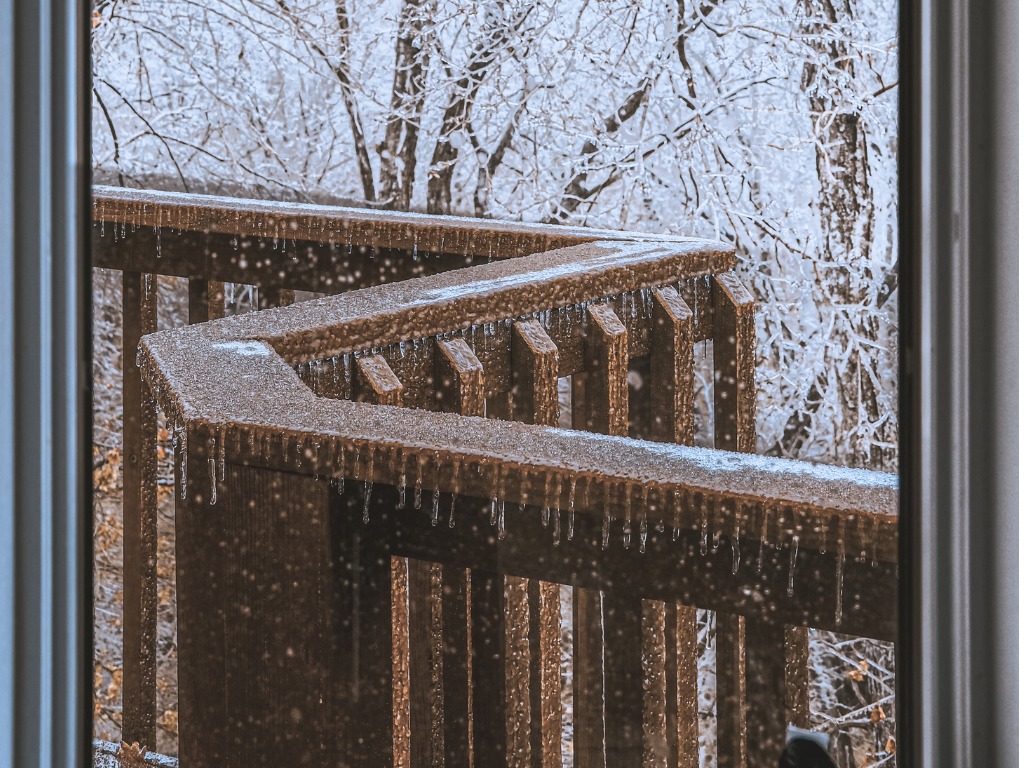
Applying sealant to a damp or frosty deck will lead, at best, to an uneven, splotchy seal that can’t effectively protect your deck. At worst, the sealant will bead up on the water and fail to be absorbed, creating a messy, dangerous slipping hazard. Always allow the deck’s surface to dry for at least 24 hours after a rainfall, and check the surface to make sure that it is ready to absorb the sealant before sealing the deck.
DO cover plants and tape off your siding before sealing.
Whenever you’re using chemicals around plants, it’s a good idea to protect them from possible contamination. A deck sealant’s job is to act as a moisture barrier for wood, and it will have the same effect on plants. Dripping sealant on a plant may prevent it from absorbing the nutrients it needs. It may develop spots and eventually die.
While sealant is being applied, it’s a good idea to use either plastic sheeting or drop cloths to cover plants near the deck. Use painter’s tape, cardboard and drop cloths to cover door trim, siding, and thresholds that lead to the interior of the house. Be careful not to use tape that’s stickier than painter’s tape, as it could peel away the finish from surfaces.
DON’T take shortcuts when resealing a deck.
Shortcuts may help you finish a job early, but they won’t help you finish a job well. If you skip cleaning and repairing a deck prior to sealing, you can end up with a finished deck that lacks color uniformity. The sealer just can’t stick to wood if there are particles on top, so it will stick to the particles instead.
Applying a sealer too thickly is another shortcut to avoid. Doing so can cause uneven drying and discoloration and make it take longer for the sealer to absorb. Don’t try to speed up the job by ignoring dry times and pretending that the deck isn’t still too sticky to walk on. Walking on a deck before it’s dry will mean that you’ll have to repeat the entire process from the very beginning.
DO stir deck sealer thoroughly before applying it.
“Shake or stir?” is a question often asked when using a new paint, stain, or sealant. It’s a safe bet that the answer, at least when it comes to deck sealers, is to stir and not shake. Shaking a sealer can cause the mixture to bubble, and those bubbles will show on the surface of the deck.
In the end, it’s good practice to read the can’s label before applying a sealant—the manufacturer’s recommendations for stirring, shaking, drying times and everything else should be spelled out clearly. If the type on the label is too small to read, snap a photo and enlarge it to get a better look at the instructions.
You don't have to do it yourself
Deck renovation pros in your area are available to help with your project. Get a free estimate today!
