We may earn revenue from the products available on this page and participate in affiliate programs. Learn More ›
Modern trends have tended toward flat, blank walls and a focus on color to bring a room together, but adding a unique wall texture to a room, or even to a single accent wall, can bring a personality to your home that a color choice simply cannot. Texturing can even help hide architectural errors, saving you costly repairs by allowing an uneven wall or ceiling to simply fade into an attractive textured pattern.
If you’re thinking that texturing is too difficult to do yourself, think again! While texturing should involve some degree of practice before deciding to texture a room in your house, the techniques used to make the following wall finishes are not as hard as you may think. Take a look below at seven popular wall texture types and the techniques behind them.
1. Comb
The comb texture is produced using techniques that create lines of various widths and shapes in drywall compound. This technique is often used to produce a repeated series of rainbow patterns on the drywall and is one of the more simplistic texturing techniques. This method requires drywall compound, a roller, and a drywall trowel that has evenly spaced teeth (or uneven teeth if you are going for a less organized pattern). Apply the drywall compound to the wall using the roller, then use the teeth of the trowel to gently apply lines in the wet compound. If you are aiming for perfect concentric circles, practice your artistic skills on a spare piece of drywall before attempting them on your wall. Let the texture dry for 24 hours before priming and painting.
2. Popcorn

Popcorn ceilings were a classic look in the 70s and can still be seen in countless homes today. The reason for this type of wall texture’s popularity is that it’s great at hiding imperfections and it can even help absorb sound between floors and walls. But the best part about this style of texturing? It’s easy and affordable to do yourself. All you need is the popcorn texture, an air compressor, and a hopper gun, which you can rent from your local home building center on Amazon. The popcorn texture is a dry mix of drywall mud and polystyrene, and it comes in a standard white color, so it’s best to prime the wall or ceiling before use. Mix the popcorn texture with water, following the instructions on the package. Make sure to securely cover all surfaces and items that are not to be sprayed. Once the rest of the room is properly covered, spray away. The texture can be painted any color you want after it has dried.
3. Orange Peel
An orange peel texture looks exactly as it sounds—it resembles the peel of an orange. You will need to prime the walls ahead of time so that the texture has a smooth, dirt-free surface to stick to. Pick up a hopper gun with an air-adjustable valve, an air compressor, and drywall compound. Mix the drywall compound with water until it becomes the consistency of thick paint or a soupy pancake batter, then pour it into your hopper. Spray a small amount from the hopper onto a test piece and adjust the air valve to suit the spray pattern that you want. You should be shooting small splatters of compound onto the wall to create the desired texture but not fully covering the primed drywall underneath. Try both heavy splatters and light splatters, and when you are confident in the spray pattern, begin to apply it to the walls. After drying, prime and paint the textured walls.
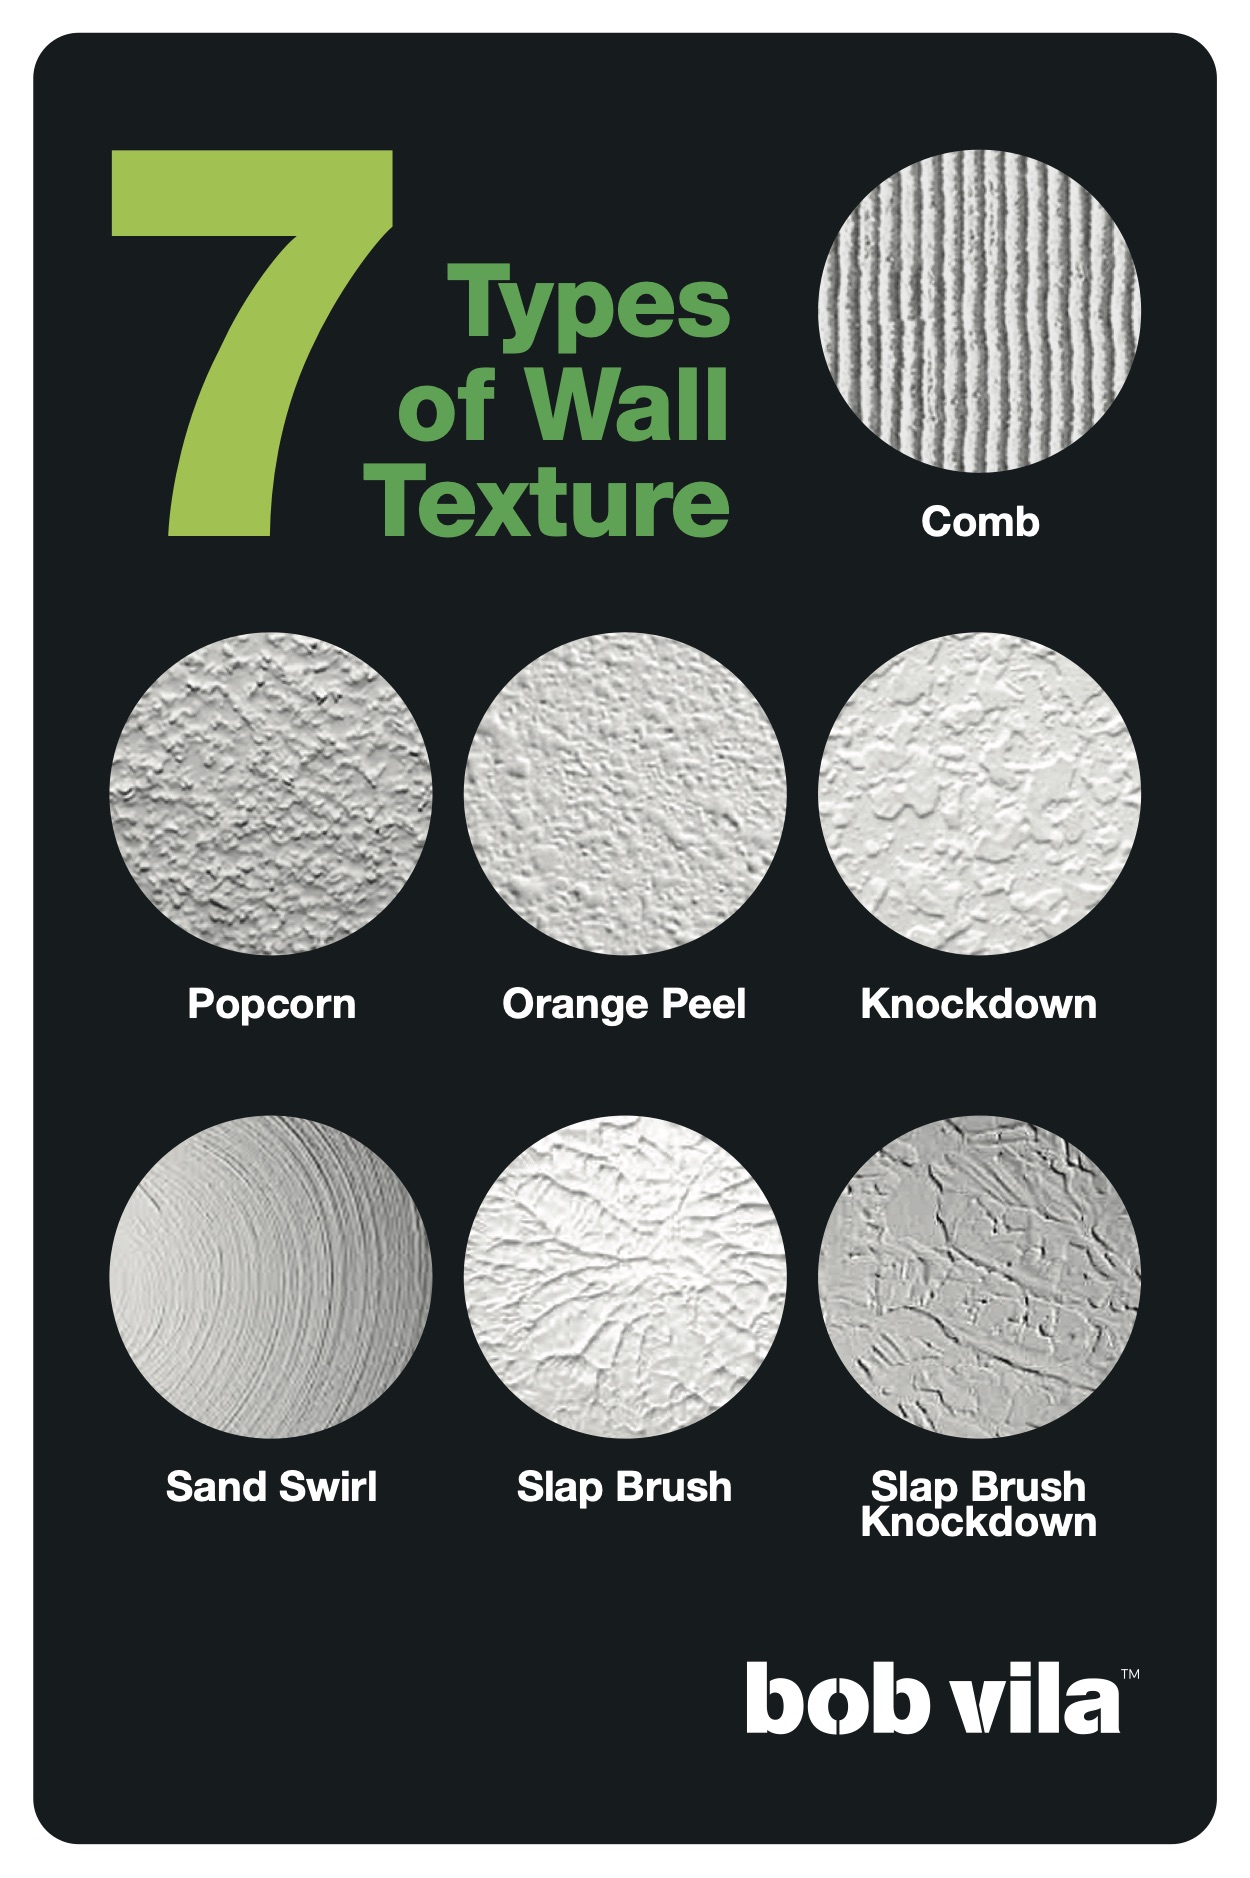
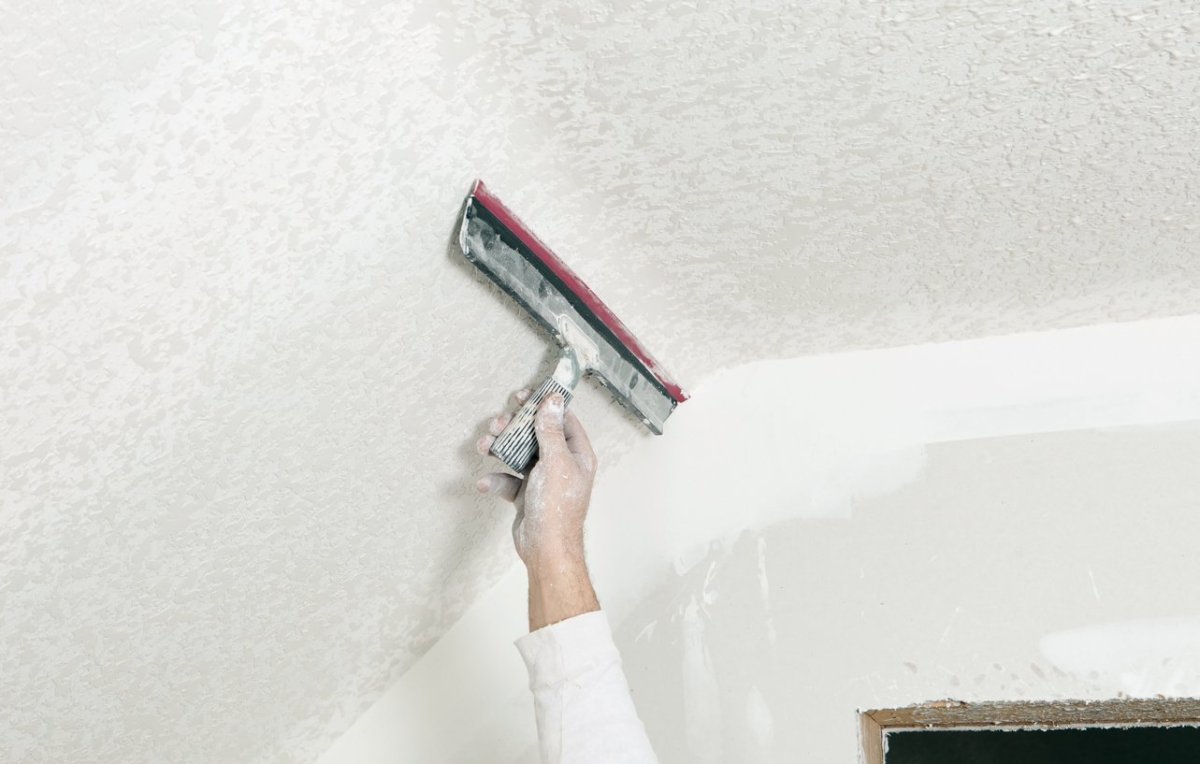
4. Knockdown
The knockdown technique creates a unique, rustic pattern, akin to stucco. Knockdown can be achieved by adding a step to the orange peel technique: After applying an orange peel texture to the walls, flatten the peaks and bumps that form in the drywall compound using an 18-inch or wider knockdown knife. Smaller rooms will likely require a wait period of about 10 to 15 minutes after spraying before the peaks can begin to be flattened, while a larger room can probably be started as soon as you are finished spraying. Just be sure to begin flattening in the same area that you began spraying. Be careful with timing! If you begin flattening the drywall compound too early, the knockdown knife will leave lines from the edges of the knife. If you see this happening, stop and wait another five or 10 minutes, then begin again. After flattening all the peaks in the orange peel texture, the wall can then be left to dry overnight before priming and painting.

5. Sand Swirl
Sand swirl adds a feel of individuality to a room without stealing the show. This style of texturing is easy to do using a compound known as perlite (primer with sand mixed into it) and a 7-inch-wide paint brush. Hold the paintbrush by the base, as this will give you more control than holding the handle. Dip the brush a few inches into the perlite, giving it a wipe on either side of the bucket to remove loose drips. Practice making a swirl pattern on a spare piece of drywall before moving onto your wall. Using the brush, start at the very top of the wall, making a big loop with an open bottom. Each row of this swirl pattern will cover up the bottom of the previous row. Apply swirls to a 5-foot section, dipping the brush into the paint after every swirl, then return to your starting point and drop down one row. Continue working your way around the room until you are complete, then let it dry. After a 24-hour drying period, you can prime and paint the walls.
6. Slap Brush
The slap brush texture creates a random pattern of thin lines on your walls that add an eccentric flair to any room. This type of wall texture is a great choice if you aren’t confident with a spray gun. All that is needed for this technique is a roller, a double crows foot drywall texture brush (also known as a slap brush, available on Amazon), and drywall compound. Mix your compound with water until it reaches a thick paint consistency, then apply it evenly to the wall using your roller. Complete two 5-foot-wide sections before picking up the slap brush. Apply drywall compound to each side of the slap brush in a thin coating, and then begin slapping the first section of the wall with the brush. There shouldn’t be any specific pattern to the texture, so have fun with it and mix it up by twisting the angle of the slap brush in the air between slaps. Once the first section is complete, roll the next 5-foot area of the wall, then apply the slap brushing to that section. Repeat this process until you have completed the room. After 24 hours of drying, you can prime and paint the room.

7. Slap Brush Knockdown
A slap brush knockdown texture combines the slap brush technique with the flattening step of the knockdown texture to create a random pattern of flatter, wider lines, instead of peaked, thin lines. To apply this texture, you will need a roller, slap brush, knockdown knife, and drywall compound. Using the slap brush technique, work your way around the room until each wall is evenly covered in a slap brush texture. For smaller rooms, wait 10 to 15 minutes before beginning to knock down the peaks using the knockdown knife. As with the knockdown technique, if you begin too early a line caused by the edge of the knife will appear in the wall texture. Stop if this happens, and wait another five to 10 minutes before proceeding. For larger rooms, you can begin knocking down the peaks in the slap brush texture immediately. Once the peaks on every wall have been flattened, the walls can be left to dry for 24 hours before painting.
