
We may earn revenue from the products available on this page and participate in affiliate programs. Learn More ›
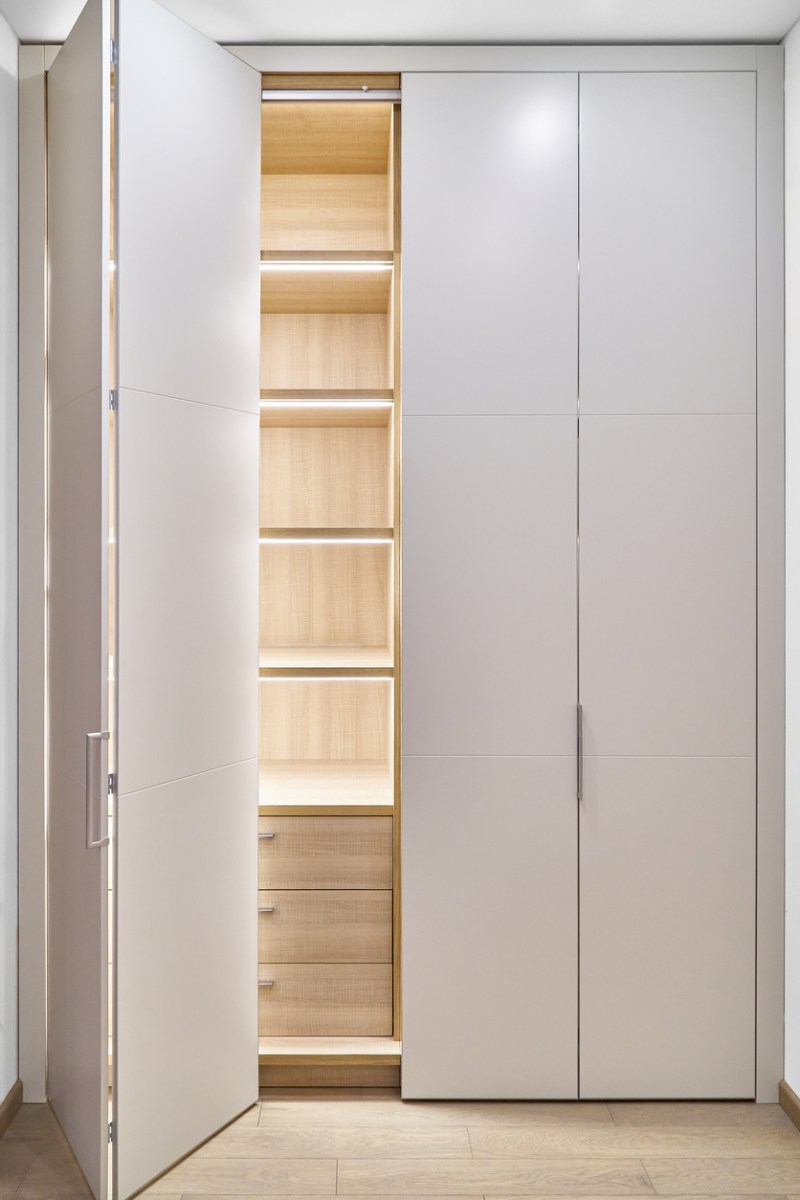
Sliding closet doors are a common installation in American homes, but that doesn’t necessarily mean they’re the best option. The problem with the ubiquitous sliding door is that it only allows access to half of the closet at any one time, which creates an organizational challenge.
As many homeowners are looking to maximize their storage space with specialty closet organization systems, or adding double or triple closet rods to fit more hangers, those traditional sliding doors have got to go! If you’re looking for a space-saving alternative, one that will enhance the look of your closets and provide easier access to their interior space, then consider installing bifold closet doors. In this guide, learn the ins and outs of popular style options and how to install bifold doors in your home.
Tools & Materials
Bobvila.com may earn a commission from purchases made through these links.
- Metal tape measure
- Level
- Screwdrivers (regular and Phillips)
- Hammer
- Bifold door kit and hardware
- Sawhorses
- Sandpaper (180- and 220-grit)
- Safety glasses (for sanding)
- Paint brush (if painting)
- Paint (if painting)
- Wood stain (if staining)
- Clear sealer (typically polyurethane; if staining)
- Disposable paint brushes
- Rags (if staining)
Before You Begin
Bifold doors typically refer to folding door panels that “stack” in and out of a given space. Also known as concertina doors or accordion doors (inspired by the accordion-like musical instruments), bifold doors offer a combination of space-saving functionality and convenience. Most of these folding doors come in pairs, although larger openings may require more panels.
Typical bifold doors come in kits in the most common closet sizes, and these kits generally contain all of the hardware necessary for installation. That being said, be sure to carefully review the manufacturers’ installation instructions and make sure that you have all of the necessary tools and hardware on hand before beginning your bifold door installation project.
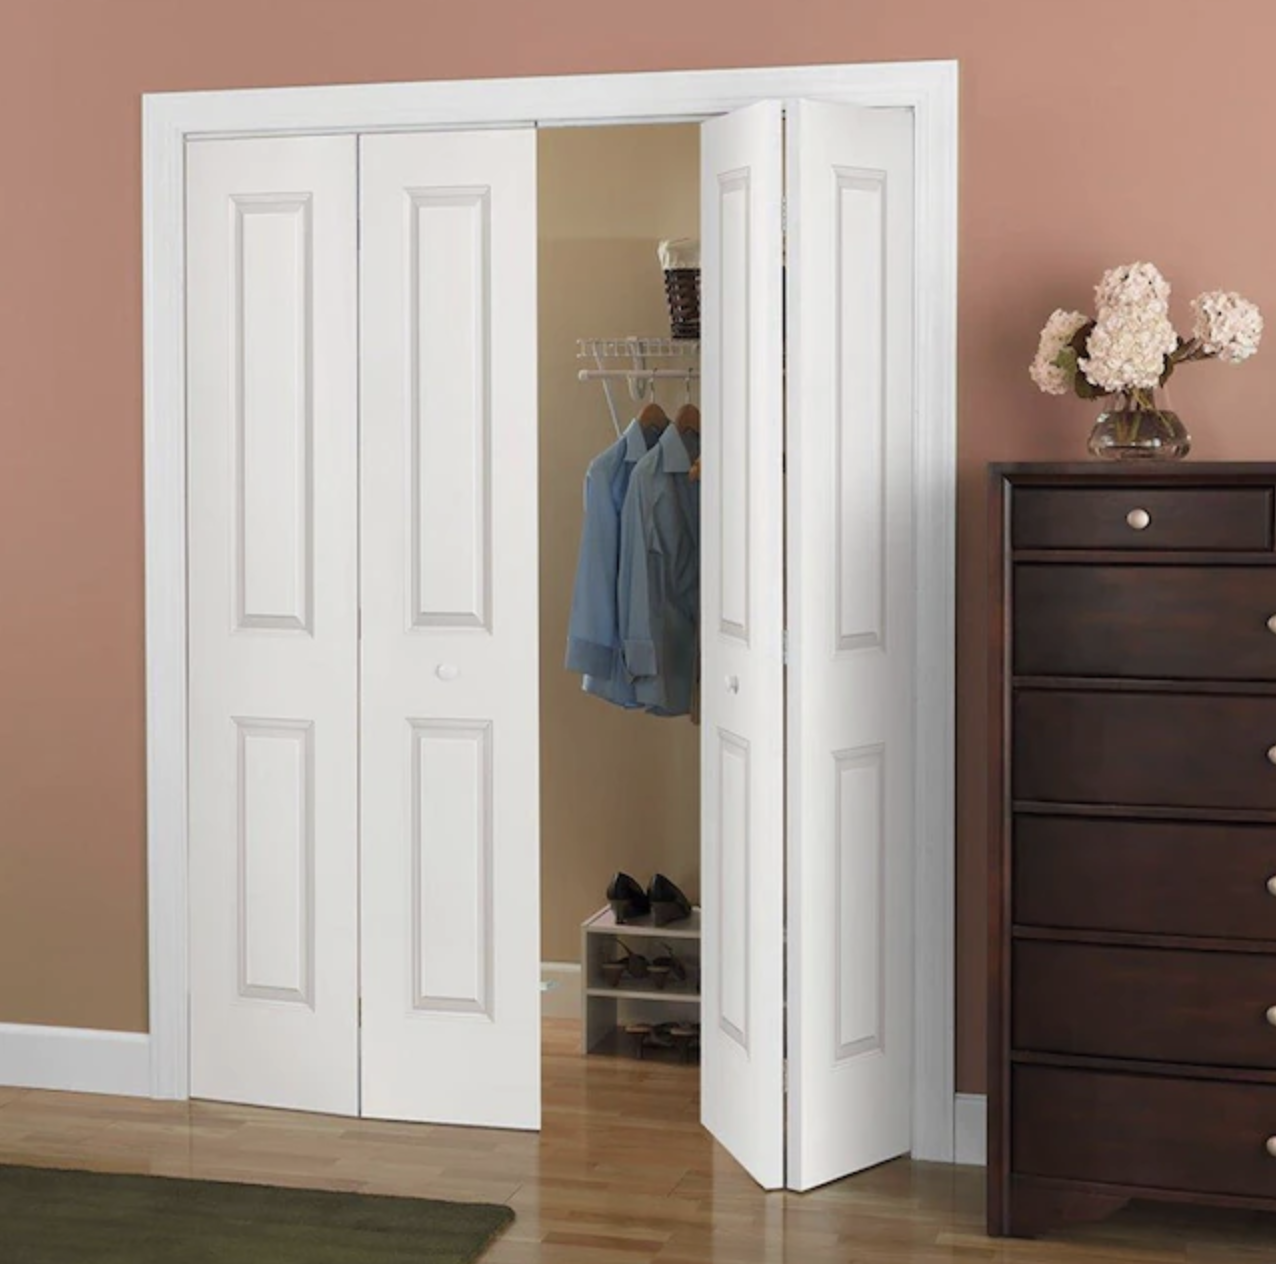
Design and Functionality
All bifold closet doors are similar in construction, consisting of two or more symmetrical door panels that pull outward from a center pivot hinge. Mounted on the sides of a closet opening, these bifolding closet doors allow access to the entire closet, not one half of the closet at a time, as is the case with sliding doors. Also, because these are foldable doors and do not swing, they take up less floor space than a conventional hinged door, making them ideal for installation in tight spaces like a hallway.
Bifold doors also are ideal for use in bedrooms, laundry rooms and mud rooms, where space is at a premium. They also work well with many closet storage options, and are great for accessing small closets. In addition to home interiors, there are bifold doors specifically designed for exterior use, allowing access to patios, decks, and other outdoor spaces.
RELATED: 12 Ways You May Be Wasting Closet Space
Style Options
Bifold closet doors are easy to install and offer myriad options in terms of both appearance and construction, including:
- Basic flat-panel looks
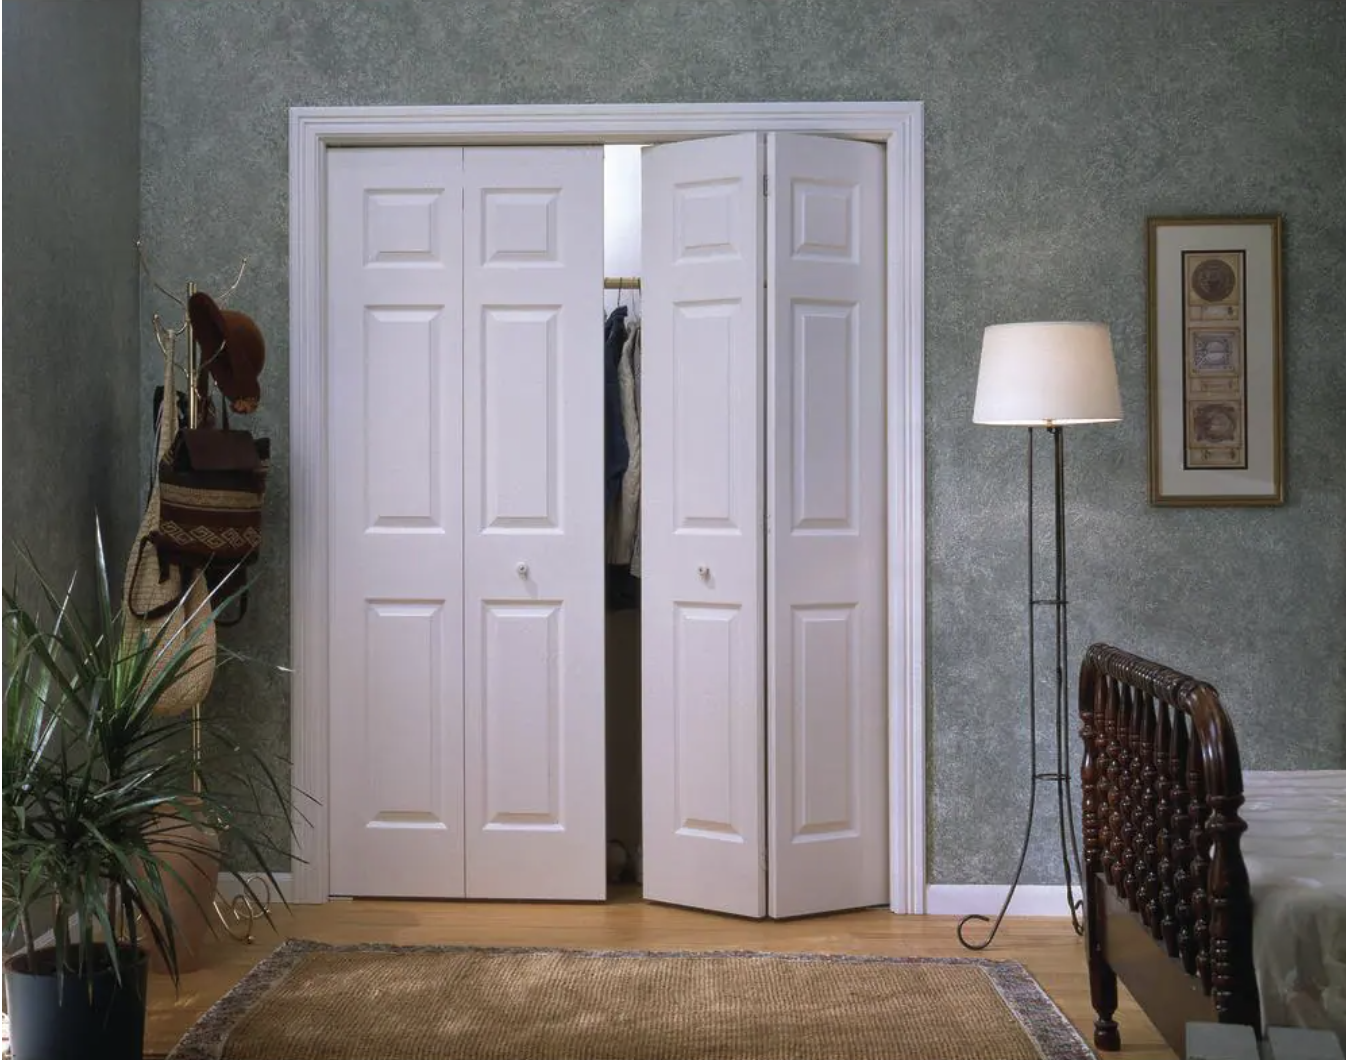
- Traditional six-panel designs
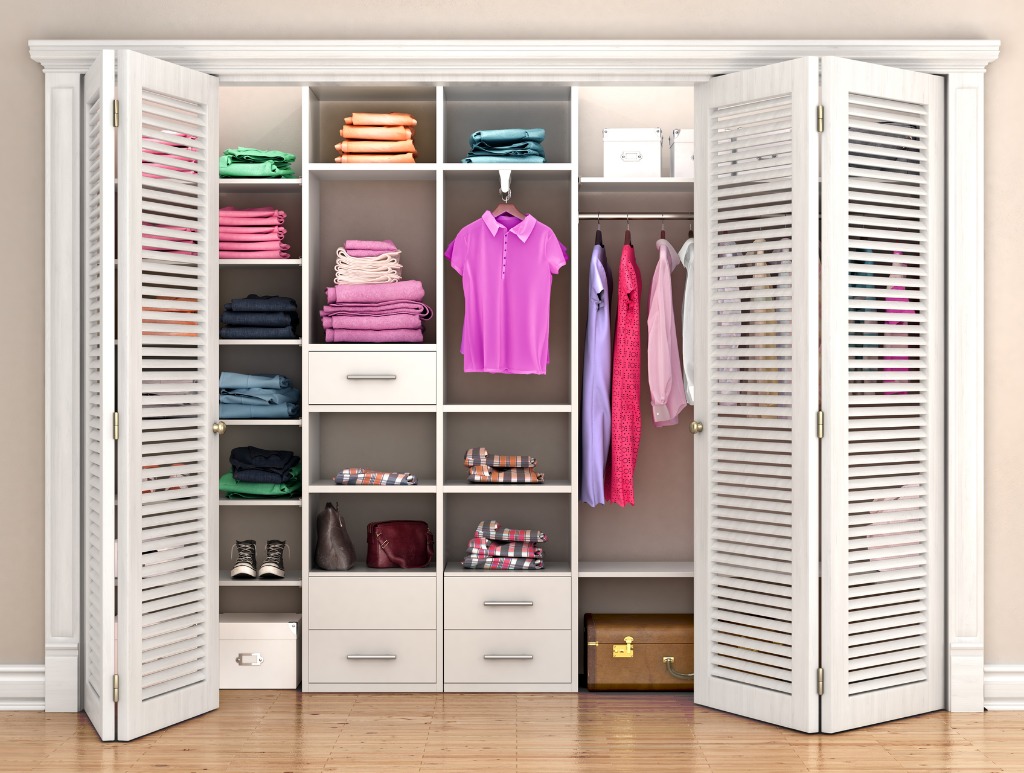
- Louver- or shutter-style panels
- Contemporary mirrored panels
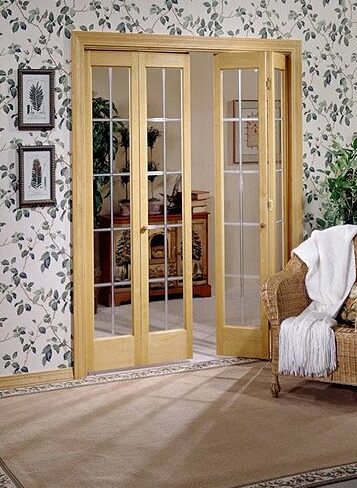
- Doors with glass inserts
Because many bifold doors are installed on bedroom closets, models with mirrored panels are quite common. In traditional homes with interior doors that feature six-panel designs, most bifold doors also feature a six-panel design. Louvered doors are an attractive alternative that can add a decorative touch to bifolding doors; the open slats on this style of door allows airflow into the closet area, preventing the “musty closet” smell.
Most interior bifold doors are constructed of wood and can be painted or stained; there are also versions constructed of powder-coated aluminum, and also less expensive units made from fiberglass or composite. Budget-conscious consumers may want to consider flat-panel doors, as these are typically less expensive than louvered or multi-panel designs.
Bifold Door Kits
Most large home improvement stores sell bifold closet doors in standard sizes to fit a typical opening; many also sell reasonably priced kits that include the door panels, installation tracks, installation hardware, and door pulls or knobs. Many retailers also sell bifold door pulls and knobs separately, so you can choose the best handles for bifold doors that also suit your specific room decor.
These kits come with diagrams that show how the hardware should be positioned on the door frame and on the door panels. Following the diagram will ensure that the pieces are correctly installed and that the doors work properly.
RELATED: 10 Chic New Ideas for Barn Doors
Most retailers also offer custom-order bifold doors that can be sized to fit virtually any opening. Wider openings may require multiple sets of doors.
Installing Bifold Doors in 6 Simple Steps
Installing bifold doors is an easy and affordable weekend project for most DIYers. Although the cost of bifold doors will vary depending on the size, design, and construction of the models you choose, typical bifold door kits cost between $150 and $500. Larger, multifold doors can cost as much as $2,000.
Regardless of the design you choose, installing bifold doors can enhance both the look and accessibility of your closets. Throughout the process, it’s wise to consult the manufacturer’s instructions for details specific to your individual kit.
STEP 1: Measure the door opening.
The first step when installing bifold closet doors involves measuring the closet door opening and then purchasing a kit in the correct size. The combined measurement of both doors should be about an inch less than the total width of the opening, and 1 to 2 inches less than the height of the door frame. This is to allow sufficient room for the hardware.
STEP 2: Finish your bifolding doors as desired.
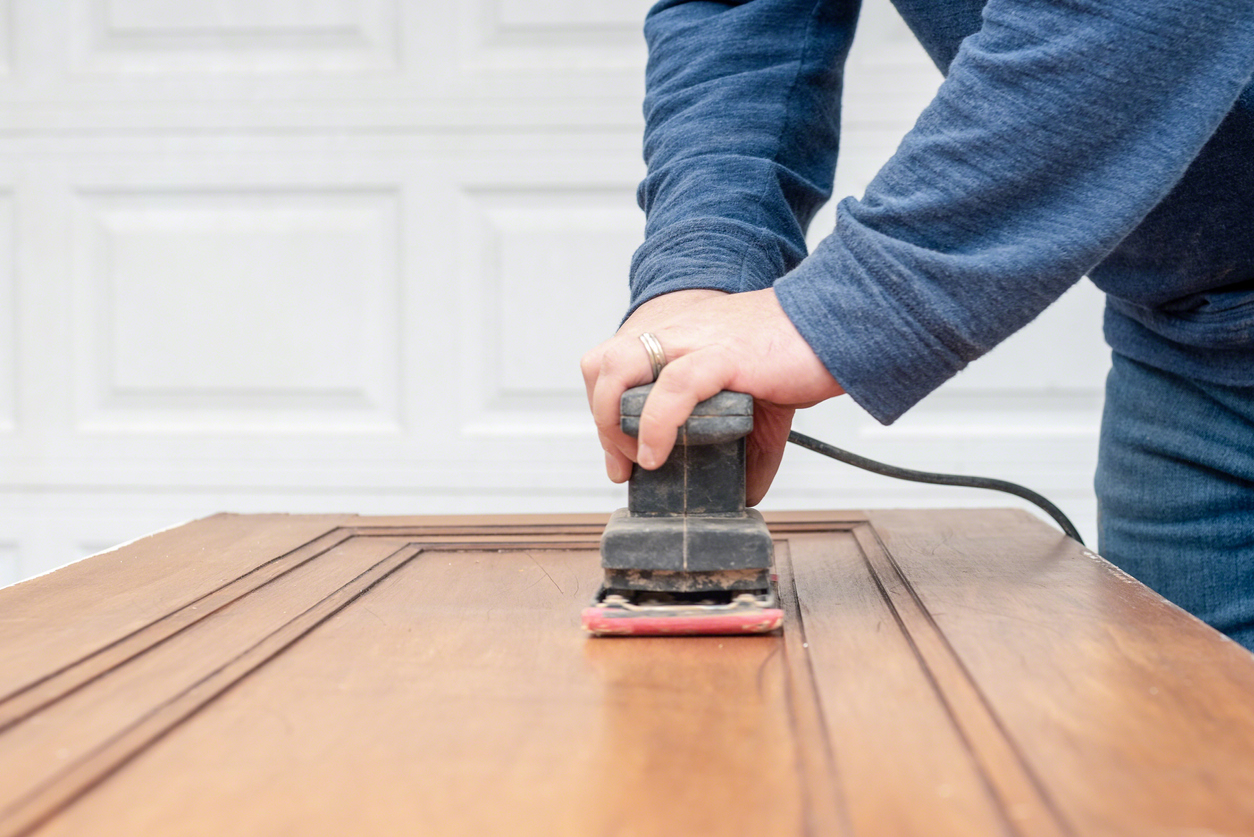
Prior to installation, paint, stain, or finish the door panels as desired. The type of finish you select will depend on the construction of the door you purchase. Since the most popular bifold doors are constructed of wood, you have a wide variety of options in terms of painting or staining the wood. Some bifold doors come prefinished or pre-primed; others are sold “raw.”
Typically, most homeowners paint the doors either to match or complement the existing walls using a good quality interior paint. Before finishing, remove all pre-installed hardware, and mask any glass or mirrored inserts, if applicable.
- If the doors are pre-primed, you simply have to lay them flat on sawhorses and paint them, painting in the direction of the wood grain. Two coats of good quality paint will usually cover a pre-primed surface.
- If the wood is unfinished, give the door panels a light sanding with 180-grit sandpaper, sanding in the direction of the wood grain. Wipe the dust and debris from the panels with a clean cloth and then apply a primer coat, followed by two coats to paint.
If you choose to stain the door panels, remove the hardware and mask any inserts as you would with painting; set the door panels flat on sawhorses. Lightly sand the surfaces with 180-grit sandpaper, sanding in the direction of the wood grain. Wipe the dust and debris from the panels with a clean cloth and then apply the desired color of wood stain. Most usually apply two coats of stain, followed by two coats of clear sealer (typically polyurethane), and sanding lightly with a 220-grit or finer sandpaper between coats. Always apply stain in the direction of the wood grain.
Typically, fiberglass, composite, and aluminum door panels are sold already finished. Always make sure that the door panels are finished prior to replacing the hardware and beginning the installation process.
Once the door panels are finished, re-attach the hinges and other hardware.
RELATED: How to Paint an Interior Door
STEP 3: Install the sliding door tracks.
Now it’s time to install each sliding door track rail. Use screws that came with the door kit to install the top rail, placing it so that the end of the rail touches the side of the door frame where you want the door panel to be seated when opened.
Install the bottom rail in the same way, making sure the end of the rail touches the same side of the door frame. Note that some hardware kits feature a bottom pivot that mounts to the door jamb instead of the floor.
STEP 4: Insert dowels into the pre-drilled holes in the door panels.
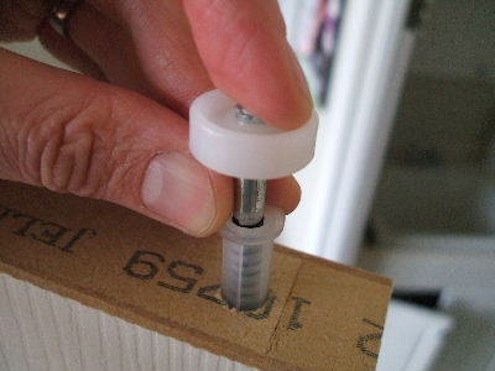
A potential source of frustration in the installation process is making sure that all of the hardware is attached and adjusted properly; otherwise, the door panels will not operate smoothly. Make sure to double-check the manufacturer’s instructions that come with your bifold door kit to make sure that you have all of the appropriate hardware pieces and that you have attached the correct pieces in the proper locations. It is always a good idea to double-check your measurements prior to starting the installation.
The next step is inserting dowels into pre-drilled holes in the tops of the door panels. Check the installation instructions to identify the different types of dowels included in your kit. Usually there are several different types of dowels, each of which serves a different function. Some dowels with adjustment screws are used to adjust the height of the door (see below). There are also stationary dowels that are placed in the top and bottom of the door panel, and there is a dowel with a spring assembly.
Make sure all of these hardware pieces are placed in the correct locations to ensure the door panels work properly. You may need a hammer to lightly tap the dowels into place. Note: Some hardware kits have pins and screws, rather than dowels.
STEP 5: Adjust the height of the door.
One dowel has an adjustment screw that allows you to adjust the height of the door; this dowel should be placed near the side wall on the bottom. Meanwhile, stationary dowels should be placed in the top and bottom of the door panel, on the side farthest away from the hinge. Finally, insert the dowel with spring assembly into the top of the door panel that is closest to the side wall.
STEP 6: Adjust the folding door hardware so the door hangs properly.
Once you have installed the dowels, set the door panels into the top and bottom rails and adjust the screws in order to center the doors. You may want to enlist a helper to hold the door panels in place while you make these adjustments.
Do not tighten any of the folding door hardware at this stage. Make sure that the doors fit evenly top to bottom, and make sure that the doors open and close properly; the action should be smooth and not jerky. Once the doors are centered and aligned top to bottom, tighten all hardware and install the door pulls.
Final Thoughts
Bifold doors are an easy, affordable DIY project that can maximize access to closets and enhance the overall appearance of interior rooms. They are a stylish upgrade to conventional sliding closet doors, and perfect for use with today’s many options for closet organization systems.
The slim silhouette and range of design options in bifold door panels ensure that you can complement virtually any interior design aesthetic. And the fact that most major home centers offer a wide variety of kits makes installation well within the reach of many homeowners.
The step-by-step installation instructions listed here are intended as a guideline; make sure to consult and follow the manufacturers’ instructions that come with your specific kit, as mounting hardware and installation details may vary.
FAQs About Bifold Door Installation
Bifold doors are a popular upgrade for many interior closets and other tight spaces. Handy homeowners can add value and style by purchasing bifold door kits, which allow for easy DIY installation. Here are answers to a few of the frequently asked questions about bifold doors.
Q. Can you open bifold doors from both sides?
Typically, bifold doors open from the center and fold back on both sides, although you can configure them to open to one side or the other. Refer to the manufacturers’ instructions to determine how to properly install and hang the doors so that they open the way you desire.
Q. How do you frame an opening for bifolding doors?
If you are starting from scratch and installing a new frame for bifolding doors, measure the height of the opening in three places: far left, center, and far right. Also measure the width in three places: top, middle, and bottom.
The framing should be an inch larger than the bifold doors you want to install, or, to put it another way, the kit you purchase should have a combined width about 1-inch less than the width of the framed opening; and about 1 to 2 inches less in height, to allow for proper clearance on the floor.
Q. Do bifold doors need a bottom track?
There are two basic types of bifold door kits: “top hung” doors and “bottom-rolling” doors. The name refers to where the main weight of the door panels is supported.
Sometimes top-hung bifold doors have a bottom pivot that mounts to the door jamb instead of having a track on the floor; in these cases the bottom track is optional. Bottom-rolling doors always require a bottom track.
Q. How do you rehang a bifold door?
Rehanging a bifold door starts at the top: place the top pivot hinge pin in the hole in the top hinge bracket, and the top door track pin in the top track. Push up on the door panel, and seat the bottom pivot hinge bolt in the bracket, making sure that the door panel is aligned properly. You may have to loosen the screw on the top bracket and adjust it.
Open and close the door panels to make sure that the operation is smooth and the door panels have enough clearance on the sides, and then retighten the hardware.
Q. How do you make a door jamb for a bifold door?
The term “door jamb” refers to the two vertical sides of the door frame. Follow the same procedure as you would for framing the door by measuring the height of the opening in three places: far left, center, and far right. Also, measure the width in three places: top, middle, and bottom. The framing pieces, including the door jamb, should be an inch larger than the bifold doors you want to install.