We may earn revenue from the products available on this page and participate in affiliate programs. Learn More ›
If you’re keen on finding some soundproofing materials that actually work, you’re not the only one. Silence is golden for so many of us: DIYers who use loud tools, night-shift workers who must reduce unwanted noise for daytime sleeping, anyone recording music or podcasts, and anyone else trying to get some work done at home. Whether the goal is rest or activity, installing the right soundproofing material is sure to help you achieve greater peace and quiet
Cutting down on the decibels can be daunting, however, as there are many different types of soundproofing solutions, and each works differently. Effective soundproofing materials catch and absorb sound waves to control their passing through barriers, leaving your home quieter and enhancing the audio quality of the sounds inside your space. Our current favorite soundproofing material is the ATS Acoustics Sound-Absorbing Panel thanks to its simple installation and ability to effectively reduce noise levels. But there are many others we like, as well. Read on to learn more about the best soundproofing materials for muffling noise and to find the product that fits your needs, style, and budget.
- BEST OVERALL: ATS Acoustics Sound-Absorbing Panel
↓ Jump to Review - BEST BANG FOR THE BUCK: SoundAssured Soundproofing Acoustic Studio Foam
↓ Jump to Review - BEST DECORATIVE: Bubos Art Acoustic Panels
↓ Jump to Review - BEST SOUND INSULATION: Rockwool Safe‘n’Sound Fire & Soundproof Insulation
↓ Jump to Review - BEST SOUNDPROOF CURTAINS: Nicetown Thermal Insulated Noise-Reducing Blackout Curtains
↓ Jump to Review - BEST ACOUSTIC UNDERLAY: FloorMuffler ultraSeal HD Premium Underlayment
↓ Jump to Review - BEST ACOUSTIC CAULK: Green Glue Noiseproofing Sealant With Cleanup Wipes
↓ Jump to Review - BEST FOR CARS: Kilmat Car Sound Deadening Mat
↓ Jump to Review - ALSO CONSIDER: Nicetown 3-Pass Noise Reducing Thermal Curtains
↓ Jump to Review
Soundproofing Materials Comparison Chart
| Product Name | Type | Rating | Extra features |
| ATS Acoustics Sound-Absorbing Panel | Acoustic panel | NRC 1.0 | Light control, styling |
| SoundAssured Acoustic Foam Wedge-Style Panels | Acoustic panel | NRC 0.65 | Light control |
| Bubos Art Acoustic Panels | Acoustic panel | NRC 0.95 | Flame retardant, styling |
| Rockwool Safe‘n’Sound Fire & Soundproof Insulation | Insulation | NRC 1.05 | Fire-resistant |
| Nicetown Thermal Insulated Noise-Reducing Blackout Curtains | Curtain | Not available | Light control, styling |
| FloorMuffler ultraSeal HD Premium Underlayment | Underlayment | 73 STC | Moisture barrier |
| Green Glue Noiseproofing Sealant With Cleanup Wipes | Coating | Not available | Insulation |
| Kilmat Car Sound Deadening Mat | Underlayment | Not available | Installation indicator |
| Nicetown 3-Pass Noise Reducing Thermal Curtains | Curtain | Not available | Thermal insulation |
Our Top Picks
From soundproof foam and acoustic panels to mineral wool and more, the following are some reliable sound-absorbing products for home and professional use. When comparing these products, shoppers will want to keep their most important considerations in mind, whether it’s cost, performance, ease of installation, or any additional features offered.
Best Overall
ATS Acoustics Sound-Absorbing Panel
See ItWhat We Like
- Excellent noise absorption of sound waves
- 2-inch-thick construction with a solid wood frame
- Available in various colors
- Easy to install compared to similar options
What We Don’t Like
- One of the more expensive panels
Specs
- Type: Acoustic panel
- Rating: NRC 1.0
- Extra features: Light control, styling
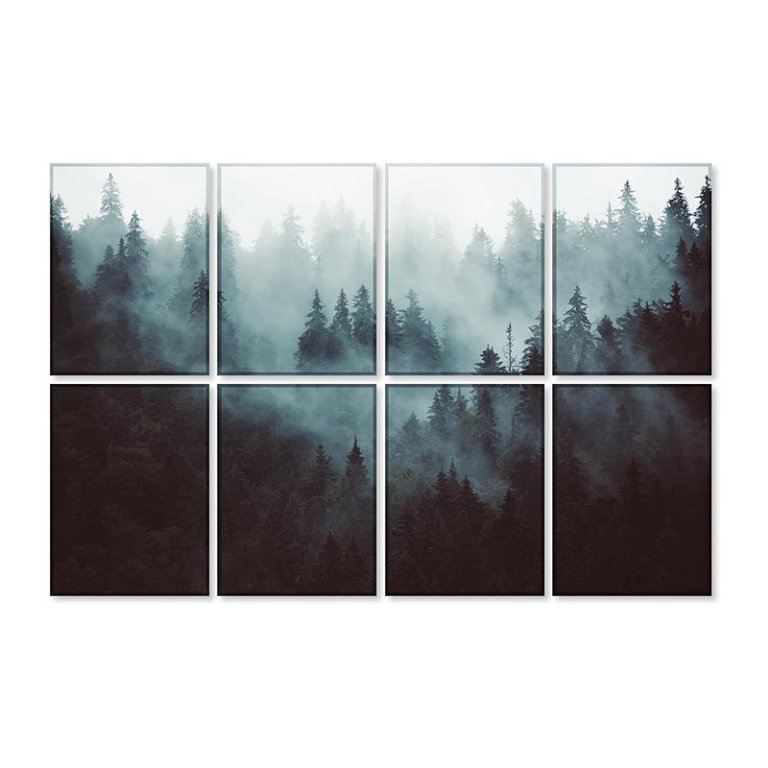
For those who don’t find foam panels or rubber sheets especially attractive, these jute-covered acoustic panels might be the ticket. The 2-foot by 4-foot panels are 2 inches thick and have solid wood frames that make them a snap to hang or attach to a wall. Though they’re available in a few different colors, the neutral tones like ivory and natural tend to suit homes and offices best.
These exterior sound-absorbing panels from ATS offer a Noise Reduction Coefficient (NRC) rating of 1.0, which measures how effectively a product absorbs sounds. On a scale of 0 to 1.0, a product with a rating of 1.0 is the most effective at reducing noise (though in some circumstances, the NRC rating can creep above 1.0).
The jute fabric will also do its part to minimize light reflection, which can be especially helpful for folks who need to sleep in after the sun rises. Plus, it can help reduce sound vibrations. However, if all that’s required is echo control, there are less expensive options that will do the trick.
Get the ATS Acoustics soundproofing material at Amazon.
Best Bang for the Buck
SoundAssured Acoustic Foam Wedge-Style Panels
See ItWhat We Like
- Easy installation (spray adhesive or double-sided utility tape)
- Very affordable option
- Available in several colors
What We Don’t Like
- Not the most effective sound-deadening option
Specs
- Type: Acoustic panel
- Rating: NRC 0.65
- Extra features: Light control
Soundproofing is serious—but it doesn’t have to look that way! The budget-friendly SoundAssured acoustic foam panels are available in a host of colors, including blue, green, and purple. These sound-dampening panels come in sections that are 1 foot square and 2 inches thick to keep noise to a minimum. They’re sold in a set of four, and shoppers can purchase several sets in different hues to create a fresh, exciting pattern at an attractive price.
We appreciate how easy these acoustic foam panels are to install with spray adhesive or double-sided utility tape strips. They’ll also do a decent job of absorbing light, keeping excess light reflection to a minimum. With an NRC rating of .65, they’re adequate but not as effective as some other options. So, while they’re great for catching echoes and creating better sound quality for in-home studios and offices, they won’t fully block that cacophonous garbage truck as it rolls down the street.
Get the SoundAssured soundproofing material at Amazon.
Best Decorative
Bubos Art Acoustic Panels
See ItWhat We Like
- Many other colors and styles also available
- Excellent NRC rating
- Easy to install using double-sided foam tape
What We Don’t Like
- Outfitting an entire room can get expensive
Specs
- Type: Acoustic panel
- Rating: NRC 0.95
- Extra features: Flame retardant, styling
For those whose home office or studio calls for something a bit classier than the eggcrate look or a network of ridges, rely on the sound-absorbing Bubos acoustic panels. The 12-inch by 16-inch panels (sold in packs of eight) come in various solid colors as well as a variety of interesting patterns. Choose a simple, client-friendly design or go full-traveler mode with a world map background.
These sound-dampening acoustic panels are made from 100 percent polyester, so they’re safe for families and pets, with no off-gassing, dust, or other possible harmful materials. They’re also flame retardant.
Outfitting an entire room with these stylish squares could get expensive. However, they’d make an attractive addition as an inset design surrounded by ridged acoustic panels.
Get the Bubos soundproofing material at Amazon.
Best Sound Insulation

Rockwool Safe‘n’Sound Fire & Soundproof Insulation
See ItWhat We Like
- Easy to install during a renovation
- Cuts easily and fits with friction
- Water-, fire-, and moisture-resistant
- Hides out of sight behind the drywall
What We Don’t Like
- Proper installation requires full access to stud bays
Specs
- Type: Insulation
- Rating: NRC 1.05
- Extra features: Fire-resistant
When it comes to adding a layer of soundproofing behind the drywall, it’s tough to beat this sound-dampening insulation from Rockwool. This effective solution can reach an NRC rating of 1.05, creating a solid foundation for soundproofing rooms or studios.
This batt insulation consists of mineral wool, which does a good job of reducing and absorbing sound while also resisting moisture, water, and fire. And, because it hides behind the drywall, it leaves room for creatively decorating the space after the renovation. However, although this sound insulation for walls easily fits in 16-inch stud bays, it requires unobstructed access to those stud bays.
Get the Rockwool soundproofing material at Lowe’s or The Home Depot.
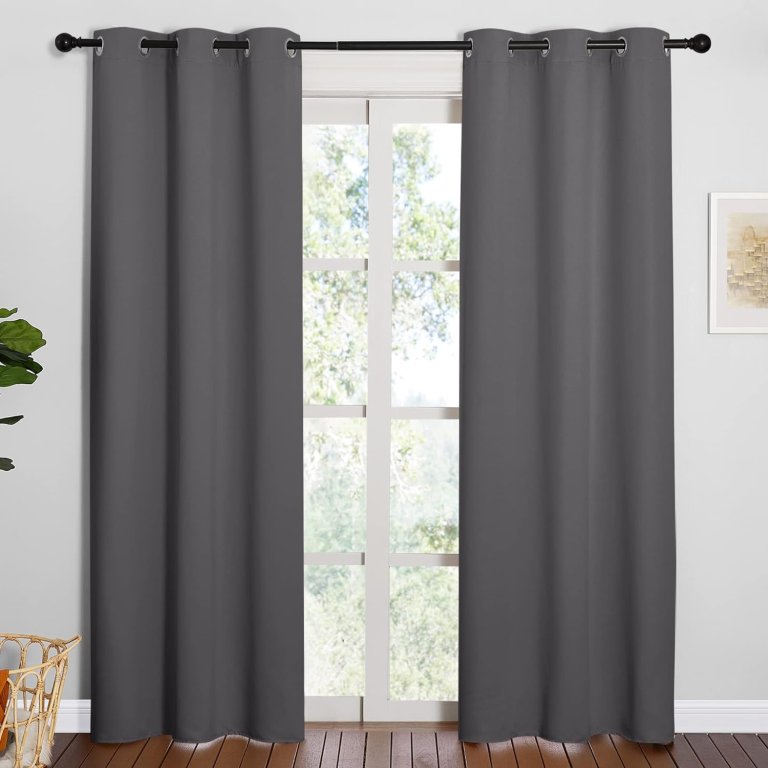
Best Soundproof Curtains
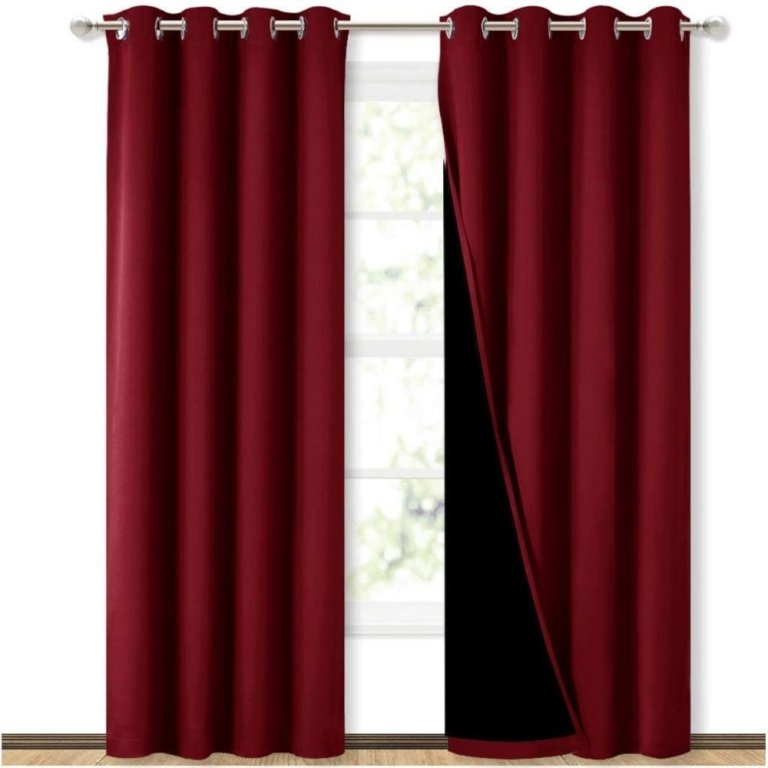
Nicetown Thermal Insulated Noise-Reducing Blackout Curtains
See ItWhat We Like
- Blackout curtains also block sunlight and UV rays
- Available in several colors and sizes
- Absorbs about twice more noise than traditional curtains
What We Don’t Like
- No NRC or STC rating available
Specs
- Type: Curtain
- Rating: Not available
- Extra features: Light control, styling
These soundproof and blackout curtains from Nicetown feature two layers of thick, triple-weave polyester fabric. This design allows them to absorb sounds up to two times more than traditional curtains, keeping the room quiet and peaceful. The two-layer design also adds a barrier of insulation to prevent warm and cold air from escaping or seeping in from outside. However, there isn’t an NRC or STC rating available.
As a bonus, these soundproof curtains block 100 percent of sunlight and UV rays from entering a room. These acoustic drapes are available in multiple sizes and 16 color options to match different room decors and personal preferences. When needed, safely machine-wash these curtains in warm water with a mild detergent and iron them on low heat.
Best Acoustic Underlay
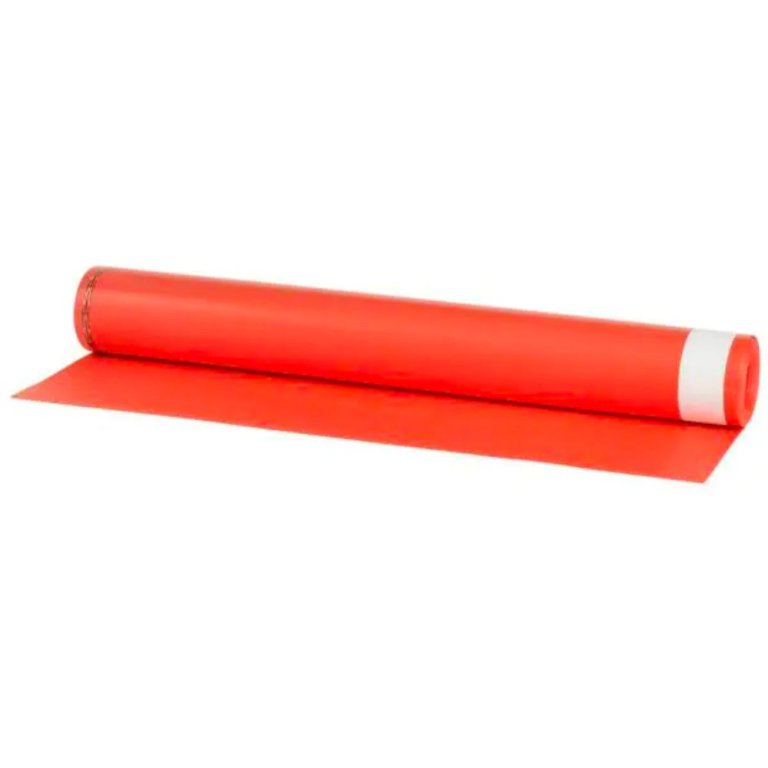
FloorMuffler ultraSeal HD Premium Underlayment
See ItWhat We Like
- Very effective noise reduction; 73 STC noise rating
- Can be easily installed under any flooring material
- Hides out of sight; won’t take up wall space
What We Don’t Like
- Must be installed with new flooring
Specs
- Type: Underlayment
- Rating: 73 STC
- Extra features: Moisture barrier
Anyone installing a new floor who would also like to benefit from some noise reduction should consider FloorMuffler’s ultraSeal HD Premium Underlayment. If the user plans correctly, the layer can be installed under laminate, engineered, or solid hardwood floors to create up to 73 STC—making a real difference in the amount of sound that travels through the floor.
This product installs easily underneath the flooring material of choice. It has adhesive strips along its length to seal the rows together as well. This creates an effective barrier against external noises and serves as the moisture barrier almost all flooring materials require. Plus, it installs underneath the floor, keeping it out of sight. We think the only downside to this product is that the user has to be willing to install a new floor over it, meaning it requires more planning and a larger budget than other soundproofing options.
Get the FloorMuffler soundproofing material at The Home Depot.
Best Acoustic Caulk
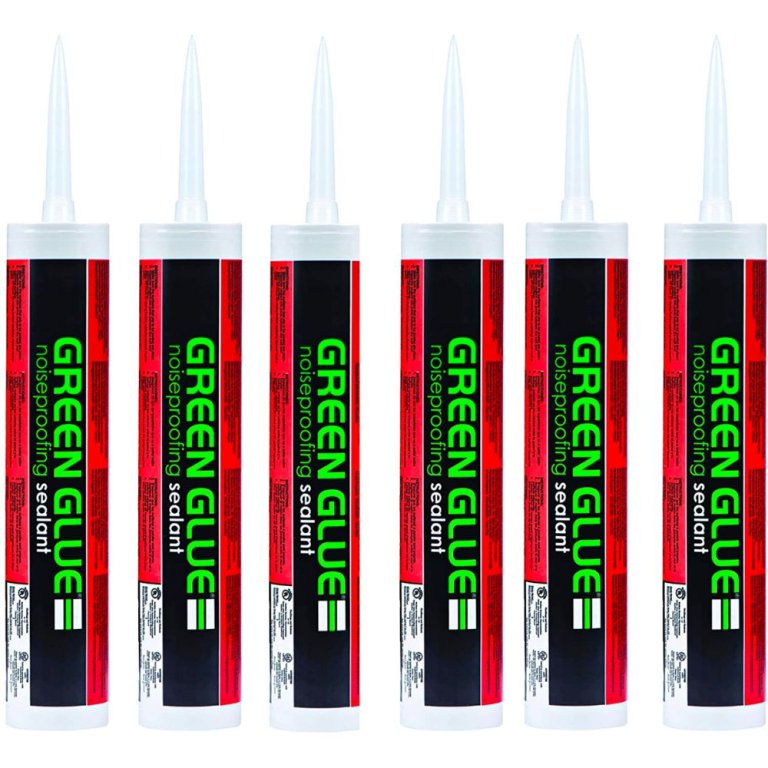
Green Glue Noiseproofing Sealant With Cleanup Wipes
See ItWhat We Like
- Easy to install using large caulking guns
- Isn’t easily visible; paintable for a seamless look
- Complements insulation and underlayment installations
- Doesn’t take up space
What We Don’t Like
- Requires large caulking gun (not included)
Specs
- Type: Coating
- Rating: Not available
- Extra features: Insulation
Home soundproofers looking to go the extra mile with their noise-reduction efforts will want to give Green Glue’s Noiseproofing Sealant a try. This acoustic-coating product seals cracks and gaps along doors, windows, flooring, ceilings, and anywhere else two objects might meet and fail to create a perfect seal. While this product is not STC- or NRC-rated, it is the next logical step after insulation, underlayment, and other, bigger soundproofing projects.
This caulk comes in 29-ounce tubes, so users will need large caulking guns, though it then becomes very easy to apply. Also, understand that this sealant doesn’t come out green; it’s white and totally paintable. Once applied around a window or door, it will cut down on noise transmission plus offer a bit of insulation.
Get the Green Glue soundproofing material at Amazon (6 tubes).
Best for Cars
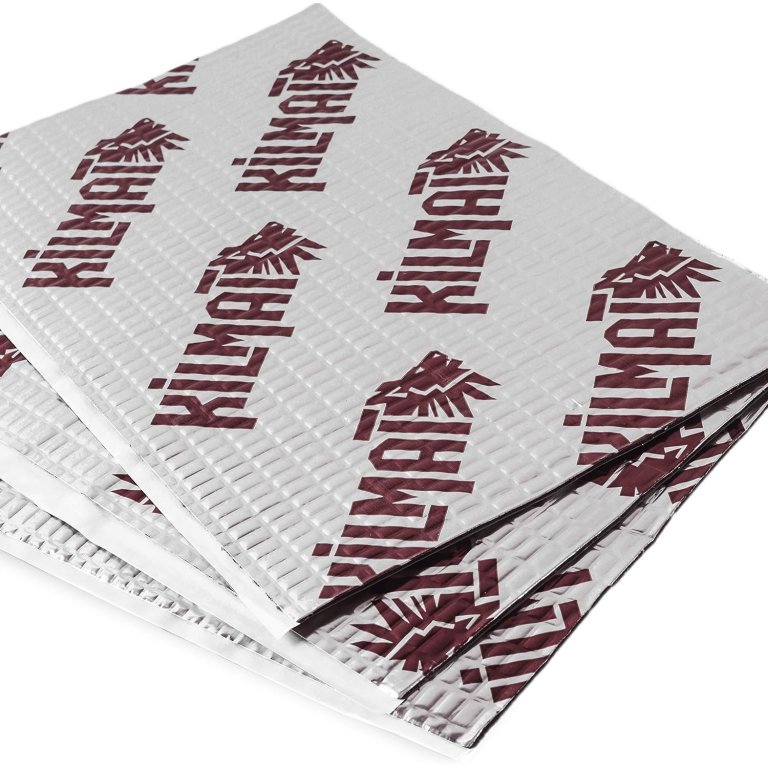
Kilmat Car Sound Deadening Mat
See ItWhat We Like
- Improved design is 1.5 times thicker
- Self-adhesive backing can be easily cut and placed
- Unaffected by cold or warm weather
What We Don’t Like
- Installation requires a roller
Specs
- Type: Underlayment
- Rating: Not available
- Extra features: Installation indicator
Soundproofing extends to vehicles, too. Anyone who’d like to cut down on engine hum or road noise will want to consider installing Kilmat’s Car Sound Deadening Mat. This soundproofing underlayment installs under a vehicle’s carpets, door panels, hood, trunk, firewall, or ceiling, and helps reduce the sounds transmitted from the road and engine.
The mat is easy to cut and features a self-adhesive backing that the user must simply stick in place. The material also indicates that it was installed properly by laying perfectly smooth. While the Kilmat Car Sound Deadening Mat installs easily, it requires a roller, which some DIYers might not have on hand for proper sound reduction.
Get the Kilmat soundproofing material at Amazon.
Also Consider
Nicetown 3-Pass Noise Reducing Thermal Curtains
See ItWhat We Like
- Improved design is 1.5 times thicker
- Self-adhesive backing can be easily cut and placed
- Unaffected by cold or warm weather
What We Don’t Like
- Installation requires a roller
Specs
- Type: Underlayment
- Rating: Not available
- Extra features: Installation indicator
Nicetown’s thermal curtains feature insulating layers with a black yarn layer sandwiched between two microfiber layers. They provide protection against both winter cold and summer heat while reducing noise and blocking up to 99 percent of sunlight.
With 1.6-inch grommets, these curtains are suitable for most standard rods. With a wide range of over 30 solid colors, these will easily match your decor style. And, with a huge variety of sizes on offer, they’ll fit virtually any window. They’re also machine-washable, so they’re easy to clean (though it may be time-consuming to get the wrinkles out afterward).
What our tester says: Stacey Nash, a Bob Vila product tester and writer, notes in The Best Thermal Curtains that “during testing, we found the triple-layer design effective at hiding the inner black thread layer. They dampened some noise but were not entirely noise blocking. They did a good job of blocking out light and heat; we’d put the percentages at 75 and 80 percent.”
Get the Nicetown soundproofing material curtains at Amazon.
Jump to Our Top Picks
How We Chose the Best Soundproofing Material
Before putting this list together, we wanted to ensure we were suggesting the best soundproofing materials on the market. In order to do that, we had to perform extensive research and compare the best features and capabilities of all these products.
First, we looked for sound-absorbing products that spanned the different types of soundproofing materials. Then, we compared NRC and STC ratings between those products to offer the most effective models. Finally, we looked at all the chosen products and sorted them by the most common categories that shoppers would require. The end result is a list of some of the best soundproofing materials available.
What to Consider When Choosing a Soundproofing Material
There is a balance to strike between effectiveness, ease of installation, cost, and other features concerning soundproofing materials that might not be evident at first. The following are some of the most important considerations to keep in mind when choosing between soundproofing methods.
Common Types of Soundproofing
Soundproofing materials come in a variety of forms, each with its strengths and weaknesses. The following are some of the most common types. Some are easy to install, like window treatments, while others require a bit more effort, like soundproof wall insulation and acoustic coating.
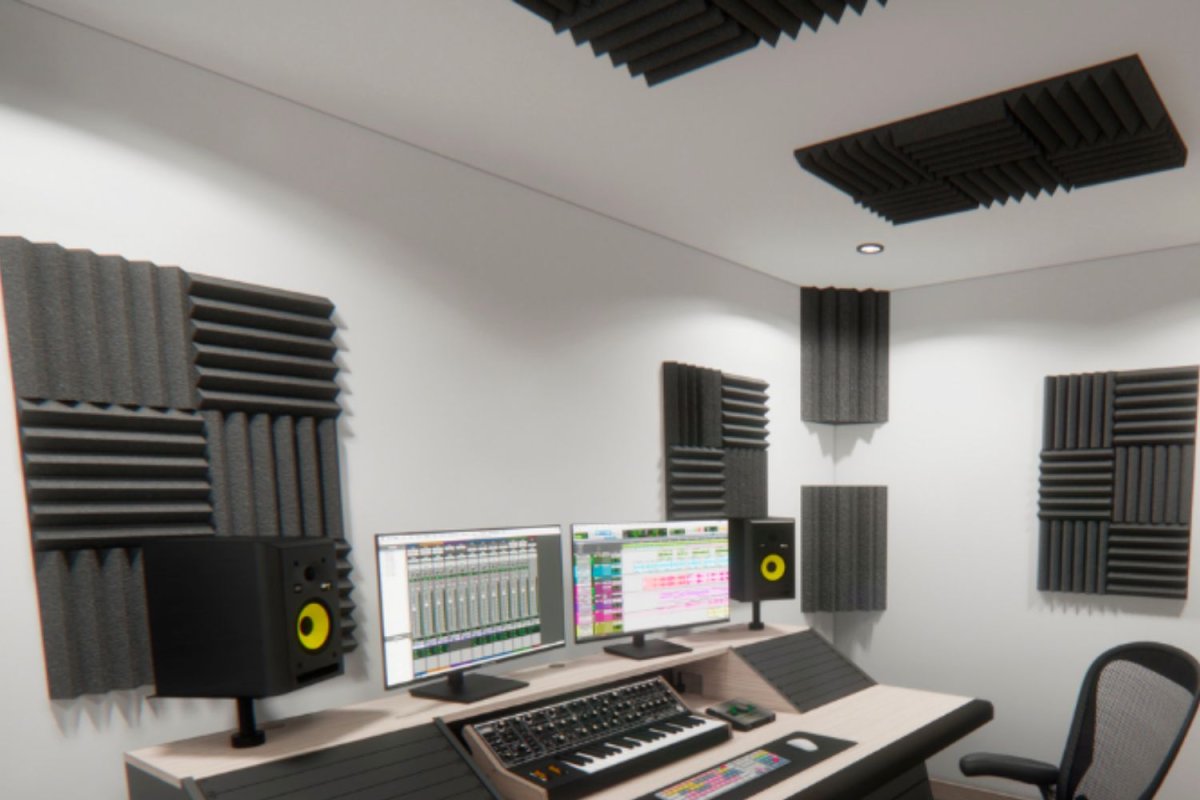
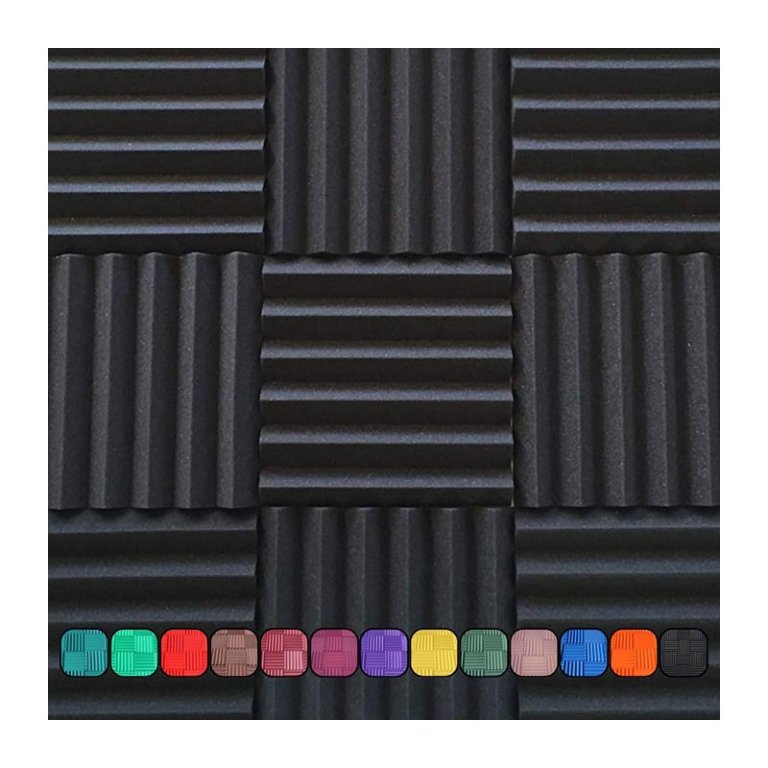
Acoustic Panels
Installing acoustic panels is one of the easiest ways to improve the acoustics within a room and provide sound absorption, but they can also help soundproof the outside world. Soundproof acoustic foam panels install on the surface of a wall; they often come attached to frames or hardboard backers.
Generally speaking, acoustic panels are made from an acoustic foam material meant to capture and muffle sound waves. More expensive panels might also have a colorful fabric or pattern stretched across them to give a decorative vibe. The less-expensive options have ridges that look like a washboard.
Prices on acoustic foam panels vary tremendously. Cheaper models can cost well under $1 per square foot, while decorative soundproof panels can cost more than $25 per square foot.
Acoustic Coating
Rather than hanging an acoustic barrier on a wall, it’s possible to paint it on. Acoustic coating, also known as soundproof paint, is a type of water-based paint designed specifically to hinder the transfer of sound waves and provide sound absorption. These soundproof paints contain ceramic microspheres, sound-absorbing fibers, and thermacels. Thermacels are tiny vacuum-sealed cells filled with a bit of pigment, and it’s this pigment that really helps muffle the sound.
Soundproof paints are heavy, but they aren’t difficult to install. A roller and a brush is all it takes. The cost per square foot of soundproof paint varies depending on the coverage, but a can of acoustic paint costs anywhere between $40 and $100.
Floor Underlayment
Ask any flooring installer and they’ll tell you the underlayment is as important as the flooring material itself, and the same applies to soundproofing. The proper flooring underlayment provides sound absorption between floors, and a high-quality underlayment can deaden the thuds of footsteps and dropped items.
The time to install a floor underlayment is when installing a new floor or carpet. It can go under carpeting, vinyl, hardwood, and other flooring materials. This form of soundproofing will cost anywhere from $1 to $5 per square foot, depending on the product and materials.
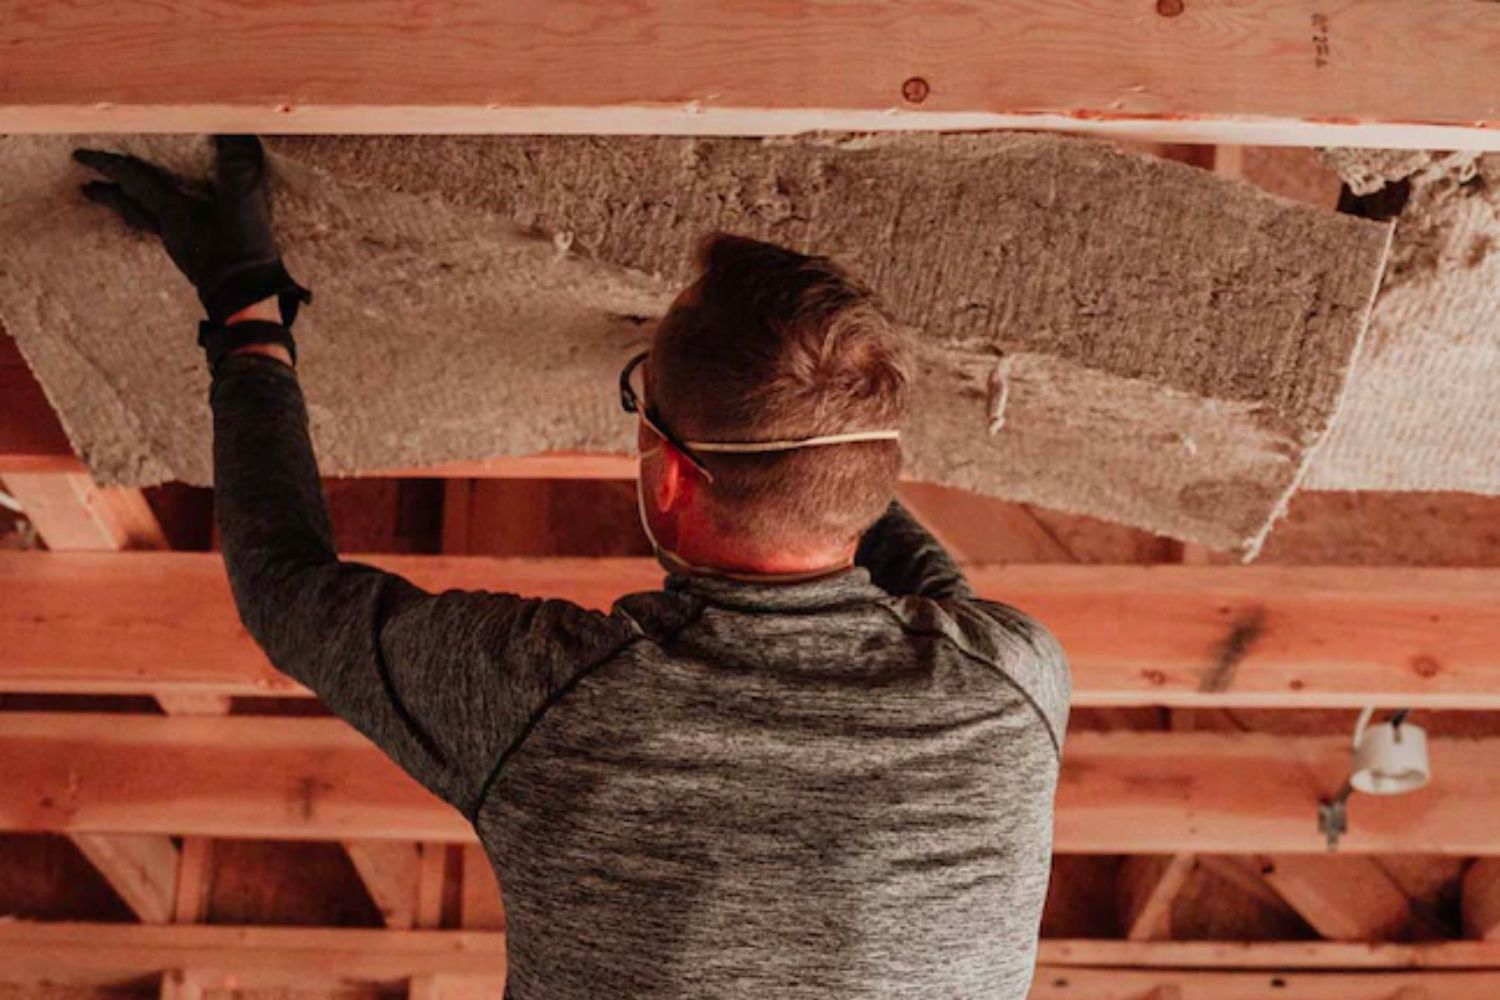
Sound Insulation
One of the most effective ways to soundproof a room or space is to use sound-reducing insulation. This insulation looks similar to fiberglass thermal insulation, but it’s typically made from mineral wool, as it is denser and more expensive than many other options. However, there are sound insulation materials made from recycled blue jeans and other fabrics.
Insulation for soundproofing is installed the same way as fiberglass insulation, making bare stud walls necessary. For that reason, it’s best to plan ahead and insulate the walls during construction or a renovation. If you install it yourself, soundproofing insulation can cost over $500 for a large room (and possibly quite a bit more than that depending on the material you use), but the price varies depending on the room size and shape.
Window Treatments
It doesn’t matter how well the walls are insulated if the windows don’t have a sound barrier stretched across them. Soundproofing windows with window treatments can block out unwanted noise, reduce sunlight, and doll the place up a bit. They also provide sound absorption within a room, preventing sound waves from bouncing off of the glass and creating reverberation or echoes.
While all fabrics help reduce sound, the main material in a set of sound-deadening curtains is PVC, which reflects sounds rather than capturing them. Regular curtains are generally expensive, but acoustic curtains can cost two to three times as much as a typical window treatment. They’re also not available in as many colors or styles, but they’re an effective option for blocking sound.
Performance
Soundproofing effects can sometimes feel relative. Changes made, such as hanging curtains or installing acoustic panels, may seem to make a major difference right away. However, over time, they might feel less effective as the user gets used to the change. For that reason, there is a rating system to help offer concrete answers as to a soundproofing material’s effectiveness.
Sound Transmission Class (or STC) is a rating of sound isolation. It’s described in numbers, and it determines how effectively a particular sound-isolation material blocks sound and noise. Generally speaking, higher numbers are better.
Noise Reduction Coefficient (NRC) describes how a product absorbs sounds, and it works on a range of 0 to 1, with 1 being the most effective. As mentioned earlier, it is possible for a product to score an NRC above 1, as did one of our favorite picks, Rockwool’s Safe‘n’Sound.) NRC ratings can be highly effective for determining a product like a panel or curtain’s effectiveness.
Cost
As mentioned above, the cost for each type of soundproofing material depends on several factors. The size of the space being soundproofed is likely the most important factor. Design and aesthetics can drive the price up, and if a renovation is necessary, the price can soar.
When determining a budget for soundproofing, it’s important to weigh what’s necessary versus what’s desired. For a podcast or music studio, full soundproofing might be necessary, requiring a larger budget. For someone who just needs to be able to sleep through school dismissal or a neighbor’s barking dog, a smaller budget should do the trick.
Installation
When determining which method or type of soundproofing materials to use, installation should be a major consideration. For someone who isn’t very handy, curtains and acoustic panels might be as far as they’re comfortable going. But for someone with some serious DIY chops, knocking down some drywall and installing soundproof insulation could be the best choice.
Generally speaking, curtains and acoustic panels are the easiest soundproofing materials to install. Next would likely be soundproof paint, though its effectiveness might not be realized without additional soundproofing methods. Finally, underlayment and wall insulation are more challenging but entirely worth it if there is already a project afoot.
Most soundproofing materials are easy to install, though. Mineral wool insulation simply pops into a stud bay, while underlayment just needs to unroll and lay on the floor. These materials rarely require specialized tools or techniques.
Extra Features
Often, the best soundproofing materials have features that serve extra purposes. Some might be additional conveniences, while others can make a difference in the user’s bank account:
- Insulation: Some soundproofing materials also insulate, reducing the need to heat or air-condition a space as extensively. Particularly in older homes without any insulation, mineral wool insulation can significantly reduce your utility bills.
- Light control: Certain materials, like curtains and acoustic panels, can help control light. Curtains can block light from getting in, while the soft fabric faces of acoustic panels can keep the light from bouncing around the room.
- Moisture control: In some cases, flooring underlayment can not only block and absorb sounds but also prevent the floor from soaking up moisture.
- Fire resistance: Mineral wool can block sounds and insulate a space, and it’s also fire-resistant. In fact, some brands offer sound insulation that can withstand temperatures in excess of 1,000 degrees Celsius.
FAQs
For more information about the best types of soundproofing material to use for various applications, read on for answers to some frequently asked questions.
Simply put, soundproofing materials function by minimizing sound energy before it reaches your ears. Different materials achieve their soundproofing effects slightly differently, but overall the premise is similar. Often this is achieved by adding mass to a structure, thereby reducing the amount of sound that can travel through it, or by utilizing materials that can “absorb” the sound, much like a sponge absorbs water.
The best way to soundproof a set of windows is by using sound-reducing curtains like the Nicetown soundproofing material drapes. Also, caulking around the outside of the window will help, and Green Glue soundproofing material glue sealant could be just the ticket.
Large-scale soundproofing generally occurs during the construction phase, so it’s best to build the walls with soundproof insulation like Rockwool soundproofing material before installing the drywall. Beyond that, installing ⅝-inch drywall and acoustic paint also will help.
The cheapest soundproofing material is generally foam, which is fairly effective and easy to install. SoundAssured’s acoustic foam panels are a good example.
This is certainly doable, though you’ll get the best results by covering acoustic insulation with new drywall. If that isn’t an option, though, you can open the wall and use blow-in or foam injection insulation. Other options include more specialized acoustic insulation, like one of our favorite products on this list, Rockwool’s Safe‘n’Sound.