We may earn revenue from the products available on this page and participate in affiliate programs. Learn More ›
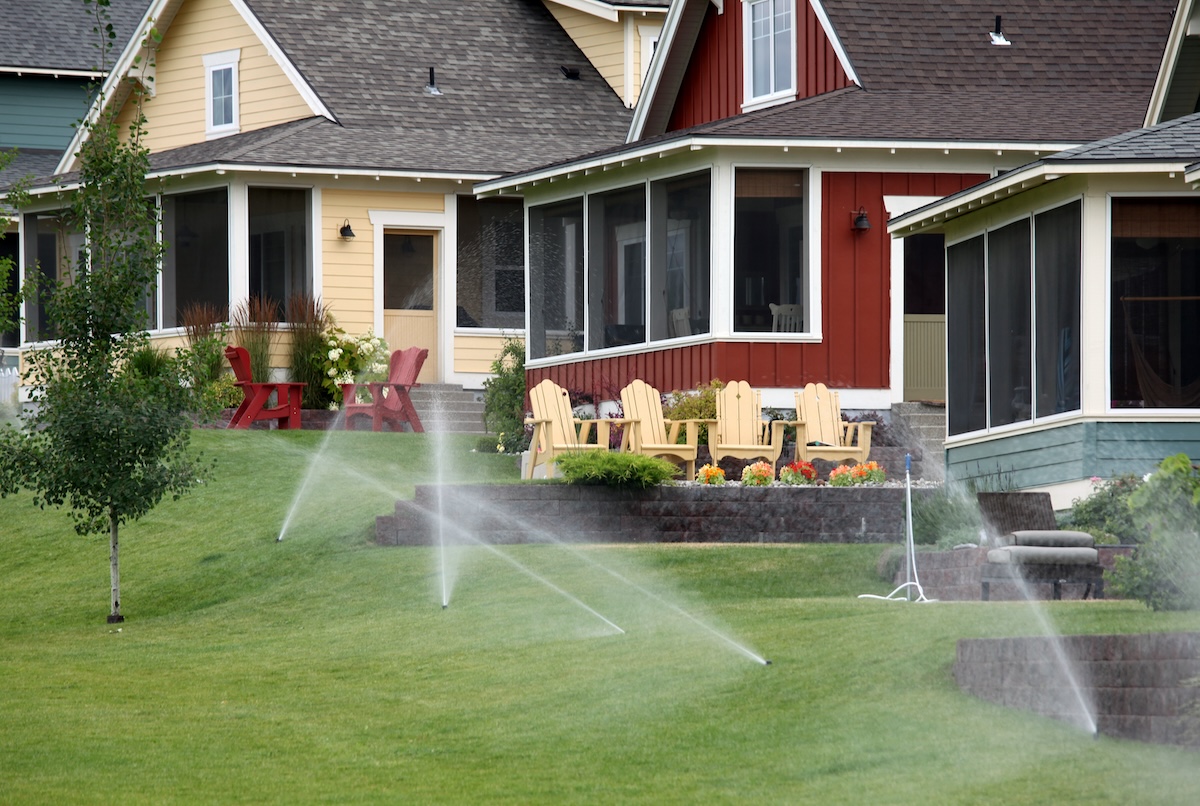
Getting the most out of your yard often starts with managing the lawn by keeping it cut to the right height, trimmed with nice edges, and watered properly. Installing an underground sprinkler system can make watering the lawn a hands-free process, saving you both time and effort. Additionally, an automated sprinkler system may help to conserve water, saving on the cost of your water bill.
Lawn sprinkler installation professionals can get this job done, but DIYers with experience in both plumbing and landscaping may be also able to tackle this job themselves to reduce the cost to install a sprinkler system. It’s important to note, however, that this project isn’t intended for beginners, so it is often best to call in the pros. Before attempting it yourself, consider the size of the yard as well as whether the yard is clear and even, or whether it’s hilly and full of obstacles.
If you feel confident you can manage this project, check out this guide to learn how to complete an underground sprinkler system installation.
Project Overview
Working Time: 16 to 20 hours
Total Time: 24 to 30 hours
Skill Level: Intermediate
Estimated Cost: $1,500 to $2,000
Before You Begin

There are a few things to keep in mind before you think about installing an in-ground sprinkler system. First, you will want to consider the difficulty of the job. Many DIYers neglect to ask if it is difficult to install your own lawn sprinkler system before they start, and then find out that they lack the skills required to complete the project. You will need to have experience in plumbing and landscaping, including prior work with PVC or poly piping, backflow preventers, valve installation, shovels, trenchers, and basic wiring.
Look into the underground sprinkler system cost to determine if you have the budget for the project, as well as checking with your municipality to find out what permits are required and whether there are any restrictions in place for residential sprinkler systems. Before getting started, the local utility company will need to be contacted to come out to the property and mark any buried lines, so you don’t accidentally damage anything while digging in the yard.
Finally, we recommended having at least one other person to help you tackle this job due to the difficulty and amount of time the project takes. Make sure to wear closed-toe shoes, gloves, and appropriate protection for being out under the heat of the sun for several hours of landscaping work.
Tools and Materials
Tools & Materials
Bobvila.com may earn a commission from purchases made through these links.
- Measuring tape
- Lanscape stakes
- Shovel
- Trencher
- Pipe fittings
- Pipe cutter
- PVC cement and primer
- Pinch clamps
- PIpe wrench
- Pliers
- Manifold
- Valve box
- Wire stripper
- Waterproof wire connectors
- Backflow preventer
- String
- Pipes
- Risers
- Plumber's tape
- Gravel
- Main valve
- Sprinkler heads
Underground Sprinkler System Installation Guide
Learning how to install a sprinkler system can be difficult with the right prior knowledge and experience, but skilled DIYers will be able to save on the cost of sprinkler system setup with DIY sprinklers that can make watering the lawn as easy as setting an automated timer. Follow these detailed steps to find out how to install an underground sprinkler system.
Step 1: Map out your sprinkler system.
You will need to create a map of the intended sprinkler system to ensure that it covers the yard and to get a basic idea of the parts you will require to complete the job. Measure and map your property at a scale of 1 inch equals 10 inches using graph paper. Take into consideration any permanent features or obstacles in the yard, like trees, flower beds, or fencing, as well as the slope and size of the yard.
Generally, this means creating several independently-contained sets of pipes and sprinkler heads, which are known as zones. Make sure to mark on the map where you plan to locate the manifold containing the control valves for each zone. Once the map is complete, you can lay out the sprinkler system plan using stakes and string, placing a marker where the lawn sprinkler heads will be positioned.
Step 2: Buy the right tools and parts.
When you are shopping for the tools and parts necessary to complete the sprinkler system installation, you will need to find out certain information about the property and decide on the right materials for the system.
- Since different sprinkler heads have different pressure requirements, check the water pressure by attaching a pressure gauge to the outside faucet.
- To help choose the right size pipes and valves, find out the size of the service line, as well as the size of the water meter (if you are on a municipal system) or the well pump size (if you are on a well).
- Finding out the flow rate will help determine how much water is available and how efficiently the system can operate. This can be done by filling a 1-gallon container and recording the time it takes to fill it, then multiplying the result by 60 to find the gallons per minute (GPM).
- Check the local sprinkler system codes to find out the type of backflow preventer that is required.
- Consider whether to use PVC or polyethylene pipe. Generally, PVC is used for residential sprinkler system projects. However, if you live in a colder climate or the yard has a high number of obstacles, then the flexibility and temperature-resistance of polyethylene may be better. Polyethylene is also widely used for drip irrigation systems, which you may want to consider as a more appropriate solution for your yard.
- Select your system components based on your findings, including the zone valves, valve box, main valve, sprinkler heads, risers, tees, elbow, couplings, backflow preventer, sprinkler controller, and piping.
Step 3: Dig trenches for your sprinkler system.
With the landscaping stakes and string laid out over the yard, you should have a basic plan for where to start digging.
- Use a trench shovel or trenching machine to dig trenches for both the water lines and the valve box. Create trenches that are about 6 inches to 12 inches deep, depending on the typical frost severity in the area. Keep in mind that the trenches should be deep enough so that the sprinklers can safely retract underground.
- Make sure that the trenches are level, otherwise any dips or bumps in the line can reduce the efficiency of the system.
- The hole for the valve box should be about 18 inches deep and 3 feet in size.
- Keep the sod in a moist, shady location, so that you can use it to cover up the trench after installing the sprinkler system.
- Dig a shallow trench from the valve box to where the sprinkler controller will be installed in order to run the wiring.
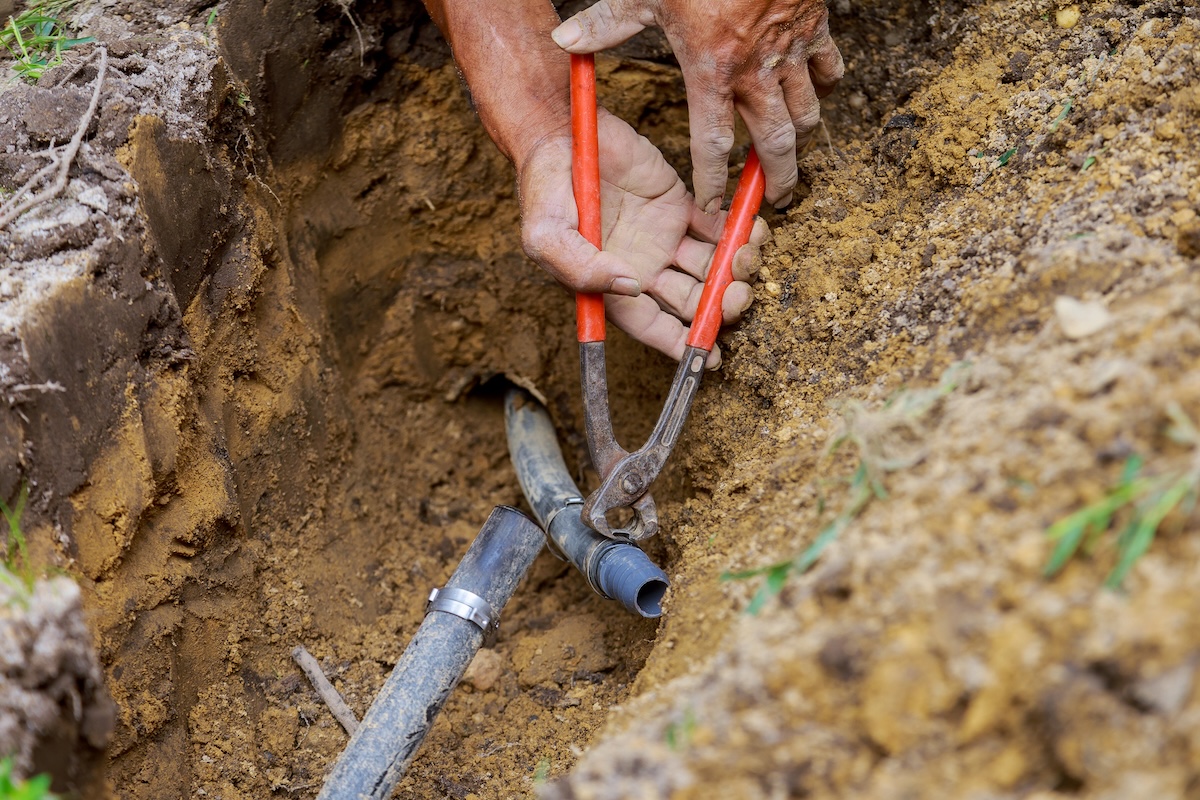
- Dig an additional trench from the main water line to the valve box location, unless you are planning to connect the sprinkler system to an existing outdoor faucet. If you do, dig a trench from the faucet to the valve box location.
Step 4: Install sprinkler system.
After the trenches are dug, you can start laying out the pieces for the system.
- Use a tape measure to measure each piece of pipe to the correct length based on the layout.
- Next, use a pipe cutter or hacksaw to cut each piece of pipe to the correct size. You can even cut the PVC pipe edges with a knife or a file, if necessary.
- For PVC pipe, you will need to move with both speed and accuracy to prevent the primer and cement from drying before the parts are properly connected.
- Before using PVC cement, slot the pieces together and make any adjustments to get the correct position, then mark the pipe and fitting to help line up the pieces again after adding cement.
- Clean the exterior of the pipe and the interior of the fitting, then apply the PVC primer and cement.
- Slide the pieces together and use the reference mark on the pipe and fitting to quickly adjust the pieces to the correct position.
- If you are using polyethylene pipe, then fitting the pieces together is as easy as inserting the fitting into the pipe, then tightening the clamps.
- Find the locations for the sprinkler heads, then wrap plumber’s tape around the threads of your risers, and thread each riser into the threaded tee fitting on the branch water lines.
Step 5: Install sprinkler valves and valve box.

The valve box typically contains the main shut off valve, which controls the flow of water for the entire sprinkler system, as well as the manifold, and a series of sprinkler control valves, which each control a zone of the sprinkler system.
- The hole for the sprinkler valves should be about 18 inches deep and 3 feet wide. It is best if it is in a central spot, as it makes it easier to direct the water to the various zones.
- Add 2 inches of gravel to the bottom of the hole, then follow the manufacturer’s direction to assemble and install the valve box. Ideally, the valve box will sit flush with the ground, so it isn’t an obstacle for the lawn mower.
- Specific products may have differing instructions, so follow the manufacturer’s directions to connect the main valve and sprinkler control valves to the manifold, then set the manifold into the valve box.
- Run wiring from the main valve and sprinkler control valves through the shallow trench you dug to the sprinkler system controller, following the direction provided by the manufacturer to wire the valves.
Step 6: Connect sprinkler lines to the zone valves.
With the manifold and zone control valves in place, use pipes, elbows, threaded adapters, and any other connectors to attach the sprinkler lines to the zone valves.
- Measure and cut the PVC pipe to the correct length.
- Determine where any 45-degree or 90-degree turns will be required.
- If necessary, wrap threaded adapters with plumber’s tape, then connect the adapters to the zone valves to join threaded brass and PVC together.
- Connect the pipe and fittings with PVC primer and cement for PVC pipe or use polyethylene pipe clamps to secure poly connections.
Step 7: Connect to the main water line and install a backflow preventer.
You can either connect the sprinkler system to an existing outdoor faucet or run the sprinkler system directly to the main water line.
If you are connecting to an existing outdoor faucet:
- Attach an appropriate backflow preventer to the faucet.
- Measure the distance from the main valve to the existing outdoor faucet.
- Measure and cut the pipe to the appropriate length.
- Attach the necessary fittings depending on the system design, including elbows, couplings, or threaded adapters, using PVC primer and cement for PVC pipe or poly pipe clamps for polyethylene pipe.
If you are connecting to the main water line:
- Turn off the water to the house. Either ask the local utilities to turn it off at the curb stop by turn it off yourself if you have the appropriate tool and permission from the municipality to use the curb stop valve.
- Cut the main water line and install a tee fitting to branch out to the sprinkler system.
- Attach an appropriate backflow preventer after the tee fitting.
- Measure the distance from the main valve to the main water line.
- Measure and cut the pipe to the appropriate length.
- Attach the necessary fittings depending on the system design, including elbows, couplings, or threaded adapters, using PVC primer and cement for PVC pipe or polyethylene pipe clamps for poly pipe.
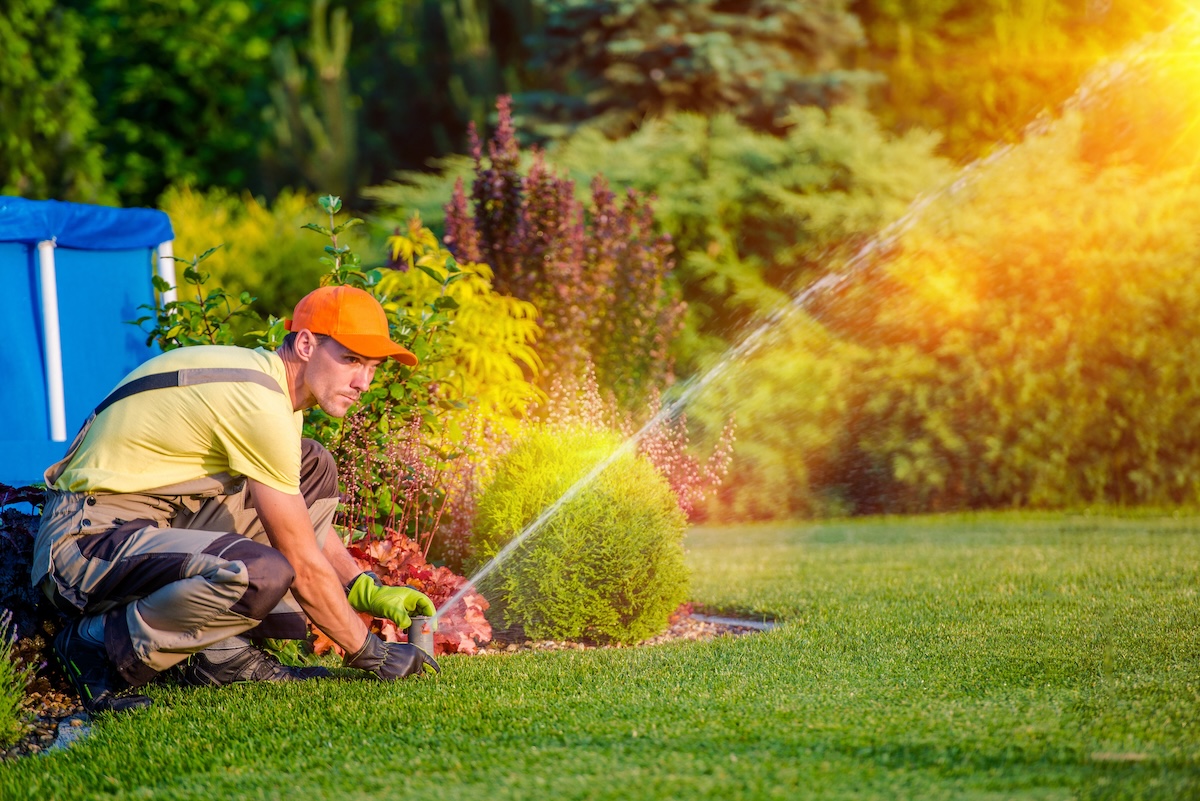
Step 8: Flush the system and install sprinkler heads.
Before installing the sprinkler heads, turn the water on and flush the system. This will allow any dirt, grass, or other debris that is trapped in the system to be forced out, instead of clogging the sprinkler heads.
After flushing the system, thread the sprinkler heads onto the ends of the installed risers. Generally, each sprinkler head should be installed about 6 inches deep, with soil packed firmly around the heads to hold them in position so they sit just below the top of the turf at your preferred mowing height.
Step 9: Set up and mount the control system.
Read and follow the directions provided by the manufacturer to install the sprinkler control system. Generally, the control box should be mounted in a sheltered area with an available electrical outlet, and the wires from the valve manifold should be run underground in a shallow trench directly to the control box.
Once you have mounted and wired the control system, test the settings according to the manufacturer’s instructions to determine how best to operate the sprinkler system for your home. Finally, replace the dirt in the trenches, fill any holes, replace the sod, then run a brief test to ensure the installation was a success. Make any necessary adjustments to ensure the entire yard is appropriately watered and program the control system with a suitable watering schedule for improved lawn care and a healthier lawn.
Sprinkler System Maintenance Tips
Maintaining an underground sprinkler system doesn’t need to be difficult as long as you regularly inspect the pipes and sprinkler heads, make necessary repairs, and winterize the sprinkler system before winter weather hits.
- Sprinkler heads should be cleaned at least once per year, though more frequent cleaning may be necessary if you notice the sprinkler heads are getting clogged before you have a chance to clean them.
- Clogged sprinkler heads should be removed from the riser, then cleared using a paper clip or stiff wire for minor problems. If the sprinkler head is completely blocked, soak it in water and clean it with a wire, then flush the head with running water. It’s also a good idea to remove any debris from the riser sleeve before reinstalling the sprinkler head.
- Flush the system at least once a year to clear any debris. Usually this will be done at the start of the watering season.
- Make sure the sprinkler heads are properly aligned and that they evenly disperse the water over the entire yard without watering sidewalks or driveways. Make appropriate adjustments to the sprinkler heads for accurate spray patterns. Consider lubricating the sprinkler heads if you find them difficult to adjust.
- Use a pressure gauge to check the water pressure regularly, ensuring that it remains within the manufacturer’s recommended range. It’s recommended to adjust the flow rate on the sprinkler heads if you feel that some areas are getting too much or too little water.
- If you find a leaking sprinkler head, you may need to replace the sprinkler head, replace the riser, or repair the riser.
- If a sprinkler pipe is leaking, then you will need to dig up the area to locate the leaking pipe, turn off the water supply, then fix the leak, which can involve using a coupling to patch the leak or even replacing sections of pipe.
- Winterize the sprinkler system by shutting off the water supply, then drain the system manually or by using a blow-out method to force the remaining water out of the sprinkler system. You should then insulate any exposed components. This process needs to be completed before the first frost to avoid damage to the system.
When to Call a Pro for Sprinkler System Installation
Sprinkler system installation isn’t a job for novice DIYers or those with limited plumbing skills. If you find that any of the above steps seem difficult or overwhelming, then it’s a good idea to call a professional to complete the installation. Similarly, if you have a large or overly complex yard with many obstacles and slopes, then it may be best to hire a pro to install the sprinkler system instead of trying to handle this job on your own.
Careless mistakes can lead to leaks, costly water bills, and the degradation of the soil in the yard, so think carefully before deciding that this is a project you can handle. If you run into any significant problems, it’s often better to turn to the pros than it is to struggle through the issue with a haphazard solution that may or may not resolve the issue.
