We may earn revenue from the products available on this page and participate in affiliate programs. Learn More ›
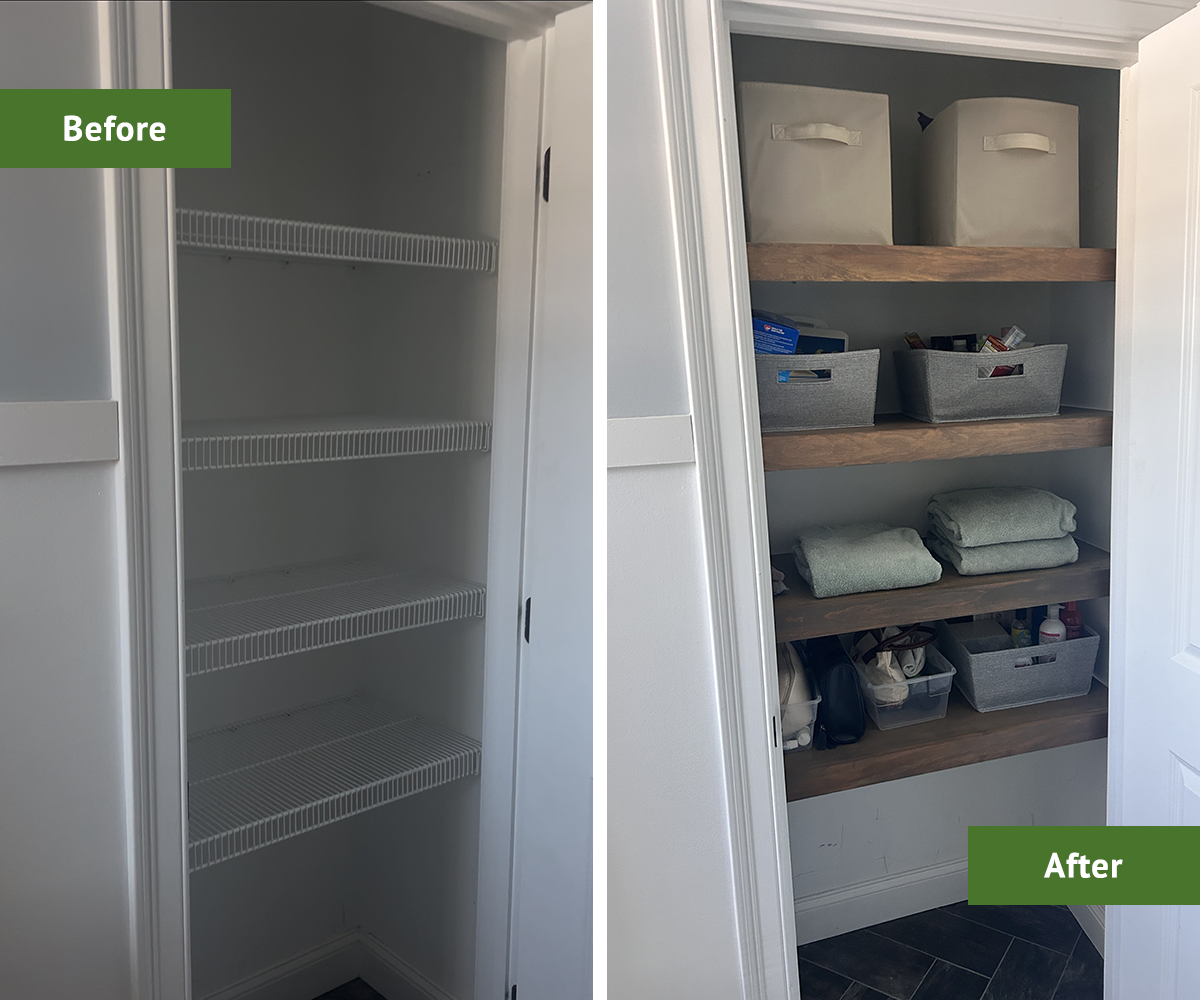
If you are tired of the white wire shelving in your home, you can upgrade the look with simple DIY wood covers. Caitlin Frank from Built by Caitlin transformed her wire shelves in just a few hours. “I was looking to update our linen closet to be more organized and wanted a quick and easy update to the look of the shelving without redoing them since they’re in perfectly good shape,” says Frank. “I saw a video of another creator make something similar so I gave it a try!”
Here’s what you need to know before you start a DIY wire shelf covers project.
Use lightweight materials.
Wire shelving isn’t meant to hold heavy objects. Typically, the fixed mount wire shelving found in linen closets, kitchen pantries, and clothes closets can carry about 25 to 45 pounds per linear foot. So if you are adding wood to a shelf that’s designed to hold 25 pounds, you need to be careful about the weight of the wood and what you plan to store on the shelves.
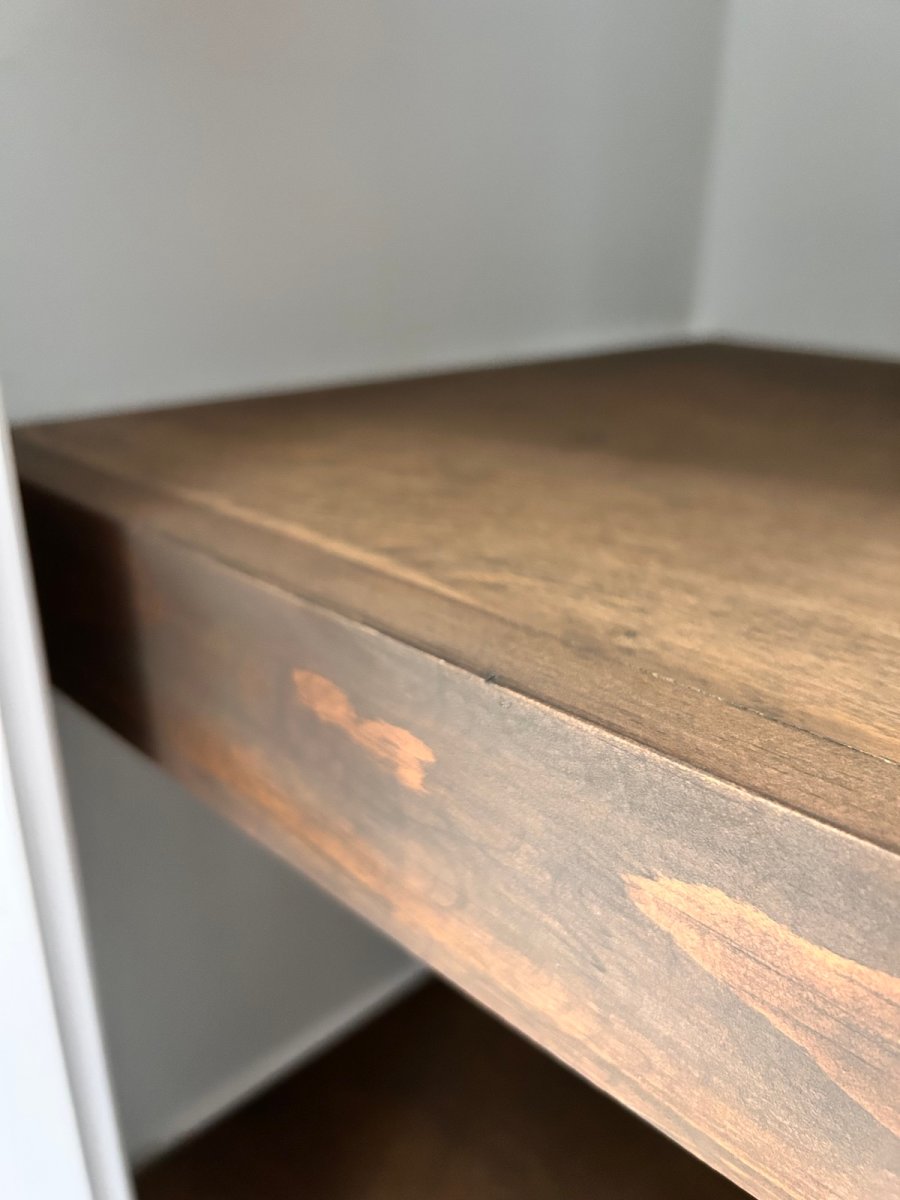
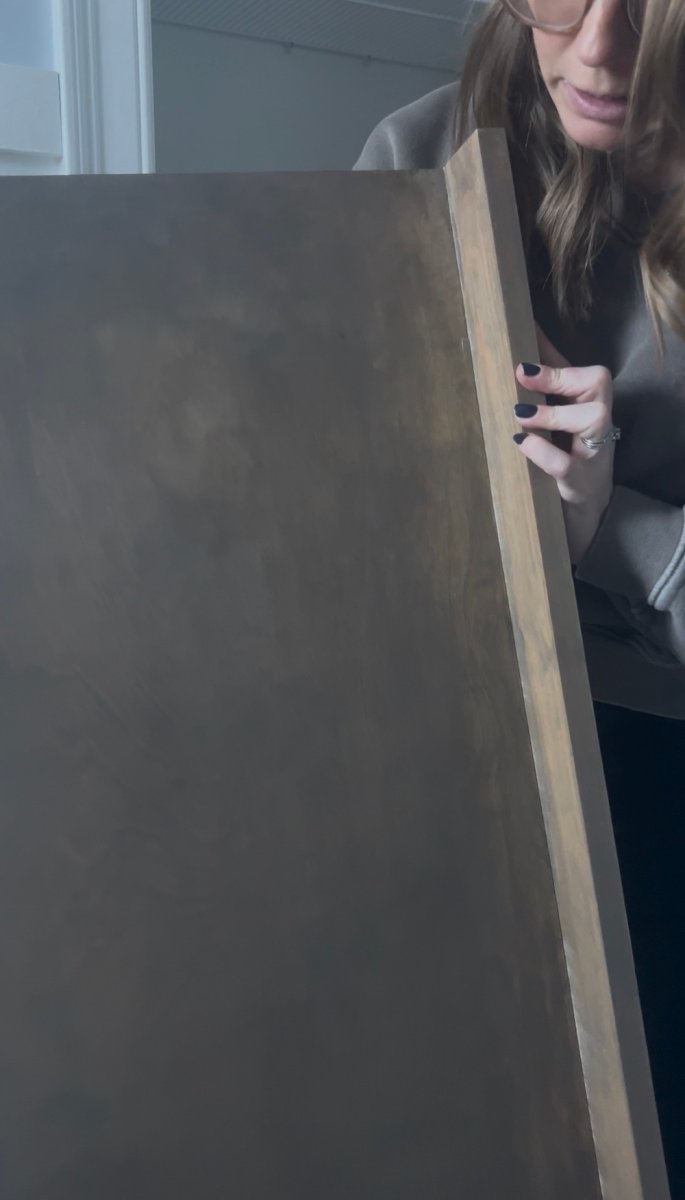
“I used ¼-inch birch plywood for the tops and 1×3 select pine for the fronts,” says Frank. “This way the material is lightweight and will cover all the wire.”
Gather the right supplies.
Covering wire shelves in plywood and 1-inch by 3-inch pine requires a variety of tools and materials. First off, make sure your vehicle can safely transport a standard sheet of 4-foot by 8-foot plywood. If not, you could pick up 2-foot by 4-foot birch plywood project panels, but the price is about the same for the sheet as the panel so the material cost will dramatically increase if you have several shelves to cover.
What else do you need? Frank says: “You’ll need wood glue, brad nailer, and a circular saw or table saw for ripping down the plywood.”

Pay attention to the details.
While it seems like a simple project, there can be finicky details that can trip up any DIYer. Always think through how you will fasten materials together and what you’ll use to secure them. Planning these details in advance can save time and frustration. Still, no matter how much you plan, there will always be lessons learned in any DIY project that can help you build your skills for the next project you tackle.
For example, one part of the project that Frank would have done differently now that she’s completed it: “I didn’t router out a lip in the 1×3 for the plywood to sit on. If I were to make them again I’d do that—it was tricky to get the nails in without that.”
Don’t assume every shelf is the same.
When facing a closet of shelves that look like they are the same size, you may assume they are exactly the same and just use one as a template to base all of your measurements. Resist this urge. “Measure each shelf’s dimensions,” says Frank. “Walls are rarely straight so they might differ.” Failing to measure could mean you’ll end up with wasted cuts and another trip to the home improvement center for another sheet of plywood.
Seal the wood before installing it.
For areas like pantries and laundry rooms, sealing wood shelving is important because there are liquids involved in those areas. It’s also important to seal wood to prevent moisture absorption, warping, and pests in other storage areas of a home.
But if you are in a rush to cover your wire shelving, you may be tempted to skip sealing before you install the wood covers. However, it’s much easier to seal shelf covers before installing them. If you seal before you install, you won’t need to be careful about cutting in the sealant around the adjoining walls and you can lay them out on a worktable or drop cloth to fully dry. Then, when they are sealed and dry, you can install the wood covers and start loading your items back into the closet. Frank says it took about 3 to 4 hours to measure, build, stain, and install the wood covers in her closet.
Make space for installing each DIY wood cover.
Depending on how close the wire shelves are located in relation to each other, you may not be able to fit the wood covers over top of the wire shelves without removing some of the wire shelves. Usually, it’s pretty easy to remove a wire shelf. Frank’s strategy worked well for her: “When installing them you’ll have to unsnap the wire shelves from the brackets other than the bottom one. And then just work your way up.”