We may earn revenue from the products available on this page and participate in affiliate programs. Learn More ›
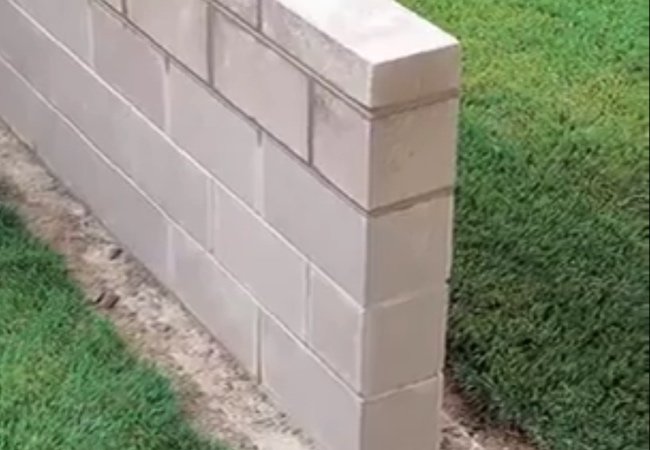
Privacy, safety, security—these are only a few of the reasons that homeowners build solid, durable garden walls. Although it’s immensely satisfying to construct one, it’s certainly no easy feat.
If the average do-it-yourself project takes only part of a day and minimal heavy lifting, then, well, this isn’t your average job. That said, with careful planning the process can be straightforward, and the project is certainly within reach—provided you have the strength to lift and place 30-pound cinder blocks.
Of all the skills involved, working with mortar may be the most challenging, as doing so calls for some technique and finesse. But no matter your skill level or experience, these step-by-step instructions from QUIKRETE® can help you transform a pile of cinder blocks into an attractive, lasting element of your hardscape.
Before reading any further, however, it’s critical to note that every block wall, structural or not, requires a solid footing. As there are varying definitions of what constitutes a building code-compliant footing, the following instructions assume that an inspection-ready foundation already exists. If you need help understanding the relevant building codes in your municipality, be sure to contact a contractor, inspector, or code enforcement specialist.
MATERIALS AND TOOLS
Tools & Materials
Bobvila.com may earn a commission from purchases made through these links.
- Line chalk
- Plastic mixing tub
- Mixing hoe
- Masonry brick trowel
- Mason's line
- 4' level
- Measuring tape
- Jointing tool
STEP 1
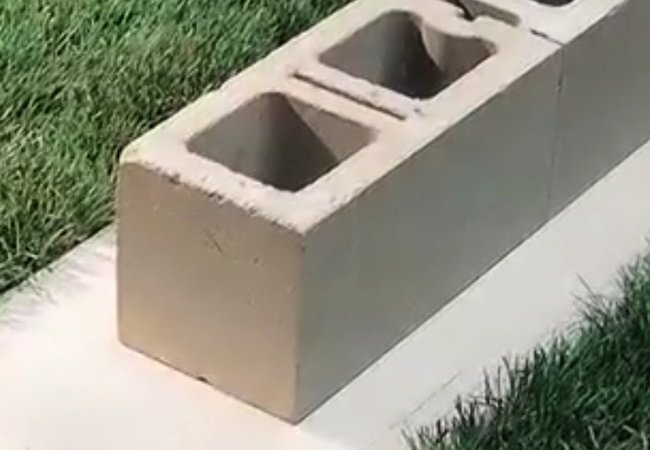
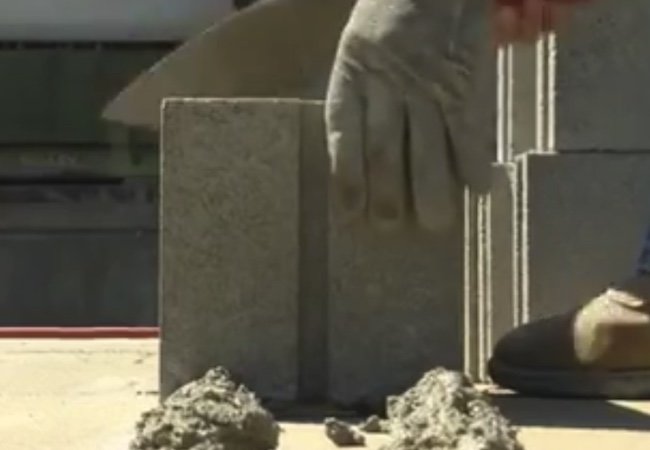
Start by simply laying out the cinder blocks for the first course of your wall. The goal here is simple: You’re determining the number of blocks necessary for the desired wall size. As you place the blocks, remember to leave a 3/8-inch gap between each one. These gaps are stand-ins for the 3/8-inch mortar joints that will appear in the finished wall (not only between each block, but also between each course). You may already know that cinder blocks are sold in nominal dimensions that assume the presence of, and take into account, a 3/8-inch mortar joint. So, though the standard block may be billed as 8″ x 8″ x 16″, it actually measures 7-5/8″ x 7-5/8″ x 15-5/8″. As a result, as you’re figuring out the number of blocks you’ll need for the base course, it’s essential to accommodate for the space to be filled in with mortar. A 3/8-inch-thick plywood scrap can help you make each gap precise and uniform. Once you are satisfied with the dry fit of your base run, snap a chalk line on either side of the blocks to serve as a reference. Then, once you have removed the blocks from the footing, you are ready to begin in earnest.
STEP 2
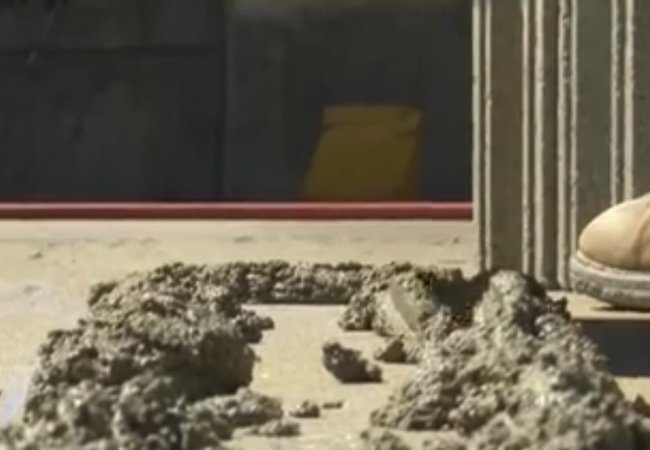
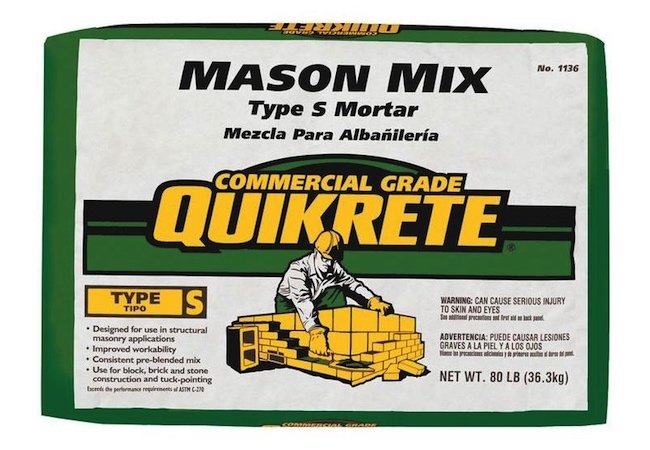
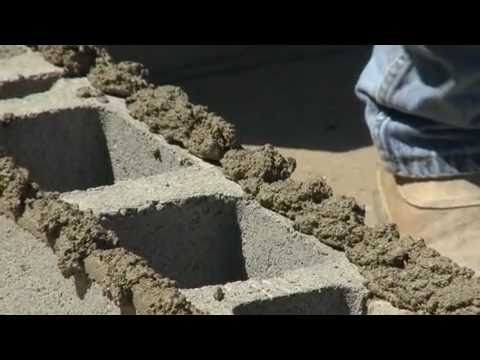
It’s time to prepare the mortar. For cinder-block walls (and brick walls too), choose QUIKRETE® Mason Mix Type S. Forgiving to those who are not experts in masonry projects, the QUIKRETE® preblended mix remains workable for a long period of time, with no sacrifice of the high-bond strength that yields a successful project. In preparing the mortar, pay close attention to the instructions printed on the package. There are only two ingredients—mortar mix and water; the trick is to strike the appropriate ratio between the two. After adding both ingredients to a wheelbarrow or mixing bin, mix them using either a mixing hoe or an electric drill with a paddle-type mixing attachment. Continue mixing until you obtain a consistency that can be easily troweled. Once the mortar is ready—and once you’ve dampened the surface of the footing—lay down a 1-inch bed of mortar along the chalk lines you snapped in Step 1. Finally, use your trowel to run a V-shaped furrow down the center of the bed of mortar; when you set the blocks onto the mortar, this furrow helps distribute the mortar evenly, forcing it to the edges of the blocks.
STEP 3
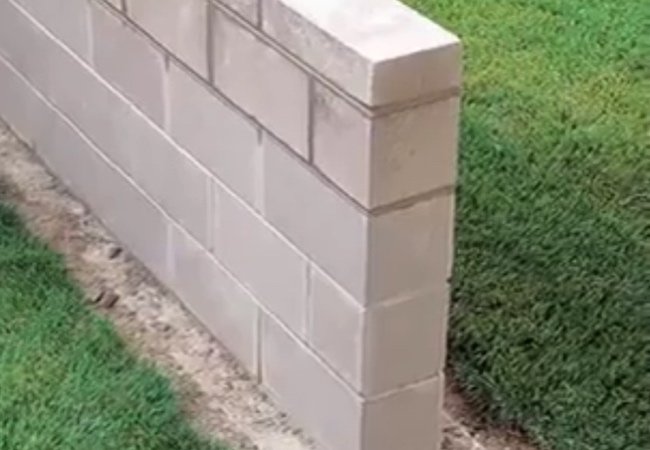
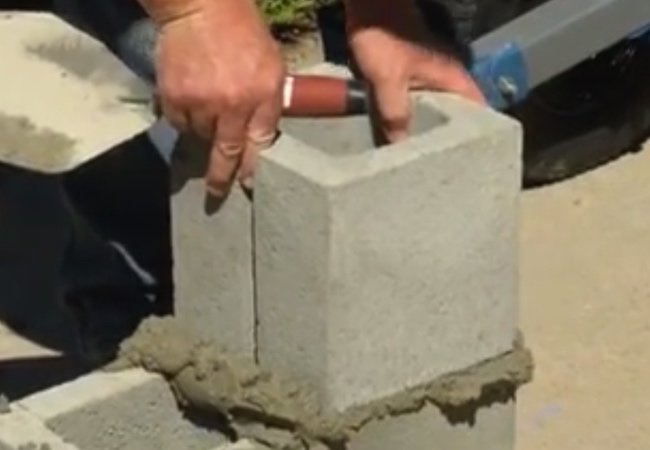
Now that you’ve applied the mortar bed to the footing, move on to laying down the first course of cinder blocks. Start at one end of the chalk outline you snapped in Step 1. Press the first block, a corner block, into the mortar. Be careful to create a 3/8-inch mortar joint on its underside. Don’t let the block slide out of place, as that could displace the mortar and upset the joint. Generally speaking, though, there’s no need to be gentle or painstaking when handling cinder blocks. Simply grab each by the sides and, looking down through the hollow cores, set the block in position. Because the corner block defines the vertical and horizontal level for succeeding blocks in the course, do take the time to double-check that the first block is both level and properly aligned. Once you’re satisfied, trim and remove excess mortar. Next, walk on over to the opposite end of the planned wall and, using the same technique as before, set down another corner block. Check its level and alignment, then trim away the excess mortar. Now, run a mason’s string between the two blocks to help you maintain uniform alignment as you add the rest of the course.
STEP 4
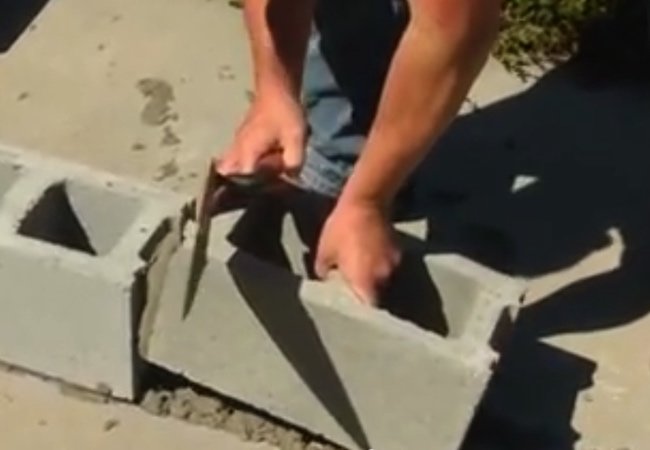
With a block set at each corner, your next step is to fill in the middle. While for the corner blocks you applied mortar only to the footing, you’ll need to “butter” one end of each of the middle blocks to adhere it to the adjacent block. Do this by adding mortar to the flanges—the edges that jut out from the block’s body. Here’s how to do the buttering: Stand the block upright on one end. Then, with a loaded-up trowel, swipe down to leave a bead of mortar along each flange. (The mortar may not stick every time. If it falls off, start over with fresh mortar and try to push the material down on the inside flange edge.) You need to mortar only one end of the block, and you can ignore the web—the partitions between the hollow cores. But don’t forget to slice a V into the applied mortar with the tip of your trowel. Once you’ve done that, press the block into the mortar bed on the footing. As you do so, angle the block’s buttered end up against the flanges of the previously laid block. Check to make sure the block is level and flush with its neighbor. If so, proceed. Continue adding blocks in this way to complete the remainder of the course.
STEP 5
To begin the second course, apply a 1-inch-thick mortar bed along the top edges of the first. At each end of the wall, set an 8″ x 8″ x 8″ cinder block, smooth side facing out. Known as half blocks, these smaller blocks are used to create a running bond pattern that lends strength to the wall. (To continue the pattern, begin alternate courses with half blocks.) Once both corners are in place, run a mason’s line between them to serve as a height guide for the blocks to be added in the middle. As in the first course, butter the flanges on one end of each block you add to the middle. As you make progress and the wall begins to take shape, don’t forget to turn the mortar occasionally. This will help keep it workable for a longer period of time. Also, remember that all the mortar joints—beneath the blocks and between the blocks—must be 3/8-inch thick. When you reach the final course, rather than using standard or half blocks, consider using smooth-topped cap blocks for a finished look. Cap blocks are laid like any other block. Apply mortar along the top edges of the last course and then, after setting the corners, lay in all the side-buttered middle blocks.
STEP 6
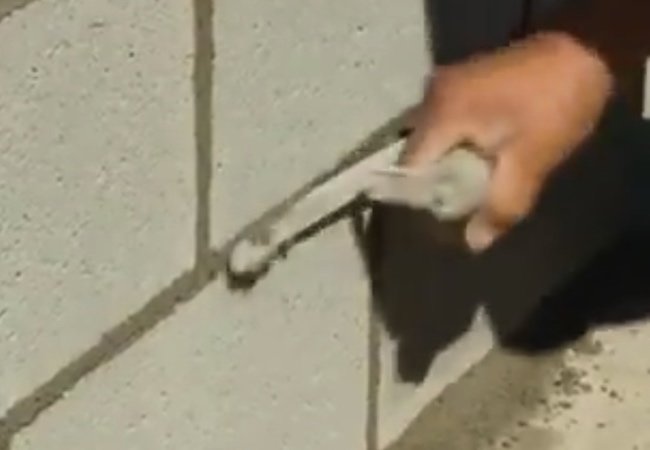
At this point, even though the wall may appear complete, there’s still some work left to do. Inspect the mortar joints; once they have set up to the point at which you can leave a slight thumbprint in the material, proceed to “strike” them. To do so, run a concave jointing tool along each joint, compressing and smoothing the mortar, while removing the excess. Address the horizontal joints first, followed by the vertical joints. Working in that order allows any residual water to run freely down the wall. For best results, strike all the joints twice and keep the jointer wet as you work, dampening the tool if and when necessary.
Watch a video demonstration of block-wall building, courtesy of QUIKRETE®!
For more even more details on building a block wall, visit QUIKRETE® now!
This post has been brought to you by QUIKRETE®. Its facts and opinions are those of BobVila.com.