
We may earn revenue from the products available on this page and participate in affiliate programs. Learn More ›
Bathrooms are important rooms in the home, providing a convenient place for people to bathe, brush their teeth, shave, do their hair, and more. So, when there is a problem with the sink, shower, or toilet, it’s necessary to troubleshoot the issue and make repairs before the problem can get worse. One such issue is a faulty toilet flush valve.
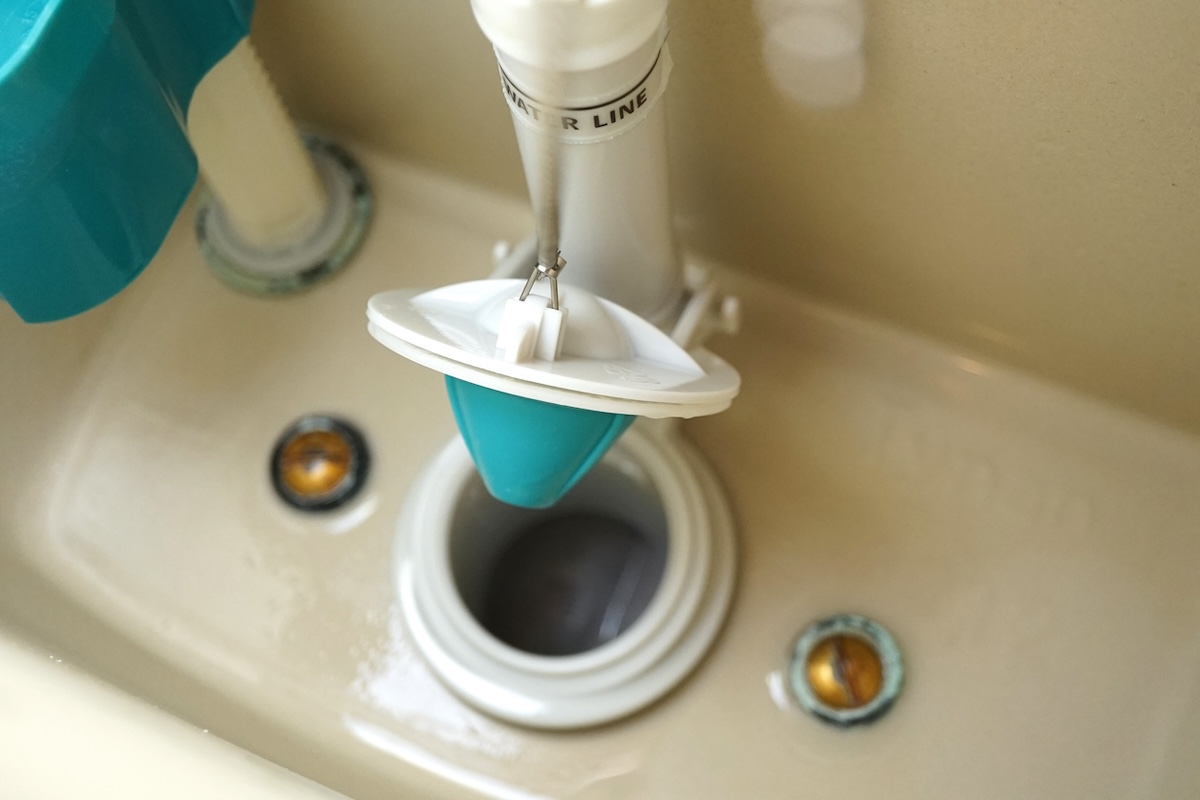
A flush valve is responsible for rapidly releasing the water from the toilet tank to flush the contents of the toilet bowl. It is typically positioned in the center of the toilet tank. Toilet flush valve parts include the overflow tube, the valve opening in the bottom of the tank, and the rubber tank ball or flapper that covers the valve opening.
Generally, a toilet flush valve replacement is required if the toilet is frequently running, even after addressing other possible causes. A cracked or severely worn toilet flush valve may also cause a leak at the connection between the toilet tank and the toilet bowl. Use this guide to find out more about the parts of a toilet and how to replace a toilet flush valve.
Tools & Materials
Bobvila.com may earn a commission from purchases made through these links.
Project Overview
Working Time: 1 hour
Total Time: 1 hour and 30 minutes
Skill Level: Intermediate
Estimated Cost: $20 to $50
Before You Begin
When looking for toilet replacement parts, note that toilet flush valves are not universal, so you need to find a toilet valve replacement that is compatible with the toilet. Most toilets will use a standard 2-inch flush valve. This measurement refers to the size of the flush valve opening in the bottom of the toilet tank. Some toilets may use a 3-inch flush valve, though this isn’t as common. Check the size of the flush valve opening to determine the correct size for the replacement parts.
In some situations, a running toilet may be due to a faulty flapper, an old chain, or a short overflow tube. If this is the case, DIYers can replace flush valve parts instead of replacing the entire flush valve assembly to reduce the cost of repairs. Just make sure this is the case, or you may replace a certain part only to find the issue is still occurring.
Once you have determined that the flush valve needs to be replaced, proceed with the following steps to remove the old parts and install the new flush valve assembly.
STEP 1: Turn off the water and drain the toilet tank.
Start this job by locating the toilet shut-off valve. It should be just behind the toilet on the incoming water line. Turn off the valve to stop the flow of water to the toilet. The toilet tank will still be full of water, so the next step is to flush the toilet to drain as much water out of the tank as possible. Use a sponge and bucket to soak up and remove the remaining water.
STEP 2: Disconnect the water supply hose and remove the toilet tank.
The incoming water supply hose connects to the base of the toilet tank where the fill valve is installed. This is usually on the left side of the toilet tank if you are facing the toilet. Use pliers to disconnect the water supply hose, then place the open end of the hose into your bucket to catch any remaining water.
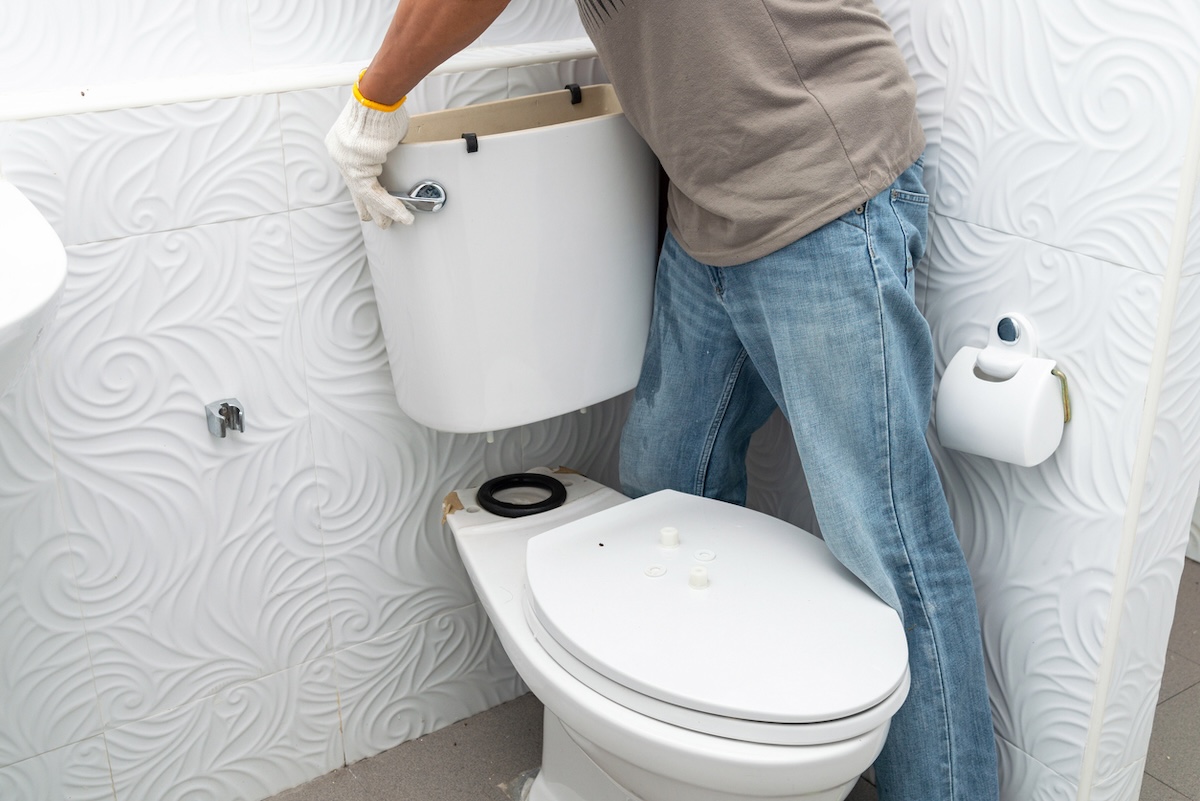
Locate the two toilet tank bolts in the bottom of the toilet tank. Use a screwdriver to hold the head of each bolt in place, while using an adjustable wrench or a set of channel lock pliers to loosen and remove the nuts.
If you cannot unscrew the nuts due to severe rusting or corrosion, then you may need to use a hacksaw to cut through the bolts. Although, if the tank bolts are in good condition, then they can be reused. After removing the tank bolts, lift the tank off of the toilet bowl and place it in a safe location.
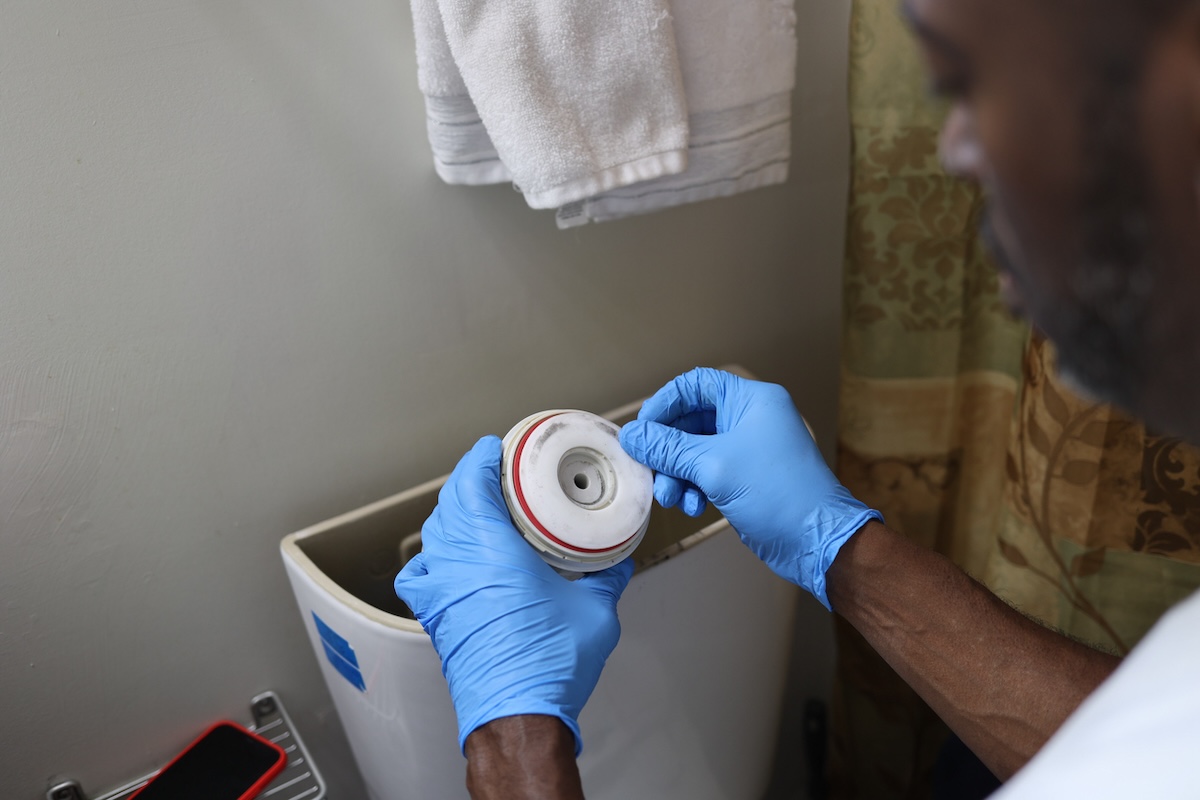
STEP 3: Remove the old flush valve.
The next step in this common toilet repair is to remove the old flush valve. In order to access the flush valve mounting nut, remove the large foam gasket on the bottom of the tank. Use an adjustable wrench or a set of Channellock pliers to unscrew the mounting nut, then pull the old flush valve out of the toilet tank. Use an old towel or cloth to wipe down the bottom of the toilet tank so that it is clean and free of debris before proceeding.

STEP 4: Install the new flush valve.
Grab the new toilet flush valve from the toilet repair kit and make sure that all the necessary parts are included before proceeding. Insert the new flush valve into the opening in the bottom of the toilet tank. Make sure that the beveled side of the washer faces down, then rotate the flush valve until the position matches the manufacturer’s directions for installation. Thread the mounting nut onto the flush valve tailpieces from underneath the tank and tighten it with a wrench or pliers. Once the new flush valve is securely fastened to the tank, place the large foam gasket over the flush valve tailpiece.
STEP 5: Mount and secure the toilet tank.
Place the toilet tank back into position on top of the toilet bowl, ensuring that the flush valve opening is properly aligned with the opening at the back of the toilet bowl. Insert the tank bolts through the bottom of the tank on either side of the flush valve. Thread the mounting nuts onto each bolt, using your fingers to tighten the nuts as much as possible. Once the nuts are hand-tightened, use a wrench or pliers to snug up the connection.
If you had to cut the tank bolts or decided to replace the tank bolts at the same time, then you will need to first install the new tank bolts and rubber washers before mounting and securing the toilet tank to the toilet bowl. After reinstalling the toilet tank, check to make sure it is level.
STEP 6: Connect the water supply line and turn on the water.
Reconnect the water supply line to the fill valve tailpiece on the base of the toilet tank, then turn the shut-off valve on to start filling the toilet tank with water. Check the water supply line connection, the tank bolts, and the flush valve connection for any leaks.
If the job was done correctly, the water should stop running once the toilet tank fills up because water is no longer leaking out of the toilet or down into the toilet bowl. After the toilet stops running, flush the toilet to test the functionality of the flush valve.
Final Thoughts
When learning how to replace a toilet flush valve, it’s important to work slowly to avoid losing any parts or making costly mistakes. Keep in mind that a toilet tank is both heavy and fragile, so when disconnecting and removing the toilet tank, it’s necessary to have a safe space to put the tank where it won’t get damaged.
Similarly, before attempting to replace a toilet flush valve, it’s a good idea to inspect the toilet flushing mechanism to determine the type of flush valve the toilet uses.
Purchasing a replacement flush valve with a similar design and size as the existing flush valve is typically the best option for a successful repair. If you aren’t sure about the size or style, take a few pictures before heading to the local home improvement store. Alternatively, you can turn the water off, drain the tank, and remove the old flush valve, then take the old flush valve to the store to find a suitable replacement.