
We may earn revenue from the products available on this page and participate in affiliate programs. Learn More ›
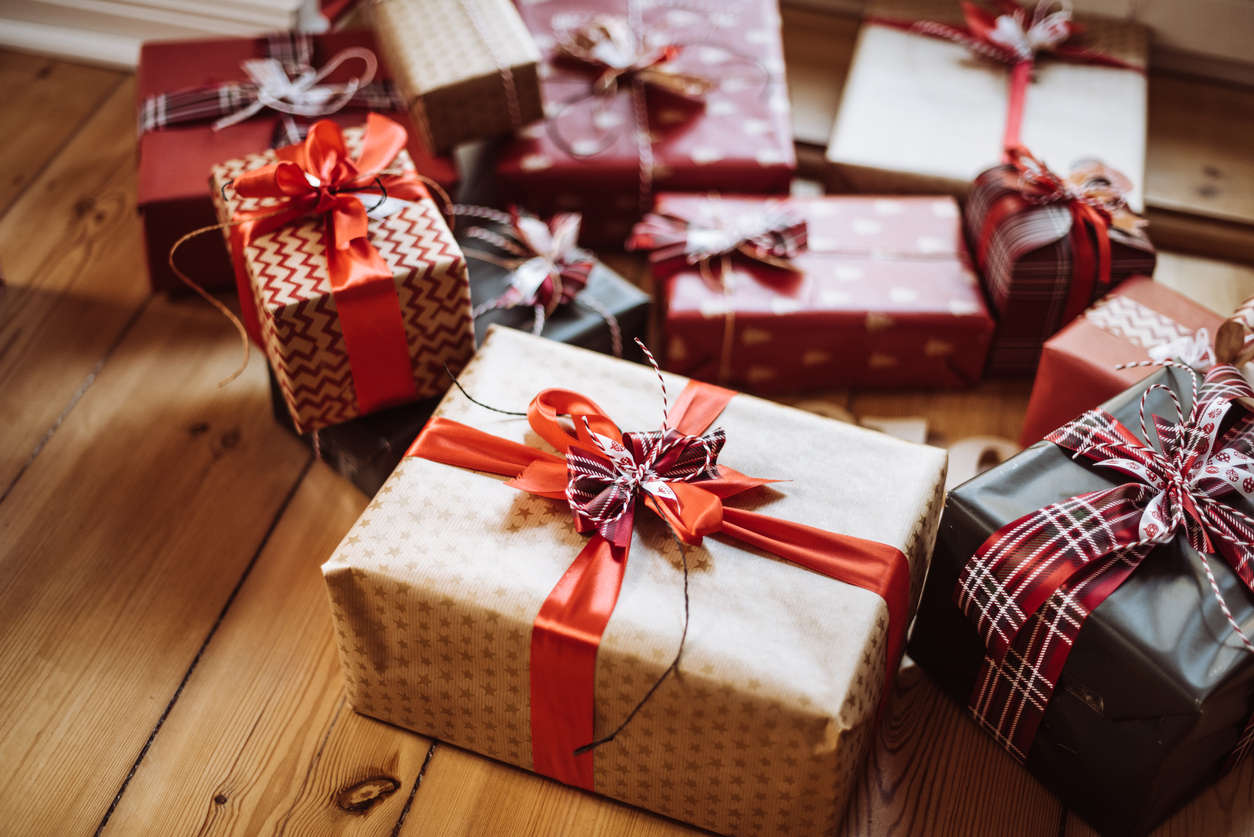
When it comes to gift-giving, it’s the thought that counts—but there’s something to be said about the presentation as well. A nicely wrapped gift feels all the more thoughtful and sweet, but knowing how to wrap a gift in a way that fits its shape without sacrificing on wow factor isn’t always straightforward. Not to mention, it can also sometimes feel wasteful.
Before you buy a new roll of wrapping paper, keep in mind that there are ways to reduce waste when wrapping gifts. Natalie Lennick, environmental activist and founder of Green Ablutions, reminds gifters: “The most sustainable item is the one you already have. Any box becomes a gift box when it contains a gift. Any paper becomes wrapping paper when you use it to wrap a present. Be creative with stamps, markers, leftover ribbon or string to add style to plain boxes or papers. It’s a great craft for kids too! Reusable wrappings can also be a gift within a gift when smaller items are wrapped in scarves or larger packages in tablecloths.”
With these tips in mind, let’s break down how to best wrap boxes, cylinder-shaped gifts, wine bottles, and even how to style a gift bag so that it looks neat and ready to impress.
RELATED: The 24 Most Beautiful—And Useful—Housewarming Gifts for Any Budget
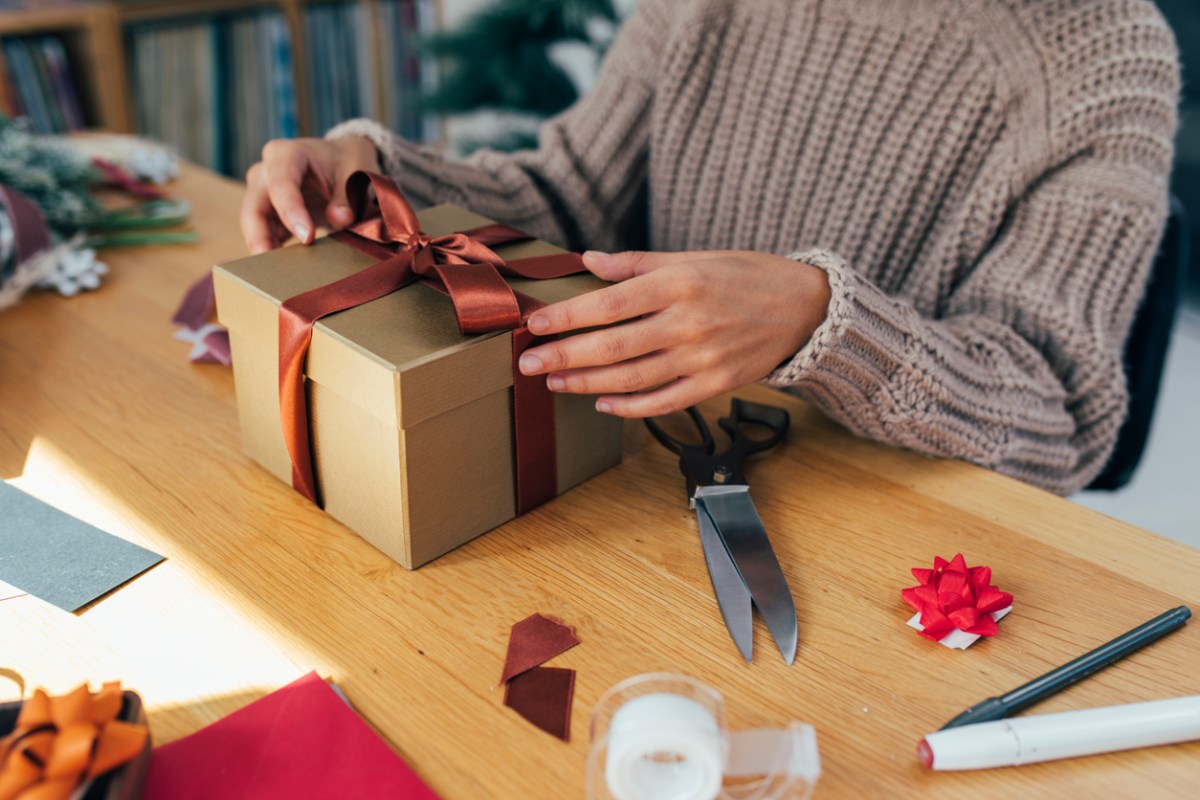
How to Wrap a Box-Shaped Gift
Wrapping a gift box is easy. If you have an irregularly shaped present, you might want to consider putting it in a box to simplify wrapping (another option is to use a gift bag, which is covered further below). Consider reusing boxes from around your home—delivery boxes, shoe boxes, and gift boxes from past celebrations all work well. You’ll also need some gift wrapping paper, scissors, and tape.
SUPPLIES
– Wrapping paper
– Scissors
– Clear tape
– Double-sided tape
STEP 1: Measure and cut the wrapping paper.
Unroll your chosen wrapping paper on a flat surface, with the pattern facing down. Place the gift box on the unrolled paper with the box’s top side down. Unroll enough paper so it is twice the length or width of the box—whichever is largest. Make sure there is enough wrapping paper for it to wrap entirely around the box, plus an extra couple of inches. On the other sides, make sure there is enough paper to cover at least three-quarters of each side. Use scissors to trim the wrapping paper with these measurements in mind.
STEP 2: Begin wrapping the box.
Center the box in the middle of the wrapping paper, with the top side of the box still face-down. Fold one of the longer sides of the wrapping paper over the box and line it up about 1 or 2 inches shy of the closer edge (most of the bottom of the box should remain uncovered). Tape it to the box.
Wrap the wrapping paper taut around the box; you can crease it along each edge of the box to make the wrapped gift look even neater. Line up the other end of the wrapping paper with the edge where you taped the first section (so now the entire box is covered). You can either trim any excess wrapping paper or neatly fold it under itself; you want a clean line along the edge of the box. Secure in place with double-sided type.
STEP 3: Wrap one end.
With the present still centered. On one side, press down directly on the top section of wrapping paper, creasing it along the edge of the box. You can tape this section to the box to keep it in place. This step will create two triangle-shaped pieces on each side. Crease each top edge for the triangle sections. Then, fold each triangular section inwards, towards the middle. Crease along each edge of the box. Hold these pieces in place, and lift up the final bottom section of the wrapping paper. Fold it upwards, creating a crease on the last edge of the box. Tape this piece in place—if it is too long, you can trim it a bit or fold it underneath itself before taping.
STEP 4: Wrap the other end and add finishing touches.
Repeat Step 3 on the other end of the box. All wrapped! To create sharp edges, you can pinch your fingers together and run them along each side of the box to make sure the paper is nicely creased to its shape. Also, you can now add optional finishing touches, like embellishing the wrapped gift with ribbon, bows, stickers (check your art supplies stash before buying anything new), or even small drawings if you don’t have pieces to add.
RELATED: The 26 Best Hostess Gifts: Beautiful and Unique Gifts for Hosts for Any Budget
How to Wrap a Cylinder-Shaped Gift
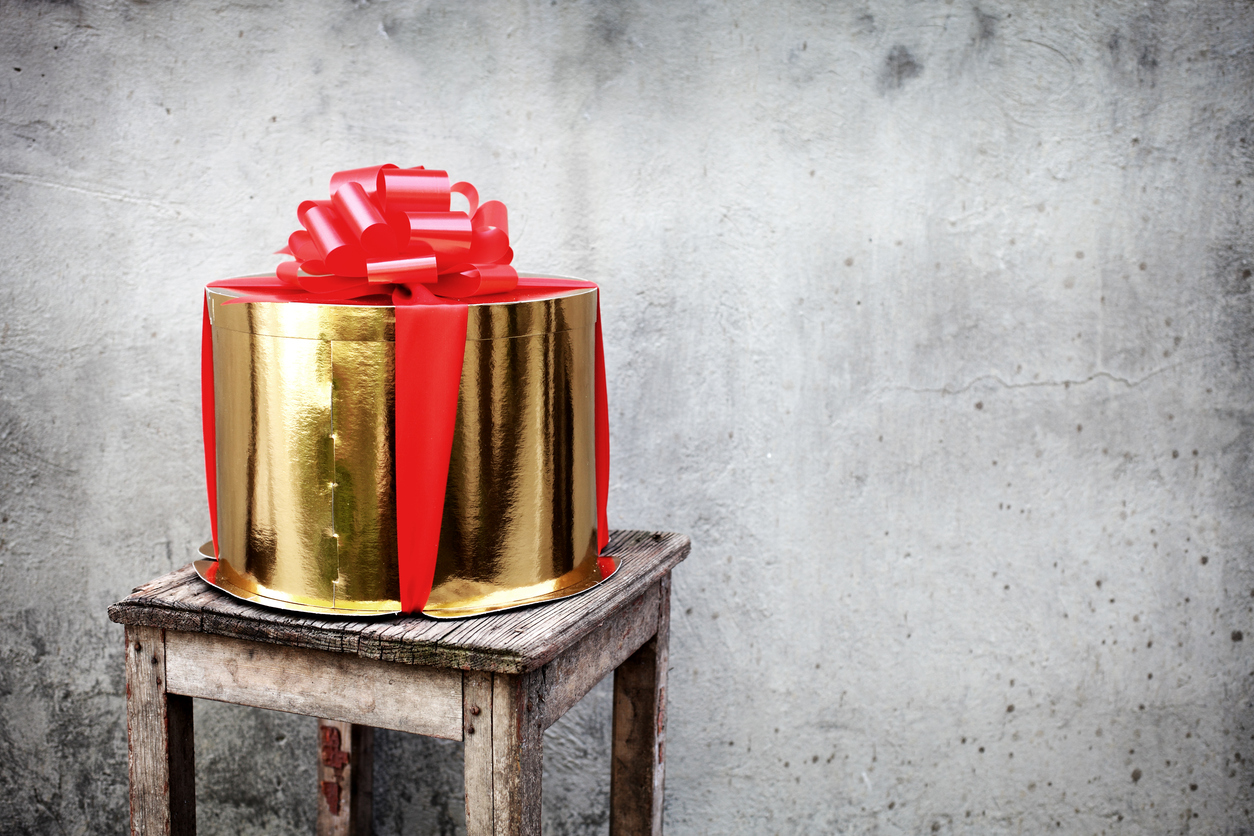
Wondering how to wrap a cylinder? A cylindrical gift is more difficult to wrap than a traditional box, but it’s still possible to make it look neat and tidy.
SUPPLIES
– Wrapping paper
– Scissors
– Clear tape
– Double-sided tape
STEP 1: Measure and cut the wrapping paper.
Unroll the wrapping paper on a flat surface, with the pattern facing away from you. Place the cylinder on the wrapping paper with the rounded side down. Adjust it so when you fold up the sides of the wrapping paper on each flat end, it reaches just a little bit over halfway up. You’ll also want to make sure the wrapping paper can wrap all the way around the rounded side of the cylinder, with an inch or so of overlap. Cut the wrapping paper to size.
STEP 2: Wrap the length of the cylinder.
Fold one side of wrapping paper around the round part of the cylinder and tape it to the gift. Wrap the paper all the way around the cylinder, keeping it taut. If you’d like, you can fold along the last inch or so of the wrapping paper to create a neater seam. Just make sure the end of the wrapping paper overlaps where you taped it at the start, so it fully covers the gift. Use double-sided tape to secure the wrapping paper in place. Make sure the gift is centered within the wrapping paper, which should now be wrapped around the cylinder like a tube.
STEP 3: Wrap the bottom end.
At the bottom end, press down directly on the top section of the wrapping paper. Go along the entire circle around the cylinder, pressing the paper down and creasing it along the edge of the cylinder. This creates a flat bottom so you can stand the gift upright. Tape this end in place. Since it’s the bottom of the gift, it doesn’t need to look perfectly neat.
STEP 4: Wrap the top end and add finishing touches.
Place the gift on the flat bottom so the cylinder is upright. Start pleating the gift paper on the top end of the cylinder. Start where the two seams meet, press the paper flat along the flat surface, creasing it along the circle. Continue this methodically around the circle, pressing down each time to crease the paper to the cylinder shape. Continue until all of the paper is pleated towards the middle. Trim off any excess paper, then tape in place. You can place a gift bow on top to cover up any messy pleats.
How to Wrap a Wine Bottle
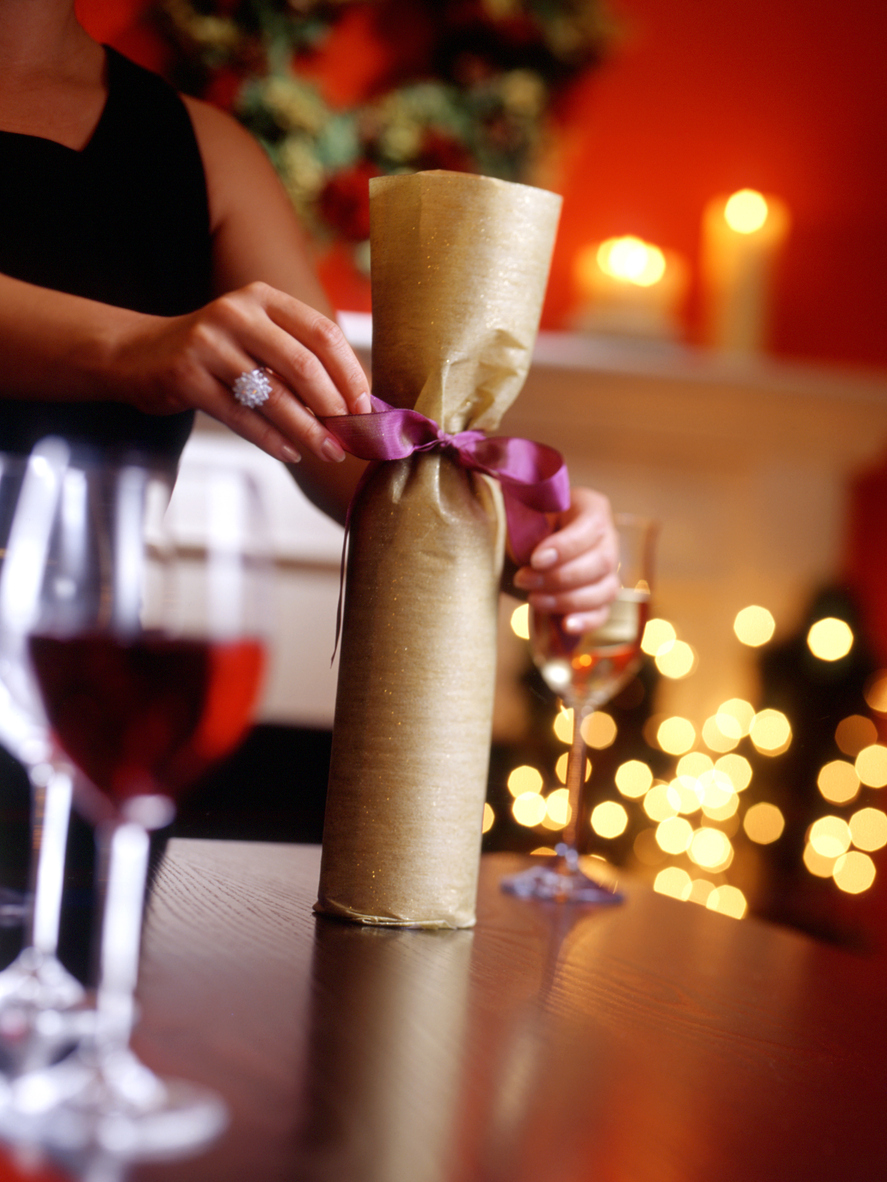
A liquor or wine bottle is a go-to gift for many occasions, but wrapping one of these big bottles can be a bit of a hassle if you’ve never done it before. Luckily, the necessary steps are similar to wrapping a cylindrical gift, and the neck of a bottle offers the unique opportunity for pretty embellishments.
SUPPLIES
– Wrapping paper
– Scissors
– Clear tape
– Double-sided tape
– Ribbon or twine
STEP 1: Measure and cut the wrapping paper.
Unroll the wrapping paper on a flat surface, pattern side facing down. Put the wine bottle on the wrapping paper with the rounded side down. Measure how much wrapping paper you’ll need: it will need to wrap around the bottle with an inch of overlap, reach a little over halfway across the bottom of the bottle from each side, and reach over the very top of the bottle by about 2 inches. Once you’ve figured out how much you need, cut the wrapping paper to size.
STEP 2: Wrap the length of the wine bottle.
Fold one side of the wrapping paper around the round side of the wine bottle and tape it to the bottle. Wrap the paper around the wine bottle tightly, making sure the paper overlaps slightly to cover the entire bottle, and tape it in place. Similar to wrapping a cylinder, you can fold along the last inch of the wrapping paper to create a neater seam. Use double-sided tape so the tape isn’t visible.
STEP 3: Wrap the bottom and decorate the top.
Just like wrapping the sides of a cylinder gift, press directly down on the wrapping paper at the bottom of the bottle, creasing it along the circle to create pleats that wrap it around the bottom. Go around the entire circle, folding the paper inwards and creasing it into place, and then secure with tape. Place the wine bottle upright. Scrunch the paper gently around the bottleneck and tie it in place with a piece of ribbon, twine, or string. Tie it into a bow for a nice finishing touch!
RELATED: 15 Gifts You Should Never Give
How to Wrap a Gift Bag
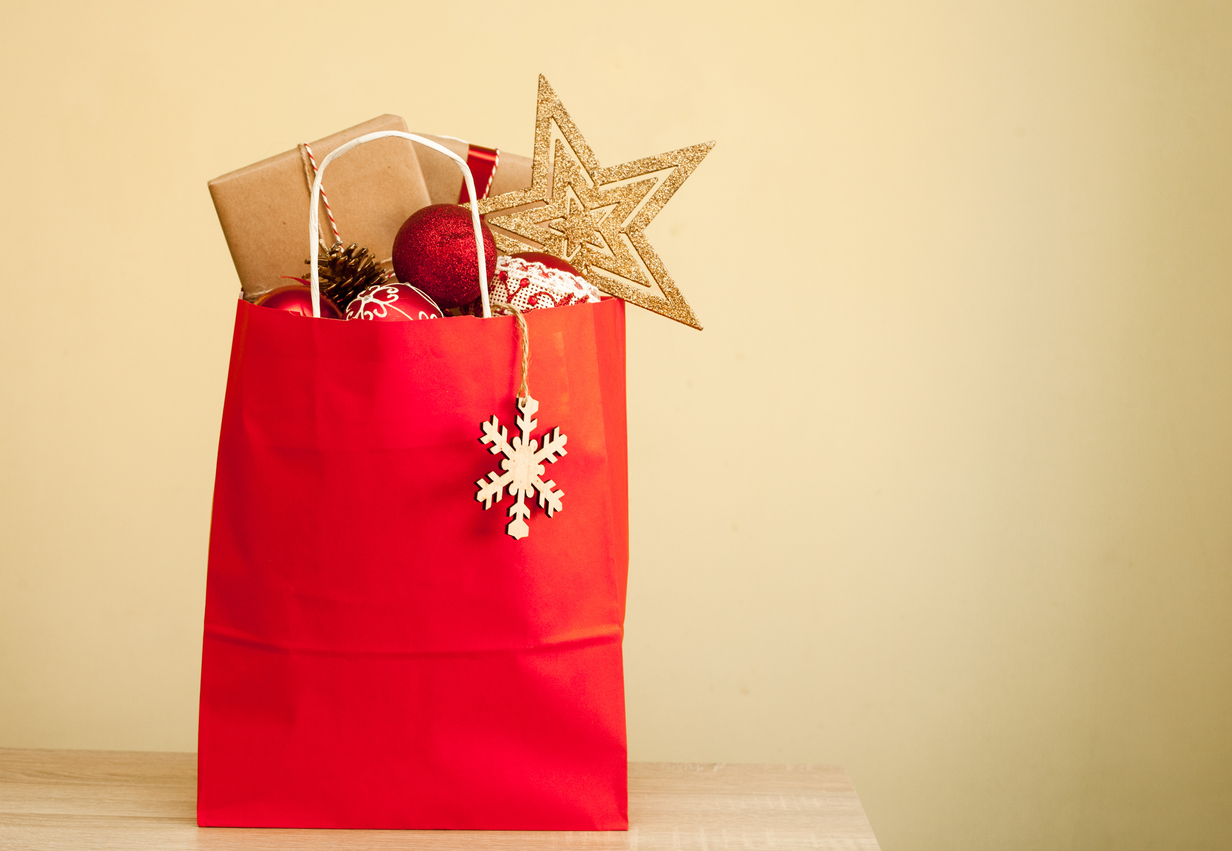
If you’re in a rush, a gift bag is the fastest gift-wrapping choice—it’s even quicker than wrapping a box! A gift bag is also a great choice for irregularly shaped gifts. While you can just place the gift in the bag and add some tissue paper and call it a day, the below steps will make it look more put-together and fun to open.
SUPPLIES
– Gift bag
– Tissue paper (in two or more colors)
STEP 1: Pick out the right gift bag.
Choose a gift bag that’s around two times taller than the gift (or gifts). Open it so it’s ready to fill with goodies. If you want to wrap the gift or each smaller item with tissue paper, you can do so at this point. If the gifts don’t fill up the bag enough (it should fill the bag half to two-thirds of the way), use tissue paper as filler on the bottom or along the side. You can reuse old tissue paper for this step; it’s best to use new tissue paper for the top decorative section.
STEP 2: Prepare the bag and tissue paper.
Place the gift(s) inside the bag, wrapping them in tissue paper if you so desire. On a flat surface, layer two or more pieces of tissue paper (each in a different color) on top of each other. Choose colors that compliment the gift bag design. Slightly misalign the layers of tissue paper so the corners are offset from each other, but make sure the center of each sheet roughly matches up.
STEP 3: Decorate the bag with tissue paper.
Pinch each piece of tissue paper right in its center and lift upwards. Twist the section that you pinched two or three times to create a bundle. The outer edges of the tissue paper should stay splayed out, creating a layered look. Stick this (with bundled side down) at the top of the gift bag. Fluff up the tissue paper sticking out of the bag. You may need to repeat this step with more tissue paper if you have a large gift bag and one bundle isn’t covering the opening. If you want more decoration, add a gift tag or ribbons to the bag handle.
Final Thoughts
Whether it’s an expensive anniversary present or a budget-friendly birthday gift, nice gift wrapping can go a long way in making your recipient feel special. No matter the shape, there’s a few gift-wrapping techniques you can use to make the present look nice. Start with bits and bobs you can find around the house, and if all else fails, reach for a gift bag and some tissue paper! Whatever method you choose and for whatever occasion, your newfound gift-wrapping skills will make your presents look as good on the outside as their generous contents make your recipient feel on the inside.