We may earn revenue from the products available on this page and participate in affiliate programs. Learn More ›
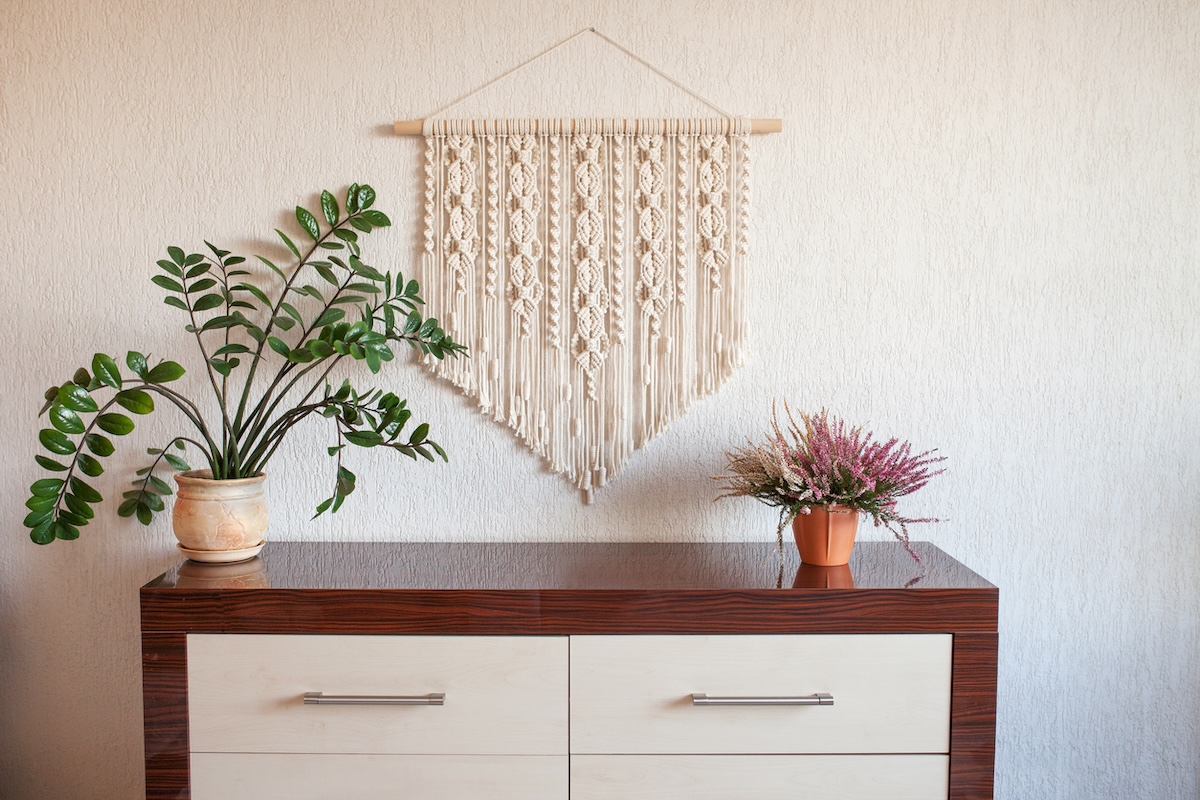
Learning how to macrame is straightforward, and once you have a few basic knots under your belt, you can make a range of gorgeous decorations and items. Macrame is a fun hobby for those who love to craft, and especially those who love to make their own home decor. From wall decorations to plant holders to rugs and even hanging furniture, there are so many potential projects using just a length of string and some knots. Get started with this guide, where we’ll go over the key materials and basic macrame knots.
Important Macrame Supplies
Macrame is an easy craft to start in part because it doesn’t require too many supplies. We’ve rounded up the basic items you need to learn how to macrame for beginners and start your first project.
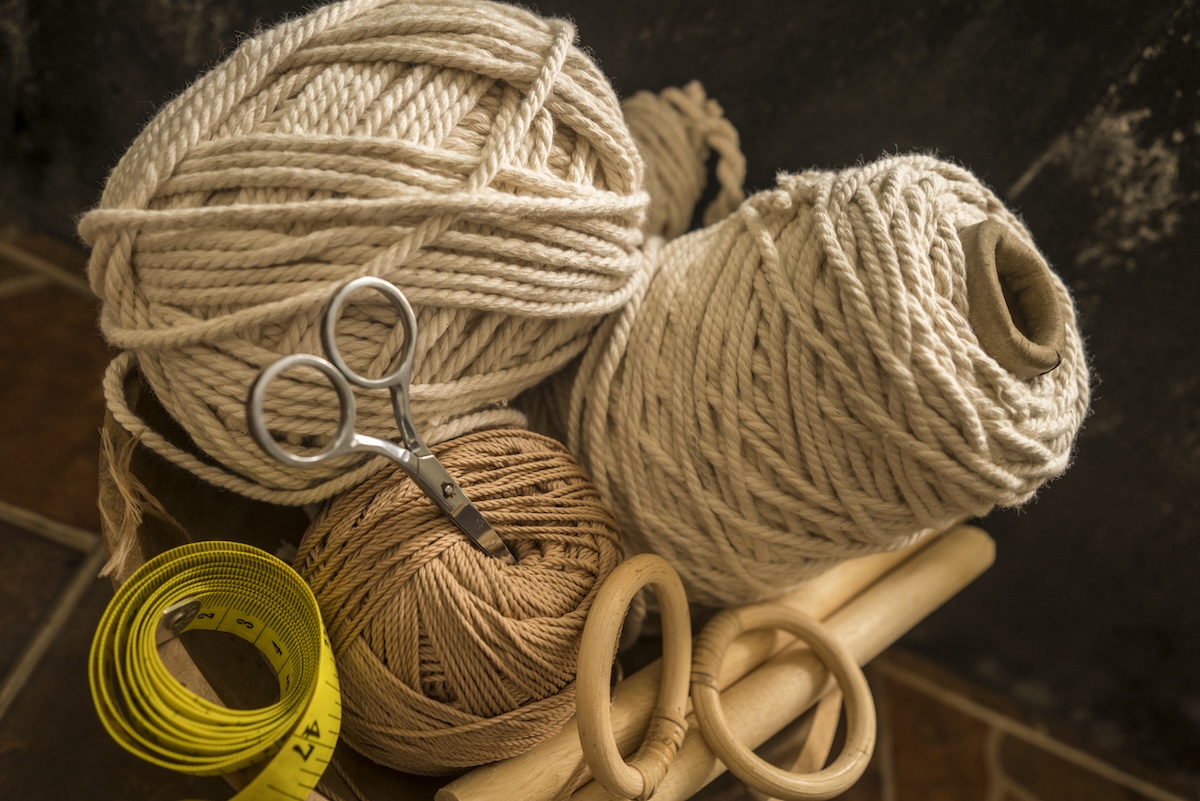
Macrame cord
Ranging from leather to paracord, pretty much any pliable string, cord, or rope can be used for macrame. Many beginners like to start with soft cotton braided macrame cord like this one available at Amazon. Start with a string or cord thickness of around 3 to 5 millimeters—this is a good thickness for many beginner projects, like hanging planters, totes, and small wall decorations.
Scissors
A pair of sharp and sturdy scissors is a must-have for macrame knotting. A lot of macrame string types are thicker than other crafting materials like yarn. You’ll want a good pair of scissors to create clean cuts; we recommend the AmazonBasics Multipurpose Comfort Grip scissors.
A macrame pattern for beginners
After practicing the basic knots, use a beginner macrame pattern to make your first project. A pattern will walk through each step and take some guesswork out of the process—for example, it will tell you the cord thickness and how long a strand you should start with so you won’t run out halfway through your project. There are plenty of free macrame designs online or for sale on craft websites like Etsy.
Tape measure
A tape measure will help you measure out your lengths of string or cord before you start a pattern. A standard tape measure like the Stanley 25 ft. PowerLock Tape Measure will get the job done.
A dowel, hoop, or ring
Many macrame projects are mounted on a base, like a wooden dowel or metal hoop or ring. These bases provide a solid anchor for your cords, so they’re great for practicing types of knots for macrame. Purchase a base type if needed, based on the pattern you choose to use.
RELATED: How to Hang Plants From the Ceiling
Preparing Your Project Space
Depending on your project, you’ll work with a vertical or horizontal workspace. In a vertical workspace, your macrame project is mounted on a hanging setup with the strings hanging down vertically. In a horizontal workspace, your project is on a flat surface, such as a table or macrame board, and you’re working the strings horizontally on your workspace. Either way, it’s important to anchor your project at the top so it doesn’t move around while you’re tying knots.
For macrame beginners, this can be as easy as duct taping your project to your work surface. For example, for vertical projects, you can tape it to a wall, table edge, or hang it over the back of a door or from a door knob. Later on, especially for larger projects, it might make sense to invest in a couple of S-hooks and a clothes hanging rack, which makes it easier to hang your project vertically. It’s much the same for horizontal projects; you can tape it to a table, or even the floor, but when you want an upgrade (especially for small, finicky projects), you can grab a macrame board like this highly rated option available at Amazon.
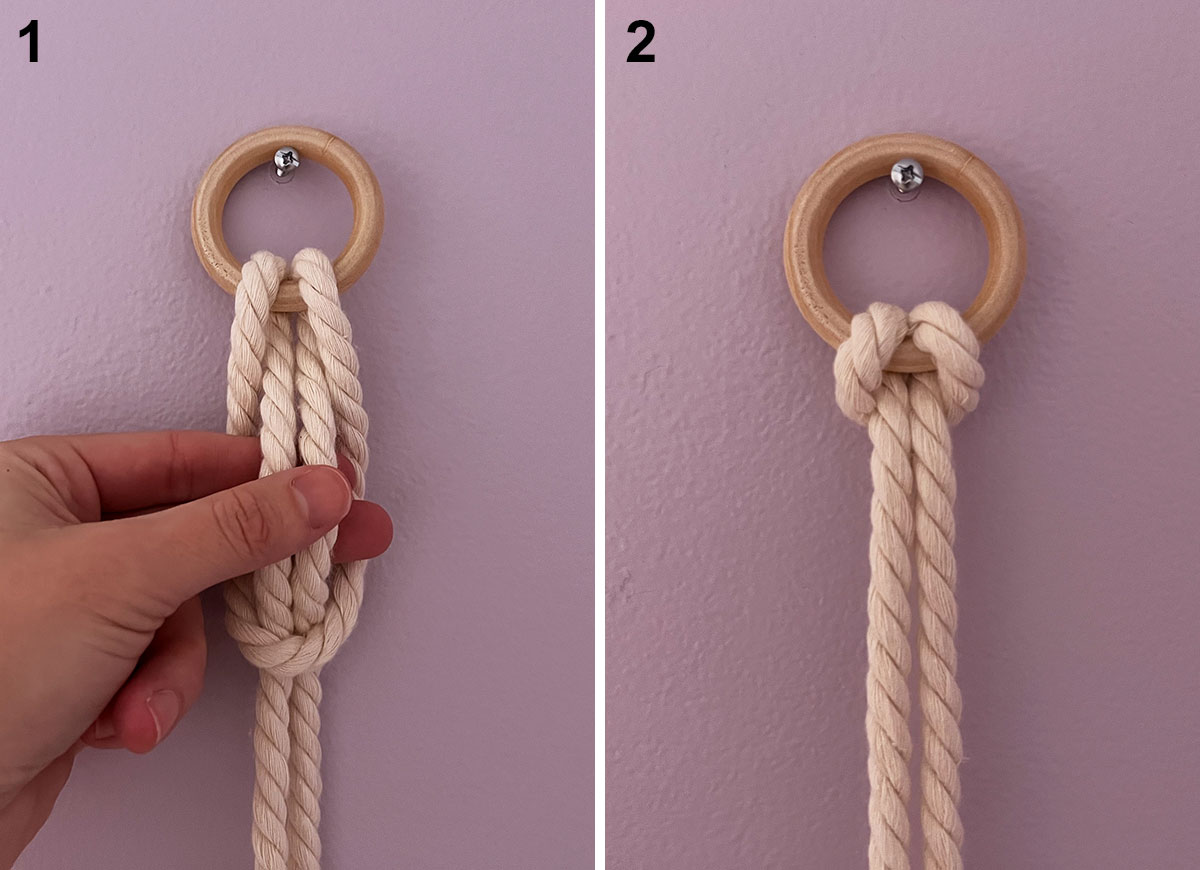
1. Lark’s Head Knot
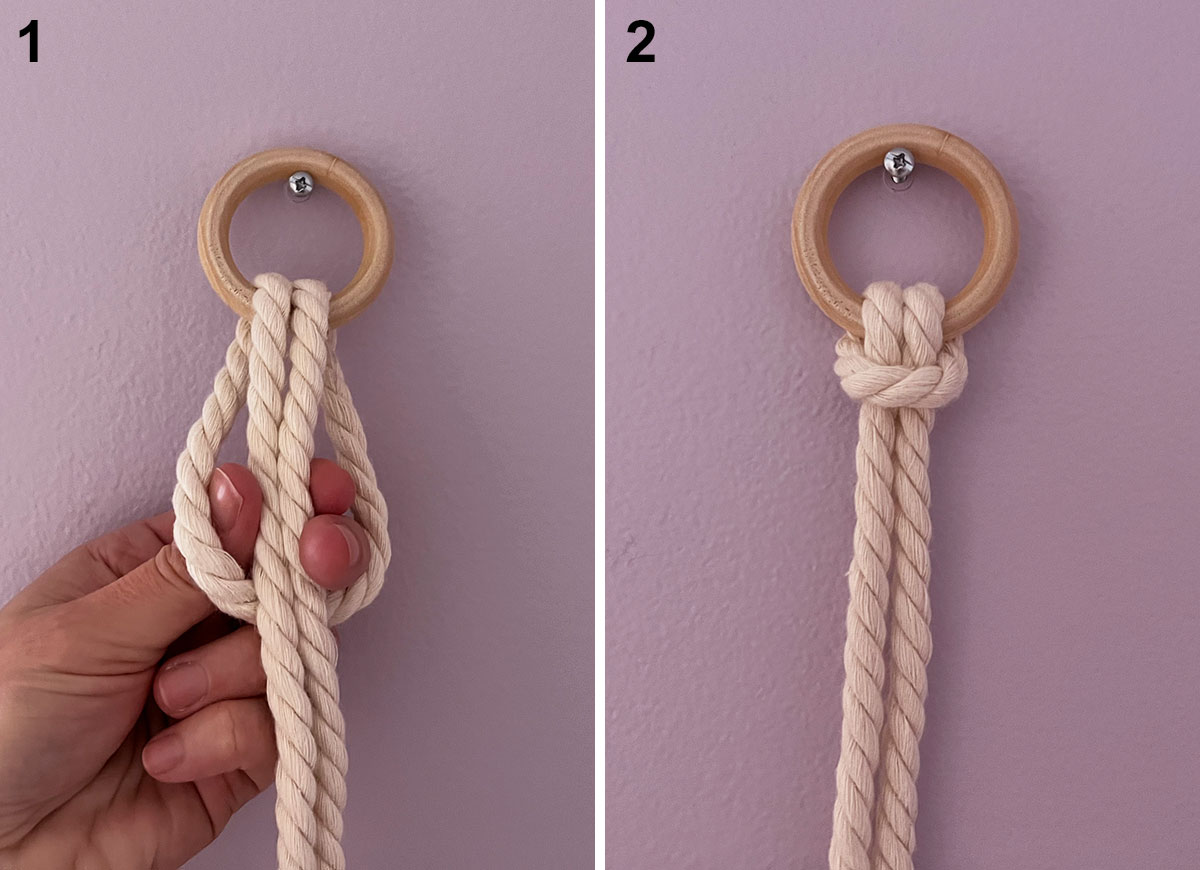
The lark’s head knot is an easy mounting knot that attaches the string to a project base (like a dowel or ring). It can also be used to attach a string to another string or edge of a finished piece, such as along the bottom to create a fringe. Start with your length of cord and fold it in half. Place the folded end over the top or front of the dowel or ring and “bend” it backwards. The folded end should be pointing downward, now behind the dowel, essentially creating a small loop. Take the two ends of the cord and run them through the loop. Pull the ends through until the knot tightens on the dowel. While doing so, ensure both strands are even (unless the pattern specifies otherwise).
2. Reverse Lark’s Head Knot
A reverse lark’s head knot is the same as a lark’s head knot, just reversed. Take your cord and fold it in half, Now, place the folded loop behind the dowel and bend the loop over the dowel, in front of it. The folded end will be pointing downward, creating a small loop in front of the dowel. Pull the ends of the cord through the loop and pull to tighten the knot to the dowel. Choosing between a lark’s head and reverse lark’s head knot generally comes down to aesthetic preference; the latter will have the front part of the knot in the back of your work, making it less obvious. Both knots will result in two strands for a project.
RELATED: 12 Clever Ways to Make Your Own DIY Hammock
3. Half Square Knot and Square Knot
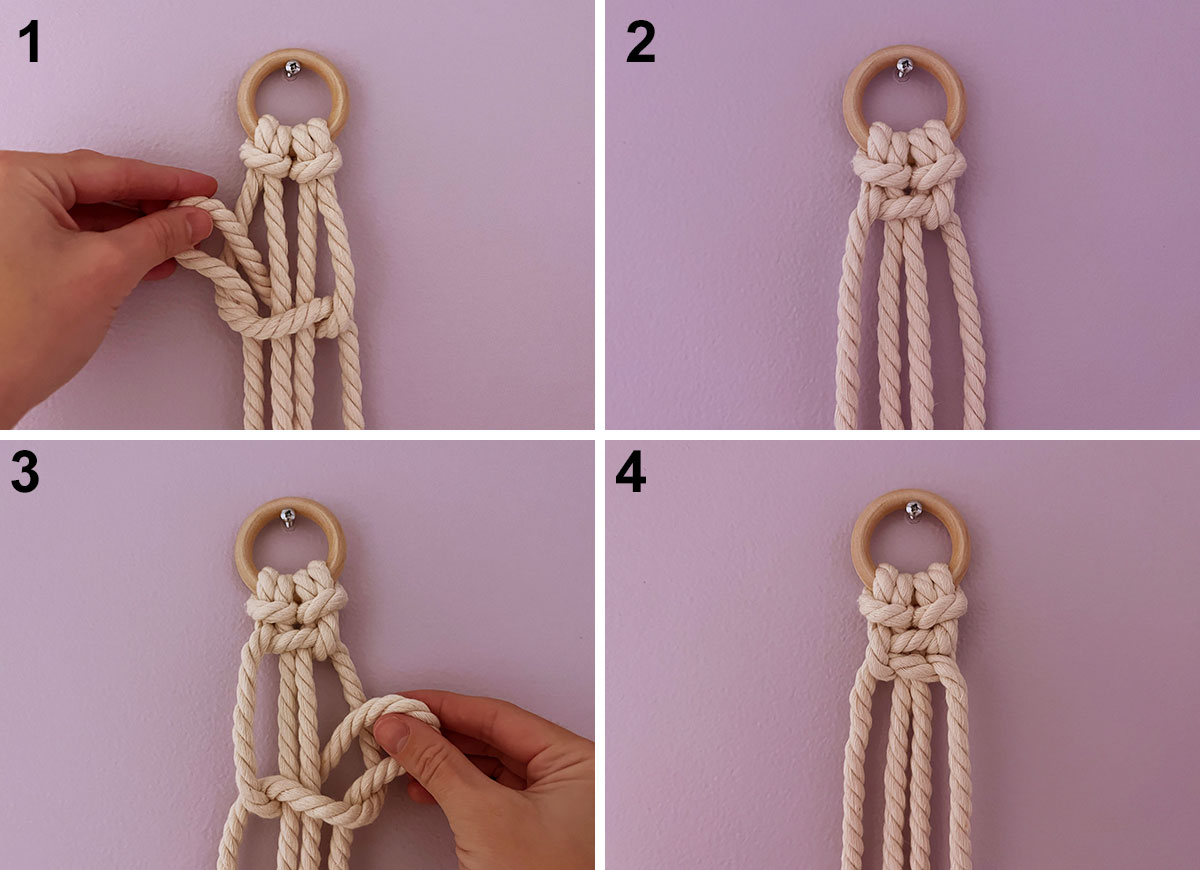
The square knot is one of the most important basic macrame knots, useful for a range of patterns. First, tie two lark’s head or reverse lark’s head knots, which will result in four strands. Take the cord on the left (which is a “working cord”—a cord being used to tie knots) and place it over the two middle “filler” cords (“filler cords” refer to the cords that the knot is being tied around). Then, place it under the furthest cord on the right. Take the cord on the right (which is another “working cord”) and move it behind the two middle filler cords, then over the working cord on the left (through the loop that the first step created.
Pull the working cords to tighten the knot and slide it up the filler cords to the lark’s head knots. This creates a left-facing half square knot. To create a full left-facing square knot, tie a right-facing half square knot (one of each makes a square knot). To do so, repeat this process again, reversed. Take the working cord on the far right and move it over the two middle filler cords and under the left working cord. Then, take the cord on the left and move it under the two middle filler cords and over the cord on the right. Pull the working cords to tighten it up close to the previous knot. This creates one left-facing square knot.
To create right-facing half square and square knots, repeat the same steps reversed, so starting with the right working cord. A left-facing square knot has a bump on the left side of the finished knot, whereas a right-facing square knot has a bump on the right side.
4. Spiral Knot
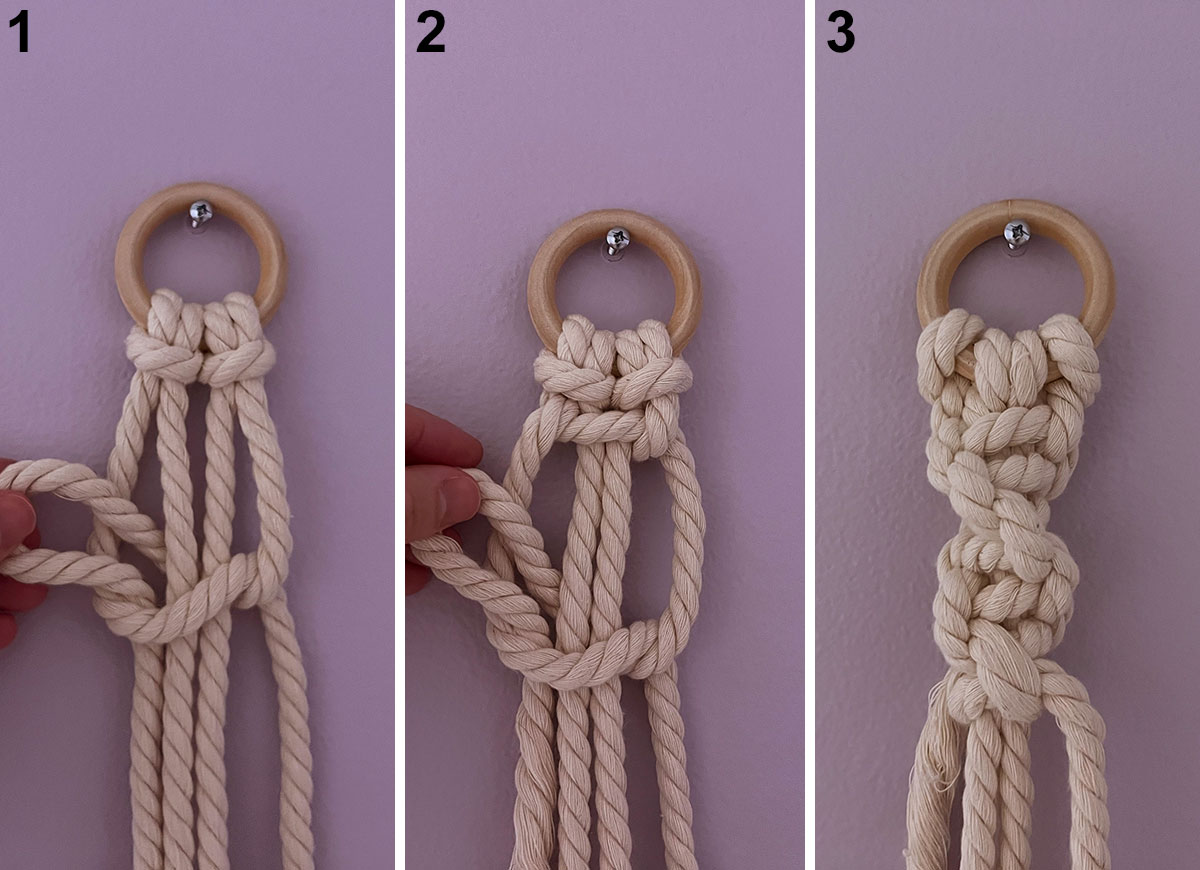
The macrame spiral knot uses a series of half square knots to create a pretty decorative spiral pattern that resembles the shape of a DNA strand. Instead of alternating between left and right half square knots (which create a square knot when paired together), it only uses repeated half square knots on one side.
Start with two separate lark’s head or reverse lark’s head knots so you have four strands to work with. Create half square knots, only grabbing the working cord from one side. For example, if you start with a left-facing half square knot, you will grab the furthest strand on the left first for each new knot.
Here’s how that looks: start by taking the cord on the left, place it over the two middle “filler” cords, and then under the furthest cord on the right. Take the cord on the right and move it behind the two middle filler cords, then over the working cord on the left. Pull tight to create a left-facing half square knot. Then, instead of grabbing the cord on the farthest right (which would be the next step to make a square knot), grab the furthest cord on the left again and repeat the above steps. The cords will start twisting to create the spiral shape.
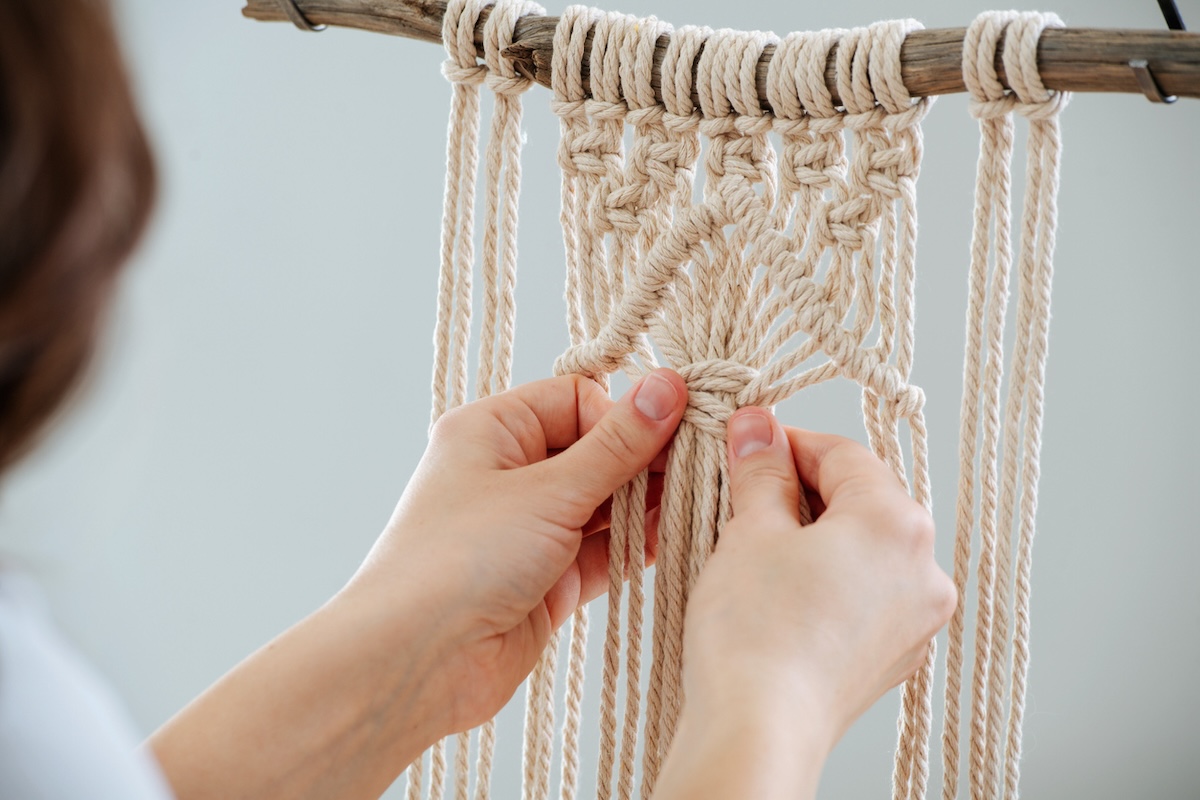
5. Horizontal and Diagonal Double Half Hitch Knot

The double half hitch is used to create horizontal, diagonal, and vertical lines in a project. The horizontal double half hitch knot creates horizontal lines. Start with three lark’s head or reverse lark’s head knots. You should have six strands total to work with. The furthest cord on the left will be the filler cord, and the other five the working cords (so each cord will tie around the filler cord). Take the filler cord (furthest left cord) and place it horizontally on top of the other cords. Take the next cord (the first working cord) and bring it up over the filler cord, and then thread the end through the loop to create a knot. Pull tight. Wrap the same working cord around the filler cord and through the loop again, pulling tight. This second knot secures the double half hitch in place.
Grab the next strand and repeat the process, wrapping the working cord around the filler cord and through the loop to create one knot, then wrapping it around and through the loop again to create the securing knot. Continue this process down the line of working strands until you reach the end. This should create a straight horizontal line. To create a diagonal double half hitch knot (pictured), don’t pull the strands as tight, letting the knots rest in a diagonal line as you go along.
RELATED: 12 Gardening and DIY Camps and Workshops for Adults
6. Vertical Double Half Hitch Knot

To create a vertical double half hitch knot (which creates vertical lines), you’ll need an additional length of cord, separate from the ones already in your project. To practice, start with the same setup as the horizontal double half hitch knot, using three lengths of cord to create three lark’s heads knots. You should have six strands on your base.
Cut a separate length of cord, which will be your working cord. Place it behind the two first strands (filler strands), then place the right side of the cord back over these filler strands, to the left and above the left end of the working cord. Thread the right end of the working cord behind the filler cords and through the loop, tying the working cord around the two filler cords. Pull tight. Repeat the process on the same first two filler cords.
Place the working cord behind the next two filler cords to the right (the next two strands from the second lark’s head knot). Repeat the same process as above to create a vertical double half hitch knot on the second set of filler cords. Your working cord should now be on the far right of your project. To create more vertical double half hitch knots, repeat these steps, just going the other direction with your working cord.
7. Gathering Knot
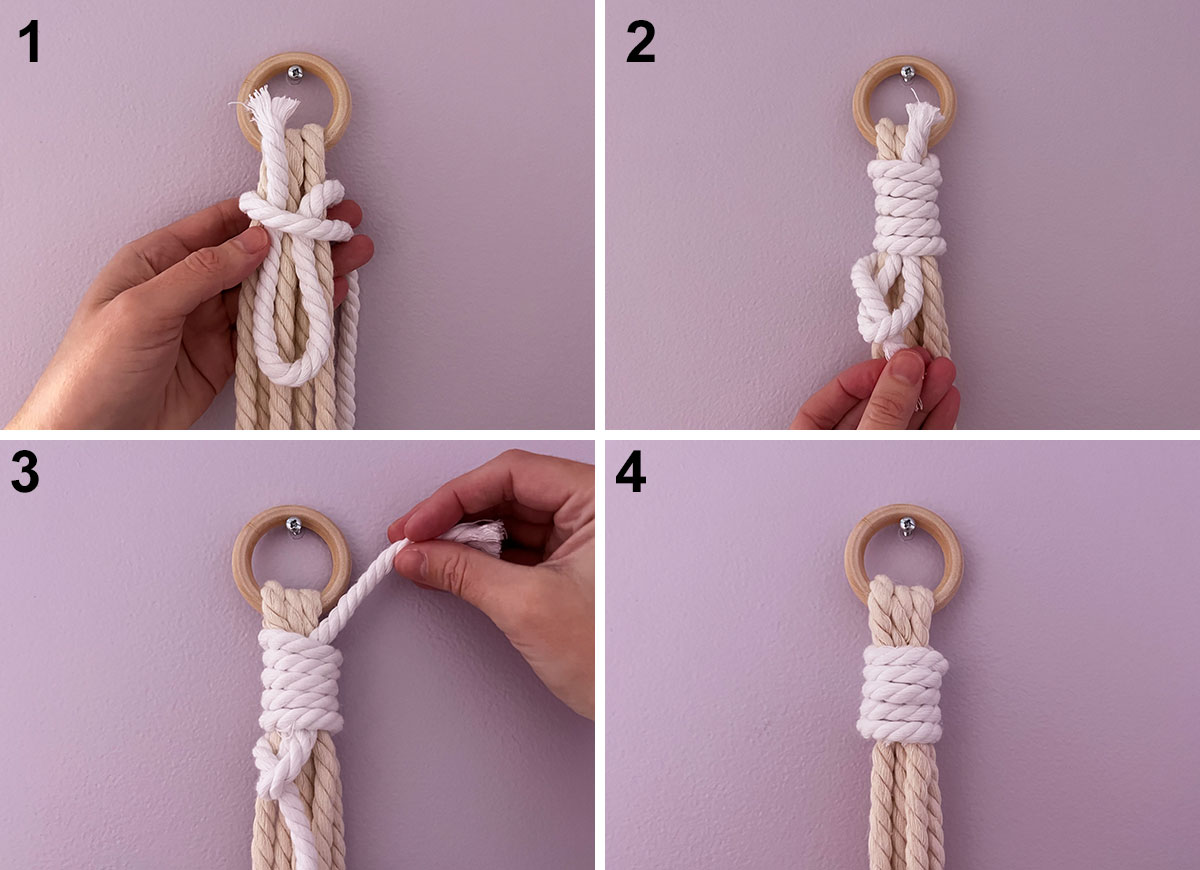
A gathering knot knots all your cords together into one neat knot. It’s often used as a finishing knot on projects, such as at the end of a hanging macrame plant holder. This knot uses two working cords, and the rest of the cords are filler cords.
Start by cutting a separate length of cord, which will be one of the working cords. On one end of this working cord, form a long tear-dropped shaped loop. Place this loop on top of the filler cords, with the rounded end facing down. Make sure to keep one end of the working cord poking out at the top, and start wrapping the rest of the working cord around the filler cords and the working cord loop. Wrap the working cord around the filler cord bundle at least five times, working downwards, stopping before you cover the loop completely. Take the working cord and thread it through the loop. Use the upper part of the working cord (the bit sticking out the top of the gathering knot) and tug on it to tuck the end of the working cord into the gathering knot. Trim each end for a neat finish.
