We may earn revenue from the products available on this page and participate in affiliate programs. Learn More ›
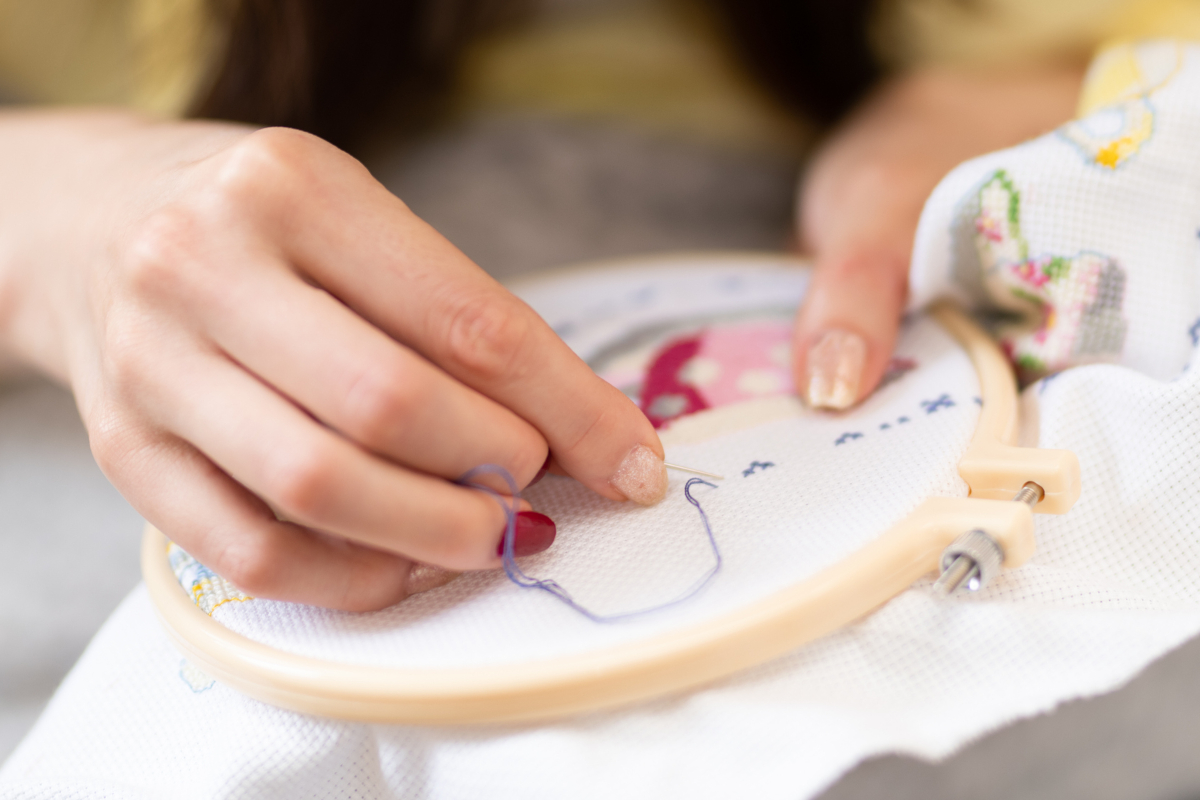
Hand embroidery looks difficult, but it’s actually one of the easiest fiber crafts to learn—not to mention one of the most versatile. Embroidering is essentially drawing with a needle and thread. Any design you can create with a pencil, you can create with hand embroidery! Of course, just like with drawing, there are varying levels of difficulty and it takes time to improve your skill.
Simple embroidery techniques are very easy to learn, and you can create using only a few basic stitches. Learn how to embroider and unlock a new world of textile decorating possibilities.
Important Embroidery Supplies
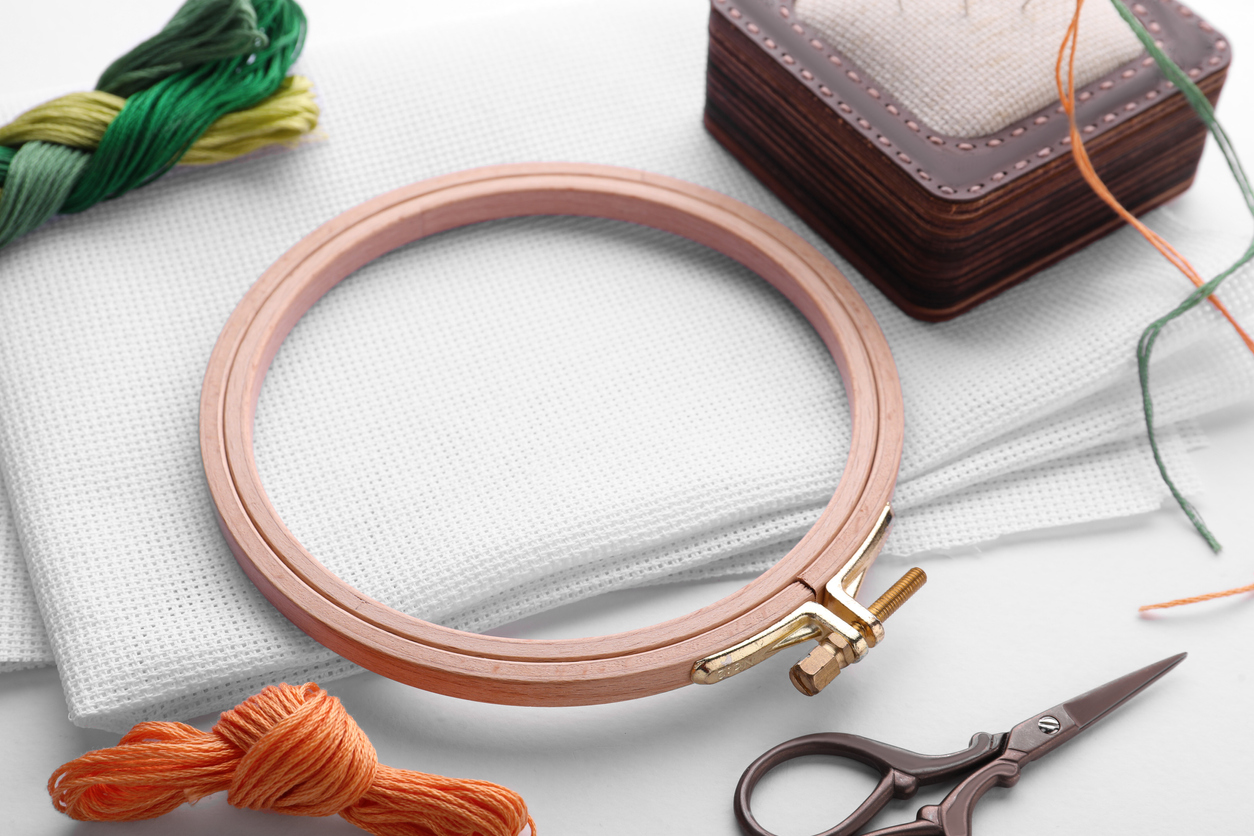
The following guide will cover hand embroidery, which is embroidering by hand, as opposed to using an embroidery machine, which is a different process altogether. To learn how to embroider, first you’ll need to start with the right supplies, listed ahead. An embroidery kit can include several of the necessary supplies and is a good choice for beginners.
Embroidery floss
The old spool of thread you have in your sewing kit is likely too thin for hand embroidering. Reach for embroidery floss instead, which is thicker and comes in a range of colors for creating designs.
Embroidery floss consists of six threads twisted around one other to create a thicker strand. Crafters can split the floss, using just a few embroidery thread strands to create thinner embroidered lines, or use the floss as-is for thicker designs. A multicolor collection, like this DMC embroidery floss pack, is a good choice for getting started.
Embroidery needle
Unlike most hand-sewing needles, embroidery needles have a larger eye (the needle eye is the hole through which embroidery floss is threaded) to fit thick embroidery floss. Just like with sewing needles, hand embroidery needles come in various sizes to work with different fabrics. This pack of Clover Gold Eye embroidery needles includes several sizes and is a great choice for beginner embroiderers.
Fabric to embroider
When embroidering, the fabric is your canvas. The best fabric type for an embroidery project comes down to personal preference, but natural fabrics like cotton, linen, and linen blends tend to work nicely. Technically, any fabric that can take a needle and thread can be embroidered, but options like this embroidery fabric will result in a nicer and smoother finished product.
Many crafters also learn embroidery to decorate their own garments or decor, so a great first project is to embroider a piece of clothing, pillowcase, or other fabric item lying around. (And don’t worry: It’s easy to remove embroidery stitches if you make a mistake!)
Embroidery hoop
Just like a painter’s canvas needs a frame, so too do embroidery projects. An embroidery hoop holds fabric taut, which makes it much easier to work with. Embroidery hoops come in several sizes and materials. Since they’re affordable, it doesn’t hurt to grab a multi-pack like this bundle of six BigOtters embroidery hoops, which offers size flexibility for future projects.
Scissors
Virtually any pair of scissors will work for an embroidery project. As long as they can cut through embroidery thread, they’ll do the job. These Amazon Basics scissors (the top choice in our guide to the best scissors) are perfectly suitable. But if you tend to work with fabric, it might make sense to invest in a pair of dedicated fabric scissors. We like this pair of Fiskars scissors from our best fabric scissors guide.
Preparing Embroidery Fabric
It’s easiest to embroider on clean, smooth fabric, so it may be prudent to launder, iron, or steam fabric before embroidering it. While it’s possible to freehand a custom embroidery, it’s easier to follow a pattern, especially for beginners. Embroidery kits may even come with a piece of fabric with a pattern already traced out. Iron-on transfers are also available for crafters to transfer an embroidery template onto their own fabric. Or, create your own pattern and draw it onto the fabric with a regular pencil or water-soluble marking pen.
Next, place the fabric on the embroidery hoop. To do so, loosen the screw at the top of the hoop and separate the two rings. Place the fabric over the inner ring, lining up the design in the middle. Place the outer ring over the fabric-covered inner ring and pull the fabric taut—it should be tight enough to create a flat working surface, but not so tight that the fabric is stretched. Tighten the screw to keep the fabric in place.
Needle-Threading Basics
If you know how to sew by hand, you’re in luck. Threading an embroidery needle is the same as threading a hand-sewing needle. In fact, it can be a bit easier since the needle eye is larger. Cut a length of embroidery floss, keeping it under 20 inches long to help prevent tangles while you embroider. Split it into your desired number of strands, if necessary. (You can use embroidery floss as-is, but the more strands, the thicker the embroidered line). Moisten and thread the cut end through the needle eye. A freshly cut end is easier to thread than a frayed one. If you have any trouble, a needle threader can come in handy. Tie a small knot at the end of the thread, and you’re ready to start embroidering.
RELATED: How to Sew a Hole in 5 Quick Steps
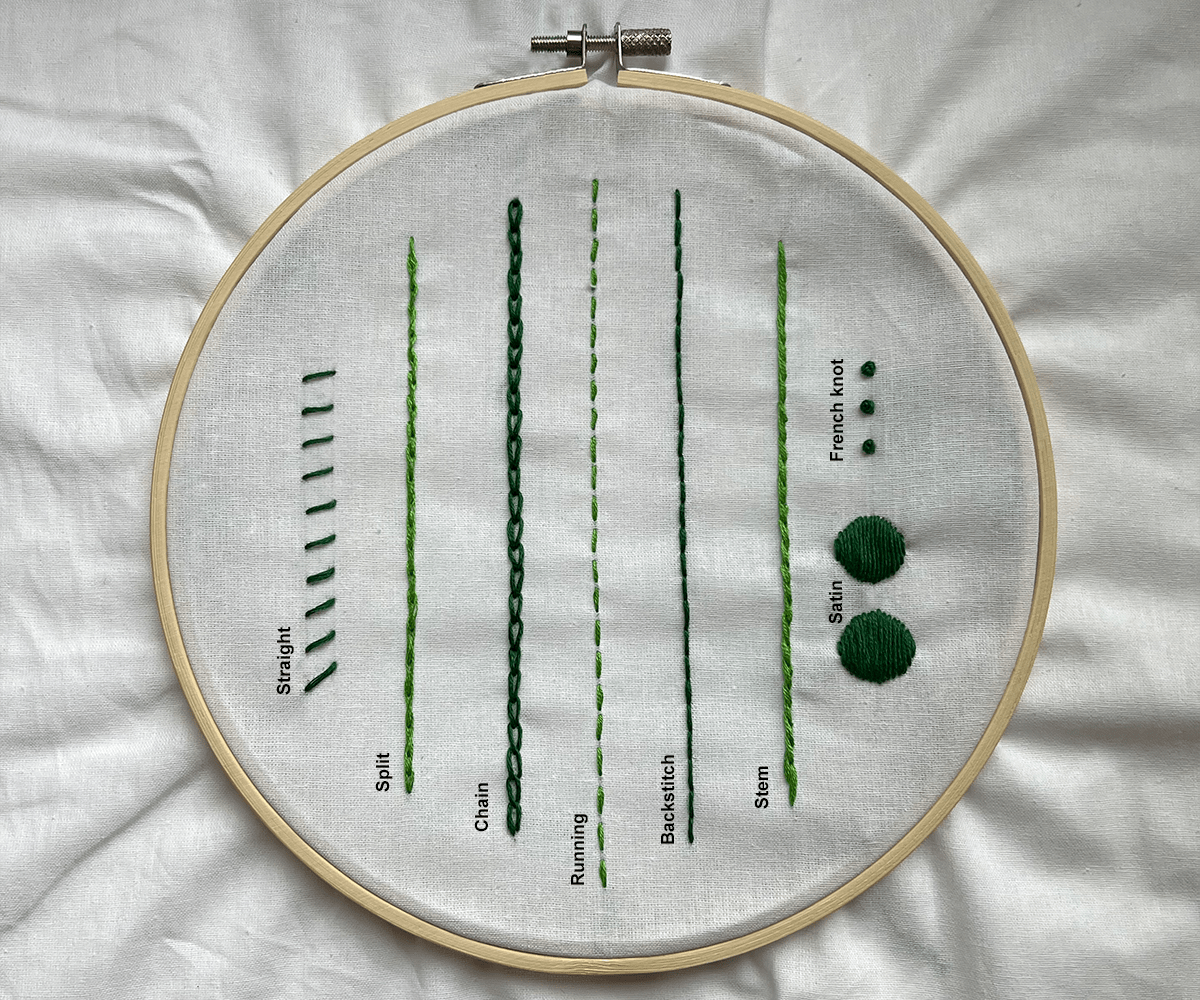
1. Running Stitch

The running stitch creates a dashed line. To start, push the needle through the back side of the fabric. Then, insert the needle into the front of the fabric where you want the stitch to end and pull through. That’s your first stitch! Leave a bit of space between stitches, and repeat the process to create the next stitch. You can vary the running stitch length and spacing to create a distinct pattern.
2. Backstitch
The backstitch is a foundational embroidery stitch. Its most simple use is to create a solid line, often used for outlining, but it has many more applications. It gets its name because it backtracks on itself to create a solid stitched line (unlike the running stitch, which creates a dashed line).
The first stitch is similar to the running stitch: Start by pushing the needle through the back side of the fabric and then insert it through the front of the fabric to create the first stitch. Then, move the needle to the spot where the next stitch should end. Push it through the fabric from the back, then move it back toward the first stitch. Stick the needle back into the front of the fabric, right at the end of the previous stitch (you can even place it in the same hole to avoid any gaps). Repeat this process as many times as needed to create a solid line.
RELATED: How to Sew by Hand: 7 Key Stitches to Know
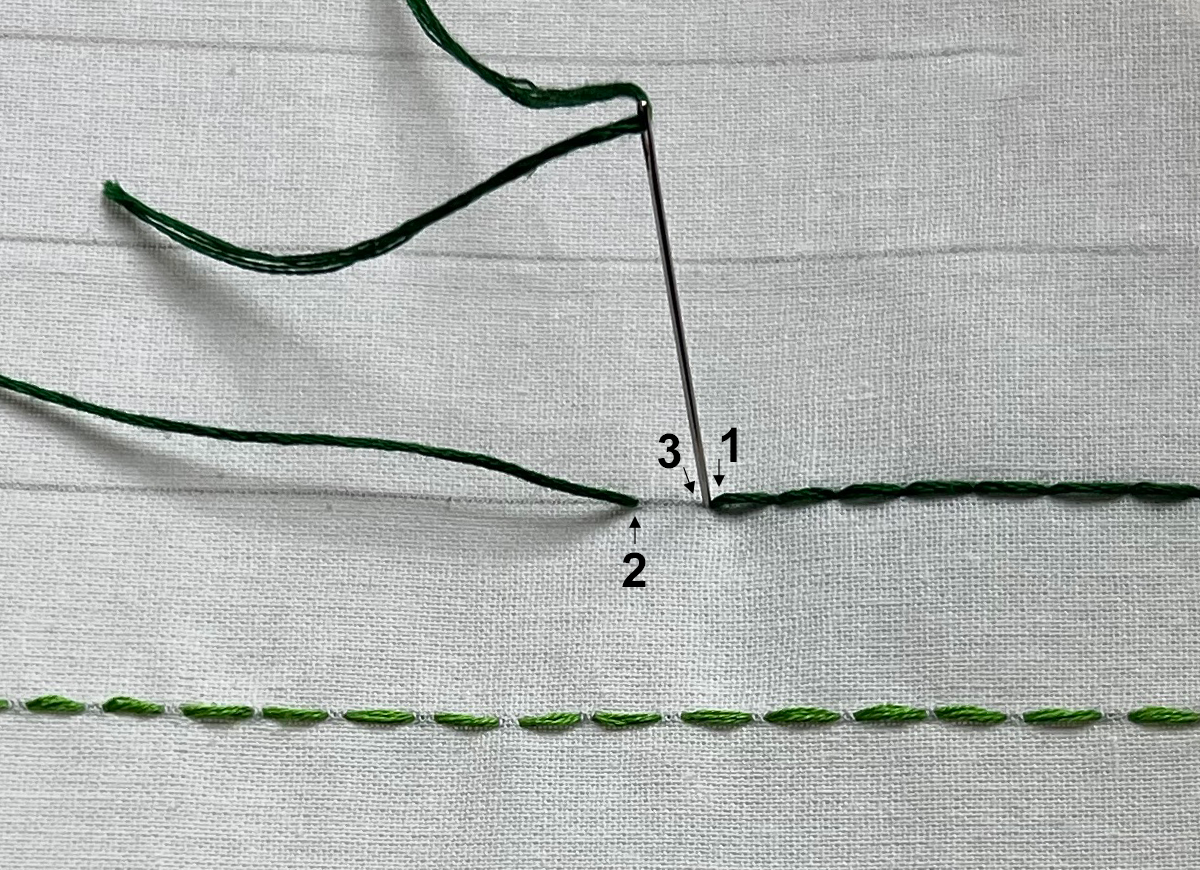
3. Stem Stitch
The stem stitch is another outlining stitch, but unlike the backstitch, it creates a more textured line that looks lovely in floral stems and vines. Start with a single straight stitch. Then, push the needle through the back of the fabric at the middle point of the previous stitch (as close as possible beside the stitch, but without splitting through the embroidery thread).
Next, push the needle through the front of the fabric a stitch length away, then push it through the back of the fabric where the previous stitch ends. Repeat the two steps from the previous sentence, going through the front of the fabric a stitch length away, then coming up through the back of the fabric where the last stitch ends. The finished line should have a twisted appearance due to the slightly overlapped stitches.
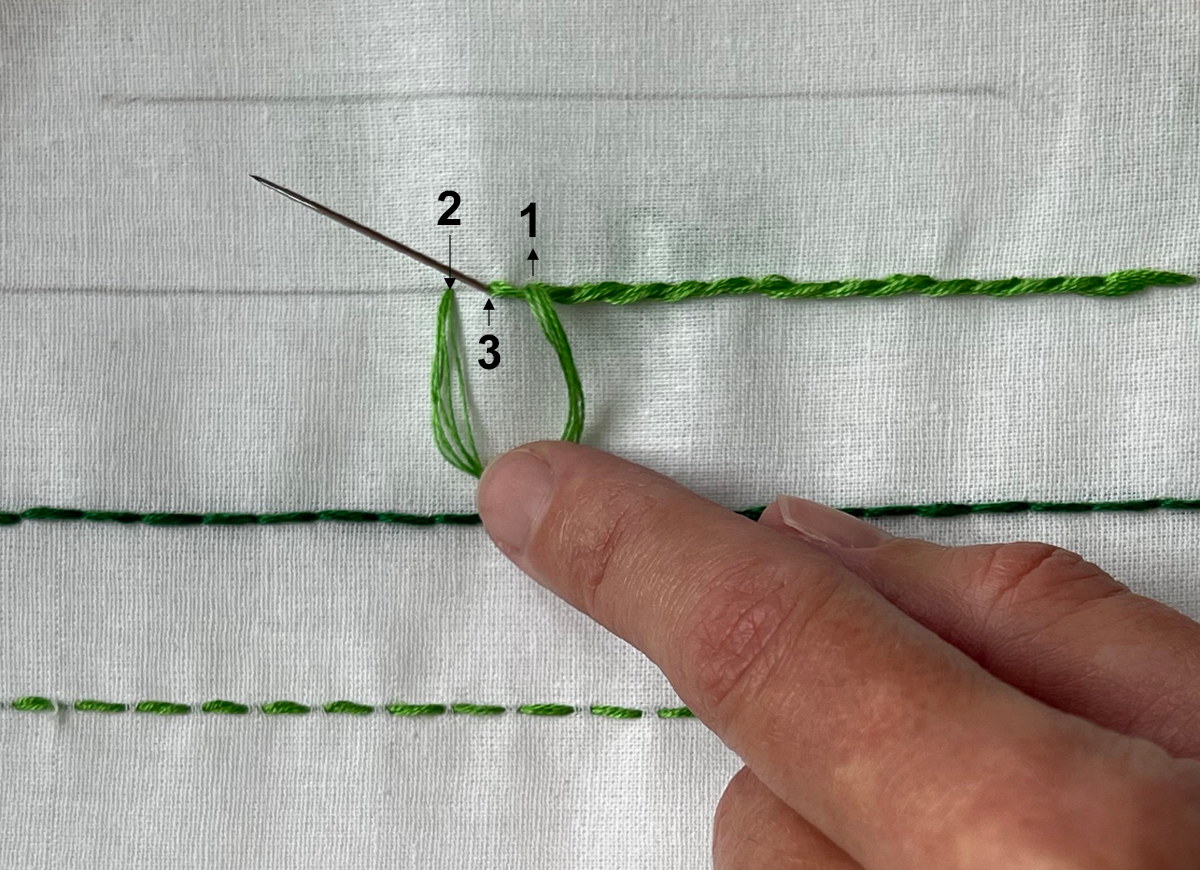
4. Chain Stitch
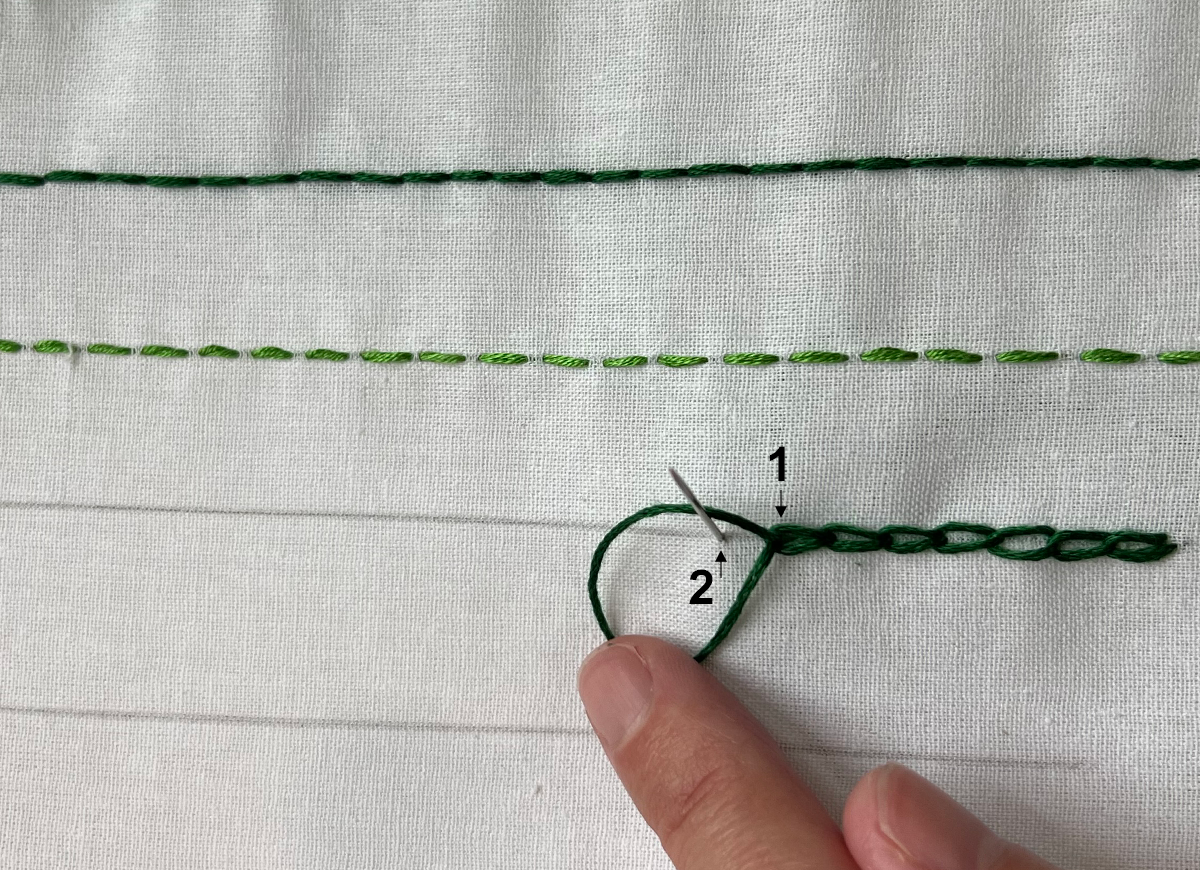
Start by inserting the needle through the back of the fabric and pulling through. Insert the needle into the front of the fabric, directly beside where you first inserted the needle (make sure not to insert it into the same hole or it will undo the first step). Pull the thread through but leave a small loop—make sure it is slightly larger than the desired size of your finished chain stitch. Insert the needle from the back of the fabric where you want the chain to end, pulling the needle through the loop. Pull the thread taut to create one chain stitch. Repeat the stitch to create a line that looks like a length of chain.
5. Straight Stitch
The straight stitch is one of the most basic foundational stitches and is true to its name: it’s just a straight stitch from one point to another. To complete a straight stitch, start with the needle at the back of the fabric and push it through to the front. This point is the start of the line. Then, put the needle back through the front of the fabric (wherever you insert the needle will be the end of the line). Pull the thread tight to create a straight line stitch. This stitch can be used in a variety of ways to add details and create patterns.
6. Split Stitch

Another outlining stitch that creates a solid line, the split stitch is created in a process similar to that of the running stitch. However, instead of moving the needle a space forward for the next stitch (which is how you continue a running stitch), you will double-back and go through the middle of the previous stitch. Insert the needle through the front of the fabric a stitch length away to finish the second stitch. Repeat until the end of your line. This process gives the name “split” stitch, since each stitch should “split” through the previous stitch.
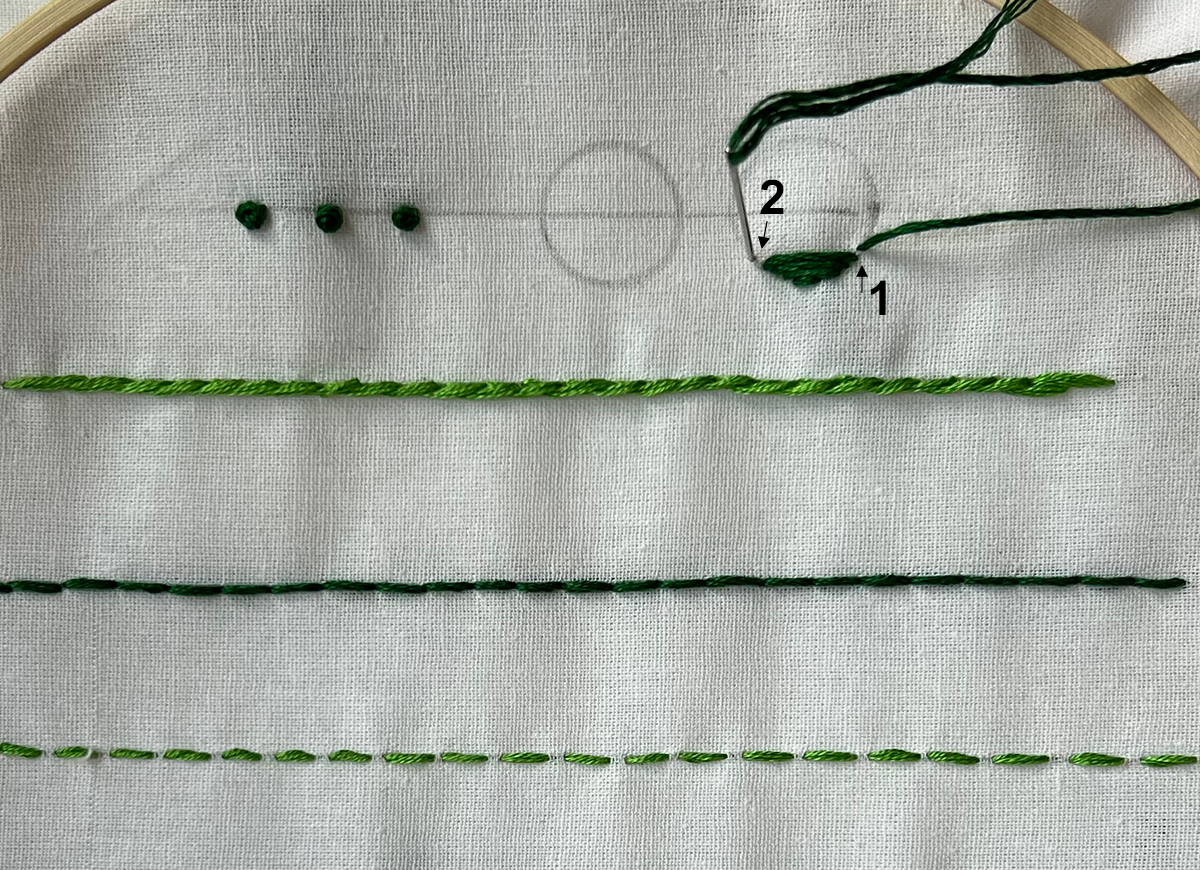
7. French Knot
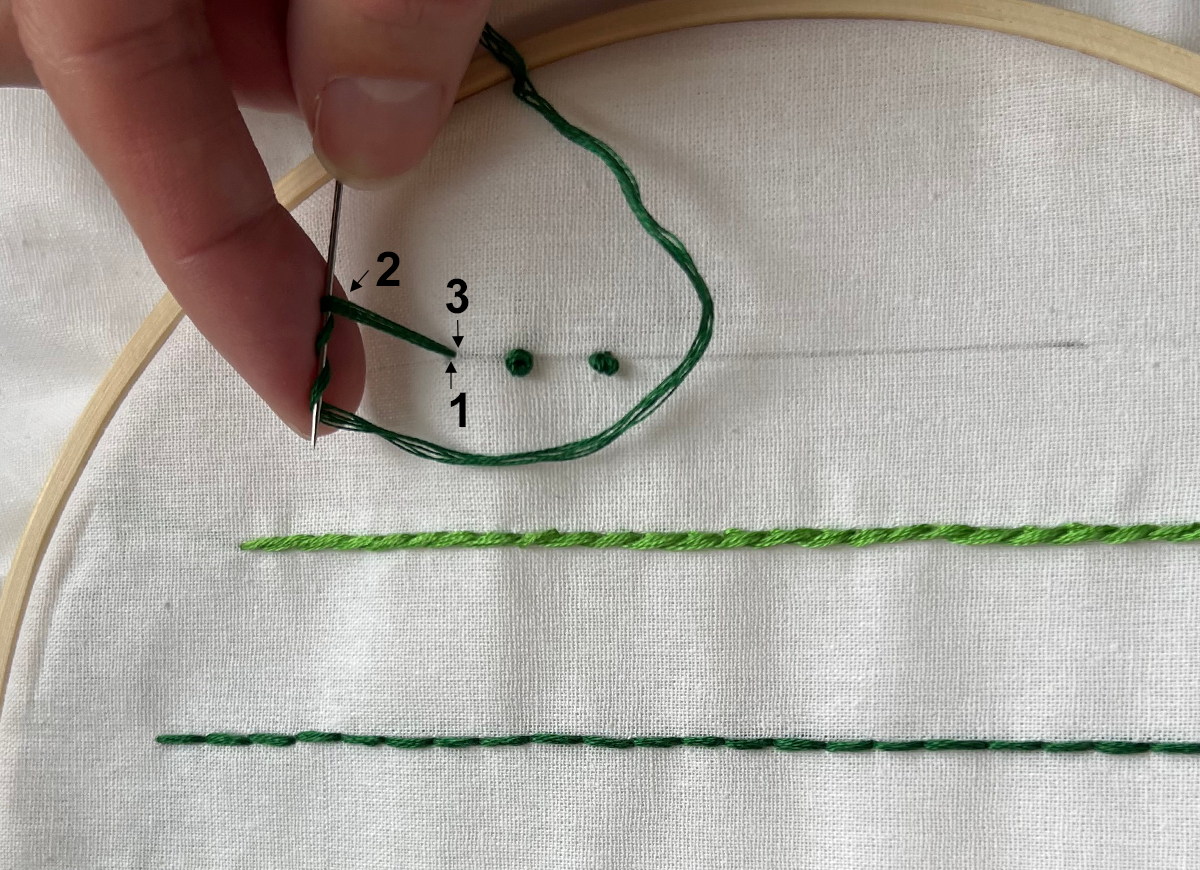
French knots can add lovely texture to an embroidery piece. Start by bringing your needle through the back of the fabric. Hold the needle parallel to your fabric, an inch or two above your work. Use your other hand to wrap the thread around the needle.
You can experiment with how many wraps you prefer; one wrap will make a small and flat French knot, and more will mean a larger and taller knot. Keep hold of the thread to prevent it from unwrapping from the needle. Stick the needle into the front of the fabric, right beside where you pushed it through in the first step. Pull the needle through until the thread creates a small knot.
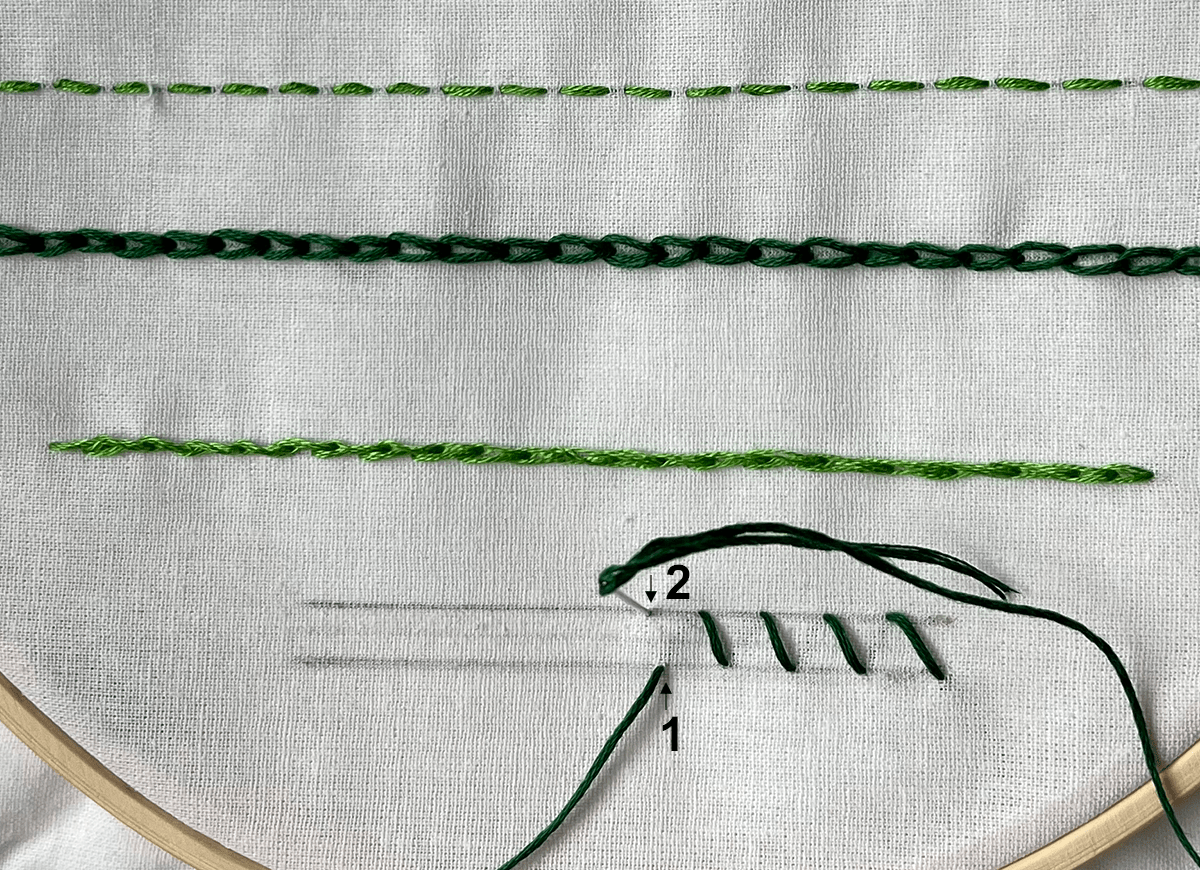
8. Satin Stitch
The satin stitch is used to fill in shapes. It essentially consists of a bunch of straight stitches close together to create a solid area of color. Just like the straight stitch, start by bringing the needle up through the fabric and then push it down through the front of the fabric. Keep each stitch close together to fill in the intended area. You can work on diagonals and slightly overlap the stitches to fill in irregular shapes.
