We may earn revenue from the products available on this page and participate in affiliate programs. Learn More ›
Installing or repairing a patio with dry cast concrete pavers is a fairly straightforward project that isn’t terribly expensive, but a little dose of hard work and creativity can make the project even more affordable. We repurposed materials that we already owned for our patio upgrade and it helped us save money on our patio redo along with other projects, and we’re happy with the results.
Here’s how we transformed our patio with pavers and saved at least $1,000 along the way.
Why did we redo our patio?
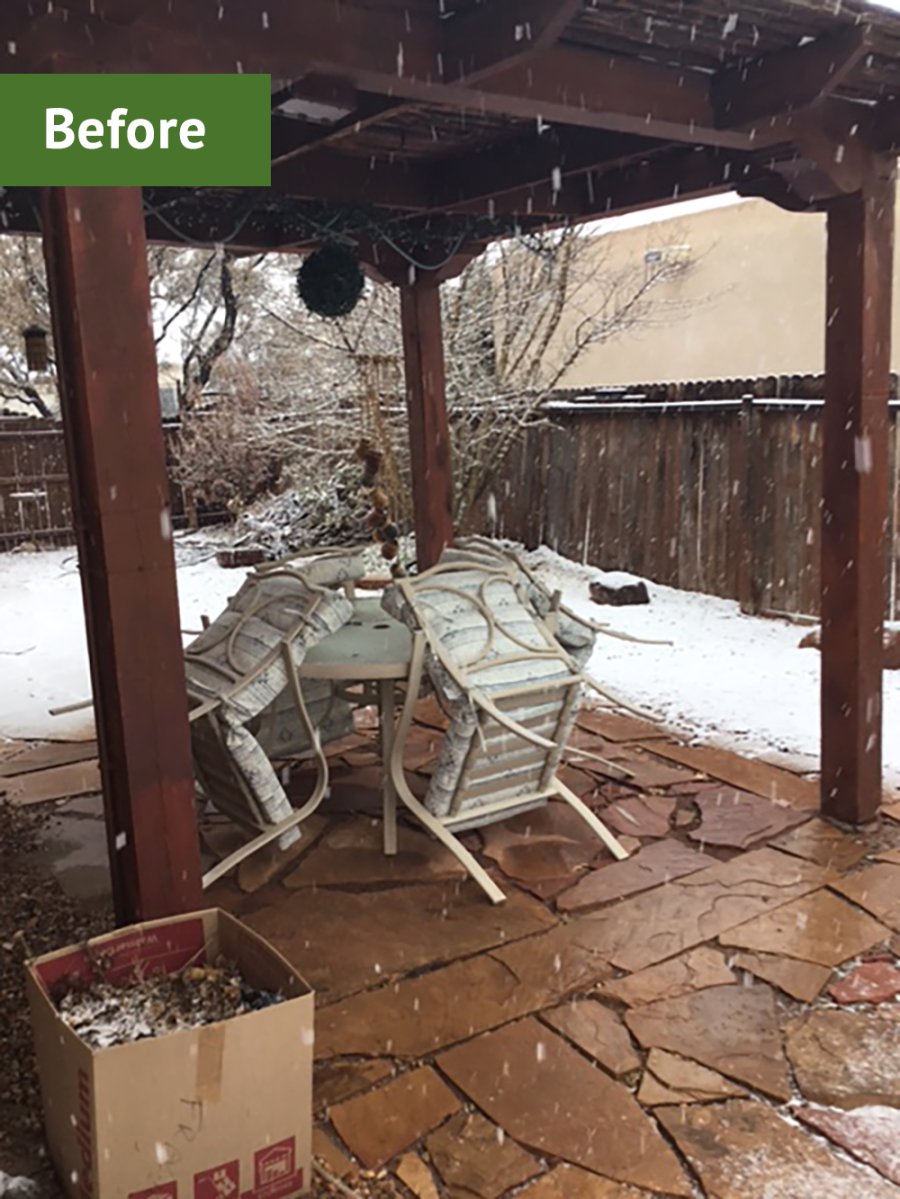
When we moved about 5 years ago into a late-1990s home in Albuquerque, New Mexico, we loved the house design and the size of the yard. The previous owner had clearly put in many hours of DIY work with flagstone, pavers, and rope lights, but some of the work was shaky or outdated. Though we deconstructed nearly everything, we stacked and saved the materials until we finalized our plans for a new look and function.
The side patio is a great place to sit and view birds or plants and eat dinner, but it was laid out in flagstone of varying sizes that did not fit together well and had large gaps. Our table and chairs would rock and small flagstones would loosen when chair legs would catch them. We disliked how unlevel the patio felt and how messy it looked, especially after a landscaping crew and their equipment upended many of the loose stones to get to another area of the yard. We knew we needed to repair the damage and create a flatter surface for our patio furniture, so we turned to the materials on hand.
Why did we combine new and used pavers?
Our immediate deconstruction of the existing hardscaping had produced a stack of about 60 12-inch-by-12-inch dry cast concrete pavers. They had been used to form uneven stairs leading up to the top of the sloped yard. Contractors constructed new stairs and tiers on the slope, which pretty much blew our landscaping budget. We knew we could save money by using as many of those pavers as possible when redoing the patio rather than paying for another patio material.
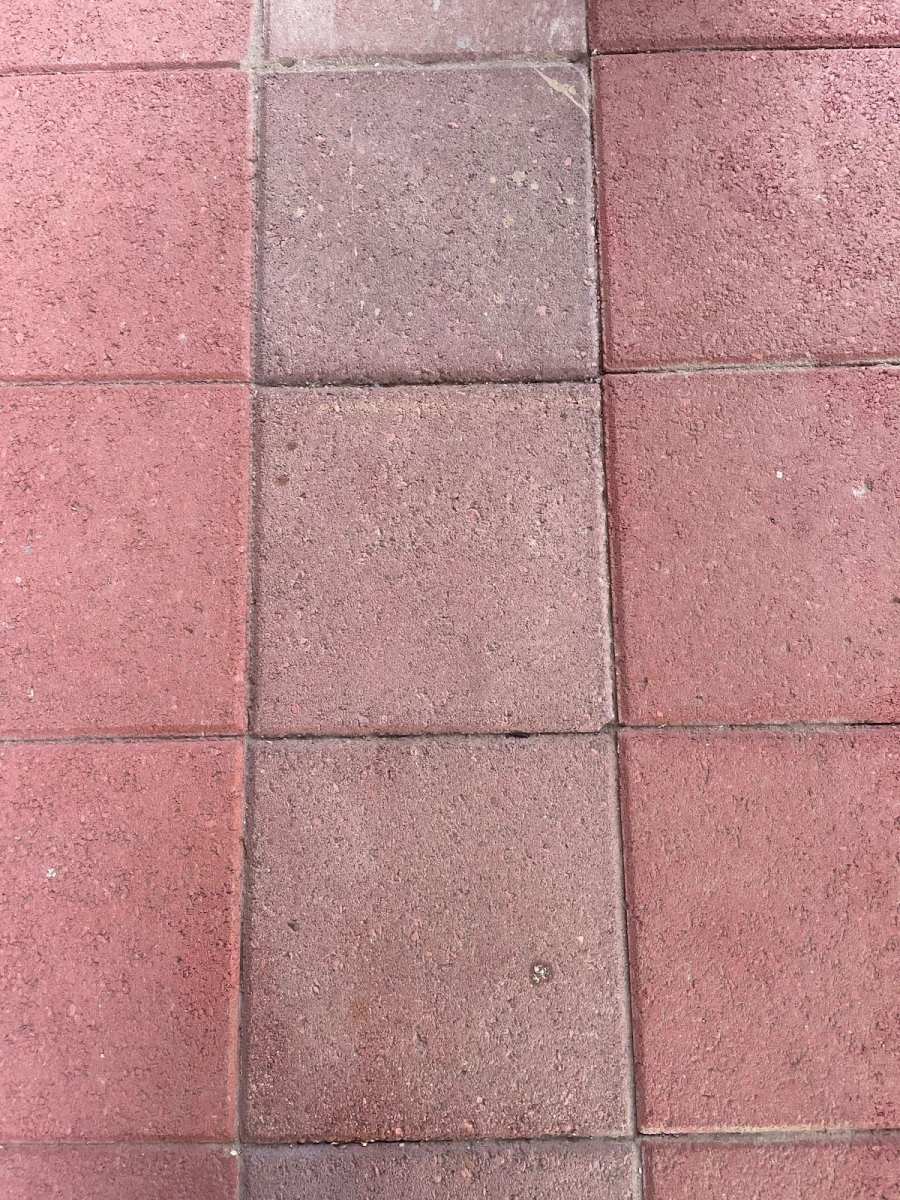
The patio already had a pergola and four posts to hold it, so we were limited to making the original size and design work. The total number of old pavers we saved fell short, though. Since they were a fairly common shape, size, and color, we knew we could match the size and basic look to complete the patio with new pavers. But the old pavers were faded, so we needed a plan to use them for just less than half the project without an obvious shift in color from one side of the patio to the other.
How much did we spend and save?
Since ours was a relatively small patio area at only 144 square feet, our materials budget was low. The total cost of 90 new pavers came to about $150. We also purchased steel landscape edging for three of the four sides since one side is against the house, and we got a few extra stakes for a total of $120. The only other expense was a 40-pound bucket of paver joint sand for about $32, for a total of just more than $300.
While the savings on materials we gained from repurposing 55 pavers amounted to only $90 to $100, the bulk of our savings came from installing the patio pavers ourselves. The surface was easy to prep and we felt comfortable with the simple square design. The estimated cost of materials and installation for a similar 144-square-foot patio range from $1,200 to $3,700, so our combined savings amounted to between $900 and $3,400. In addition to saving on the patio itself, we repurposed the large pieces from the old patio into flagstone pathways in various areas of the yard, saving at least another $700 on our landscaping.
How did we design the paver patio?
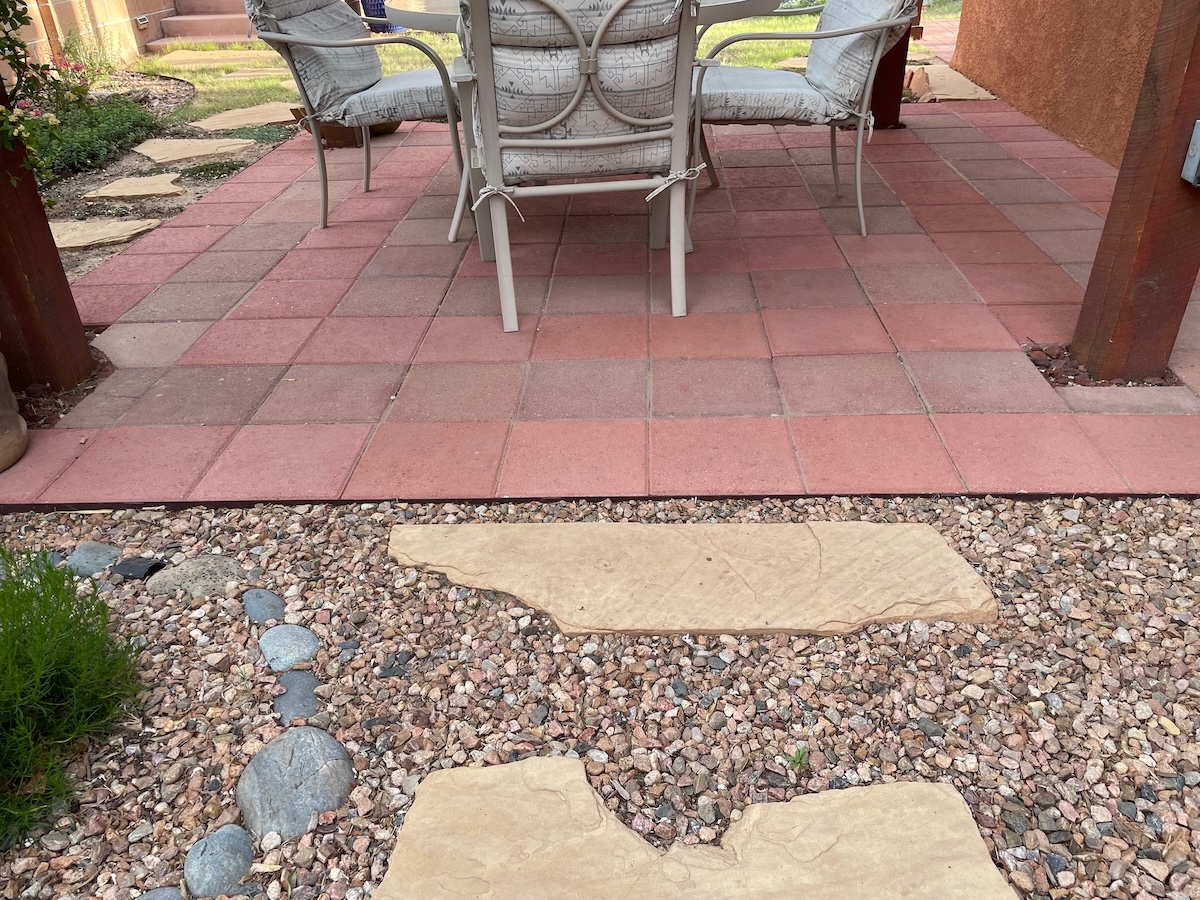
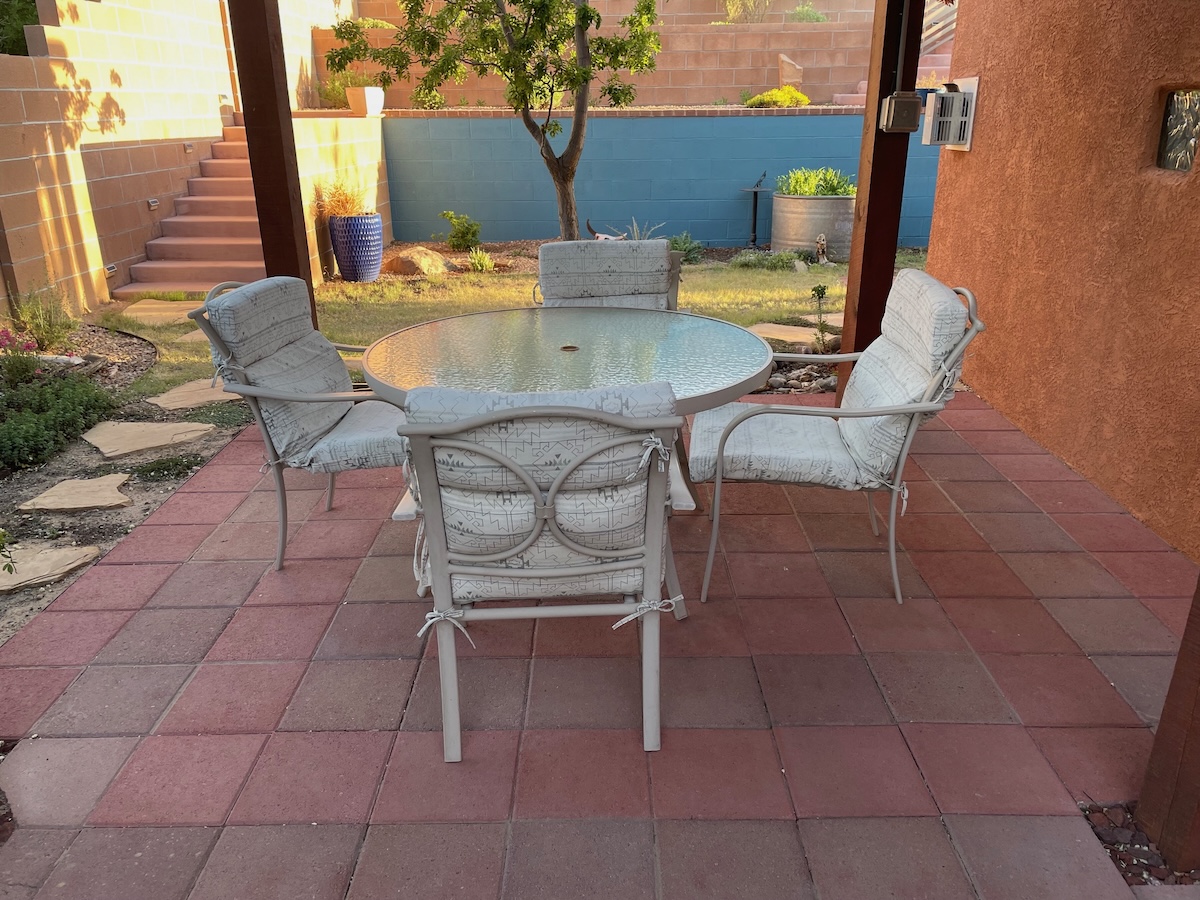
Before laying down any pavers, we had to figure out a design. We considered random placement of the old pavers scattered in with new, but I think it is tough to make something look random, so we came up with a box design. We laid new pavers in the entire outside row first since it requires more material and then laid a square inside that row consisting of repurposed pavers. We continued to alternate new rows and old rows toward the middle to form a sort of box or rug pattern.
How did we install the paver patio?
Here is what we did to update our patio with new and repurposed pavers.
- Prep the area. My husband removed much of the gravel that was near the surface and leveled the soil.
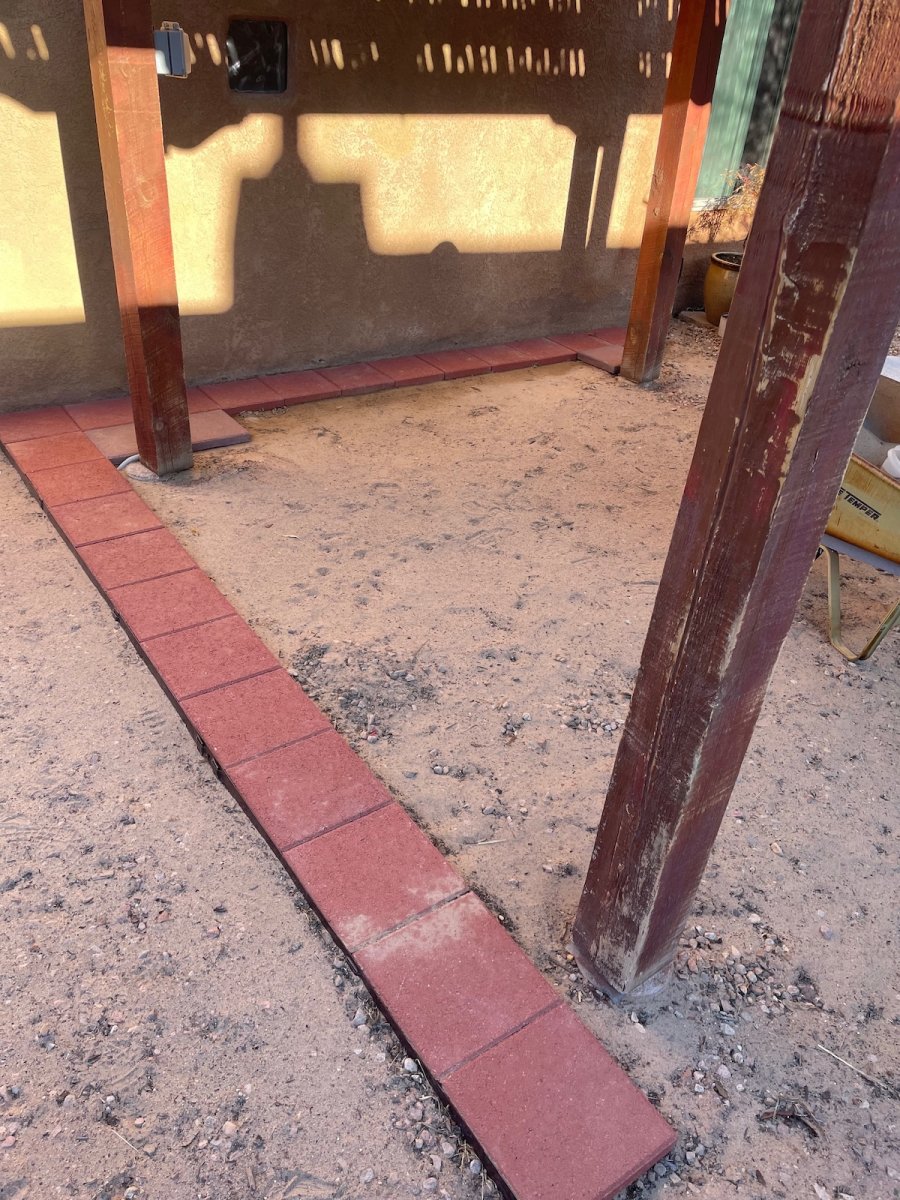
- Lay the first row. We started with a row against the house. Since the house side is straight, and any gaps would be noticeable, we started with a row of pavers along the house side.
- Level each paver. We leveled each paver to its “neighbor” and in both directions as we set each one.
- Insert metal edging. The edging really helped serve as a way to make the pavers align from side to side, so we set down the first row of 12 along the southern edge to establish the exact end of the metal edging. It was easier to lay the pavers first than calculating the length beforehand so we didn’t have to pull up the edging if we were off in our calculation.
- Lay the other outside rows of pavers. Set the metal edging and lay the outside row of pavers that are parallel to the house. Then set the edging and lay the outside rows that are perpendicular to the house.
- Incorporate repurposed pavers. Lay the repurposed pavers in the second rows.
- Alternate new and repurposed pavers. Continue laying rows by alternating new and repurposed pavers for each row.
- Pour paver joint sand around the patio. We swept paver sand into the joints with a push broom, sweeping off extra sand that did not settle into joints.
- Spray with water. Spray the patio with water to activate the binding properties of the sand.
What do you need to know before redoing a paver patio?
Although we had completed similar DIY projects, we still learned a few lessons while saving money on our patio repair and maintenance. The following tips and strategies are helpful.
Planning
- Before beginning, purchase or borrow a rubber mallet and level.
- When repairing or redoing a patio, you might have to work with existing structures. We discovered that our existing pergola posts were not entirely square, so the gaps around them are not as even or finished as we would like.
- For a patio that will have a table and chairs, smaller gaps or joints are essential. We kept ours to the smallest size possible, about 1/16- to ⅛-inch wide, to avoid catching chair legs.
- We repurposed most of the pavers and large flagstone pieces. We gave away the small flagstone and other unused materials to neighbors.
- If your patio repair involves busting up concrete or is the result of poor grading or drainage, you might need professional help and a bigger budget.
Installation
- Laying pavers is much easier if you can use full pavers only.
- Cutting pavers either requires a stone and chisel that can result in rough, often uneven edges. Another method is using a circular saw and diamond blade or a wet saw.
- Use a mallet to gently tap all edges of the paver in place and to adjust height when leveling.
- Level each paver on its own (front to back, side to side) and in relation to each paver that’s touching the one you are leveling as you go.
- Sink edging or a border to just below paver height, accounting for the paver sinking a bit when you set it.
Maintenance
- You can protect the pavers from stains and weather with a sealant.
- We did not add a paver sealer, and have noticed that the color differences between old and new pavers are becoming less apparent, but that’s fine with the design we used.
- To maintain a sturdy and level surface, it is best to add joint sand again after a few years or when you notice gaps between pavers or any wobbly pavers.