We may earn revenue from the products available on this page and participate in affiliate programs. Learn More ›
Refurbishing old furniture is a popular hobby, and for good reason. It’s amazing how a new coat of paint or a change of fabric can revitalize pieces that are past their prime, making them fashionable and functional once more.
To bring an old chair or other seating up to date, reupholstering is often in order, and cutting foam is a key step in this process. Although the foam will be hidden by fabric, care needs to be taken at this stage because poor shaping will often show through in the finished piece. Read on to learn the best way to cut foam for your next project.
Choosing the correct foam is important but not difficult. There are three types generally used in upholstery: medium-density foam for furniture that will have only occasional use, high-density foam for day-to-day use, and outdoor foam for patio furniture that may get wet. Thicknesses range from 1 to 6 inches.
Tools & Materials
Bobvila.com may earn a commission from purchases made through these links.
- Tape measure
- Long straightedge (a yardstick or a thin piece of plywood)
- Felt-tip pen with a medium or fine tip
Before You Begin

Always buy foam from reputable sources. Cutting polyurethane foam should be perfectly safe because the foam is treated with flame-retardant chemicals during production. That said, untreated foam, which is extremely flammable, may be available at some outlets, so take care in where you shop.
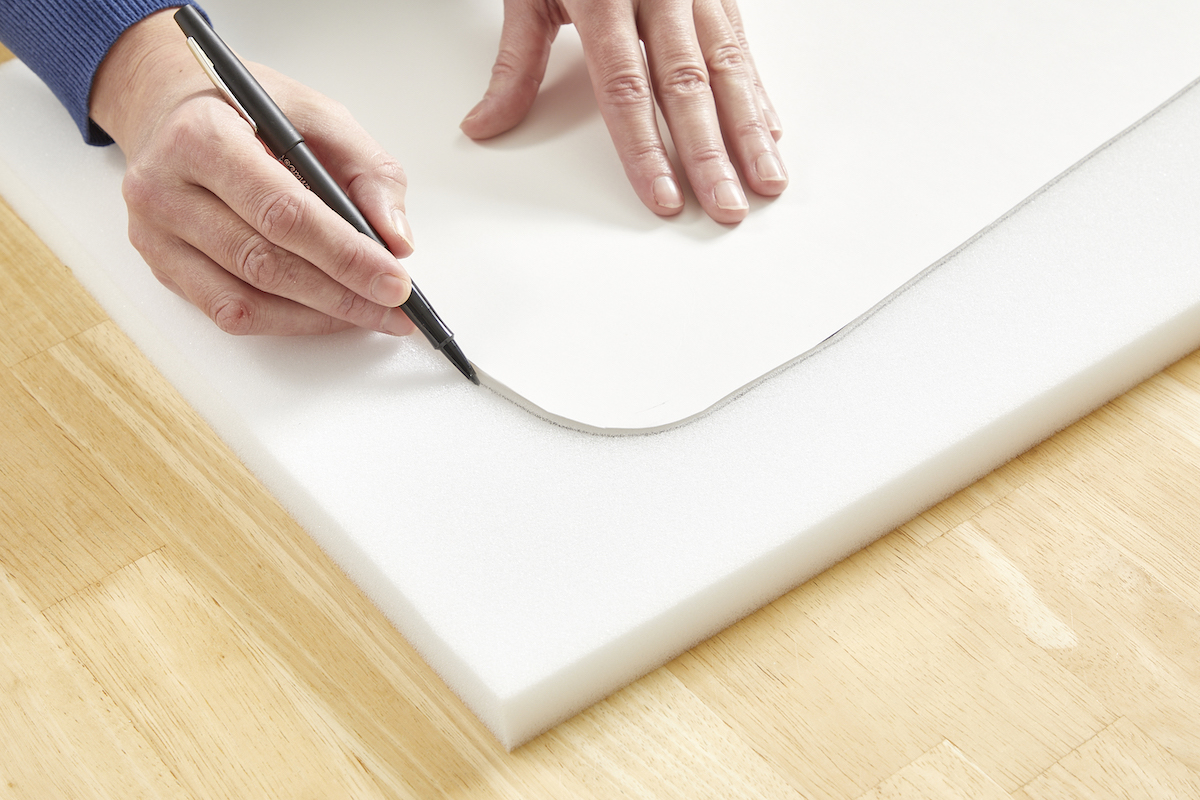
Step 1: Measure and mark where you’d like to cut.
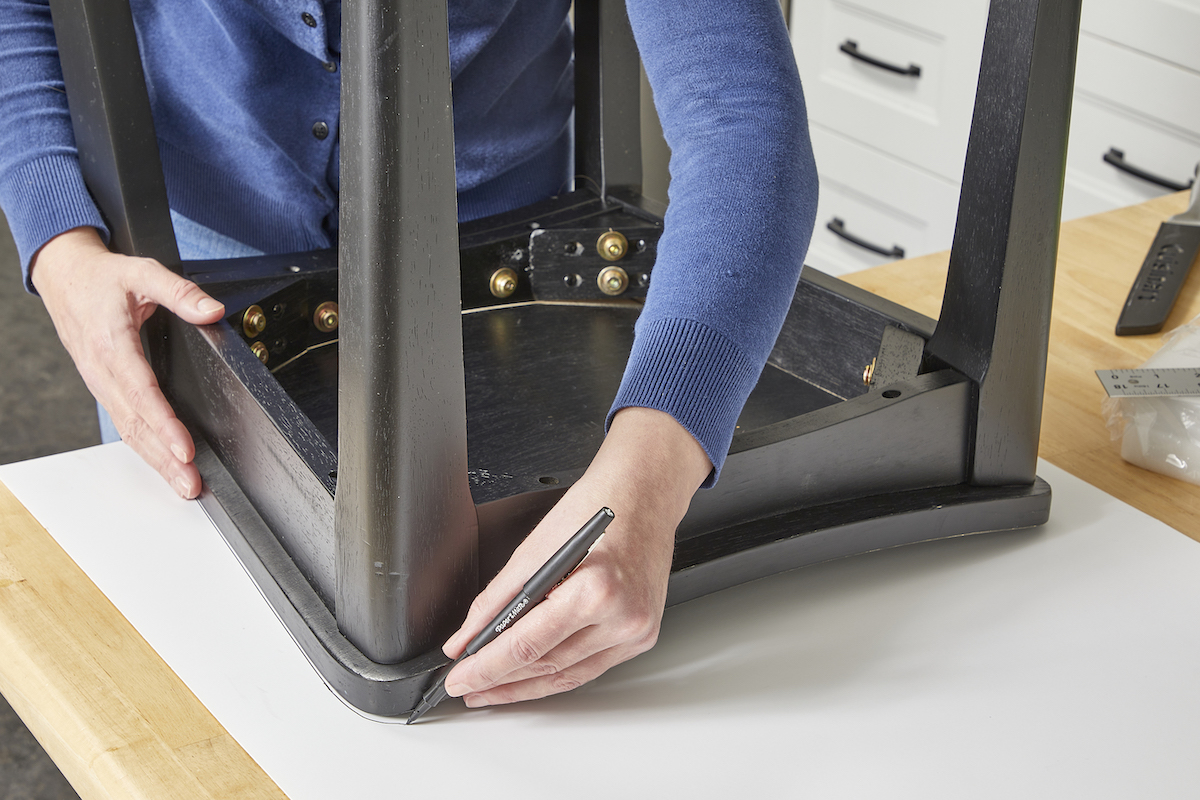
When transferring dimensions from an existing piece of furniture, it is important to measure the seating and not the existing foam, which will have been compressed and distorted by use. You can mark directly on the foam, but making a template from thin card gives you the opportunity to refine size and shape. If you need to cut several seats from one piece of foam, lay your template on the foam in different positions to plan the most economical use. Be sure to leave gaps between the pieces because if you try to share edges, a mistake on one will spoil both.
Mark the foam using a felt-tip pen. Do not try to trace the template freehand. Instead, use a straightedge for lines. Avoid leaning on the foam when holding the straightedge, as compressing it while marking will cause inaccuracies. Apply just enough pressure to draw the line so you don’t tear into the foam with the pen.
RELATED: How to Reupholster a Couch Like a Pro
Step 2: Use a sharp, serrated knife to score along the mark.
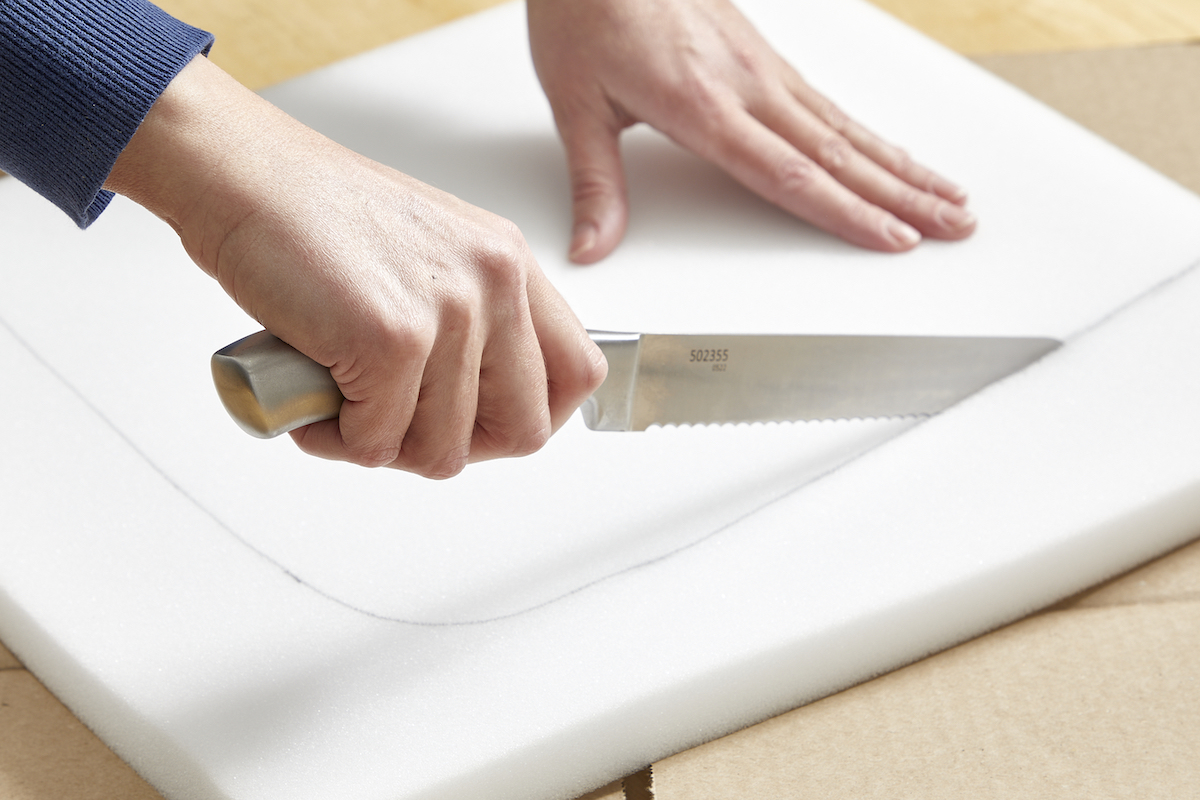
Although tutorials on how to cut upholstery foam recommend both smooth and serrated blades, smooth blades, such as those on carving knives, can bind or drag in the cut. Serrated blades usually cut more cleanly.
Whether cutting soft foam or high-density foam of any thickness, cut only one sheet at a time. It may be tempting to compress several sheets together to get through the job more quickly, but compressing foam changes its shape and can result in errors.
It’s a good idea to practice cutting a scrap piece of foam first, if possible. Start with a shallow cut, using the tip of the knife, and then drag toward you in one smooth motion from start to finish along one side. You can do this freehand or use a straightedge to guide the blade. Turn the foam and repeat until the whole shape is outlined.
You can repeat the shallow cutting process until the foam has been cut all the way through or, after the initial shallow cut, you can cut through the remainder using a smooth sawing motion. Work slowly so the knife cuts rather than compresses. Some upholsterers use an electric carving knife, which is certainly faster, but good control takes practice.
RELATED: See Our Test Results: The Best Staple Guns for Various Projects
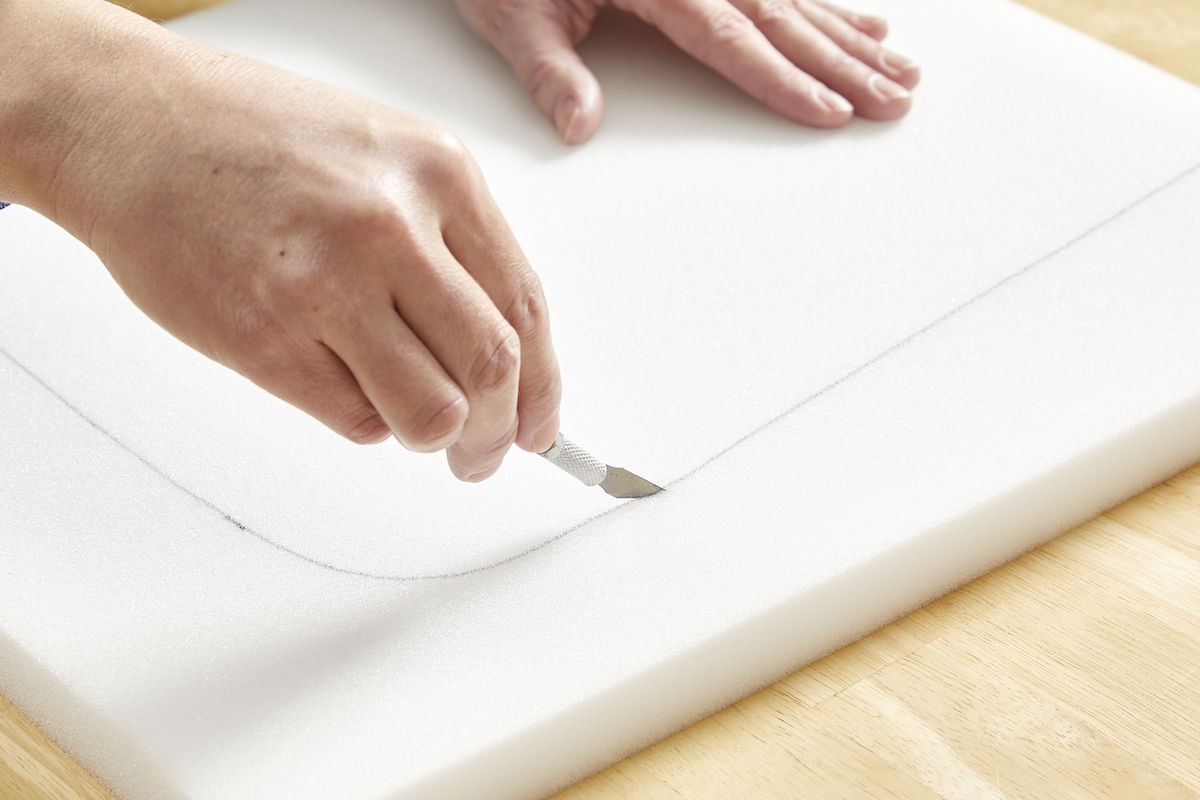
Step 3: To cut curves, hold the knife perpendicular to the foam and use a short sawing motion.

Cutting curves can be challenging because the foam is more likely to compress and drag on the blade. Hold the blade as near upright as possible, and cut in small increments. Try to turn the blade gently as you go, following the curve. If you can maintain a continuous motion, you’ll end up with a smooth curve instead of a lot of small flats.
Sometimes you need to cut bevels or rounded corners. You can use the same knife technique described above, but for small areas, a pair of sharp, long-bladed scissors can be equally effective. Snip off small pieces, checking often until you achieve the required shape.
Note: Be sure to clean up foam cuttings as you work. They can present a choking hazard to small children and animals.
RELATED: Solved! The Best Paint for Furniture
Final Thoughts
The methods described here focus on how to cut high-density foam using a tried-and-tested approach employed by both DIYers and professional upholsterers. This process works equally well for any soft foam and helps ensure a high-quality finish to your reupholstery projects.
The best way to cut foam board, by contrast, is to use a sharp craft knife or box cutter, with a straightedge as a guide. Don’t rush: Cutting too quickly can cause the blade to jump the straightedge and cut your fingers.
