We may earn revenue from the products available on this page and participate in affiliate programs. Learn More ›
Add storage to your bathroom—and in the process, give the space a jolt of fresh style—by installing a medicine cabinet. Even if you’re new to making improvements to your home, installing a medicine cabinet is a satisfying and practical do-it-yourself project. However, hanging medicine cabinets has complexities that are best addressed through a careful, deliberate approach.
In this guide, we walk you through two ways to install a medicine cabinet in your bathroom: The first way is surface-mounting a medicine cabinet to the wall, which doesn’t require that you cut into the drywall. We’ll also explain how to install a recessed medicine cabinet, or one that sits almost flush with your bathroom wall.
Before You Begin
For those who are new to the world of DIY, hanging a medicine cabinet might seem intimidating. The following are some of the most important considerations to keep in mind before starting this project.
Inset vs. Surface-Mounted Cabinets
Medicine cabinets come in a range of styles and designs, but before you make any decisions about how big a cabinet you want or what color it will be, you should first decide whether you want one that is inset or surface-mounted. (Some medicine cabinets can actually be mounted either way—inside the wall or on top of it—but in the end you still need to decide how you’ll mount the one you choose.)
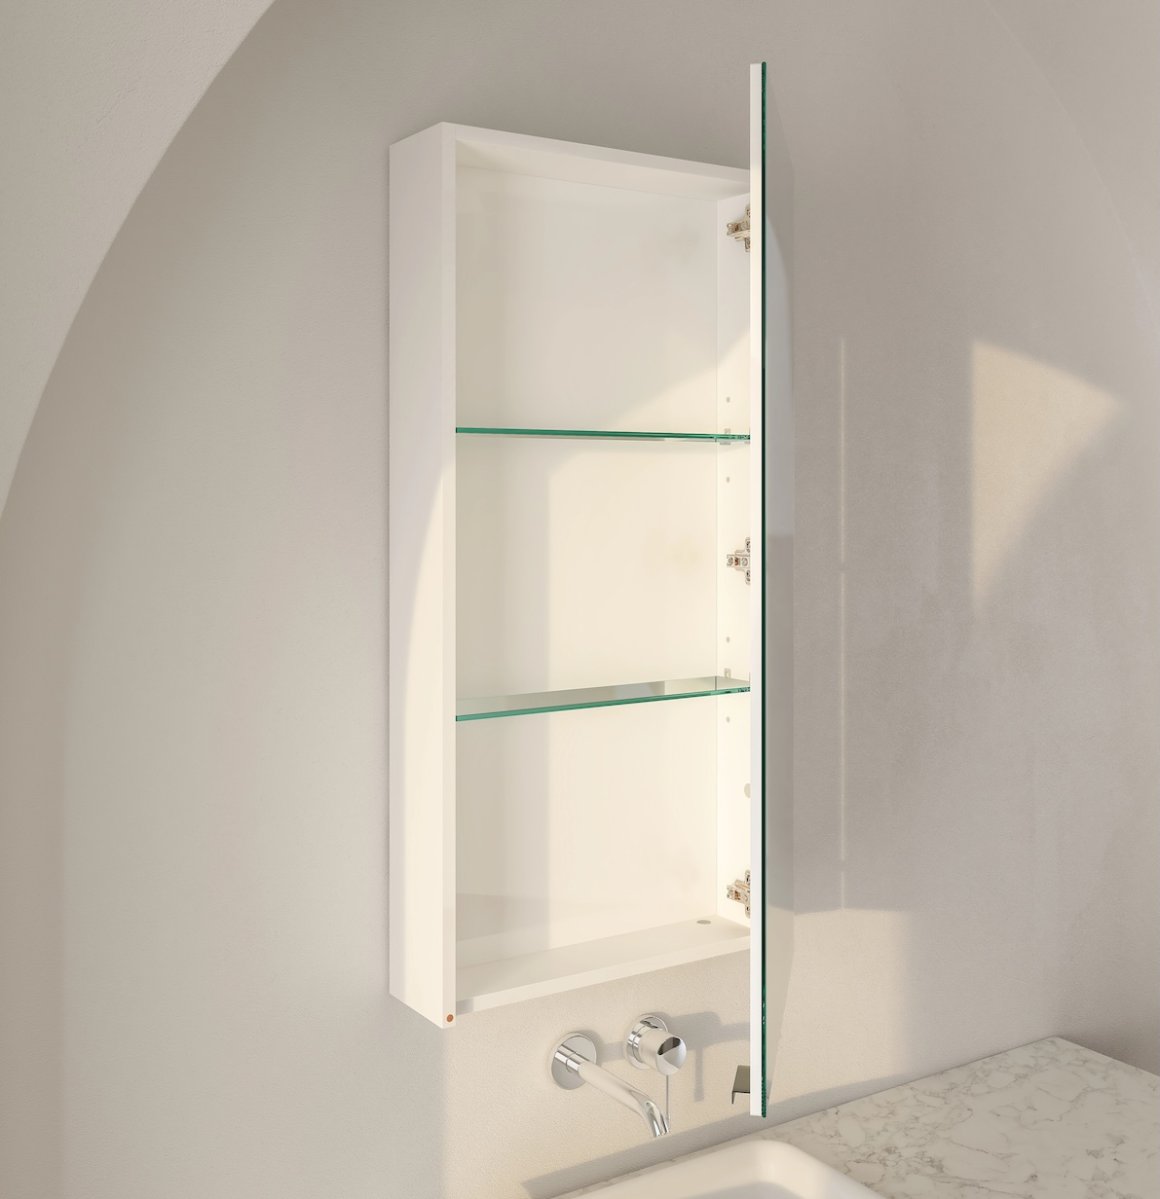
- Inset, or recessed, cabinets are installed inside the wall cavity. The installer has to cut into and remove some drywall, install blocking, and attach the medicine cabinet to the wall framing from inside the cabinet. This gives the cabinet a more streamlined, flush-mount design that often looks cleaner than surface-mounted options.
- Surface-mounted cabinets are the easiest to install. The installer locates the wall’s studs, attaches the cabinet’s fasteners to the wall, and hangs the cabinet from the fasteners. Surface-mounted cabinets are sometimes a homeowner’s only viable option if there are vents or plumbing pipes inside the wall over the bathroom vanity.
What’s Inside Your Walls?
There are any number of things you don’t want to break behind the drywall in your bathroom: Plumbing supply lines, vents, drains, and electrical wiring may all run from floor to floor directly behind the sink. Before installing a medicine cabinet—particularly a recessed medicine cabinet—DIYers need to know what’s inside the walls. Here are a few ways to figure out what’s back there:
- Check the home’s layout. Consider the home’s layout. Is there a sink on another level of the home that’s directly above or below this one? Where is the vent pipe that exits the roof? If they’re in the general vicinity, they could very well be behind the sink.
- Use a stud finder. When it comes to locating wires, it’s best to use a stud finder with an AC-wire detection feature. Keep in mind, though, that just because the stud finder doesn’t alert you to electricity doesn’t mean there isn’t any wiring in the wall. DIYers still need to be careful, and shut off the power to the bathroom before starting this project.
- Open up the wall. The most surefire way to determine what’s in the wall is to carefully remove the drywall between the studs and see for yourself. If there is a closet on the other side of the wall, consider removing the drywall from the closet side, because it’ll be a lot easier to hide the repair behind a row of coats and sweaters.

How to Use a Stud Finder | Tool Training With Mark
The best-case scenario for those who want to install an inset medicine cabinet is the drywall in your bathroom is on non-load-bearing studs, without any utilities behind them. If your installation involves masonry or plaster walls, take it from us: Wrestling with these materials often proves to be more effort than it’s worth. Removing bricks from a masonry wall involves installing steel, and plaster with metal lathe can be a nightmare to work with.
How to Install a Surface-Mounted Medicine Cabinet

Of the two ways to install a medicine cabinet, installing a surface-mounted cabinet is almost always the easier option. Still, you want to make sure to do the job correctly to ensure the aspirin, cough syrup, and hair spray don’t come tumbling down in the middle of the night. These instructions on how to mount a medicine cabinet to drywall will help you score some secure bathroom storage.
SUPPLIES
Stud finder
Surface-mounted medicine cabinet with fasteners
Level
Pencil
Drill
Step 1: Scan your wall and prepare to drill.

While many stud finders work by detecting changes in material density, others can actually detect the type of material behind the wall. Less expensive stud finders use magnets to detect the fasteners attaching the drywall to the stud. For that reason, they will typically work for locating studs, pipes, and electrical circuits.
To locate the studs, slowly scan the stud finder across the wall while holding the scan button down. On the wall, mark where the device starts to beep (the edge of the stud) and where it stops sounding (the other edge). If you are replacing an old medicine cabinet, check the existing fastener locations, as they very well may be in studs. Generally speaking, these marks will be 16 inches apart, measured from their centers. Any alerts that occur between these two sets of marks are likely to be water supply lines, drains, or wires. It could also be horizontal blocking.
Note: Many builders will install a piece of 2×6 lumber running on-edge and horizontally from stud to stud behind the sink. This is known as blocking, and its specific use in this instance is as a structural member for hanging a medicine cabinet. This makes installing or replacing a medicine cabinet a breeze. You’ll want to scan between the studs, from about 60 and 72 inches off the ground, to see if there is blocking behind the wall.
Essential Gear
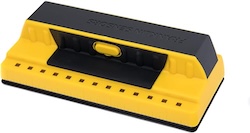
The nicest thing about the Franklin Sensors ProSensor 710 Stud Finder is that its scan bed is 7½ inches long, and the finder contains multiple sensors. A series of 13 lights are located along the top of this Franklin stud finder, and as the tool passes over a stud, the corresponding light is illuminated. It’s easy to detect both single-stud and double-stud framing members within the test wall.
Get the FRANKLIN SENSORS ProSensor 710 Stud Finder for $52.95 at Amazon
Step 2: Position the medicine cabinet on the wall.
Medicine cabinets and those who use them come in a variety of sizes. If the face of the cabinet is mirrored, pay particular attention to its height; the mirror should be at eye level. Keep in mind that “eye-level” is relative, depending on the heights of the home’s occupants. A good basic rule is to mount the cabinet so the center of the mirror is roughly 64 inches from the ground. This will provide enough mirror space for most family members and guests.
Next, position the medicine cabinet flush to the wall, approximately where you would like to install it. If there is blocking behind the wall, it’s a good idea to hang the cabinet from fasteners driven into the blocking. Also, confirm that nothing fixed or moveable (doors, drawers, light fixtures, and the like) will be obstructed if you hang the cabinet in this spot.
Step 3: Level the cabinet and mark the top and bottom edges with a pencil.
Having determined the best spot for installing the medicine cabinet, enlist a helper to hold it in place. Meanwhile, reach for the level and place it on top of the cabinet (assuming there’s a ledge—if not, simply hold it against the top edge). Make any necessary adjustments until the cabinet is perfectly level, then draw lines where the top and bottom edges of the frame meet the wall.
Step 4: Mark the mounting holes on the wall through the back cabinet panel.
With your helper still holding the cabinet, open its door (or doors) and locate the holes in the interior. On the wall, pencil an X-mark to correlate with each one of the installation holes that you identified. Then, take the cabinet away from the wall and set it aside at a safe distance—you don’t want to damage the cabinet as you’re drilling into the wall.
Step 5: Drill into the wall with the right-sized bit.

If the marks from the previous step line up on the studs or blocking, then the cabinet will be easier to install. If not, you’ll want to install hollow wall anchors to prevent the cabinet from pulling out of the wall.
- If the Xs land on the blocking or studs, predrilling for the simple wood screws in the kit will be all that’s necessary.
- If the Xs land on empty cavity space, find the hollow wall anchors in the kit. Match the wall anchors to the appropriately sized bit. It should be slightly snug and require tapping the anchor into the wall, but not so snug that the anchors bend, twist, or damage the wall.
Outfit the drill/driver with the correct bit and then drill holes in the wall wherever X marks the spot. Tread carefully here; if the drilled holes are too large, the cabinet is probably going to wobble.
Note: In some cases, the cabinet may not come with any hardware at all. If that’s the case, opt for washer head cabinet screws, which are also known as pocket hole screws.
Step 6: Screw the cabinet into the wall.
Position the cabinet back on the wall, matching its top and bottom edges to the pencil lines you drew in Step 3. While your helper holds the cabinet, screw the fasteners through each of the holes on the back of the cabinet and into the studs or anchors.
Don’t attach them tightly until you are satisfied that the cabinet is precisely where you want it.
How to Install a Recessed Medicine Cabinet

Installing a recessed medicine cabinet is quite a bit more work, but it’s still a project a competent DIYer can handle. The following instructions will outline all of the critical points in installing an inset medicine cabinet.
SUPPLIES
Inset medicine cabinet
Pencil
Stud finder
Drywall saw
Flashlight
Circular saw or miter saw
Level
Voltage tester
Utility knife
Reciprocating saw
Drill
2×4 framing lumber
Drywall screws
1½-inch washer head screws
Drywall joint compound
Spackle knives
Sanding sponge
Primer
Paint
Paintbrush
Step 1: Examine the wall carefully.
For recessed medicine cabinet DIY installation, it’s especially important to know what’s hiding behind the drywall. Use the stud finder to get a rough idea of where the studs behind the wall are located, and mark their edges with a pencil.
Make sure to turn the power to the room off at the electrical panel before proceeding. Then, draw a 5×5-inch square in the area between the studs where the cabinet will go, and carefully cut it out with the drywall saw. It’s not necessary to cut fast or aggressively yet, so DIYers should take their time until the square is removed completely.
Note: Be sure that the wall is not a load-bearing wall. If it is, continue reading this guide until the end to decide whether or not reframing a load-bearing wall is worth the effort.
Step 2: Check your wall for utility lines that might get in the way of an inset medicine cabinet.

Use the flashlight to look inside the wall. Look for wires, supply lines, and pipes. If those items are present, replace the square, mud, tape, sand, and install a surface-mount cabinet. If they’re not, or there is enough room to work around them (meaning they’re toward the back of the wall stud bay), move to the next step.
Step 3: Approximate your cabinet placement.
Once you’ve determined that the space behind the drywall is suitable, place the medicine cabinet against the wall and get a rough idea of its placement. The cabinet usually hangs directly above the center of the bathroom sink, which means there will probably be some in-wall framing work to do. But, it’s more important to do this job correctly and have the cabinet look right than to cut corners and have an askew cabinet.
Mark the wall in the center of where the medicine cabinet will go. This is usually directly over the sink, approximately 64 inches from the ground.
Step 4: Measure your inset medicine cabinet, and transfer its outline to your wall.
Inset medicine cabinets typically have overhanging flanges and doors, so it’s important to measure the actual cabinet box itself. Carefully place the cabinet face down and measure the back of the cabinet for height and width. It’s often a good idea to add ¼ inch to this measurement to allow for a bit of wiggle room as you set the cabinet inside the wall.
Using the center mark for reference, use a tape measure, pencil, and level to transfer these measurements to the wall. For example, if the cabinet is 14 inches wide (adding the ¼ inch for wiggle room), measure out to the left 7⅛ inches and draw a mark, followed by measuring out to the right 7⅛ inches and marking a mark.
Use the bubble level to draw plumb lines on the wall at these marks. Repeat the process for the top and bottom line, dividing the height of the cabinet (plus ¼ inch) by two, marking the wall, and drawing level lines.
Test fit the cabinet to ensure it fits within the outline while being plumb and level.
Step 5: Check again that you’ve cut power to your bathroom.
If there are wires behind the wall, double-check that you’ve cut the power to the bathroom. This will prevent the chance of an errant blade stroke from slicing through the lighting circuit and shocking you.
Even if the wires are out of the way but in the same stud bay, it’s better to be safe than sorry. Find the appropriate breaker in the electrical panel and flip it to the off position. Be sure to head back and check the wire with a non-contact voltage tester to ensure the line is indeed dead.
Step 6: Cut along the outline you’ve drawn with a drywall saw.

Score the surface of the drywall with the utility knife along the outline drawn in Step 3. Using the drywall saw, carefully cut along the outline to remove the section of drywall where the cabinet will go.
There is a chance that there’s a stud somewhere within that outline. For the cabinet to be inset and centered above the sink, that stud will have to come out and be reframed. If that’s the case, simply use a reciprocating saw to cut the stud where it meets the upper and lower edges of the cutout.
Step 7: Install blocking to support the recessed medicine cabinet.
Before you go any further, test fit the cabinet to ensure that it fits the way you want it to. If the drywall needs trimming, carefully remove the excess with a utility knife until the cabinet fits nicely.
Next, cut two pieces of 2×4 lumber so they’re approximately 2 inches longer than the overall height of the cabinet. These boards will serve as blocking. Place them behind the drywall on either side of the opening, holding them vertically. Drive drywall screws through the drywall and into these new blocks behind the wall. Use three or four screws per side to ensure the cabinet has steady support.
Note: The blocking studs do not need to be on-edge like the other studs in the wall. They may be on the flat, which makes them easier to hold against the back of the drywall.
Step 8: Hang your inset medicine cabinet in the framed wall opening.
Insert the medicine cabinet in the hole with the new blocking on either side. Working from inside the cabinet, drive screws through the side of the medicine cabinet and into the wood blocking.
Drive a screw at each corner, but don’t tighten the screws until checking the cabinet for square and level. Tweak the cabinet and slowly tighten the screws so it is sitting absolutely flush against the wall, plumb, and level.
Step 9: Put the finishing touches on your cabinet.
Finish the installation. Make sure that the door can remain in both open and closed positions to ensure no one will accidentally bang their heads against an open door. If necessary, adjust the hinges so the door sits flush with the cabinet itself. Erase any pencil marks as well.
If there are any exposed drywall edges or cracks around the cabinet, fill them with drywall compound or spackle and allow them to dry. Once dry, sand the compound smooth before priming and painting the wall.
Pro Tips for Mounting a Medicine Cabinet
- Temporarily tape the door (or doors) closed to safeguard against damage during installation.
- Power tools and moisture don’t mix: Before using the drill/driver, make sure the area is completely dry.
- Don’t worry about the visible pencil marks post-installation. Just erase them!
Final Thoughts
Whether it’s a surface-mounted medicine cabinet or an inset medicine cabinet, correct installation is key. The cabinet needs to be secure and safe, and it should function properly without the doors swinging outward or the cabinet wobbling). By following the tips in this guide, learning how to install a medicine cabinet safely and securely is well within the capabilities of most DIYers.
FAQs
Q. How much space should there be between a vanity and medicine cabinet?
The space between the vanity and medicine cabinet is somewhat arbitrary as medicine cabinets come in a range of sizes. The important thing is that the center of the medicine cabinet is roughly 64 inches from the ground.
Q. Can you hang a medicine cabinet without studs?
You can, but you’ll need to use hollow wall anchors. These pieces of hardware insert through the wall and provide support and strength that threads on a drywall screw alone cannot match. If you need help finding studs without a stud finder, this article includes several ways to do so.
Q. Should you hang a recessed wall cabinet between studs or on them?
Recessed wall cabinets must land between studs to be inset. If there is a stud in the way of the cabinet, it may be necessary to cut that stud to make way for the cabinet.
Q. Can you mount a medicine cabinet on drywall?
Yes, but installing it on drywall (instead of directly to the studs) requires special hollow wall anchors. These anchors expand in the hole and provide more surface area, allowing the hardware to carry more weight than drywall screw threads alone can handle.
Q. How do you install a recessed medicine cabinet in a load-bearing wall?
Installing a recessed medicine cabinet in a load-bearing wall is tricky:
Remove all of the drywall from floor to ceiling at the cabinet’s location.
Build temporary support on both sides of the wall, approximately 2 feet back from the wall.
Remove the stud that’s in the way.
Install a 2×6 header made from two pieces of lumber, construction adhesive, and ½-inch plywood. Glue and screw these pieces together, and place them under the top plate, between the studs where the cabinet will sit.
Install two jack studs, one under each end of the header.
Install two jack studs (approximately 40 to 48 inches) against the previous jack studs before installing a plate across them.
Install another two jack studs between the plate and the header.
The wall should now be framed with enough access for a recessed cabinet.